Sugar cookies represent one of the most beloved treats in home baking, cherished for their versatility and nostalgic appeal. Whether you’re preparing for a holiday celebration, a child’s birthday party, or simply satisfying a sweet craving, mastering the art of creating tender, flavorful sugar cookies paired with silky buttercream frosting is a valuable skill. This comprehensive guide walks you through every step of the process, from mixing your dough to applying the final decorative touches.
Understanding the Foundation: What Makes Great Sugar Cookies
The key to producing exceptional sugar cookies lies in understanding the balance between texture and flavor. Many home bakers struggle with cookies that turn out either too crispy or too dense, missing that ideal tender crumb that makes commercial versions so appealing. The secret involves carefully selecting your ingredients, maintaining precise measurements, and understanding how each component contributes to the final product.
Quality begins with choosing the right flour. All-purpose flour serves as the standard choice for most home bakers, providing the ideal protein content for cookies that are tender yet structurally sound. The addition of baking powder and baking soda plays a crucial role in achieving the desired rise and texture—baking powder creates a gentle lift, while baking soda adds slight browning and contributes to the cookie’s spread during baking. Room temperature butter is equally essential, as it creams more effectively with sugar, incorporating air that helps create a lighter texture.
Beyond these basics, incorporating dairy elements such as heavy cream or milk adds moisture and richness that distinguishes homemade cookies from their boxed counterparts. This ingredient prevents excessive dryness and contributes to a more tender bite that dissolves pleasantly on the palate.
Preparing Your Ingredients and Workspace
Successful baking begins before you even turn on your mixer. Taking time to properly prepare your workspace and gather ingredients—a practice called mise en place—ensures smooth execution and reduces the likelihood of forgotten steps.
Ingredient preparation tips:
- Remove butter from refrigeration 30 minutes to 1 hour before beginning, ensuring it reaches true room temperature for optimal creaming
- Crack eggs into a separate bowl and allow them to warm to room temperature, which helps them blend more seamlessly into the batter
- Measure flour by spooning it into your measuring cup and leveling with a knife rather than scooping directly from the bag, which can compact flour and lead to excess in your recipe
- Gather all dry ingredients in one bowl and all wet ingredients in another before beginning to mix
- Preheat your oven 15 minutes before you plan to bake, allowing it to reach a consistent temperature throughout the baking chamber
Mastering the Mixing Process
The sequence in which you combine ingredients significantly impacts your final product. Beginning with creaming butter and sugar together serves an important purpose: this process incorporates air bubbles into the mixture, which expand during baking and create a lighter texture. This step typically requires 2-3 minutes of mixing at medium-high speed until the mixture transforms from a dense paste to a pale, fluffy consistency with a noticeably lighter color.
Once your butter and sugar reach the proper consistency, incorporate your room temperature egg, beating until completely combined. This ensures even distribution and prevents lumps that could create unwanted texture variations in your finished cookies. Follow with your liquid ingredients—vanilla extract and heavy cream—beating until the mixture becomes smooth and uniform in appearance.
The final mixing stage requires a different approach. Combine your dry ingredients—flour, baking powder, baking soda, and salt—in a separate bowl before gradually adding them to the wet mixture. Use a low mixer speed to prevent overdevelopment of gluten, which would result in tough, chewy cookies rather than the tender texture you’re seeking. Mix only until the flour disappears; streaks of dry ingredients should not be visible, but vigorous mixing is unnecessary and counterproductive.
Shaping and Preparing for Baking
Cookie dough consistency should be thick but workable, similar to the texture of soft clay. If your dough seems too soft or sticky, refrigerate it for 30 minutes before scooping. This resting period allows gluten to relax and the dough to firm up slightly, making it easier to handle while preventing excessive spreading during baking.
A cookie scoop—available at most kitchen supply stores and online retailers—provides the most consistent method for creating uniform cookies that bake evenly. Use approximately 1.5 tablespoons of dough per cookie, spacing them at least 2 inches apart on parchment-lined baking sheets. The parchment paper serves multiple purposes: it prevents sticking, ensures even browning on the bottom, and simplifies cleanup after baking.
The Baking Process: Temperature and Timing
Preheat your oven to 350°F (177°C) and allow it to stabilize for at least 15 minutes before inserting cookies. Oven temperature accuracy is critical; consider investing in an oven thermometer if your oven tends to run hot or cold, as even 25-degree variations can significantly impact baking results.
Bake cookies for 10-12 minutes, watching carefully during the final minutes. The ideal endpoint occurs when cookie edges just begin to show golden coloring while centers remain pale and soft. Cookies continue cooking on the baking sheet after removal from the oven, so removing them slightly before they appear completely set actually results in the softest, most tender texture.
Allow cookies to cool on the baking sheet for 5 minutes before transferring them to a wire cooling rack. This brief resting period allows the structure to set just enough to prevent breakage during transfer, while the wire rack allows air circulation underneath, preventing condensation and moisture buildup that could soften the bottom excessively.
Creating Perfect Buttercream Frosting
Buttercream frosting combines simplicity with elegance, requiring just five basic ingredients: butter, powdered sugar, vanilla extract, heavy cream, and salt. The magic lies in understanding how to balance these components into a frosting that is simultaneously spreadable and structurally sound enough to maintain decorative piping.
Begin by beating room temperature butter at medium-high speed for approximately 30 seconds until it becomes smooth and lighter in appearance. Add vanilla extract and a pinch of salt, beating briefly to incorporate. Gradually add powdered sugar, a quarter cup at a time, beating well between each addition and scraping down the bowl sides frequently to ensure even mixing.
As you add powdered sugar, the frosting will initially appear thick and slightly grainy—this is normal and expected. Continue adding sugar until all is incorporated, then add heavy cream one tablespoon at a time while beating on high speed. This final ingredient transforms the frosting from a dense paste into a light, fluffy spread. The frosting should have a consistency similar to creamy peanut butter—thick enough to hold its shape but spreadable without excessive resistance.
If your frosting becomes too thick, add additional heavy cream one tablespoon at a time. If it seems too thin or doesn’t hold its shape, incorporate additional powdered sugar in quarter-cup increments. This flexibility allows you to achieve the exact consistency needed for your specific application.
Decoration Techniques and Creative Options
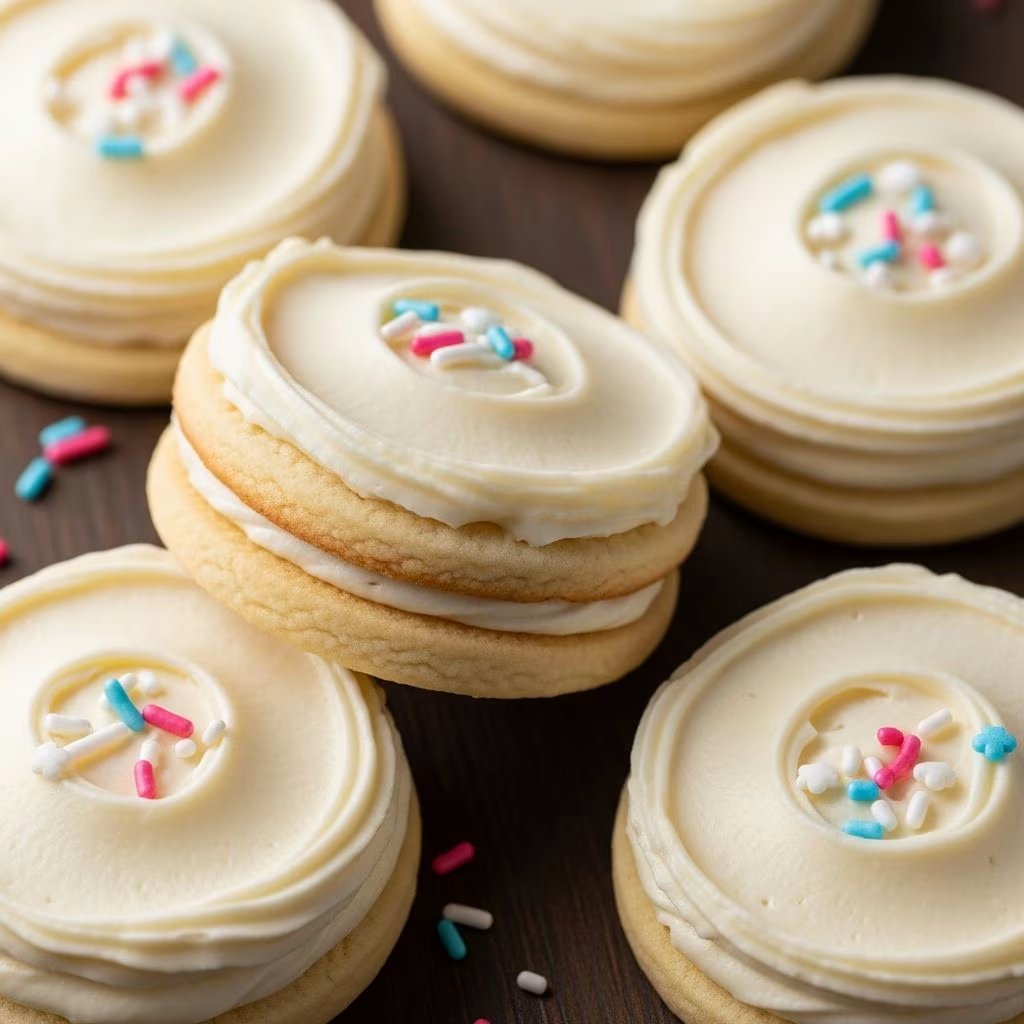
Spreading method: For a casual appearance, use a small spatula or butter knife to spread frosting directly onto cooled cookies. This straightforward approach works beautifully for everyday treats and children’s decorating projects.
Piping method: Transfer frosting to a piping bag fitted with your chosen tip for more decorative designs. A round tip creates simple dots or scrollwork, while star tips produce dimensional designs. This method requires slightly thicker frosting for best results—reduce the heavy cream by one tablespoon if using the piping approach.
Color customization: Gel food coloring produces vibrant hues without thinning the frosting as liquid food coloring would. Add coloring just before the final beating, mixing thoroughly to ensure even distribution. This approach allows you to create multiple frosting colors in separate batches for themed cookie decorations.
Topping additions: Immediately after applying frosting (before it sets), add sprinkles, edible glitter, crushed candies, or other decorative elements. The frosting acts as an adhesive, securing decorations in place during the setting process.
Storage Guidelines for Extended Freshness
Properly stored cookies maintain their quality for several days, allowing you to prepare ahead for events or enjoy homemade treats throughout the week. Store unfrosted cookies in an airtight container at room temperature for up to five days. Frosted cookies can be stored similarly, though they should be arranged in a single layer or separated by parchment paper to prevent frosting transfer or damage.
For longer storage, both frosted and unfrosted cookies freeze excellently for up to three months. Arrange them on a baking sheet until frozen solid, then transfer to freezer-safe containers or bags to maximize space efficiency. Thaw at room temperature for approximately one hour before serving.
Troubleshooting Common Baking Challenges
| Problem | Likely Cause | Solution |
|---|---|---|
| Cookies spread excessively during baking | Dough too warm or too much butter | Refrigerate dough before baking; verify accurate butter measurement |
| Cookies turn out too dense or heavy | Overmixing or too much flour | Mix dry ingredients minimally; measure flour correctly by spooning and leveling |
| Frosting appears grainy or separated | Insufficient beating or temperature imbalance | Beat longer; ensure all ingredients are room temperature |
| Cookies brown too quickly on edges | Oven temperature too high | Verify oven temperature with thermometer; adjust down if needed |
| Frosting too soft to pipe or hold shape | Too much cream or room too warm | Add more powdered sugar; refrigerate frosting briefly before piping |
Adapting the Recipe for Dietary Needs
While the traditional recipe delivers reliable results, many bakers seek to adapt the recipe for specific dietary preferences or restrictions. For those avoiding dairy, dairy-free butter substitutes can replace traditional butter in both cookies and frosting, though results may vary slightly in texture and rise. Non-dairy milk products such as oat or almond milk can substitute for heavy cream, though the frosting may have a slightly different consistency.
Gluten-free bakers can substitute all-purpose gluten-free flour blends for traditional flour, using a 1:1 ratio in most cases. These flour blends typically contain xanthan gum, which replaces the binding properties of gluten. Reduce leavening agents slightly—use 1.5 teaspoons baking powder and 1/4 teaspoon baking soda rather than the standard amounts—as gluten-free formulas often rise more readily.
Frequently Asked Questions
Can I prepare cookie dough in advance?
Yes, cookie dough stores well in the refrigerator for up to three days before baking. For longer storage, freeze dough for up to three months in an airtight container or portion it into individual dough balls on a baking sheet, then transfer frozen portions to freezer bags. Frozen dough requires slightly longer baking time—add 1-2 minutes to the standard baking duration.
What causes cookies to crack during baking?
Cracking typically results from oven temperature that is too high, causing the cookies to set too quickly on the outside before the interior has time to expand. Verify your oven temperature and reduce it by 25 degrees if cracking occurs. Additionally, avoid opening the oven door during the first 8 minutes of baking, as temperature fluctuations can cause cracking.
How can I make my cookies softer?
Remove cookies from the oven slightly before they appear completely done—when edges are golden but centers still appear pale and slightly underbaked. The residual heat while cooling completes the baking process while maintaining a softer texture. Additionally, store cookies with a slice of bread in an airtight container; the bread slowly releases moisture that softens the cookies over several hours.
Can I use salted butter instead of unsalted?
Unsalted butter is recommended for better control over total salt content in your recipe. If only salted butter is available, reduce the added salt to 1/8 teaspoon to prevent an overly salty final product.
References
- The Science of Baking — King Arthur Baking Company. 2024. https://www.kingarthurbaking.com/learn/guides/baking-science
- Buttercream Frosting Consistency Guide — Sally’s Baking Addiction. 2023. https://sallysbakingaddiction.com/cookie-decorating-buttercream/