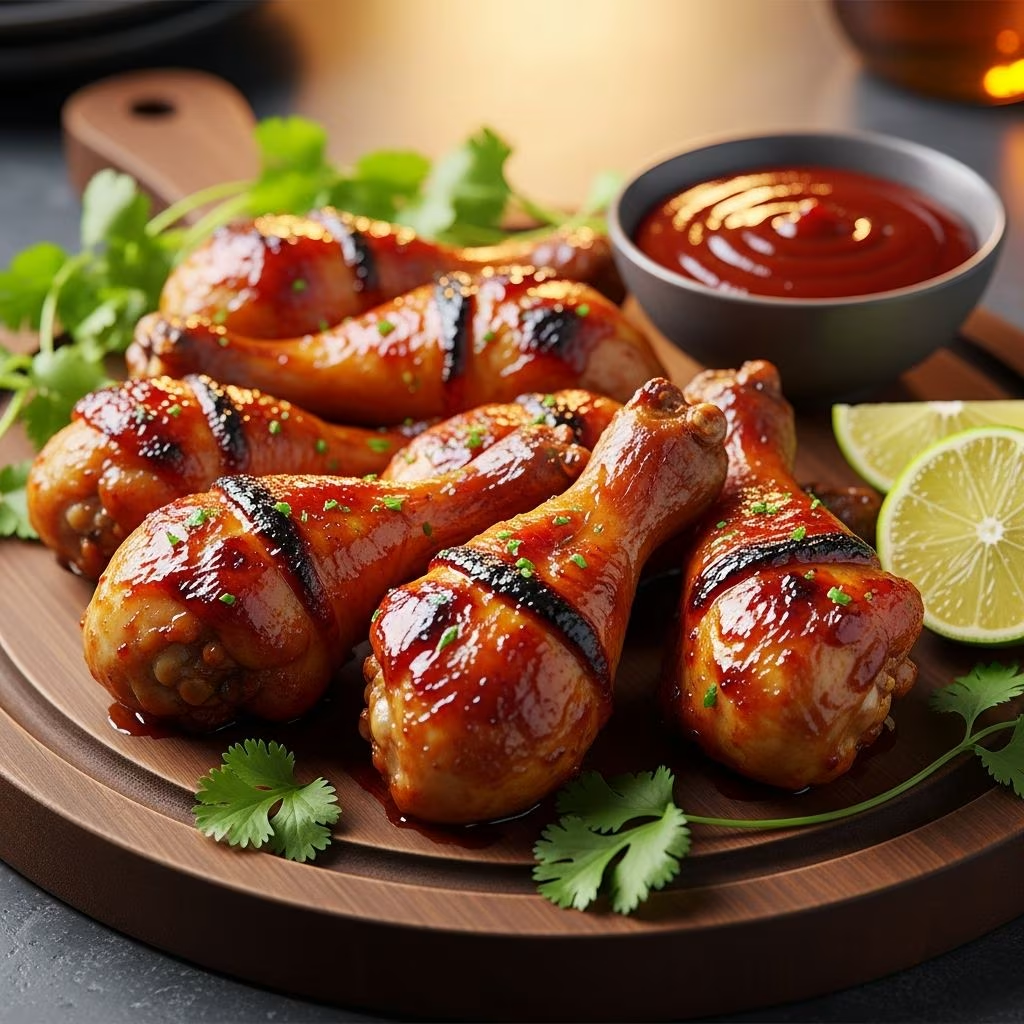
Drumsticks represent one of the most versatile and budget-friendly cuts of chicken available for home cooks. When prepared in the oven with a flavorful barbecue glaze, these humble legs transform into a restaurant-quality dish that impresses family and guests alike. The combination of dry spice rubs, caramelized sauce, and proper cooking technique yields drumsticks that are simultaneously tender inside and crispy on the outside.
Understanding the Foundation: Why Drumsticks Work Best
Chicken drumsticks contain more connective tissue and fat compared to breast meat, making them naturally forgiving during cooking. The bone running through the center provides structural support and distributes heat evenly throughout the meat. This composition means drumsticks can withstand the longer cooking times required for developing flavor without drying out. The dark meat also contains more myoglobin, a protein that carries moisture, contributing to juicier results than lighter poultry cuts.
The skin on drumsticks serves an important function during baking. It protects the underlying meat from direct heat while rendering fat that bastes the chicken internally. However, many recipes call for removing the skin before cooking, which creates a different texture profile—one that relies on sauce adhesion rather than rendered fat for moisture and browning.
Essential Equipment and Preparation Steps
Successful oven-baked drumsticks begin with proper preparation and the right tools. A rimmed baking sheet or shallow baking dish provides the ideal cooking vessel, allowing heat to circulate around each drumstick while containing drippings. Lining your cooking surface with parchment paper or aluminum foil simplifies cleanup and prevents sticking.
Before cooking, examine each drumstick for any remaining feathers or quill fragments. Pat the meat dry with paper towels to promote better browning and spice adherence. Some preparation methods involve making shallow slits in the flesh, which allows seasoning rubs and marinades to penetrate deeper into the meat rather than remaining only on the surface.
The Dry Rub Strategy: Building Flavor Foundation
A well-constructed dry rub provides the flavor foundation for exceptional drumsticks. The standard aromatics—garlic powder, onion powder, and paprika—create a savory base that complements barbecue sauce perfectly. Smoked paprika adds depth and complexity, while black pepper provides subtle heat. Brown sugar in the rub enhances caramelization and adds subtle sweetness that balances acidity in barbecue sauce.
Application technique matters significantly. Rather than simply sprinkling seasoning over the drumsticks, rub the mixture vigorously into the meat using your hands. This friction helps flavors adhere and opens the meat’s surface to better absorption. For enhanced flavor development, allowing seasoned drumsticks to rest in the refrigerator for at least 30 minutes permits spices to begin their penetration process before heat is applied.
Optional additions to dry rubs include cayenne pepper for heat, smoked salt for complexity, or ginger for subtle warmth. The beauty of the dry rub approach is its flexibility—cooks can adjust proportions according to personal preferences and available ingredients.
Temperature Selection and Oven Positioning
Oven temperature significantly impacts the final texture and browning of drumsticks. Most successful recipes employ temperatures ranging from 350°F to 425°F, with the majority clustering around 400°F. Higher temperatures promote crispier exteriors but require careful monitoring to prevent burning. Lower temperatures produce more uniform cooking but demand extended baking times.
Many recipes employ a two-stage temperature approach. Initial cooking at a moderate temperature (350-400°F) ensures the meat cooks through completely without exterior charring. Then, temperature increases during the final minutes create the desirable browning and caramelization that makes drumsticks visually appealing and flavorful.
Oven rack positioning influences heat distribution. Placing drumsticks in the middle rack ensures consistent heat circulation from both above and below. Some cooks elevate drumsticks on a wire rack within the baking dish, allowing air circulation underneath that promotes crispier skin.
The Multi-Stage Cooking Process
Optimal drumstick preparation involves multiple cooking phases rather than a single baking period. The initial stage, typically lasting 20-30 minutes, develops a partially cooked interior while beginning exterior browning. During this phase, drumsticks cook uncovered to allow moisture evaporation, which creates the foundation for crisping.
The second stage introduces the barbecue sauce, applied via brush after the initial cooking period. This timing prevents sauce from burning excessively while still allowing it to caramelize and adhere to the meat. Some cooks prefer applying sauce in multiple light coats rather than a single heavy application, which creates more even coverage and prevents pooling.
The final stage typically lasts 10-15 minutes, during which sauce fully caramelizes and meats reach safe internal temperatures. Many recipes suggest increasing heat during this final phase to maximize browning while the moisture-retaining barbecue sauce protects the meat from burning.
Critical Temperature Guidelines for Food Safety
Chicken safety depends on reaching proper internal temperatures. The USDA standard requires poultry reach 165°F at the thickest part of the meat, not touching bone. Using an instant-read thermometer eliminates guesswork and prevents both undercooking and overcooking. Insert the thermometer horizontally into the thickest portion of the drumstick for accurate readings.
Some recipes reference lower interim temperatures during cooking stages (150°F at 30 minutes, for example), allowing cooks to monitor progress and adjust timing based on drumstick size and oven characteristics. Smaller drumsticks may finish in 40-50 minutes total, while larger specimens require 50-60 minutes.
Sauce Selection and Application Techniques
Commercial barbecue sauce provides convenience and consistent flavor profiles, but homemade versions offer customization opportunities. Popular additions include honey for sweetness, soy sauce for umami depth, and hoisin sauce for complex fermented flavors. Vinegar-based sauces cut richness and add brightness, while mustard-based preparations provide tang and help emulsify fats.
Sauce consistency affects application success. Thicker sauces cling better to drumsticks and develop appealing caramelized edges, while thinner sauces penetrate meat surfaces more readily. Some recipes suggest reserving a portion of sauce for post-cooking brushing or dipping, which ensures fresh, unadjusted flavors for serving.
Troubleshooting Common Challenges
Dry, tough drumsticks typically result from overcooking or excessive heat. Monitoring internal temperature religiously and reducing oven heat if browning occurs too quickly prevents this issue. Another common problem—sauce burning excessively—stems from applying sauce too early. Waiting until interior cooking is nearly complete allows sauce to caramelize without charring to unpalatability.
Uneven browning often indicates inconsistent drumstick sizing or uneven oven temperature distribution. Arranging similar-sized drumsticks together and rotating the baking sheet halfway through cooking promotes uniformity. If your oven has hot spots, manually rotating individual drumsticks improves results.
Resting and Serving Recommendations
Allowing cooked drumsticks to rest 5-10 minutes before serving provides important benefits. Residual heat continues internal cooking slightly while muscle fibers relax, redistributing juices throughout the meat rather than allowing them to escape when cut. This brief rest period significantly impacts perceived juiciness and tenderness.
Presentation options range from simple plating to creative garnishes. Fresh green onions, sesame seeds, or cilantro add visual appeal and complementary flavors. Serving extra sauce alongside drumsticks allows diners to customize moisture levels. Coleslaw or grilled vegetables make excellent supporting dishes that balance the sweet and savory profiles of barbecue-glazed chicken.
Storage and Reheating Instructions
Leftover drumsticks refrigerate successfully for 3-4 days in airtight containers. Reheating in a 350°F oven for 8-10 minutes restores appealing texture better than microwave methods. Alternatively, shredded cooled drumstick meat works beautifully in sandwiches, grain bowls, or salads, offering meal-planning flexibility.
Customization Options for Dietary Preferences
Skin removal before cooking appeals to calorie-conscious cooks and accommodates certain dietary practices. The resulting texture differs from skin-on preparations—meat edges brown differently without rendered fat protection, but sauce provides moisture compensation. Recipes specifically designed for skinless drumsticks typically include increased oil in rubs or sauces to maintain moisture levels.
Sauce customization permits accommodating various dietary preferences. Sugar-free or naturally sweetened barbecue sauces substitute for conventional versions. Spice profile adjustments account for heat preferences—reducing or eliminating cayenne pepper, for instance, decreases pungency for sensitive palates.
Recipe Comparison Table
| Cooking Method | Oven Temperature | Initial Cook Time | Sauce Application | Final Cook Time | Total Time |
|---|---|---|---|---|---|
| Standard Two-Stage | 400°F | 30 minutes | After 30 minutes | 20-25 minutes | 50-55 minutes |
| Lower Temperature | 350-375°F | 40 minutes | After 40 minutes | 10-15 minutes | 50-55 minutes |
| High Heat Express | 425°F | 20 minutes | After 20 minutes | 20-25 minutes | 40-45 minutes |
| Marinated Approach | 350-400°F | 40-50 minutes | Throughout cooking | Included in total | 50-60 minutes |
Frequently Asked Questions
Can drumsticks be cooked on a stovetop instead of in an oven?
Yes, though results differ from oven-roasting. Stovetop methods produce crispier skin but require careful heat management to cook interiors completely without burning exteriors. Oven-roasting provides more forgiving, consistent results for most home cooks.
What’s the difference between roasting and baking drumsticks?
These terms are largely interchangeable in modern cooking. Roasting traditionally implies higher heat and uncovered cooking, while baking suggests lower heat and sometimes covered vessels. Most drumstick recipes employ characteristics of both methods.
How do I prevent sauce from burning?
Apply sauce only during the final 20-25 minutes of cooking, after the meat is substantially cooked. Use medium-thickness sauce consistency, and consider reducing oven temperature slightly if browning occurs too rapidly.
Why are my drumsticks rubbery?
Overcooking causes this texture. Monitor internal temperature closely—chicken becomes rubbery when proteins denature excessively from prolonged heat. Reduce cooking time or lower oven temperature if this occurs consistently.
Can I prepare drumsticks the night before cooking?
Absolutely. Seasoning drumsticks 12-24 hours in advance allows flavors to penetrate thoroughly. Cover and refrigerate until ready to cook, removing from refrigeration 15-20 minutes before baking to allow them to approach room temperature for more even cooking.
References
- Baked BBQ Chicken Drumsticks — Craving Home Cooked. 2024. https://cravinghomecooked.com/baked-bbq-chicken-drumsticks/
- Baked BBQ Chicken Legs (Drumsticks) — Real Food Whole Life. 2024. https://realfoodwholelife.com/recipes/baked-chicken-drumsticks/
- Oven Baked BBQ Drumsticks — A Seasoned Greeting. 2025-02-09. https://aseasonedgreeting.com/2025/02/09/oven-baked-bbq-drumsticks/
- BBQ Chicken Legs in Oven — Soulfully Made. 2024. https://www.soulfullymade.com/oven-baked-bbq-chicken-drumsticks/
- Crispy Baked BBQ Chicken Drumsticks — How Sweet Eats. 2025-01-01. https://www.howsweeteats.com/2025/01/baked-bbq-chicken-drumsticks/
- Crispy Baked BBQ Chicken Drumsticks — Healthy Fitness Meals. 2024. https://healthyfitnessmeals.com/baked-chicken-drumsticks/