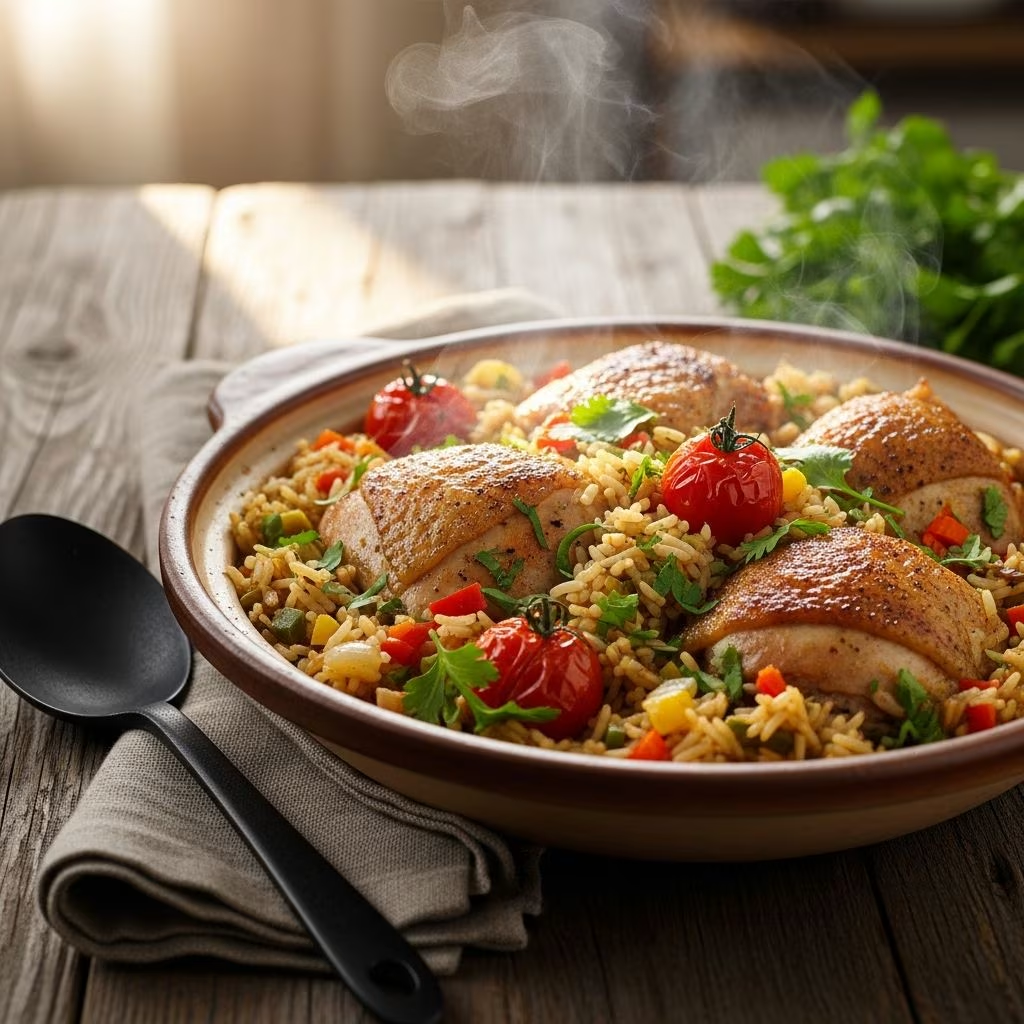
One-pot meals represent the pinnacle of convenient home cooking, combining protein, carbohydrates, and vegetables into a single, satisfying dish. The one-pot chicken and rice preparation stands as a versatile foundation that adapts to various flavor profiles and dietary preferences while maintaining its fundamental appeal: minimal cleanup and maximum flavor.
This comprehensive approach to creating chicken and rice dishes addresses ingredient selection, cooking methodology, timing considerations, and advanced techniques that transform a basic recipe into restaurant-quality results achieved in your own kitchen.
Understanding Your Cooking Vessel Selection
The foundation of successful one-pot cooking begins with selecting the appropriate cookware. Several options provide excellent results, each with distinct advantages for different cooking styles and kitchen preferences.
- Dutch Oven: Heavy cast iron or enameled cast iron vessels distribute heat uniformly, preventing hot spots and ensuring even cooking throughout the dish. Their substantial weight maintains consistent temperature and provides superior heat retention.
- Large Skillet: Wide cooking surfaces expedite the browning process and reduce cooking time. Skillets work particularly well for recipes requiring extended sautéing of vegetables before the simmering phase.
- Soup Pot: Deeper vessels accommodate larger quantities and prevent splattering during the initial cooking stages. Their capacity makes them ideal for feeding larger households.
- Braising Pan: Shallow, wide-bottomed pans offer excellent browning capabilities while maintaining adequate depth for liquid absorption.
Regardless of vessel selection, ensure your cookware features a well-fitting lid that traps moisture during the simmering phase. A compromised seal allows steam to escape prematurely, disrupting the cooking process and potentially leaving rice undercooked.
Selecting and Preparing Your Proteins
Protein selection fundamentally influences the final dish’s texture and flavor complexity. Different cuts of chicken deliver varying results based on their fat content and cooking characteristics.
Chicken thighs represent an excellent choice for one-pot preparations, offering superior moisture retention compared to breast meat. Their higher fat content prevents drying during extended cooking periods and contributes richness to the surrounding broth. Thighs maintain structural integrity throughout the cooking process, resisting the tendency toward stringiness that sometimes affects breast meat.
Boneless, skinless thighs cut into bite-sized chunks accelerate cooking while maintaining tenderness. For whole thighs, extend cooking times by approximately five to seven minutes to ensure thorough doneness throughout the thicker portions.
Chicken breast meat provides a leaner alternative for dietary preferences prioritizing fat reduction. Chopping breast meat into uniform, bite-sized pieces prevents uneven cooking and reduces the likelihood of dry exterior sections while interior portions remain undercooked.
Seasoning your protein before cooking creates a flavorful crust and distributes flavors throughout. A simple combination of salt, pepper, and complementary dried herbs (such as thyme, oregano, or Italian seasoning) applied generously before searing establishes the flavor foundation for the entire dish.
The Critical Vegetable Foundation
Aromatic vegetables form the flavor base that distinguishes exceptional one-pot meals from merely adequate preparations. Strategic selection and timing of vegetable additions creates layered complexity without overwhelming the dish.
Primary Aromatics: Onions and shallots release their natural sugars during cooking, developing sweet, caramelized notes that enhance the overall flavor profile. Dice these ingredients uniformly to promote even softening. Minced garlic added near the end of the sautéing phase preserves its pungent characteristics without burning, which produces bitter, undesirable flavors.
Supporting Vegetables: Carrots contribute natural sweetness and textural contrast. Their firm structure withstands extended cooking without dissolving into the broth. Cut carrots into consistent sizes approximately one-quarter inch thick to ensure uniform cooking throughout the simmering period.
Additional Considerations: Mushrooms introduce earthy umami depth that amplifies savory characteristics. Celery provides subtle herbaceous notes without dominating the flavor landscape. Bell peppers add brightness and slight sweetness when added toward the final stages of cooking.
Vegetable preparation timing dramatically affects the final result. Softer vegetables added early risk becoming mushy, while those added late may remain undercooked. Plan additions based on each ingredient’s density and cooking time requirements.
Rice Selection and Preparation Techniques
Rice variety fundamentally determines texture, absorption rate, and flavor compatibility with other ingredients. Different rice types require adjusted liquid ratios and cooking times to achieve optimal results.
White Jasmine Rice: Delicate, aromatic varieties absorb moisture efficiently while maintaining individual grain separation. Their subtle floral notes complement most flavor combinations. A standard ratio of approximately 1.5 cups liquid per 1 cup uncooked jasmine rice produces tender, fluffy results.
Long-Grain White Rice: These versatile staples cook consistently and provide neutral flavor that accommodates bold spice combinations. Their firmer texture resists overcooking better than softer varieties.
Basmati Rice: Premium basmati varieties offer superior fragrance and individual grain definition. Their firmer structure maintains integrity throughout extended cooking periods, preventing the mushy texture sometimes encountered with other white rice varieties.
Rinsing uncooked rice before incorporating it into the dish removes excess surface starch that can create a gluey texture. Cold running water effectively eliminates this starch until the water runs clear. Proper rinsing produces noticeably superior final results compared to unrinsed rice.
Toasting uncooked rice briefly in fat before adding liquid develops nutty, complex flavors that enhance the finished dish. This technique requires approximately one to two minutes of constant stirring to coat each grain and initiate the toasting process without burning.
Liquid Selection and Ratio Management
The cooking liquid carries flavors throughout the dish while providing the moisture necessary for rice hydration and chicken cooking. Thoughtful liquid selection elevates the final result beyond basic adequacy.
Chicken broth or stock represents the optimal choice, infusing the dish with deep, savory characteristics that enhance both rice and protein. Homemade stock delivers superior flavor compared to commercial varieties, though quality store-bought options provide acceptable results.
Vegetable broth serves as an acceptable alternative for vegetarian adaptations or when chicken broth is unavailable. The final dish lacks the deep savory notes provided by meat-based broths but maintains overall palatability.
Water combined with bouillon cubes or paste offers convenience and acceptable results, though the resulting flavor remains somewhat thin compared to proper broth preparations.
Proper liquid-to-rice ratios ensure complete hydration without producing mushy, overcooked results. Standard recommendations suggest approximately 2.25 cups liquid per 1 cup uncooked rice, though variations in rice type, cookware, and altitude require adjustments. Monitor the cooking process visually—when liquid reduces to nearly nothing and steam holes appear in the rice surface, cooking has reached completion.
Mastering the Cooking Process
Successful one-pot chicken and rice preparation follows a structured sequence that builds flavors methodically while managing timing precision.
Phase One: Protein Preparation
Heat your chosen cooking vessel over medium heat and add cooking fat (olive oil or butter work equally well). Allow the fat to reach proper temperature—approximately one minute at medium heat produces adequate heat for browning. Add seasoned chicken pieces and cook undisturbed for approximately five to seven minutes, developing a flavorful crust through the Maillard reaction. This browning process creates complex flavors that permeate the final dish. Turn pieces and cook the opposite side until golden, approximately three to four minutes. Transfer chicken to a clean plate, retaining any accumulated juices for later incorporation.
Phase Two: Aromatic Development
Maintaining medium heat, add diced onions and shallots to the same pot, stirring occasionally for approximately four to five minutes until they become translucent and release their sweet aromatic compounds. Add minced garlic during the final minute of this phase, stirring constantly to prevent burning. The pot’s retained heat from previous cooking accelerates aromatic development.
Phase Three: Supporting Vegetable Incorporation
Add firmer vegetables such as carrots and mushrooms, stirring to combine. These vegetables require extended cooking time to reach proper tenderness, justifying their earlier addition. Cook for approximately three to four minutes, allowing vegetables to begin softening.
Phase Four: Rice Toasting
Introduce rinsed, drained rice to the pot, stirring constantly for one to two minutes. This crucial step develops nutty flavors and coats each grain with fat, promoting individual grain separation in the final result. Observe the rice closely—it should become slightly translucent at the edges without browning.
Phase Five: Liquid Addition and Flavor Adjustment
Pour the measured liquid into the pot, stirring gently to disperse any rice clinging to the bottom. At this point, assess seasonings by tasting the liquid. Adjust salt and pepper as necessary before the simmering phase begins, when adjustments become more difficult. Increase heat to medium-high and bring the liquid to a rolling boil, stirring occasionally to prevent rice from sticking to the pot bottom.
Phase Six: Controlled Simmering
Once liquid reaches a full boil, reduce heat to low and stir the mixture thoroughly. Return the cooked chicken and any accumulated juices to the pot, nestling pieces among the rice and vegetables. Cover with a lid and allow the dish to simmer undisturbed for approximately twenty minutes. Resist the temptation to lift the lid or stir—interruptions disrupt steam circulation and extend cooking time.
Phase Seven: Rest and Completion
After twenty minutes, remove the pot from heat while maintaining the lid position. Allow the dish to rest for approximately five to ten minutes. During this resting phase, residual heat completes the cooking process while remaining steam distributes evenly throughout. Remove the lid and fluff rice gently with a fork, separating any clumped grains. Taste and adjust final seasonings as necessary.
Temperature Guidelines and Doneness Assessment
| Component | Target Temperature | Assessment Method |
|---|---|---|
| Chicken Thighs | 165°F (74°C) internal temperature | Instant-read thermometer inserted into thickest portion without touching bone |
| Chicken Breast | 165°F (74°C) internal temperature | No pink remains inside; juices run clear when pierced |
| Rice | Not applicable | Tender texture; liquid completely absorbed; grains separate easily with fork |
| Vegetables | Not applicable | Fork-tender; maintains slight structural integrity without mushiness |
Troubleshooting Common Issues
Undercooked Rice with Dry Chicken: This combination typically indicates insufficient liquid or excessive heat during simmering. Ensure proper liquid ratios and verify that heat remains at the low setting. If this issue occurs mid-cooking, add additional broth (approximately one-quarter cup) and extend simmering time.
Mushy Rice: Overcooking or excessive liquid causes rice grains to lose structural integrity and absorb too much moisture. Reduce simmering time by two to three minutes in future preparations. Lower the liquid ratio by approximately one-quarter cup if the problem persists.
Dry, Stringy Chicken: Overcooking or lean protein selection produces this undesirable texture. Reduce cooking time by three to five minutes or select fattier chicken cuts such as thighs instead of breast meat.
Burnt Rice on Pot Bottom: Improper heat management causes direct contact between rice and hot cookware. Maintain low heat after bringing liquid to a boil. Ensure adequate stirring during the initial liquid addition phase to prevent rice settling.
Flavor Variation and Customization Approaches
The fundamental one-pot chicken and rice framework accommodates numerous flavor profiles through strategic ingredient substitutions and addition timing.
- Mediterranean Variation: Replace standard herbs with oregano and basil, add sun-dried tomatoes during the vegetable phase, and incorporate fresh parsley as a finishing garnish.
- Asian-Inspired Adaptation: Substitute vegetable broth with coconut milk, add ginger and sesame oil to the seasoning blend, and garnish with sesame seeds and chopped green onions.
- Spanish Influence: Incorporate smoked paprika into the seasoning mixture, add saffron threads dissolved in warm broth, and include diced tomatoes with bell peppers.
- Creamy Enrichment: Stir heavy cream or sour cream into the finished dish just before serving for luxurious texture and richness.
Storage and Reheating Considerations
Properly stored one-pot chicken and rice maintains quality for three to four days under refrigeration. Allow the dish to cool to room temperature before transferring to an airtight container, preventing condensation from creating unwanted moisture. Reheat gently on the stovetop over medium-low heat, stirring occasionally and adding small amounts of additional broth if the mixture appears dry.
Frequently Asked Questions
Can I use frozen chicken in one-pot rice dishes?
Frozen chicken requires thawing before cooking to ensure even heat distribution and proper doneness. Adding frozen chicken directly increases cooking time unpredictably and risks producing undercooked centers with overcooked edges.
What causes rice to remain undercooked while chicken finishes properly?
This typically results from insufficient liquid or excessive heat during simmering. Rice requires adequate moisture and low, consistent heat for proper hydration. Verify your liquid measurements and ensure the burner remains at the low setting throughout cooking.
How do I prevent rice from sticking to the pot bottom?
Proper stirring during the liquid addition phase distributes rice evenly and prevents settling. Maintaining low heat after bringing liquid to a boil eliminates direct contact between rice and hot cookware that causes burning.
Can I prepare this dish in advance?
While fully cooked one-pot chicken and rice stores well for several days, preparing and storing components separately provides greater flexibility. Cook vegetables and chicken ahead of time, then combine with broth and rice just before serving for optimal texture.
What adjustments are necessary for high-altitude cooking?
High-altitude cooking requires additional liquid due to reduced atmospheric pressure that accelerates evaporation. Increase liquid by approximately one-quarter cup for every 3,000 feet of elevation above sea level.
References
- USDA Food Safety and Inspection Service – Safe Internal Temperature Guide — United States Department of Agriculture. 2024. https://www.fsis.usda.gov/food-safety/safe-food-handling-and-preparation/food-safety-basics/safe-temperature-chart
- Rice Cooking Standards and Techniques — USA Rice Federation. 2023. https://www.usarice.com/recipes-and-cooking/cooking-methods
- Maillard Reaction in Cooking — McGee, Harold. On Food and Cooking: The Science and Lore of the Kitchen (Revised Edition). Scribner. 2004.
- Poultry Safety Guidelines — Centers for Disease Control and Prevention. 2025. https://www.cdc.gov/foodsafety/communication/steps-healthy-food-preparation.html