Cronuts blend the buttery flakiness of croissants with the indulgent sweetness of donuts, creating a pastry sensation that’s both challenging and rewarding to make at home. This guide focuses on the foundational dough-making process, a multi-day endeavor that demands patience and precision. By following these steps, you’ll achieve the signature layered texture that defines a true cronut.
Understanding the Cronut Phenomenon
The cronut, invented by chef Dominique Ansel in 2013, quickly became a global hit due to its unique hybrid nature. Unlike standard donuts fried from simple yeast dough, cronuts require a laminated dough technique similar to croissants or puff pastry. This involves encasing cold butter within dough and folding it repeatedly to create hundreds of thin layers that puff up dramatically during frying. The result is an exterior that’s shatteringly crisp, with a tender, airy interior.
Homemade versions can rival bakery ones if you invest the time. Expect 2-3 days for the dough alone, allowing for proofing, chilling, and lamination. This isn’t a quick recipe but one for bakers who enjoy the craft.
Essential Ingredients for Cronut Dough
Gathering high-quality ingredients is crucial for success. Here’s a breakdown of what you’ll need for about 12 cronuts:
- Bread flour: 500g – Provides strength for lamination due to higher protein content.
- All-purpose flour: 100g – Adds tenderness.
- Sugar: 50g – Feeds yeast and adds subtle sweetness.
- Salt: 10g – Enhances flavor.
- Active dry yeast: 10g – For lift and structure.
- Egg whites: 150g – Contributes to richness without excess moisture.
- Water or milk: 200ml – Hydrates the dough; milk adds extra tenderness.
- Butter (for dough): 50g – Softened, for initial mixing.
- Heavy cream: 50ml – Boosts richness.
- Butter block (for lamination): 300g – High-fat European-style butter, kept very cold.
Opt for unsalted butter with at least 82% fat content to ensure clean lamination without greasy leaks.
Day 1: Preparing the Base Dough
Start early to allow ample proofing time. The goal is a smooth, elastic dough with minimal gluten development to keep it tender.
- Combine dry ingredients in a stand mixer bowl: flours, sugar, salt, and yeast.
- Add wet ingredients: egg whites, water (or milk), softened butter, and cream.
- Mix on low speed for 3 minutes until just combined – the dough will look shaggy.
- Increase to medium speed for 6 minutes. It should form a firm, smooth ball like “baby skin,” without sticking.
- Shape into a tight ball, place in a greased bowl, cover with plastic wrap directly on the surface, and proof in a warm spot (75-80°F) until doubled, 2-3 hours.
- Punch down by folding edges to the center, releasing gas. On parchment, form a 10-inch square, about 1-inch thick.
- Transfer to a sheet pan, cover tightly, and refrigerate overnight. This chills and relaxes the gluten.
This initial dough is your detrempe – the base that will envelop the butter.
Day 2: Crafting the Butter Block and First Lamination
Cold butter is key; it must remain pliable yet solid to create steam pockets during baking.
Forming the Butter Block
- Place 300g cold butter between two parchment sheets.
- Tap gently with a rolling pin to soften slightly, then roll into a 7-inch square, ½-inch thick.
- Chill until firm but not brittle, about 30 minutes. Refrigerate overnight if prepping ahead.
Encasing and Initial Turns
Work quickly in a cool kitchen (below 70°F) to prevent butter meltdown.
- Roll chilled dough to a 10-inch square, 1-inch thick, on a lightly floured surface.
- Position butter diamond-style in the center.
- Fold dough corners over butter like an envelope, pinching seams securely.
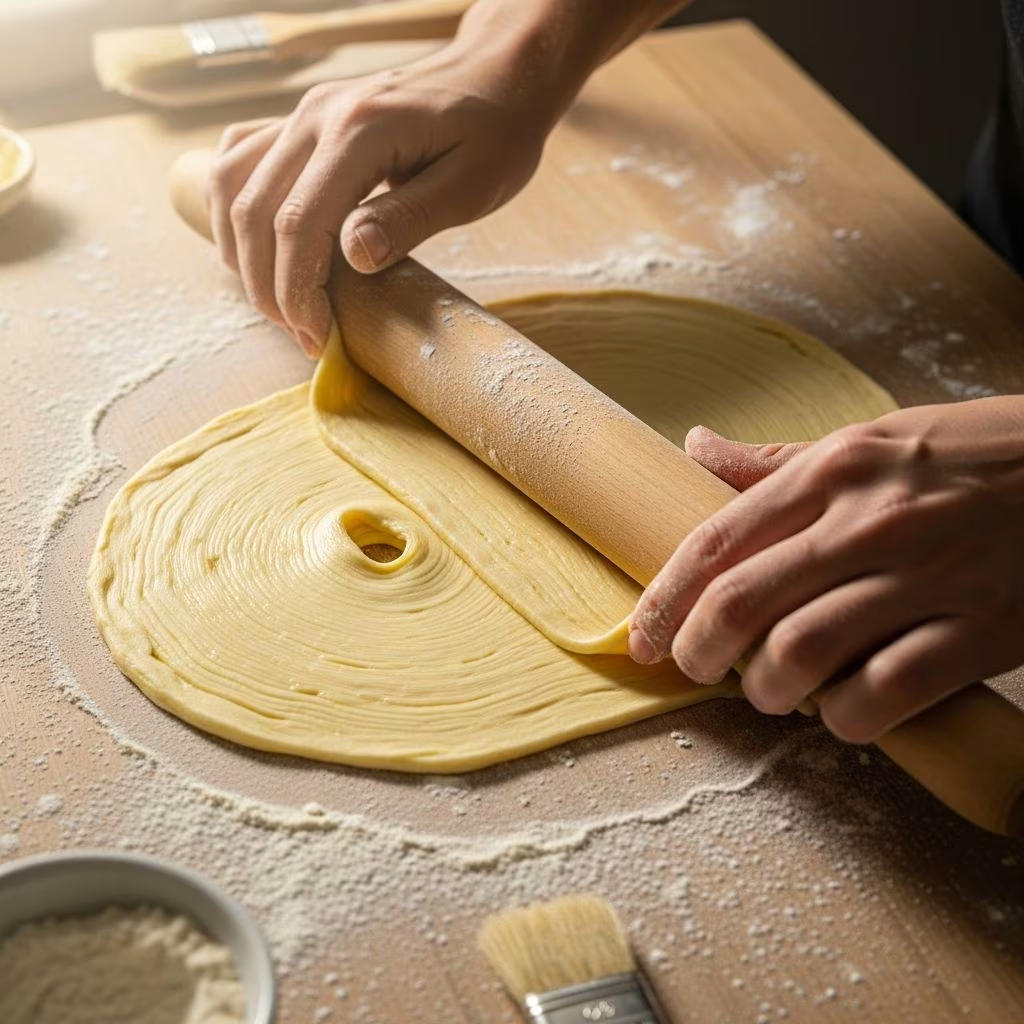
- Roll from center outward to a 20×20-inch rectangle, ¼-inch thick, keeping even pressure.
- Fold in half horizontally (book fold), then vertically, yielding a 10-inch square with 4 layers.
- Wrap and chill 1 hour.
- Repeat: Roll to 20-inch square, fold similarly for another 4 layers (now 16 total). Wrap and refrigerate overnight.
These are single turns; three total build 64+ layers. Dust minimally to avoid tough dough.
Day 3: Final Shaping and Cutting
The dough now has immense potential for flakiness.
- Roll to a 15-inch square, ½-inch thick. Chill 1 hour to relax.
- Use a 3.5-inch ring cutter for outer circles, 1-inch for holes, yielding 12 cronuts. Reserve centers for frying.
- Place on parchment-lined trays, cover loosely, and proof 1-2 hours until puffy but not doubled.
Avoid overproofing; the dough should spring back slowly when poked.
Frying Techniques for Perfect Results
Frying transforms the laminated dough.
- Heat neutral oil (canola or vegetable) to 350-360°F in a deep pot – 2-3 inches deep.
- Fry 90 seconds per side until deep golden; flip once. Cronut holes take 45 seconds total.
- Drain on paper towels; cool slightly before filling or coating.
Maintain temperature to prevent greasy or raw centers. Fry in batches.
Flavor Enhancements and Coatings
Elevate with fillings and toppings.
Simple Vanilla Glaze
| Ingredient | Amount |
|---|---|
| Confectioners’ sugar | 2 cups |
| Milk | 2-4 tbsp |
| Vanilla extract | 1 tsp |
Whisk until smooth, drizzle over cooled cronuts.
Flavored Sugars
- Cinnamon-sugar: 1 cup sugar + 2 tbsp cinnamon.
- Citrus zest: 1 cup sugar + zest of 2 lemons/oranges.
- Spiced: Add cardamom or ginger.
Roll warm cronuts in sugar immediately after frying for adhesion.
Quick Alternatives for Beginners
For faster results, use store-bought puff pastry or crescent dough:
- Puff pastry: Thaw, cut rings, fry 1 minute per side at 375°F. Dip in cinnamon sugar.
- Crescent rolls: Layer two sheets, cut, fold for extra layers, fry as above.
These yield great texture in under an hour but lack authentic lamination depth.
Common Mistakes and Troubleshooting
| Issue | Cause | Solution |
|---|---|---|
| Greasy cronuts | Butter too warm during lamination | Chill more frequently; cooler kitchen |
| Dense layers | Overworked dough or too much flour | Mix minimally; dust lightly |
| Raw centers | Oil too cool or thick dough | Monitor temp; roll thinner |
| Deflated shape | Overproofed | Proof shorter; test poke |
Storage and Make-Ahead Tips
Fresh is best; store unfilled cronuts airtight up to 2 days or freeze shaped dough. Re-proof before frying. Fillings like pastry cream or ganache should be prepped separately and piped post-frying using a Bismarck tip.
FAQs
Can I make cronuts vegan?
Yes, substitute plant-based butter, egg replacer, and non-dairy milk/cream. Results may vary in flakiness.
How many layers does the dough have?
Three single turns create 64 layers; additional turns can reach 729 for ultra-flaky results.
What’s the best oil for frying?
Neutral oils like canola or grapeseed with high smoke points (400°F+).
Can I bake instead of fry?
Baking at 400°F yields cro-doughnuts but misses the fried crispiness.
How do I fill cronuts?
Slice horizontally, pipe filling, or inject via small holes with a pastry bag.
References
- Homemade Cronut™ – Serena Lissy — Serena Lissy. 2023-05-15. https://serenalissy.com/the-cronut/
- Easy Cronuts Recipe – Mom Foodie — Mom Foodie. 2022-11-10. https://momfoodie.com/cronuts/
- COPYCAT CRONUT RECIPE – Baking Beauty — Baking Beauty. 2023-01-20. https://www.bakingbeauty.net/easy-diy-cronuts-recipe/
- How to make Cronuts – Laminated dough – pastry series part 5 — YouTube (Bruno Albouze). 2021-08-05. https://www.youtube.com/watch?v=NuE9HEGym7Y
- Cronut Recipe Made with Puff Pastry – Mon Petit Four — Mon Petit Four. 2022-06-12. https://www.monpetitfour.com/cronut/