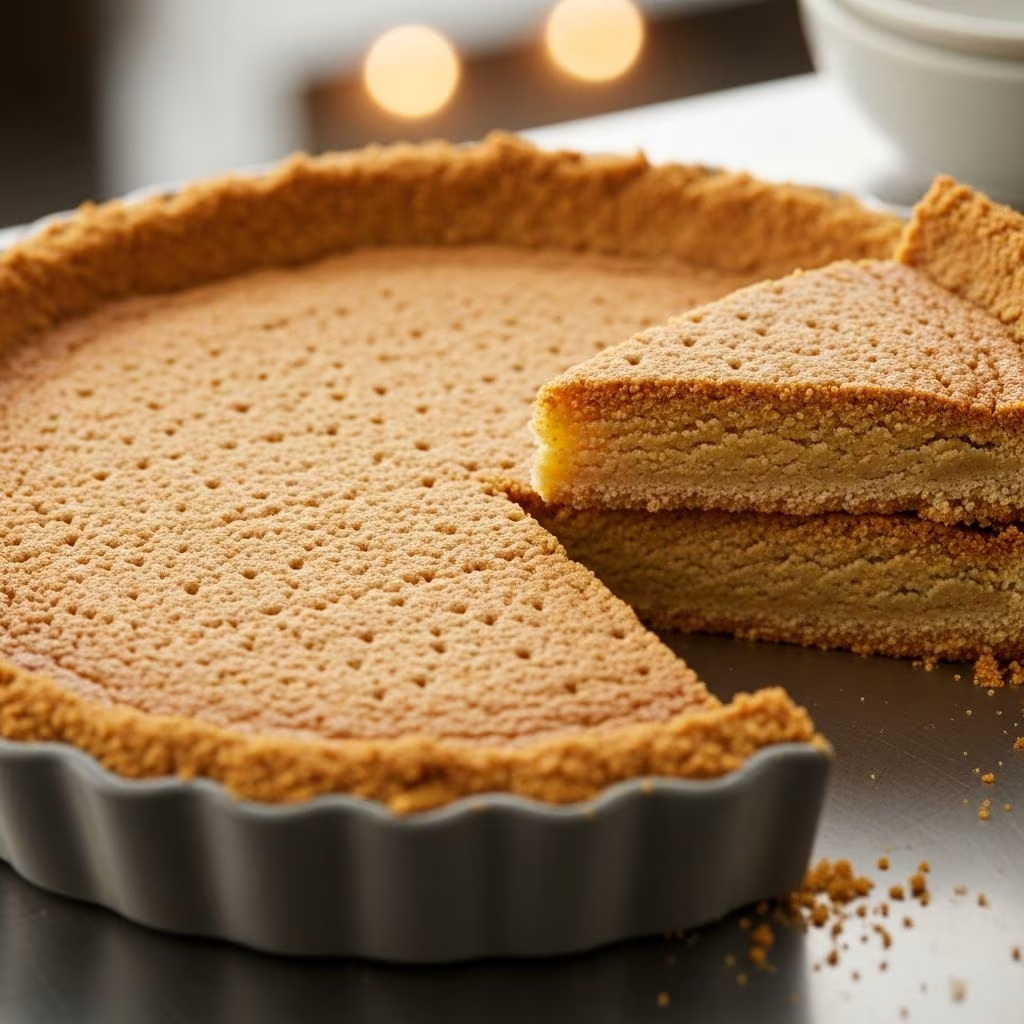
Creating a graham cracker crust is one of the simplest ways to elevate any dessert. This versatile base pairs perfectly with creamy fillings, fruity toppings, and even no-bake treats. Unlike traditional pastry dough, it requires no rolling or chilling, making it ideal for beginners and pros alike. In this comprehensive guide, we’ll explore everything from basic recipes to advanced techniques, ensuring your crust holds up beautifully every time.
Why Choose a Graham Cracker Crust?
Graham cracker crusts offer a sweet, crunchy contrast to smooth pie fillings. Their origins trace back to simple American baking traditions, where whole wheat graham crackers provide a nutty flavor and sturdy texture. This crust type shines in cheesecakes, key lime pies, and icebox desserts because it doesn’t sog out easily when chilled.
- Speed: Ready in under 15 minutes.
- Versatility: Works for baked, frozen, or no-bake pies.
- Customizable: Easily adapt for dietary needs like gluten-free or vegan.
Home bakers love it for its forgiving nature—no fancy equipment needed beyond a mixing bowl and pie pan.
Essential Ingredients for Success
The beauty of a graham cracker crust lies in its minimal ingredients: crushed graham crackers, sugar, and butter. Here’s a breakdown of each component and why it matters.
| Ingredient | Amount (for 9-inch pie) | Role | Best Choices |
|---|---|---|---|
| Graham Cracker Crumbs | 1.5 cups (about 12 sheets) | Provides structure and flavor | Honey or cinnamon grahams; gluten-free if needed |
| Granulated Sugar | 1/3 cup | Sweetens and helps binding | White or light brown for deeper flavor |
| Melted Butter | 5-6 Tbsp | Binds crumbs together | Unsalted; vegan butter alternative |
| Salt (optional) | 1/2 tsp | Balances sweetness | Kosher salt for even distribution |
| Cinnamon (optional) | 1/4 tsp | Adds warmth | Ground cinnamon for spice boost |
Pro tip: Pulse whole graham crackers in a food processor for uniform crumbs. Avoid pre-packaged crumbs if possible—they can be overly fine and dry.
Step-by-Step Recipe for Classic Crust
Follow these instructions for a foolproof 9-inch crust that bakes to golden perfection.
- Preheat Oven: Set to 350°F (175°C). This temperature gently toasts the crust without burning.
- Crush Crackers: Process 12 full graham cracker sheets into fine crumbs, yielding 1.5 cups. A rolling pin works too for a rustic texture.
- Mix Dry Ingredients: In a bowl, combine crumbs, 1/3 cup sugar, and optional salt/cinnamon.
- Add Butter: Pour in 6 Tbsp melted butter. Stir until the mixture resembles wet sand—it should hold shape when squeezed.
- Press into Pan: Dump into an ungreased 9-inch pie plate. Use the bottom of a measuring cup to firmly press crumbs across the bottom and up the sides evenly.
- Bake: 7-10 minutes until edges are lightly golden. Cool completely before filling.
Total time: 15 minutes. Yields 8-12 servings. For no-bake pies, chill 1-2 hours instead of baking.
Creative Variations to Try
Once mastered, experiment with twists to match your pie flavors.
- Gluten-Free Version: Swap for certified gluten-free graham-style crackers. The texture remains crisp.
- Vegan Delight: Use plant-based butter or coconut oil. Reduce sugar if using sweetened coconut.
- Chocolate Infusion: Add 2 Tbsp cocoa powder and extra sugar for a brownie-like base.
- Nutty Crunch: Mix in 1/4 cup finely chopped pecans or almonds for texture.
- Brown Sugar Swap: Replace white sugar with brown for a caramel note. Honey works too, but pair with less sugar to avoid stickiness.
For deeper pans like cheesecakes, increase crumbs to 2 cups and butter to 8 Tbsp.
Tools and Techniques for Pro Results
Great tools make pressing effortless and results consistent.
- Pie Pan: Glass or metal 9-inch deep-dish for even baking.
- Food Processor or Blender: For quick, even crumbs.
- Measuring Cup: Flat bottom ideal for compacting.
- Parchment Sling: Line springform pans for easy removal.
Technique tip: Chill the formed crust 15 minutes before baking to prevent crumbling. For extra hold, brush with a thin egg white wash before baking.
Pairing Your Crust with Irresistible Fillings
A graham cracker crust is the perfect canvas for countless pies. Here are top pairings:
- Creamy Classics: Cheesecake, lemon meringue, or peanut butter pie.
- Fruity Favorites: Key lime, strawberry rhubarb, or cherry.
- No-Bake Wonders: Banana pudding, chocolate eclair, or yogurt parfaits.
- Frozen Treats: Ice cream pies or frozen yogurt.
For 30+ ideas, consider seasonal fruits in summer or spiced pumpkins in fall. Always match crust sweetness to filling—less sugar for tart fruits.
Troubleshooting Common Issues
Even simple recipes can go wrong. Here’s how to fix and prevent problems.
| Problem | Cause | Solution |
|---|---|---|
| Crumbly Crust | Too little butter | Add 1-2 more Tbsp next time; press harder |
| Soggy Bottom | No pre-bake or watery filling | Bake crust; add cornstarch to fillings |
| Overly Sweet | Excess sugar | Reduce to 1/4 cup; taste mix before pressing |
| Uneven Edges | Poor pressing | Use straight-edged glass; rotate pan |
| Slips from Sides | Not chilled | Firm press and 10-min fridge set |
Storage: Baked crusts keep 2 days at room temp or freeze up to 3 months wrapped tightly.
Nutrition and Storage Basics
Per slice (1/12th): ~150 calories, 9g fat, 16g carbs. Use low-fat butter for lighter versions. Store filled pies in fridge up to 5 days; unfilled crusts longer.
Frequently Asked Questions (FAQs)
Can I make graham cracker crust without baking?
Yes! Press firmly and chill 2 hours. Ideal for no-bake cheesecakes.
What’s the difference between honey and cinnamon grahams?
Honey adds subtle sweetness; cinnamon brings spice. Both work great.
How do I crush graham crackers without a food processor?
Place in a zip-top bag and smash with a rolling pin until fine.
Is store-bought crust as good as homemade?
Homemade tastes fresher and allows customization, but store-bought saves time.
Can this crust be used for tarts or bars?
Absolutely—adjust thickness for bars; press into rectangular pans.
With these tips, your graham cracker crusts will be bakery-worthy. Experiment boldly and enjoy the crunch!
References
- Graham Cracker Crust | Tastes Better from Scratch — Tastes Better from Scratch. Accessed 2026. https://tastesbetterfromscratch.com/graham-cracker-crust/
- The BEST Graham Cracker Pie Crust – Cookies and Cups — Cookies and Cups. Accessed 2026. https://cookiesandcups.com/the-best-graham-cracker-crust/
- 30 Delicious Pie Recipes with Graham Cracker Crust – Tikkido.com — Tikkido.com. Accessed 2026. https://tikkido.com/blog/graham-cracker-crust-pie-recipes