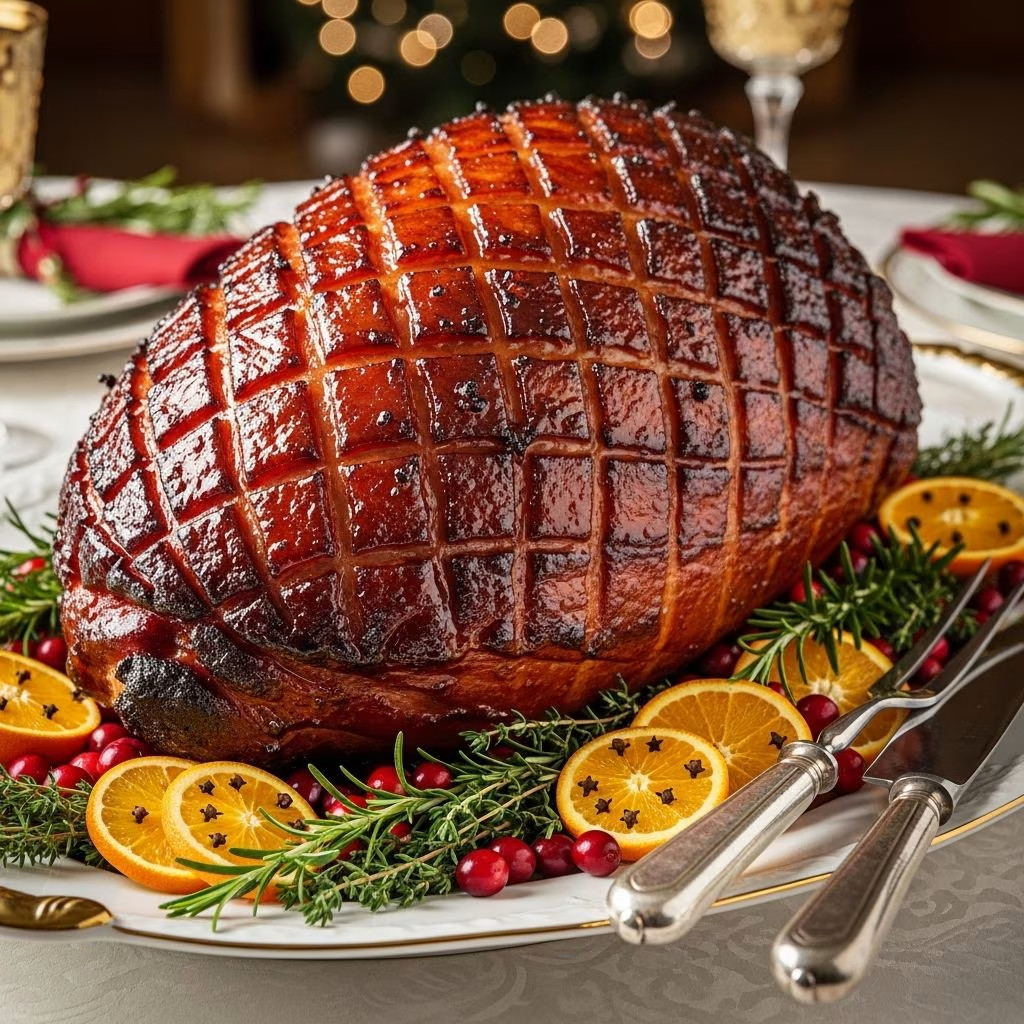
Preparing a succulent ham with a glossy, caramelized glaze is a cornerstone of holiday entertaining. What many home cooks don’t realize is that achieving that restaurant-quality finish requires understanding a few key principles about temperature management, moisture retention, and the timing of when to apply sweet coatings. This guide walks you through every step needed to transform a simple ham into an impressive centerpiece that will have guests asking for your technique.
Understanding Your Starting Point: Types and Sizes
The first decision you’ll make when planning a glazed ham is selecting the right cut and size for your gathering. Most home cooks work with spiral-cut half hams that are fully cooked, ranging from 8 to 13 pounds. These pre-sliced options are convenient because they reduce carving work dramatically and ensure uniform presentation at the table. The bone-in varieties are preferred over boneless options because the bone contributes gelatin and flavor to the meat while cooking, resulting in superior moisture and taste.
When estimating quantities, plan for approximately one-quarter pound per person if serving as part of a larger buffet, or one-half pound per person if the ham is a primary protein for your meal. This calculation helps ensure you prepare the appropriate size without excessive leftovers or insufficient portions.
The Two-Phase Cooking Method: Why Temperature Matters
The most successful approach to baked ham employs a two-temperature cooking strategy that prioritizes moisture retention during the bulk of cooking time while finishing with high heat to caramelize the glaze. This technique prevents the meat from drying out while still achieving that desirable golden, sticky exterior.
Initial Cooking Phase: Begin by preheating your oven to 325°F. Place your ham cut-side down in a roasting pan and add approximately one-half inch of water to the bottom of the pan. This shallow water bath creates a humid environment inside the oven, allowing the ham to cook gently and retain moisture throughout the initial cooking period. Cover the entire pan tightly with aluminum foil to trap steam. Calculate your total cooking time at 10 minutes per pound of ham. For a 10-pound ham, this means 100 minutes, or just over 90 minutes before you transition to the finishing phase.
Finishing Phase: Approximately 30 minutes before your total cooking time is complete, remove the ham from the oven and increase the oven temperature significantly. Some recipes recommend 425°F while others suggest 350°F. The higher temperature of 425°F will produce more dramatic caramelization but requires careful attention to prevent burning. Remove the foil and discard the water. This is when you transition from moisture retention to active glaze development.
Preparing Your Glaze: Balance and Consistency
A successful glaze accomplishes two things: it adds flavor through sweetness and savory elements, and it adheres to the ham’s surface while caramelizing in the oven. Every glaze should contain a sweetening agent—whether brown sugar, honey, maple syrup, or pineapple juice—which promotes the caramelization process.
Classic Glaze Formula
The most versatile glaze combines three basic ingredients in equal measure: brown sugar, maple syrup, and fresh orange juice. Whisk together one-quarter cup of each ingredient to create a balanced, medium-thickness coating. This ratio works exceptionally well because the citrus juice cuts through the sweetness while the maple adds depth beyond basic sugar.
Alternative Glaze Compositions
For those seeking variations, several proven combinations deliver different flavor profiles:
- Spiced Honey Glaze: One cup brown sugar, one-half cup honey, one-half cup orange juice, one teaspoon cinnamon, and one-half teaspoon cloves. This combination creates complexity with warm spice notes.
- Tropical Pineapple Variation: One cup brown sugar, one cup pineapple juice, one-half cup honey, one stick butter, one-quarter teaspoon vanilla extract, and one tablespoon cornstarch. The cornstarch thickens the glaze slightly, helping it cling to the ham more effectively.
- Simplified Mustard Approach: One-half cup brown sugar mixed with one-half cup Dijon mustard creates a pungent, less-sweet option for those preferring savory flavor dominance.
The Glaze Application Process
Timing is critical when applying glaze to ham. Many cooks make the mistake of coating the ham too early, allowing the glaze to dry or burn during extended cooking. The proper technique involves waiting until the final 30 minutes before your calculated total cooking time concludes.
Once you’ve removed the foil and increased the oven temperature, generously brush the glaze over all exposed surfaces of the ham using a pastry brush or basting brush. Return the ham to the oven for 15 minutes. After this interval, remove the ham again and apply a second coat of glaze, brushing thoroughly to ensure even coverage. Return for a final 15 minutes of cooking. If additional glaze remains, you may apply it during the final 5 minutes of cooking time.
Some recipes recommend pre-cooking the glaze components by bringing them to a boil, then simmering for 2-3 minutes before cooling. This thickening step, which takes only a few additional minutes, helps the glaze adhere better and caramelize more uniformly than raw glaze alone.
Essential Equipment and Preparation Steps
Success begins before your ham enters the oven. Prepare your workspace and gather the following items:
- Large roasting pan with at least 3-inch sides to contain liquid
- Heavy-duty aluminum foil for tenting
- Meat thermometer to verify doneness
- Pastry or basting brush for glaze application
- Small saucepan for heating glaze components
- Whisk for combining glaze ingredients
- Small liquid measuring cup for easy glaze distribution
- Sharp carving knife for serving
Before cooking begins, remove your ham from the refrigerator 15-20 minutes early to allow it to approach room temperature. Rinse the exterior under cool water and pat dry thoroughly with paper towels. This removes any surface residue and ensures the glaze adheres properly.
Temperature Safety and Doneness
Since commercial hams are fully cooked before purchase, your primary cooking objective is heating the ham through while developing the exterior finish. Use an instant-read meat thermometer inserted into the thickest part of the meat (avoiding the bone) to confirm the internal temperature reaches 140°F. This ensures safe consumption while preventing overcooking that would dry out the meat.
Resting and Serving
After removing the ham from the oven, resist the temptation to slice immediately. Transfer it to a clean cutting board and allow it to rest for at least 20 minutes. This resting period allows the meat fibers to relax and reabsorb juices, resulting in moister slices. During this time, the exterior glaze also sets and firms up, making carving cleaner and presentation more appealing.
Some recipes suggest turning the ham on its side and running a knife along the central circular bone to help release the pre-cut slices. This technique works particularly well with spiral-cut hams and makes serving effortless.
Troubleshooting Common Issues
| Problem | Cause | Solution |
|---|---|---|
| Glaze burns or turns black | Oven temperature too high or glaze applied too early | Lower oven temperature to 350°F or apply glaze only during final 30 minutes |
| Ham appears dry inside | Water pan dried out or foil removed too early | Maintain water level throughout initial cooking; only remove foil in final phase |
| Glaze won’t adhere or drips off | Raw glaze lacks thickness or ham surface too wet | Pre-cook glaze and let cool; ensure ham is dry before first application |
| Exterior not golden enough | Oven temperature insufficiently high or glaze too thin | Increase finishing temperature to 425°F or add cornstarch to glaze for better browning |
Frequently Asked Questions
Can I prepare the glaze in advance?
Yes, you can prepare glaze ingredients up to 24 hours ahead. Store the liquid mixture in a sealed container in the refrigerator. If the recipe includes pre-cooking the glaze, allow it to come to room temperature before application to prevent thermal shock to the ham.
What should I do with leftover ham?
Store leftover ham in an airtight container in the refrigerator for up to 5 days. Use it for sandwiches, fried rice, soups, or hash. The bones make excellent stock for bean soups or lentil dishes.
Can I freeze baked ham with glaze?
Yes, wrap cooled glazed ham tightly in plastic wrap and aluminum foil, then freeze for up to 2 months. Thaw in the refrigerator overnight and reheat gently in a 350°F oven covered with foil to prevent additional browning.
Does the type of brown sugar matter?
Dark brown sugar contains slightly more molasses than light brown sugar, providing deeper flavor and darker caramelization. Either works perfectly; use your preference or what you have on hand.
How far in advance can I purchase the ham?
Purchase ham no more than 3-5 days before cooking. Store in the coldest part of your refrigerator, typically the back of the bottom shelf. Pre-sliced hams should be kept in original packaging until ready to cook.
Making Your Glazed Ham Memorable
The combination of proper cooking technique and thoughtfully prepared glaze transforms a simple prepared ham into a showstopping centerpiece worthy of celebration. By respecting the two-phase cooking method, you ensure the interior remains moist and tender while the exterior achieves that irresistible caramelized finish. Whether you choose a citrus-forward glaze, warm spiced variation, or tangy mustard option, the fundamental principles of timing and temperature management remain constant.
The beauty of this preparation method lies in its reliability and flexibility. Once you understand the basic framework, you can confidently adjust glaze ingredients to suit your preferences or what ingredients you have available. Your guests will appreciate the results, and you’ll have mastered a technique that serves you well for holidays and special occasions for years to come.
References
- Simple Baked Ham with Brown Sugar Glaze — Alexandra’s Kitchen. 2021-03-26. https://alexandracooks.com/2021/03/26/simple-baked-ham-with-brown-sugar-glaze/
- 3-Ingredient Brown Sugar Glazed Ham — Gift of Hospitality. https://www.giftofhospitality.com/3-ingredient-brown-sugar-glazed-ham/
- Baked Ham with Brown Sugar Glaze Recipe — Dinner, then Dessert. https://dinnerthendessert.com/baked-ham-with-brown-sugar-glaze/
- Baked Ham with Brown Sugar Glaze — Spend With Pennies. https://www.spendwithpennies.com/baked-ham-with-brown-sugar-glaze/
- Brown Sugar Glazed Baked Ham — Cooking with Freddie. https://www.youtube.com/watch?v=oYC9kIC0BOY