Pasties represent one of the most satisfying handheld meals you can prepare in your kitchen. These savory filled pastries have traveled through centuries and continents, becoming beloved comfort food in numerous cultures. Whether you’re seeking to recreate a traditional recipe or explore modern variations, understanding the fundamentals of pastry construction and filling preparation will set you up for success.
Understanding the Heritage and Cultural Significance
The history of pasties extends back to working communities where portability and sustenance were paramount concerns. Miners in various regions relied on these sturdy hand pies as complete meals they could carry underground and consume without utensils. The tradition became particularly strong in mining regions, where generations of families perfected their techniques and passed recipes down through family lines.
Different regions developed their own interpretations based on locally available ingredients and cultural preferences. From coastal areas incorporating seafood varieties to inland regions emphasizing root vegetables and beef, pasties adapted to their environments while maintaining the fundamental concept of a portable, nourishing meal. This regional diversity means that creating your own version allows you to honor both traditional methods and personal preferences.
Selecting Quality Ingredients for Superior Results
The foundation of exceptional pasties begins with understanding each ingredient’s role in the final product.
Choosing the Perfect Flour and Fat
All-purpose flour provides the ideal base for your pastry dough, offering the right balance of protein content to create a tender yet structurally sound crust. The flour must be combined with unsalted butter that has been properly chilled and diced into small pieces. These cold butter particles create steam during baking, developing the characteristic flaky layers that make pastries so appealing. The temperature of your butter cannot be overstated—room temperature butter will produce a dense, tough crust rather than the desired delicate texture.
The Meat Selection Process
For traditional beef pasties, selecting the right cut of meat makes a significant difference. Top sirloin offers a lean option that provides excellent flavor without excessive fat. Alternatively, stew meat can work well, particularly when cut into appropriately sized pieces that cook through evenly during the baking process. The key is choosing meat with minimal visible fat marbling, as too much fat will make the filling greasy and overwhelm the other flavors.
Vegetable Components
Authentic pasty fillings traditionally incorporate root vegetables that hold their structure during cooking and complement the meat perfectly. Potatoes provide bulk and substance, while onions contribute aromatic depth to the filling. Rutabagas offer a slightly sweet earthiness that balances savory elements. Many cooks also incorporate carrots and parsnips, which add natural sweetness and additional nutritional value. These vegetables should be cut into uniform small pieces to ensure they cook at the same rate and distribute evenly throughout each pasty.
Flavor Enhancement Through Seasonings
Fresh herbs elevate pasty fillings from simple to sophisticated. Fresh thyme and rosemary provide aromatic complexity that complements beef beautifully. Worcestershire sauce adds depth and umami richness to the filling. Salt and freshly ground black pepper should be adjusted to your taste preferences, remembering that flavors become more concentrated as the filling cooks.
Constructing the Pastry Dough
Creating the dough requires attention to technique and temperature maintenance throughout the process.
Essential Dough Ingredients and Measurements
A basic shortcrust dough for eight pasties requires 2½ cups all-purpose flour, ¾ teaspoon salt, 1 cup chilled unsalted butter cut into small cubes, and 5-7 tablespoons of ice-cold water. These proportions create a dough with the ideal ratio of flour to fat for achieving flakiness while maintaining structural integrity.
Step-by-Step Dough Preparation
- Combine flour and salt in a large mixing bowl, whisking together to distribute the salt evenly
- Add the diced cold butter to the flour mixture and use a pastry cutter or your fingertips to work the butter into the flour until the mixture resembles coarse breadcrumbs with pea-sized pieces of butter remaining visible
- Gradually sprinkle ice-cold water over the mixture while gently tossing with a fork, adding just enough water until the dough comes together
- Form the dough into a flat disk, wrap in plastic wrap, and refrigerate for at least 30 minutes before rolling
The critical element in this process is minimizing gluten development while incorporating just enough water for cohesion. Overworking the dough produces toughness rather than tenderness, so handle it with a light touch and avoid excessive mixing.
Preparing and Seasoning the Filling
The filling requires thoughtful preparation to ensure balanced flavors and proper cooking.
Ingredient Preparation Techniques
Cut your selected beef into small cubes or finely chop it to create a texture that distributes evenly within the pastry. Potatoes should be peeled and cut into small dice, approximately ¼-inch cubes. Onions require mincing into pieces smaller than the potatoes to distribute their flavor throughout the filling. Rutabaga, if using, should be cut similarly to the potatoes. Having all ingredients prepared and within reach before assembly streamlines the process and prevents filling from becoming warm while you work.
Combining and Seasoning
Mix the prepared meat with all vegetable pieces in a large bowl. Add your selected fresh herbs, Worcestershire sauce if desired, salt, and pepper. Combine thoroughly, ensuring the seasonings distribute evenly throughout. Add a small sliver of cold butter to the mixture—this melts during cooking and enriches the filling while adding moisture. The filling can be prepared several hours ahead and refrigerated, which actually improves the flavor as ingredients meld together.
Rolling and Shaping Techniques
Proper rolling and shaping ensures even cooking and attractive presentation.
The Rolling Process
Remove your chilled dough from the refrigerator and let it sit for 5 minutes to slightly soften. Divide it into eight equal portions and shape each portion into a rough ball. On a lightly floured surface, roll each ball into a circular shape approximately ⅛-inch thick, about 6-7 inches in diameter. The dough should be thin enough to crisp during baking yet sturdy enough to contain the filling without tearing.
Filling and Sealing
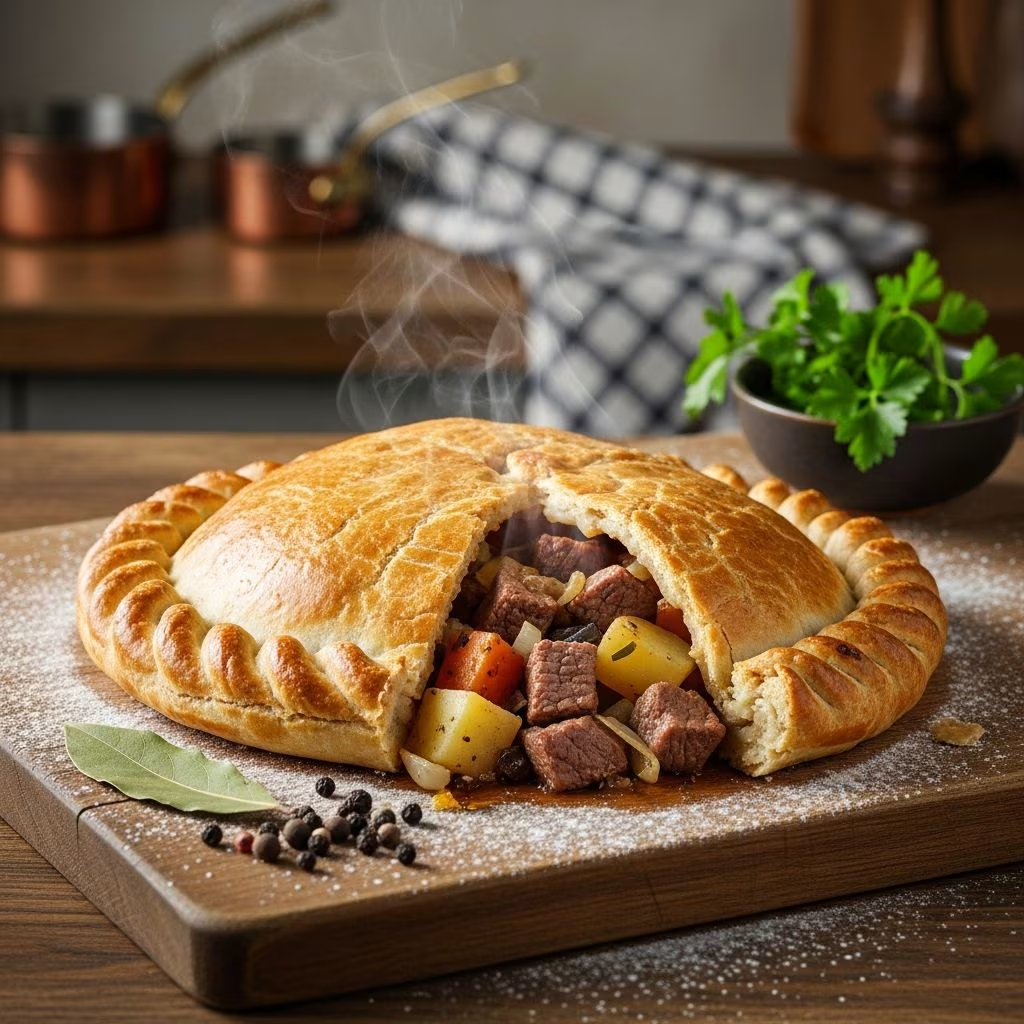
Place approximately ½ cup of filling in the center of each dough circle. Prepare an eggwash by beating one egg with one tablespoon of water. Lightly brush the edges of the dough with eggwash, which helps seal the pasty and promotes browning. Fold the dough in half over the filling, bringing the top edge down to meet the bottom edge. Using a fork or your fingers, crimp the curved edge firmly to create a tight seal that prevents filling from escaping during baking. The crimped edge can be decorative, creating the traditional ridged appearance pasties are known for.
Preparing for Baking
Arrange shaped pasties on parchment-lined baking trays, leaving adequate space between each one for air circulation. Brush the exterior of each pasty with eggwash to achieve an attractive golden color during baking. This visible preparation step signals quality and care in your work.
Baking Instructions and Temperature Management
Proper baking technique ensures both filling and crust reach desired doneness simultaneously.
Two-Stage Baking Method
Preheat your oven to 400°F. Place the prepared pasties in the preheated oven and bake for 15 minutes. This initial high-temperature phase allows the crust to begin setting and developing color. After 15 minutes, rotate the baking trays to ensure even browning, then reduce the oven temperature to 350°F. Continue baking for approximately 30 minutes more, rotating the trays once more halfway through this phase. The total baking time of approximately 45 minutes allows the filling to cook through completely while the crust develops an appetizing golden-brown exterior.
Determining Doneness
Remove pasties from the oven when the crust is uniformly golden brown and firm to the touch. The filling should reach an internal temperature of 165°F if you’re using meat. Serve warm for maximum enjoyment, though pasties also taste wonderful at room temperature, making them suitable for packed meals or picnics.
Exploring Filling Variations and Adaptations
While traditional beef and vegetable pasties remain popular, numerous variations accommodate different preferences and dietary needs.
Seafood Options
Smoked haddock combined with fresh parsley and mature cheddar cheese creates a coastal variation that appeals to seafood lovers. Fish-based fillings require less cooking time, so monitor them carefully to prevent overcooking.
Vegetable and Cheese Combinations
Pea and bacon pasties filled with mascarpone, smoked bacon, peas, and Parmesan represent creative departures from traditional meat-based fillings. These variations demonstrate how the pastry serves as a vessel for numerous flavor combinations.
Substitution Guidelines
When adapting recipes, maintain consistent ingredient proportions while substituting vegetables based on preference. Turnips work equally well as rutabagas, and root vegetables generally complement beef better than softer vegetables. Keep the total filling volume consistent to ensure proper cooking and sealing.
Storage and Make-Ahead Strategies
Pasties lend themselves to advance preparation, making them convenient for busy schedules.
Freezing Unbaked Pasties
Assembled pasties can be frozen before baking by placing them on a baking tray without eggwash, freezing until solid, then transferring to freezer bags for long-term storage. When ready to bake, brush frozen pasties with eggwash and add approximately 10-15 minutes to the total baking time.
Storing Baked Pasties
Fully baked pasties keep well at room temperature for up to two days when stored in an airtight container. They can also be refrigerated for up to four days or frozen for several months. Reheat gently in a 325°F oven for 15-20 minutes until warmed through.
Troubleshooting Common Issues
| Problem | Cause | Solution |
|---|---|---|
| Dense, tough crust | Overworked dough or warm butter | Use cold butter, handle dough minimally, chill between steps |
| Filling leaking during baking | Insufficient sealing or too much filling | Use exactly ½ cup filling, crimp edges firmly, brush edges with eggwash |
| Pale, unappealing crust | Insufficient eggwash or low oven temperature | Apply eggwash generously, verify oven temperature with thermometer |
| Uncooked vegetables in filling | Oven temperature too high or baking time too short | Cut vegetables uniformly small, follow temperature stages precisely |
Frequently Asked Questions About Pasties
Can I make pasties without a food processor?
Absolutely. Traditional methods use fingertips to work butter into flour, which many bakers find superior because it maintains better temperature control and creates superior texture.
Is it necessary to use fresh herbs?
Fresh herbs provide superior flavor, but dried herbs can substitute at approximately one-third the quantity. Adjust based on personal preference and available ingredients.
How far in advance can I prepare filling?
Filling can be prepared up to two days ahead and refrigerated, allowing flavors to meld. Keep it covered to prevent drying out.
What’s the difference between pasties and pies?
Pasties are hand-held turnovers sealed on all sides, while pies typically have a bottom crust and top crust with filling between. Pasties are designed for eating without utensils.
Can I use puff pastry instead of shortcrust?
Yes, puff pastry creates a fluffier, more delicate result, though it requires different handling. Puff pastry sheets can simply be filled and sealed without additional rolling.
Serving Suggestions and Accompaniments
Pasties shine when served with thoughtful accompaniments. A simple green salad provides fresh contrast to the rich, savory filling. Pickled vegetables add brightness and aid digestion. For traditional presentations, serve alongside a hearty vegetable soup or with gravy for dipping. Pasties work equally well as casual weeknight dinners or elegant entertaining options.
References
- Cornish Pasties Traditional Recipe — Your Home Based Mom. 2024. https://www.yourhomebasedmom.com/cornish-pasty-meat-potato-pie/
- Beef Pasty Recipe Inspired by Cornish Pasties — An Edible Mosaic. 2024. https://www.anediblemosaic.com/herbed-beef-pasties-with-carrot-and-parsnip/
- Easy Homemade Cornish Pasties — Tastes Better from Scratch. 2024. https://tastesbetterfromscratch.com/cornish-pasties/
- Cornish Pasty Recipe — Or Whatever You Do. 2013. https://www.orwhateveryoudo.com/2013/03/pasties.html
- Pasty Recipes Collection — BBC Good Food. 2024. https://www.bbcgoodfood.com/recipes/collection/pasty-recipes