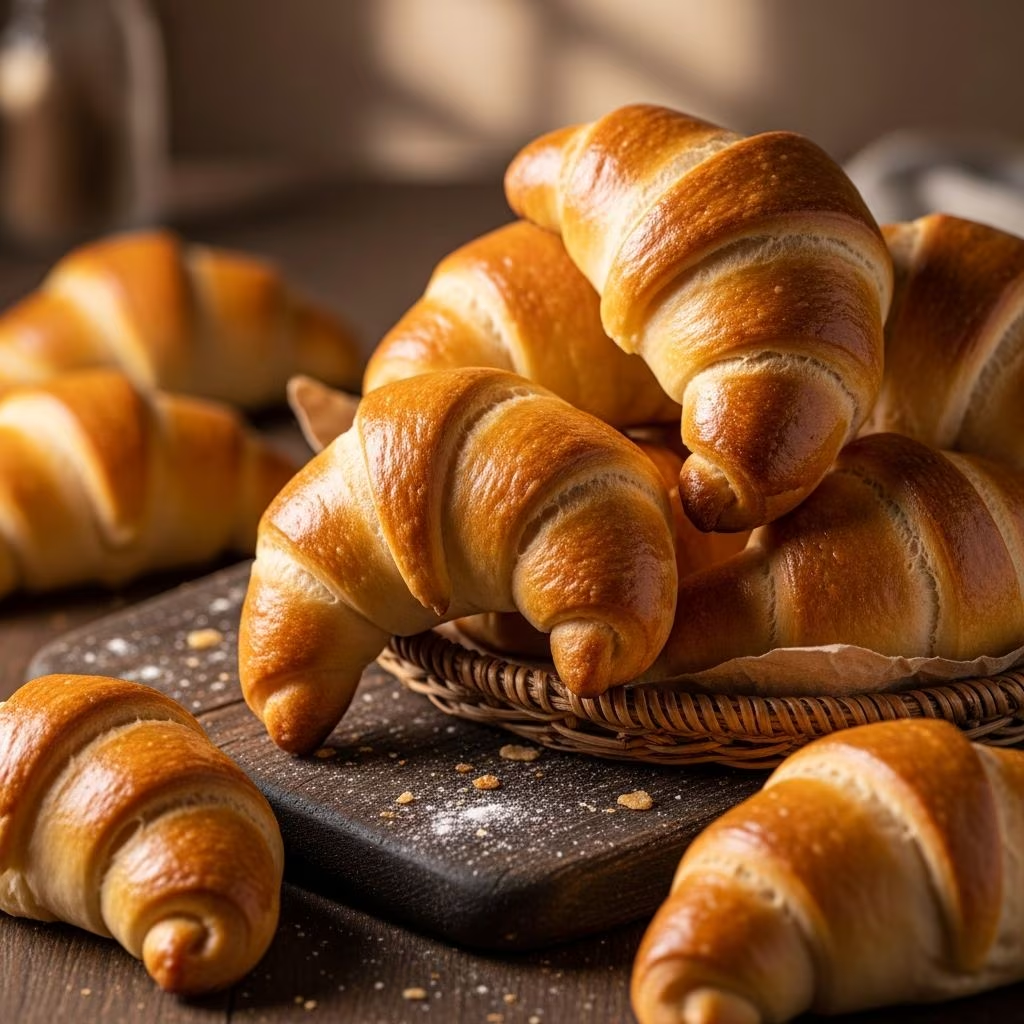
Homemade **golden crescent rolls** bring a touch of warmth and comfort to any table, with their flaky layers, subtle sweetness, and rich buttery flavor. Unlike store-bought versions, these rolls offer a fresh, pillowy texture that pairs beautifully with holiday feasts, weeknight dinners, or brunch spreads. Crafting them from scratch involves simple ingredients and a bit of patience, rewarding you with rolls that puff up dramatically in the oven, emerging with a shimmering golden hue.
Why Choose Homemade Crescent Rolls?
Store-bought dough is convenient, but nothing compares to the aroma of yeast activating and dough rising in your kitchen. These rolls stay soft for days, thanks to the balance of fats and flour that traps moisture. They’re versatile too—serve plain, stuffed, or as a base for savory dishes. Bakers praise their ease, noting how minimal equipment yields professional results.
Essential Ingredients for Success
The beauty of crescent rolls lies in pantry staples transformed through proper technique. Here’s what you’ll need for about 24 rolls:
- 2 packages active dry yeast (or 4 1/2 tsp instant yeast) – The rising powerhouse; ensure it’s fresh for reliable lift.
- 3/4 cup warm water (110°F) – Activates yeast without killing it; too hot scalds, too cold slows fermentation.
- 1/2 cup granulated sugar – Feeds yeast and adds gentle sweetness.
- 1 tsp salt – Balances flavors and strengthens gluten.
- 2 large eggs, room temperature – Adds richness, tenderness, and golden color.
- 1/2 cup shortening or softened butter – Provides flakiness; shortening for stability, butter for flavor.
- 3 to 4 cups all-purpose flour – Forms structure; start low to avoid dense rolls.
- 1/4 cup softened butter – For layering inside the dough.
Variations include swapping shortening for butter for extra richness or adding milk for softer texture, as seen in enriched dough recipes.
Step-by-Step Dough Preparation
Begin in a large bowl or stand mixer with dough hook. Patience during rising ensures airy results.
- Proof the yeast: Dissolve yeast in warm water with a pinch of sugar. Wait 5-10 minutes for foam—proof of vitality.
- Mix wet ingredients: Stir in sugar, salt, eggs, and shortening until smooth. Beat vigorously for 2 minutes to develop gluten early.
- Incorporate flour: Add 2 cups flour first, beating smooth. Gradually mix in remaining flour until dough pulls from bowl sides but remains slightly sticky. Knead 5-8 minutes by hand or machine for elasticity.
- First rise: Shape into a ball, place in greased bowl, cover with damp cloth. Let double in warm spot (75-85°F), 1-1.5 hours.
Dough should spring back slowly when poked, indicating readiness.
Shaping the Iconic Crescent Form
This step creates the signature spiral. Punch down risen dough, divide in half.
- Roll each half into 12-inch circle on floured surface, about 1/4-inch thick.
- Spread generously with softened butter for layers.
- Cut into 12-16 wedges using pizza cutter or knife.
- Roll tightly from wide base to point, stretching slightly. Place point-down on parchment-lined sheets, 2 inches apart.
Cover loosely; second rise takes 45-60 minutes until puffy. Brush with butter before baking at 400°F for 12-15 minutes until deep golden.
Pro Tips for Flawless Results
Achieve bakery quality with these insights:
| Common Issue | Solution |
|---|---|
| Dense rolls | Use fresh yeast, measure flour by weight (spoon and level), avoid over-kneading. |
| Flat shape | Ensure full rising; warm drafts-free spot speeds process. |
| Tough texture | Room-temp eggs/butter integrate better; don’t skip butter layers. |
| Pale color | Bake on middle rack; egg wash for shine. |
High-altitude bakers reduce yeast by 25% and increase liquid slightly. Freeze shaped rolls pre-rise for up to 2 months.
Storing and Freezing Your Rolls
Freshly baked rolls store at room temp in airtight container 2 days, fridge 5 days (reheat at 350°F). Freeze baked or unbaked up to 3 months. Thaw overnight, rise if needed, bake as directed. They retain softness longer than many breads due to eggs and fat.
Delicious Serving Ideas and Variations
Elevate beyond basics:
- Classic dinner side: With turkey, gravy, or soup.
- Sweet twist: Brush with cinnamon butter or fill with Nutella.
- Savory stuffed: Ham-cheese, spinach-artichoke, or taco beef.
- Holiday upgrade: Brush with garlic-herb butter post-bake.
- Breakfast: Sandwich eggs and bacon inside.
For whole wheat version, sub 1 cup flour with whole wheat. Potato flakes add extra softness, keeping rolls fresh longer.
Nutrition and Dietary Notes
Per roll (1/16 recipe): ~150 calories, 6g fat, 20g carbs, 3g protein. Enriched dough provides some iron, B-vitamins from flour/eggs. For vegan, use plant milk, aquafaba, vegan butter. Gluten-free adaptations require specialty flour blends, though texture differs.
Frequently Asked Questions (FAQs)
Can I use instant yeast instead of active dry?
Yes, add directly to flour; no proofing needed. Reduce by 25% for equivalent rise.
Why didn’t my dough rise?
Check yeast expiration, water temp (test on wrist—warm, not hot), or drafty kitchen. Proof test confirms viability.
How do I make them ahead for holidays?
Shape, freeze on sheet, transfer to bag. Thaw/rise overnight in fridge, bake fresh.
Are these like croissants?
Similar shape and butteriness, but less laminated layers—fluffier, quicker to make.
Can I halve the recipe?
Yes, but yeast amounts tricky; better freeze extras.
Advanced Techniques for Expert Bakers
For ultra-flaky results, chill buttered dough circles 15 minutes before cutting—firms layers. Lamination mimics croissants: fold dough thrice post-first rise, chill, roll again. Experiment with bread flour for chewier bite or add dry milk for tenderness. Track humidity; humid days need less flour.
Scaling up for crowds: Double ingredients, but mix in batches to avoid overload. These rolls impress at potlucks, their golden spirals drawing compliments.
Mastering golden crescent rolls builds confidence in yeast baking. Their simplicity belies the joy of pulling warm, flaky bites apart. Practice refines your touch, turning routine meals into celebrations.
References
- Golden Crescent Rolls — Words of Deliciousness. 2015-10-12. https://www.wordsofdeliciousness.com/golden-crescent-rolls/
- Buttery Golden Crescent Rolls Recipe — Mom On Timeout. 2020-11-20. https://www.momontimeout.com/buttery-golden-crescent-rolls-recipe/
- Homemade Crescent Dinner Rolls Recipe — That Bread Lady. 2022-09-15. https://thatbreadlady.com/homemade-crescent-dinner-rolls-recipe/
- 7 Easy Crescent Roll Recipes — Living On A Dime. 2021-03-05. https://www.livingonadime.com/crescent-roll-recipes/
- Homemade Crescent Rolls — African Bites. 2023-01-10. https://www.africanbites.com/homemade-crescent-rolls/