There’s something inherently special about serving homemade eggnog during the holiday season. Unlike store-bought versions that often taste artificially sweetened or overly thick, freshly made eggnog delivers a luxurious, velvety texture with perfectly balanced spice notes. The process might seem intimidating at first, but with the right techniques and understanding of how the ingredients work together, anyone can master this classic festive drink.
Understanding the Foundation of Traditional Eggnog
At its core, eggnog is fundamentally a custard-based beverage that combines eggs, sugar, and dairy to create a rich, indulgent drink. The beauty of making it at home lies in controlling the quality of each ingredient and customizing the flavor profile to your preferences. Unlike many holiday recipes that require specialized equipment or culinary expertise, eggnog relies on basic kitchen tools and straightforward techniques.
The magic happens when you understand how heat transforms raw eggs into a silky custard. Proper tempering and cooking ensure both food safety and the ideal texture that makes homemade eggnog memorable. The result is a drink that’s thicker and more satisfying than its commercial counterparts, with a homemade warmth that brings people together during celebrations.
Essential Ingredients and Their Roles
Creating exceptional eggnog starts with quality ingredients working in harmony. Each component serves a specific purpose in developing both flavor and texture.
- Egg Yolks: These form the custard base, providing richness and emulsifying power. Typically, recipes use six large egg yolks per batch, though some variations use whole eggs for added lightness and volume.
- Granulated Sugar: Beyond sweetness, sugar dissolves into the custard and helps create the proper consistency. Most recipes call for approximately one-half to three-quarters cup of sugar, adjusted to taste preferences.
- Heavy Cream: This ingredient adds luxurious texture and mouthfeel. Typically ranging from one to two cups, heavy cream contributes to the drink’s signature richness and can be whipped separately to create an airy topping.
- Whole Milk: Serving as the primary liquid base, milk provides volume and helps balance the richness of the cream. Most recipes incorporate one to four cups depending on desired consistency.
- Nutmeg: This warm spice defines eggnog’s character. Ground nutmeg, usually one-half to one teaspoon, infuses the drink with its distinctive holiday flavor. Fresh-ground nutmeg delivers superior taste compared to pre-ground varieties.
- Cinnamon: Working alongside nutmeg, cinnamon adds depth and complexity. Typically used in smaller quantities (one-half to one teaspoon), cinnamon complements the other spices without overpowering them.
- Vanilla Extract: Pure vanilla extract, usually one-quarter to two teaspoons, provides subtle sweetness and aromatic notes that round out the flavor profile.
- Salt: A small pinch of salt enhances all other flavors and prevents the drink from tasting one-dimensional.
Step-by-Step Technique for Perfect Eggnog
Preparing the Egg and Sugar Base
Begin by combining egg yolks with granulated sugar in a medium-sized bowl. Using either an electric mixer or vigorous whisking by hand, beat this mixture for approximately one minute until it becomes light in color and takes on a thick, fluffy consistency. This initial beating incorporates air into the eggs and helps distribute the sugar evenly. The transformation in color from deep yellow to pale yellow signals that you’ve achieved proper aeration.
Heating the Dairy Components
While the egg mixture rests, prepare the cream, milk, and spices. Combine these ingredients in a medium saucepan and heat over medium to medium-high heat. Stir the mixture frequently to ensure even heating and prevent scorching. The goal is to bring the liquid to a bare simmer—you’ll notice small bubbles forming around the edges and perhaps one or two bubbles breaking the surface in the center. This typically occurs around 160 degrees Fahrenheit, which is the temperature required to pasteurize eggs and eliminate food safety concerns.
The Critical Tempering Process
Tempering stands as the most important step in eggnog preparation. This technique slowly raises the temperature of the raw eggs without scrambling them. Add one large spoonful of the hot milk mixture to the beaten egg mixture while whisking vigorously. Continue this process, adding one spoonful at a time, until approximately half of the hot milk has been incorporated. The egg mixture will become progressively thinner as you add more liquid, which is exactly what should happen.
Once most of the hot milk has been combined with the eggs, pour the entire tempered egg mixture back into the saucepan with the remaining hot milk. This combined mixture ensures even heating throughout.
Final Cooking and Thickening
Return the saucepan to the stove over low to medium-low heat. Whisk constantly for approximately one to two minutes, watching carefully as the mixture gradually thickens. You’re aiming for the eggnog to coat the back of a spatula lightly—when you draw your finger across the coated spatula, it should leave a clear line. An instant-read thermometer should read 160 degrees Fahrenheit, confirming proper pasteurization.
Importantly, the mixture will continue thickening as it cools, so avoid cooking it too long or the final product will be excessively thick. Remove from heat once you achieve light thickening.
Finishing Touches
Remove the cooked custard from heat and add vanilla extract, stirring to combine thoroughly. For recipes that incorporate straining, pour the mixture through a fine mesh sieve into a clean bowl. This step removes any cooked egg bits and ensures a completely smooth texture.
Transfer the eggnog to a storage container and refrigerate for at least four hours, though overnight chilling allows flavors to meld and the mixture to reach ideal serving temperature. Some recipes suggest adding heavy cream immediately after cooking, while others prefer whipping cream separately and folding it in just before serving for maximum airiness.
Variations and Customization Options
| Variation Type | Ingredients to Add | Preparation Notes |
|---|---|---|
| Extra Spiced Version | Add ground cloves and ginger powder | Reduce other spices slightly to prevent overpowering flavors |
| Alcoholic Eggnog | Rum, brandy, or bourbon (1/4 to 1/2 cup) | Add after cooking has completed and mixture has cooled slightly |
| Lighter Version | Use whole eggs and whip whites separately | Fold whipped whites into custard just before serving for fluffiness |
| Non-Alcoholic Premium | Extra vanilla and a small amount of almond extract | Increases flavor complexity without requiring spirits |
Serving Suggestions and Presentation
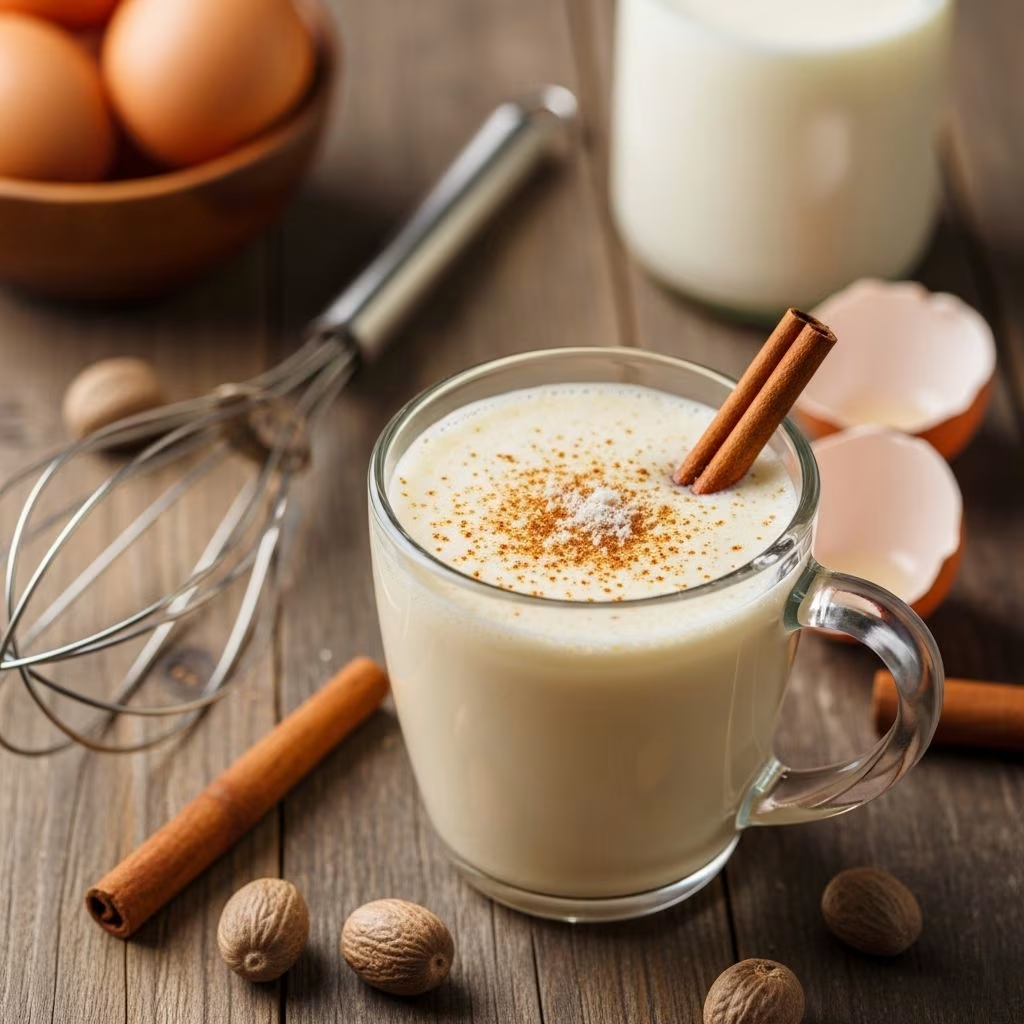
Serve eggnog in small glasses or mugs to account for its rich density. A garnish of freshly grated nutmeg on top not only looks festive but also provides an aromatic introduction to the drink. Some people enjoy topping their eggnog with homemade whipped cream for extra indulgence.
For gatherings, consider preparing the custard base a day ahead and folding in whipped cream just before serving. This timing allows the base flavors to develop while ensuring the whipped cream remains light and fluffy. Offer optional toppings including cinnamon sticks, additional nutmeg, or a drizzle of bourbon or rum for guests to customize their portions.
Troubleshooting Common Issues
Scrambled or Grainy Texture
This results from eggs cooking too quickly or unevenly. The solution involves thorough tempering—adding hot liquid very gradually while whisking continuously. Maintaining low to medium heat during the final cooking stage also prevents this issue.
Excessively Thin Consistency
If your finished eggnog doesn’t thicken after chilling, you may not have cooked it long enough or to a high enough temperature. Ensure your mixture reaches 160 degrees Fahrenheit and that it noticeably coats a spatula before removing from heat.
Overly Thick or Curdled Appearance
Overcooking causes this problem. Remember that eggnog thickens significantly as it cools, so remove it from heat while it still appears slightly looser than your desired final consistency. If separation occurs, strain the mixture through fine mesh to remove any cooked egg solids.
Insufficient Spice Flavor
Fresh spices deliver superior flavor to those that have sat in the pantry for years. If your eggnog tastes bland, consider using freshly ground nutmeg and purchasing new cinnamon. You can also add a few extra gratings of nutmeg or a dash of ground cloves to enhance the spice profile.
Storage and Shelf Life
Properly prepared and refrigerated eggnog stays fresh for approximately two weeks in a sealed container. The high fat content and acid from any added alcohol naturally preserve the drink. For longer storage, consider freezing eggnog in ice cube trays, which allows you to enjoy small portions throughout the season. Thaw frozen eggnog in the refrigerator before serving.
Frequently Asked Questions
Is homemade eggnog safe to drink with raw eggs?
Yes, when prepared properly. Cooking the egg and milk mixture to 160 degrees Fahrenheit pasteurizes the eggs and eliminates food safety concerns. Using an instant-read thermometer ensures you reach this critical temperature. Alternatively, you can purchase pasteurized eggs from the grocery store for added peace of mind.
Can I make eggnog without alcohol?
Absolutely. Alcohol is entirely optional in eggnog. Many traditional recipes are alcohol-free, and the custard base alone provides rich flavor and luxurious texture. If you prefer, add extra vanilla extract or a touch of almond extract to enhance the flavor profile of non-alcoholic versions.
How far in advance can I prepare eggnog for a party?
You can prepare the custard base up to two days ahead of time, storing it covered in the refrigerator. If using whipped cream, prepare it no more than a few hours before serving, or it may begin to lose volume and become watery. Fold whipped cream into the chilled custard just before serving for the best texture.
What type of alcohol works best in eggnog?
Traditional choices include rum, brandy, and bourbon. Rum is the most common selection, offering a subtle sweetness that complements the spices. Brandy provides elegance and sophistication, while bourbon adds warmth and oak notes. Some people prefer a combination of spirits for added complexity.
Why does my eggnog separate or look curdled?
Separation usually indicates overcooking or excessively high heat. To prevent this, maintain low to medium-low heat throughout cooking and use a whisk constantly to ensure even heating. If separation occurs, strain the mixture through fine mesh to remove cooked egg solids and improve appearance.
The Art of Making Eggnog a Tradition
Creating homemade eggnog transforms a simple holiday beverage into a meaningful tradition. Whether you serve it at formal gatherings or enjoy it quietly on winter mornings, the care involved in preparation reflects the thoughtfulness of the season. The investment of time and attention to technique results in a drink that store-bought versions simply cannot replicate.
By mastering these fundamentals and understanding the role of each ingredient, you’ll develop the confidence to make eggnog consistently and adjust it to your family’s preferences year after year. This culinary skill becomes something you’ll be proud to share, impressing guests while creating lasting memories around this beloved holiday staple.
References
- Homemade Eggnog Recipe — Tastes Better From Scratch. https://tastesbetterfromscratch.com/homemade-eggnog/
- Creamiest Classic Homemade Eggnog — Made in a Pinch. https://madeinapinch.com/best-homemade-eggnog/
- Homemade Eggnog Recipe — Joy Food Sunshine. https://joyfoodsunshine.com/eggnog-recipe/
- Super Easy & Perfectly Spiced Eggnog Recipe — Joshua Weissman. https://www.joshuaweissman.com/recipes/best-easy-eggnog-recipe
- Old-Fashioned Homemade Eggnog Recipe — The House & Homestead. https://thehouseandhomestead.com/old-fashioned-homemade-eggnog-recipe/