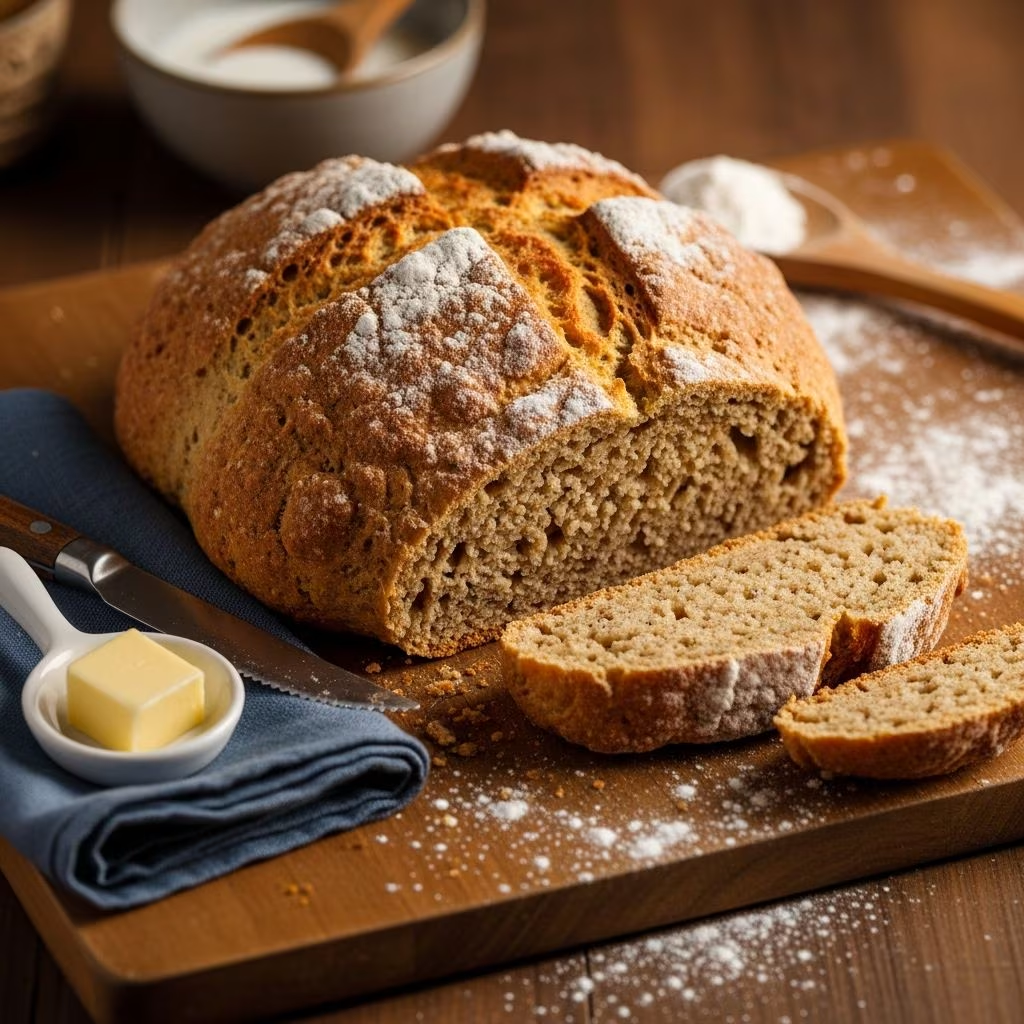
Irish soda bread stands as one of the most beloved baked goods in traditional Irish cuisine. Unlike many other bread varieties that rely on commercial yeast and lengthy fermentation periods, this particular loaf achieves its distinctive texture and rise through the chemical reaction between baking soda and acidic buttermilk. This fundamental difference makes it an ideal choice for home bakers seeking quick results without compromising on flavor or authenticity.
The beauty of this bread lies in its remarkable simplicity. With a preparation time of just five minutes and a total baking duration of roughly forty minutes, you can have a warm, fragrant loaf cooling on your counter before most yeast-based breads finish their initial rise. This efficiency has made Irish soda bread a staple in modern kitchens, particularly among those looking for straightforward recipes that deliver impressive results.
Understanding the Science Behind Soda Bread
The fundamental principle that makes Irish soda bread work differs significantly from conventional bread-making techniques. When baking soda (sodium bicarbonate) combines with the lactic acid present in buttermilk, it immediately produces carbon dioxide gas. These tiny bubbles become trapped within the dough structure, creating lift and a tender crumb without requiring any yeast activation time.
This chemical leavening process means that the dough must move into the oven as quickly as possible after mixing. Unlike yeasted doughs that benefit from extended resting periods, soda bread batter begins its rise the moment wet and dry ingredients combine. Delaying the baking process allows the gas bubbles to escape, resulting in a denser loaf with less volume. Speed is therefore not merely convenient—it is essential to achieving optimal results.
The acidic buttermilk serves multiple purposes beyond just triggering the leavening reaction. It contributes to the bread’s tender crumb structure and subtly enhances flavor with a slight tang that balances sweetness if sugar has been added. Traditional recipes sometimes substitute regular milk combined with vinegar or lemon juice when buttermilk is unavailable, demonstrating how the acid component plays a central role in the formula.
Essential Ingredients You’ll Need
The ingredient list for Irish soda bread reads like a masterclass in minimalism. Most recipes rely on between four and seven components, with variations primarily involving optional additions like dried fruit or enrichments such as eggs and butter.
The Core Components
- All-purpose flour: Typically four cups forms the foundation, providing structure and gluten development for the bread’s crumb
- Buttermilk: Usually between one and two cups, this essential ingredient provides the acid necessary for leavening and contributes to texture and flavor
- Baking soda: Roughly one teaspoon to one and one-quarter teaspoons activates when it meets the buttermilk’s acidity
- Salt: Typically one to one and one-half teaspoons enhances flavor and controls fermentation speed
- Sugar: Optional at approximately one tablespoon, adds subtle sweetness and can be omitted for savory applications
Optional Enrichments and Variations
While the basic formula works beautifully on its own, many bakers incorporate additional ingredients to customize their loaves. Dried currants, raisins, or cranberries add pockets of sweetness and texture. Some recipes include an egg beaten into the wet ingredients, which enriches the crumb and improves browning. Softened or melted butter can be mixed into the dough for increased richness, while others prefer to cut cold butter into the flour mixture—a technique that creates a flakier interior similar to scones.
Whole wheat flour can replace a portion of the all-purpose flour for recipes emphasizing heartier character and additional nutritional content. Wheat germ sometimes appears in these variations, contributing nutty flavor and increased fiber.
Step-by-Step Instructions for Success
Preparation Phase
Begin by preheating your oven to between 400°F and 450°F, depending on your specific recipe and oven characteristics. The exact temperature varies slightly among different approaches, but this range consistently produces excellent results. Line a baking sheet with parchment paper or a silicone mat, lightly flouring the surface. Having your baking vessel ready before you begin mixing is crucial since the dough should not sit waiting for the oven to reach temperature.
Combining Dry Ingredients
In a large mixing bowl, whisk together the flour, baking soda, salt, and sugar if using. Some recipes call for sifting these components together, which aerates the flour and ensures even distribution of the leavening agent throughout. Even if you skip sifting, thorough whisking prevents lumps and promotes uniform rise during baking. This dry mixture can be prepared several hours in advance, making it convenient for meal planning.
Incorporating Wet Ingredients
Form a well in the center of your dry ingredients and pour in the buttermilk. Using a fork or rubber spatula, gradually pull flour from the sides into the wet center, mixing gently until the ingredients just barely combine. This technique creates a shaggy, sticky dough without overworking the gluten, which would toughen the final texture. The mixing should take only thirty seconds or so—you are aiming for a dough that just comes together, not one that is fully smooth.
If your recipe includes optional additions like dried fruit, fold these in quickly at this final stage, stirring just ten seconds more to distribute them evenly throughout.
Shaping and Scoring
Transfer the sticky dough onto your prepared baking sheet using a spatula or dough scraper. Lightly flour your hands and the top of the dough, then gently shape it into a round ball or disc. The dough should not be kneaded aggressively as it is for yeast breads; instead, use just three to four gentle folds to bring it together. The final shape should measure approximately six to seven inches in diameter for standard recipes.
Using a sharp serrated knife, score the top with a cross pattern, cutting approximately half an inch deep. This traditional marking serves both aesthetic and functional purposes—it allows steam to escape and encourages even rising. Some bakers make additional decorative scores along the sides, creating visual appeal while facilitating moisture release.
Baking
Place the shaped and scored dough immediately into the preheated oven. The actual baking time ranges from thirty-five to forty minutes depending on your oven and the specific recipe followed. The bread is finished when the top achieves a golden-brown color and the bottom sounds hollow when tapped with your knuckles. An instant-read thermometer inserted into the thickest part should register approximately 200°F to 210°F.
Remove the baked bread from the oven and transfer it to a cooling rack. Allow it to cool for at least fifteen minutes before slicing, though some recipes suggest cooling for up to thirty minutes for easier cutting.
Common Mistakes to Avoid
| Problem | Cause | Solution |
|---|---|---|
| Dense, heavy crumb | Overmixing the dough or delaying baking | Mix only until ingredients barely combine; bake immediately |
| Pale or uneven browning | Oven temperature too low or inconsistent | Verify oven temperature with an oven thermometer; use 425°F-450°F |
| Gummy interior | Underbaking or cutting bread while still hot | Bake until golden; cool for at least 15 minutes before slicing |
| Dry or crumbly texture | Overbaking or incorrect buttermilk measurement | Monitor carefully; use exact measurements and check doneness at 35 minutes |
| Bread spreads instead of rises | Dough too wet or baking soda inactive | Check buttermilk freshness; reduce liquid if dough seems overly sticky |
Flavor Variations Worth Exploring
The traditional plain loaf works beautifully for soups and savory meals, but endless customization possibilities exist. Adding one cup of dried currants or raisins creates a bread suitable for serving alongside tea or breakfast. Some bakers incorporate fresh or dried herbs such as rosemary or thyme, creating an herbed version perfect for pairing with cheese and charcuterie.
For those seeking more adventurous flavors, seeds like caraway historically appeared in certain regional Irish soda bread traditions. Modern interpretations sometimes include everything bagel seasoning, cheddar cheese, or bacon bits mixed into the dry ingredients. A drizzle of honey mixed with the buttermilk adds subtle sweetness without requiring additional sugar.
Storage and Serving Suggestions
Irish soda bread maintains its quality for two to three days when stored in an airtight container or wrapped tightly in plastic wrap at room temperature. The crust will soften slightly during storage, which many bakers prefer to the initial crispness. If you prefer maintaining a crunchier exterior, store uncovered in a paper bag instead.
Freezing works well for extended storage—wrap cooled bread thoroughly in plastic wrap and aluminum foil, then freeze for up to three months. Thaw at room temperature for several hours or briefly warm slices in a toaster oven to refresh the texture.
Traditionally, Irish soda bread pairs wonderfully with butter and jam, making it ideal for breakfast or tea. It also serves as an excellent companion to hearty soups and stews, helping to soak up flavorful broths. Cheese boards benefit from thick slices of freshly baked soda bread, and it works beautifully for creative sandwiches.
Troubleshooting Your Results
If your first attempt does not achieve the desired results, several factors warrant investigation. Buttermilk quality directly impacts leavening effectiveness—if your buttermilk is old or has been stored too long, its acidity diminishes, reducing the chemical reaction’s vigor. Always check expiration dates and consider the age of opened containers.
Oven temperature accuracy matters tremendously in bread baking. An oven thermometer provides valuable insight into whether your appliance maintains the temperature you believe it does. Many home ovens run hot or cold, and even a twenty-degree variation noticeably affects browning and rise.
The texture of your finished bread depends heavily on mixing technique. Hands-off approaches like using a fork to combine ingredients help prevent tough, overdeveloped gluten. If your bread consistently emerges dense despite following instructions correctly, reduce mixing time even further or try using just enough buttermilk to bring ingredients together without excess liquid.
Why This Bread Deserves a Place in Your Rotation
Irish soda bread represents an accessible entry point into bread baking for novices while remaining rewarding for experienced bakers seeking quick results. The absence of yeast eliminates variables related to temperature sensitivity and rising times, making the process more predictable and forgiving. The ingredient list remains short enough that pantry staples suffice, requiring no special purchases or advance planning.
Beyond practical advantages, this bread connects you to culinary traditions spanning centuries. What began as a practical solution for baking without commercial yeast has evolved into a beloved classic that appears on tables worldwide. Making Irish soda bread at home allows you to appreciate its rustic charm while customizing it to your personal preferences in ways commercial versions cannot match.
Frequently Asked Questions
Can I make Irish soda bread without buttermilk?
Yes. Combine regular milk with white vinegar or lemon juice in a one-to-one ratio and let it sit for five minutes before using. This creates a substitute with comparable acidity, though the flavor profile shifts slightly.
Why did my soda bread not rise properly?
The most common culprit involves delayed baking after mixing. The leavening reaction begins immediately upon contact between baking soda and buttermilk, so waiting even five minutes allows gas bubbles to escape. Additionally, verify that your baking soda is fresh—old baking soda loses potency over time.
Should I knead Irish soda bread dough?
Minimal kneading is desirable. Three to four gentle folds to bring the dough together suffice. Extensive kneading develops gluten excessively, resulting in tough bread rather than the tender crumb characteristic of soda bread.
Can frozen soda bread be reheated?
Absolutely. Thaw completely at room temperature, then warm slices in a 325°F oven for about ten minutes to restore freshness. Toasting also revives the crust nicely.
What makes the distinctive cross on top of Irish soda bread?
Tradition holds that the cross allowed steam to escape evenly during baking and had spiritual significance. Functionally, it encourages uniform rise and browning across the loaf surface.
References
- Irish Soda Bread (easy, no yeast) — Vintage Kitchen Notes. https://vintagekitchennotes.com/irish-soda-bread-recipe/
- Super Simple Irish Soda Bread — Alexandra’s Kitchen. https://alexandracooks.com/2016/03/irish-soda-bread-two-ways/
- Easy Irish Soda Bread — Sprinkle Bakes. https://www.sprinklebakes.com/2024/02/easy-irish-soda-bread.html
- Traditional Irish Soda Bread Recipe — Savory Nothings. https://www.savorynothings.com/traditional-irish-soda-bread/
- Quick and Easy Irish Soda Bread: No Yeast, 1 hour Bread! — YouTube. https://www.youtube.com/watch?v=vVT1Q60Btk0