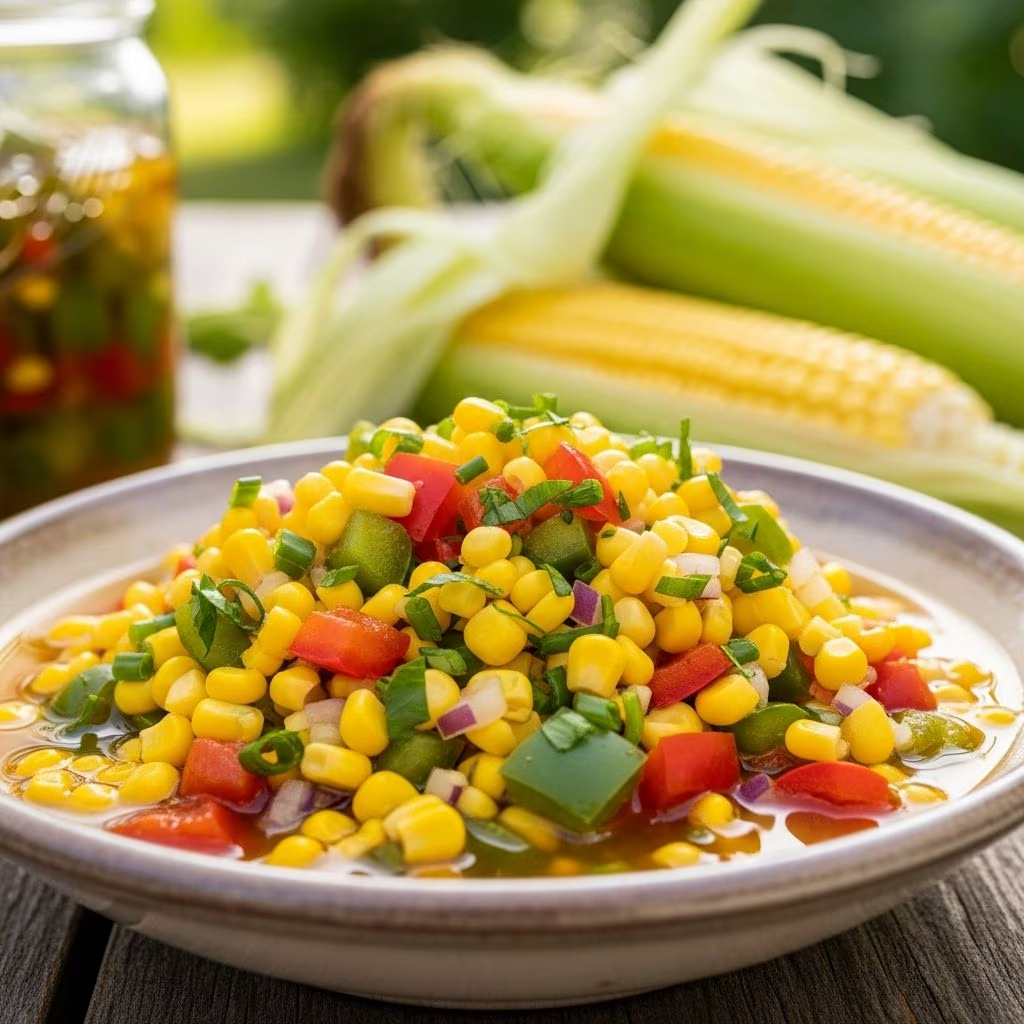
Corn relish stands as one of the most versatile and beloved condiments in American cuisine, bringing together the sweetness of fresh corn with the brightness of vinegar and an array of complementary vegetables. This traditional preserve has graced dinner tables for generations, serving as the ideal accompaniment to grilled meats, hot dogs, pulled pork sandwiches, and countless other dishes. Whether you’re a seasoned home canner or exploring preservation for the first time, mastering the technique of making corn relish opens up a world of culinary possibilities.
Understanding the Foundation of Corn Relish
At its core, corn relish represents a beautiful balance between several key flavor components working in harmony. The foundation begins with fresh sweet corn kernels, which provide the essential sweetness and textural foundation that defines this condiment. The addition of colorful bell peppers—typically red and green varieties—contributes both visual appeal and a subtle fruity undertone that enhances the overall flavor profile.
The tangy element comes from distilled white vinegar, which acts as both a flavor enhancer and a preservative, allowing your relish to maintain its quality for extended periods. Sugar plays an important counterbalancing role, tempering the vinegar’s acidity while amplifying the corn’s natural sweetness. Together, these primary ingredients create the characteristic sweet-tangy taste that makes corn relish instantly recognizable.
Essential Ingredients for Authentic Preparation
Creating homemade corn relish requires an organized approach to ingredient selection and measurement. Here are the key components you’ll need:
- Sweet corn: Eight to ten cups of fresh kernels, blanched and prepared from approximately 10-12 medium ears
- Bell peppers: A combination of red and green peppers, finely diced for uniform texture and appearance
- Onions: Yellow or sweet onions, diced to a consistent size for even cooking
- Vinegar: Distilled white vinegar serves as the primary acidic ingredient, providing preservation and tanginess
- Sugar: Granulated white sugar balances the vinegar’s acidity
- Spices: Mustard seeds, celery seeds, salt, and crushed red pepper create the characteristic flavor complexity
- Thickening agent: Cornstarch mixed with water creates the desired consistency
Step-by-Step Preparation Method
Vegetable Preparation and Assembly
The foundation of successful corn relish begins with meticulous vegetable preparation. Start by removing the husks and silk from fresh corn, then carefully cut the kernels from the cob using a sharp knife or specialized corn cutter. If you’re using frozen corn, thaw it completely and drain any excess moisture. Blanch fresh corn kernels briefly in boiling water to help preserve their color and texture during the cooking process.
While the corn cooks, turn your attention to the remaining vegetables. Wash and dry your bell peppers thoroughly, then remove the seeds and membranes. Dice the peppers into consistent pieces approximately one-quarter inch in size. Follow the same process for your onions, aiming for uniform sizing to ensure even cooking throughout the relish. The consistency of your vegetable cuts directly impacts both the final texture and the visual presentation of your finished product.
Creating the Vinegar Base
In a large, heavy-bottomed pot—crucial for even heat distribution and preventing scorching—combine your distilled white vinegar, sugar, and all dried spices. The spice blend typically includes mustard seeds for gentle heat and earthiness, celery seeds for aromatic depth, kosher salt for flavor enhancement, and crushed red pepper for a subtle spicy kick. Bring this mixture to a rolling boil over medium-high heat, stirring occasionally to ensure the sugar dissolves completely. This step is essential for melding the flavors and creating the aromatic base that will infuse throughout your relish.
Combining and Cooking
Once your vinegar mixture reaches a boil, carefully add the prepared vegetables. The initial addition might cause the mixture to foam slightly—this is a normal reaction and easily managed. Return the mixture to a boil, then immediately reduce the heat to low and simmer gently, uncovered, for approximately 15-20 minutes. This extended cooking time allows the flavors to meld, the vegetables to soften slightly while maintaining their structural integrity, and the overall mixture to achieve the desired balance of flavors.
After the simmering period, use a spoon to skim off any foam that has accumulated on the surface. This step improves both the appearance and clarity of your finished relish. Next, prepare your thickening slurry by mixing cornstarch with cold water until completely smooth, with no lumps remaining. Gradually stir this mixture into the simmering relish, combining thoroughly to avoid lumps.
Final Thickening and Cooling
Increase the heat to medium and allow the relish to simmer for an additional 4-5 minutes, stirring occasionally. You’ll observe the mixture gradually thickening as the cornstarch gelatinizes. The relish should reach a consistency that clings to a spoon but still flows slightly when tilted. Once you achieve the desired thickness, remove the pot from heat and allow the relish to cool to room temperature before transferring to storage containers.
Preservation Options and Storage Methods
| Preservation Method | Storage Duration | Container Type | Process Details |
|---|---|---|---|
| Water Bath Canning | 1-2 years | Sterilized pint jars | Leave 1/4 inch headspace, process for 15 minutes |
| Refrigerator Storage | 2-3 weeks | Glass containers or jars | Store cooled relish directly in refrigerator |
| Freezer Storage | 3-6 months | Freezer-safe containers | Allow adequate headspace for expansion |
Water Bath Canning Process
For long-term preservation, water bath canning provides an excellent option. While your relish cooks, prepare your canning equipment by sterilizing jars, lids, and bands in boiling water for at least 10 minutes. Using a ladle and a canning funnel, carefully transfer the hot relish into the prepared jars, leaving exactly one-quarter inch of headspace at the top. This space allows for proper sealing and expansion during processing.
Wipe the jar rims clean with a damp cloth to remove any drips or particles that might interfere with sealing. Place the lids on the jars and screw on the bands until they’re finger-tight—not overly tightened, as this can prevent proper venting during processing. Lower the filled jars into your water bath canner using a jar lifter, ensuring they’re completely submerged with at least one inch of water covering the tops. Process for 15 minutes at a rolling boil, then carefully remove the jars and place them on a clean kitchen towel to cool undisturbed for 12-24 hours.
Refrigerator Storage
If you prefer not to can your relish, simple refrigeration works perfectly well. Allow the cooled relish to set in the refrigerator for several hours before serving, which allows flavors to fully develop and the mixture to achieve its final consistency. Properly stored in sealed glass containers, homemade corn relish maintains excellent quality for up to three weeks in the refrigerator, making it ideal for regular use throughout the season.
Variations and Creative Adaptations
While the classic corn relish recipe provides an excellent foundation, numerous creative variations allow you to customize the flavor profile to match your personal preferences. Some cooks incorporate additional vegetables such as diced celery for crunch and aromatic complexity, or fresh jalapeños for those who prefer a spicier condiment. Others experiment with different vinegar types—apple cider vinegar or rice vinegar—each contributing subtle flavor variations.
Spice enthusiasts might add cumin and coriander seeds for a southwestern flair, or turmeric for warmth and color. Poblano peppers offer a milder, slightly smoky alternative to traditional bell peppers. Fresh herbs like cilantro or dill can be stirred in after cooking for bright, herbaceous notes. The beauty of homemade relish lies in its adaptability to your unique culinary vision.
Serving Suggestions and Culinary Applications
Corn relish’s versatility extends far beyond traditional hot dog and hamburger applications. This vibrant condiment enhances grilled chicken and fish with its bright, tangy flavor profile. Layer it generously on pulled pork sandwiches for a sweet-tangy contrast that elevates the entire eating experience. Spoon it atop crispy tacos or burrito bowls for authentic flavor complexity.
Consider serving corn relish alongside barbecued meats as part of a traditional Southern spread. It pairs beautifully with creamy coleslaw and crispy fried chicken for a nostalgic meal. For entertaining, present it alongside cheese boards and charcuterie spreads, offering an unexpected savory-sweet component that guests will appreciate. Adventurous cooks might incorporate corn relish into potato salads, alongside grilled vegetables, or as a topping for cream cheese and crackers at appetizer gatherings.
Troubleshooting Common Issues
Understanding potential challenges helps ensure consistent success with your corn relish endeavors. If your finished relish appears too thin, you likely need additional thickening agent—prepare another cornstarch slurry and simmer for several more minutes. Conversely, an overly thick consistency indicates you’ve added too much cornstarch; thin it with a tablespoon or two of water at a time until you achieve the desired texture.
Cloudy appearance in canned relish sometimes occurs during processing but doesn’t affect flavor or safety. This typically results from cornstarch particles or mineral content in the water. If you notice fermentation or off-odors in your canned product, discard it immediately and investigate your sterilization and processing procedures. Proper jar sterilization, adequate processing time, and appropriate headspace are critical to preventing spoilage.
Equipment Recommendations and Setup
Successful relish making requires appropriate equipment investment. A large, heavy-bottomed stainless steel pot—at least 8-10 quarts—provides even heat distribution essential for consistent results. A sharp chef’s knife or food processor facilitates efficient vegetable preparation and ensures uniform cutting throughout. For those planning to can regularly, a dedicated water bath canner with a rack and jar lifter eliminates guesswork and improves safety.
Other helpful tools include a canning funnel for cleanly filling jars, a magnetic lid lifter for safely handling hot lids, a bubble remover tool for eliminating air pockets, and a headspace measuring tool for precise filling. While these specialized tools aren’t absolutely essential—many experienced canners work with standard kitchen implements—they significantly improve accuracy and reduce frustration during the preservation process.
Frequently Asked Questions
Can I use frozen corn for making relish?
Yes, frozen corn works acceptably well as a substitute for fresh corn. Thaw it completely, drain any excess liquid, and proceed with the recipe as written. The flavor and texture will be slightly different from fresh corn, but the finished relish will still be delicious and shelf-stable.
How long does properly canned corn relish last?
Water bath-processed corn relish, when properly sealed and stored in a cool, dark location, maintains excellent quality for 1-2 years. The relish remains safe to consume beyond this period but may experience slight flavor or texture changes.
What causes foam during cooking?
Foam forms when vegetable proteins and starches rise to the surface during the initial boiling phase. This is completely normal and easily removed with a skimming spoon. It doesn’t indicate any problem with your relish.
Can I reduce the sugar content?
While sugar serves primarily as a flavor component in this recipe, it also contributes to preservation. Reducing sugar by 10-15% is generally safe, but significant reductions may affect both flavor balance and shelf stability, particularly if not water bath canning.
Is distilled white vinegar necessary, or can I use other types?
Distilled white vinegar is recommended because its consistent acidity level (5%) ensures proper preservation. Apple cider vinegar or rice vinegar can substitute for flavor variation, but maintain the same volume and verify their acidity levels meet preservation standards.
References
- Old Fashioned Corn Relish — Prairie Californian. Accessed April 2026. https://prairiecalifornian.com/old-fashioned-corn-relish/
- Zesty Sweet Corn Refrigerator Relish — A Farmgirl’s Dabbles. Accessed April 2026. https://www.afarmgirlsdabbles.com/zesty-sweet-corn-refrigerator-relish-recipe/
- Homemade Corn Relish — Joyful Balance. Accessed April 2026. https://joyfulbalanceonline.com/homemade-corn-relish/
- BEST Corn Relish — The Daring Gourmet. Accessed April 2026. https://www.daringgourmet.com/homemade-sweet-corn-relish/
- Tex-Mex Corn Relish Canning Recipe — Canning Diva. Accessed April 2026. https://canningdiva.com/recipes/tex-mex-corn-relish-canning-recipe/