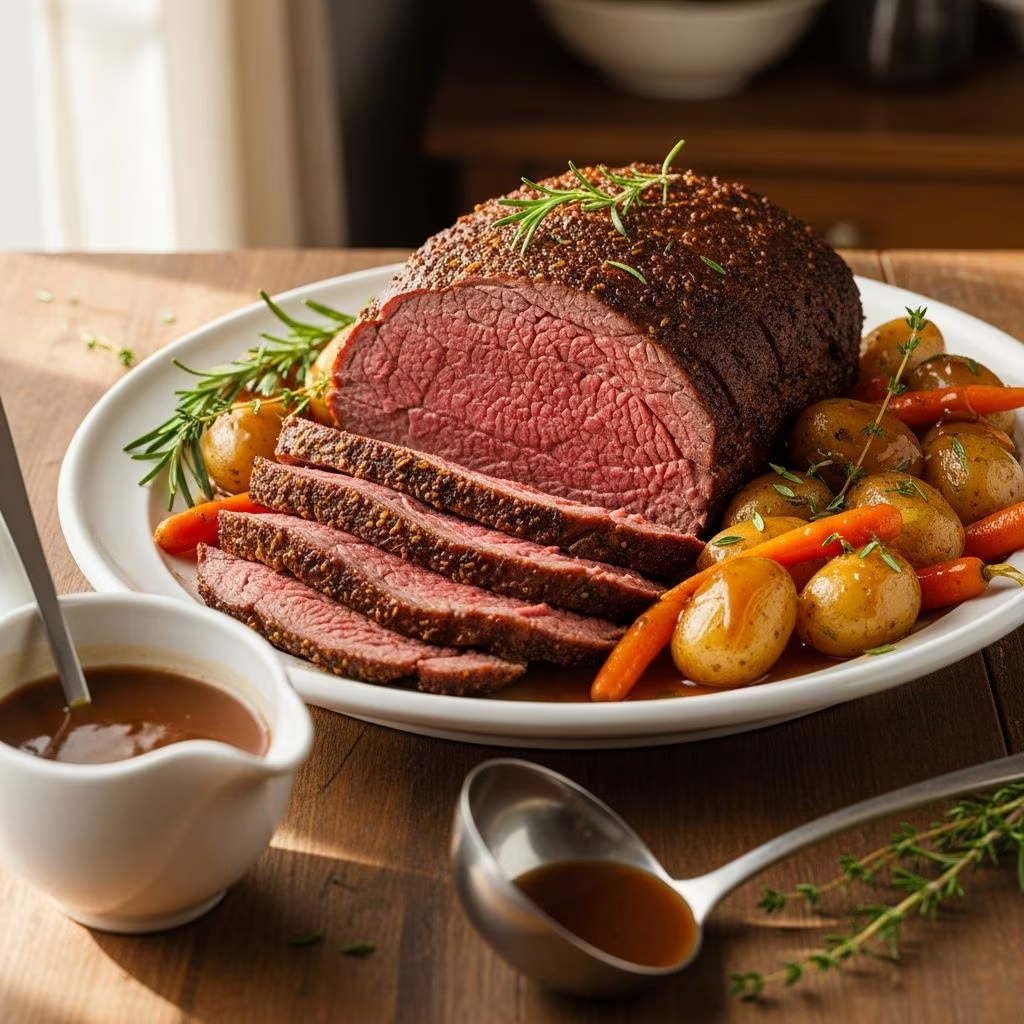
Few dishes evoke the warmth and satisfaction of a well-prepared beef roast. When prepared in a slow cooker, this classic comfort food becomes even more accessible, requiring minimal hands-on time while delivering maximum flavor and tenderness. The slow, moist heat environment of a slow cooker transforms tougher cuts of beef into succulent, fall-apart masterpieces. Whether you’re preparing dinner for your family or hosting guests, a slow-cooker beef roast offers both convenience and elegance on the dinner table.
Selecting the Right Cut of Beef
The foundation of any exceptional slow-cooker roast begins with choosing the appropriate meat. Chuck roast and rump roast are the ideal selections for this cooking method, as these cuts contain sufficient marbling and connective tissue that breaks down during the extended cooking process. These tougher cuts, which would be challenging to prepare using traditional roasting methods, become incredibly tender when subjected to low, moist heat over several hours.
When shopping for your roast, aim for a piece weighing between 2.5 to 4 pounds, which will comfortably serve six to eight people depending on appetites and side dishes. Examine the meat for even coloring and trim away any excessive surface fat before preparation, though some intramuscular fat is beneficial for flavor retention and moisture.
Essential Preparation Steps Before Cooking
Proper preparation transforms a good roast into an exceptional one. Begin by patting your beef roast dry with paper towels—this critical step enables better browning during the searing process. A dry surface creates the Maillard reaction, the chemical process that produces the savory, complex flavors associated with browned meat.
Seasoning Your Roast: Create a flavorful coating by combining steak seasoning, Italian herbs, and your preferred spice blend. Apply this mixture generously across all surfaces of the meat, working it into the grain. This exterior seasoning forms the foundation of your dish’s flavor profile, and taking time to distribute it evenly ensures consistent taste throughout.
The Searing Process: Heat a large cast-iron or heavy-bottomed skillet over medium-high heat and add a small amount of vegetable oil. Once the oil shimmers, carefully place your roast in the skillet and allow it to cook undisturbed for three to four minutes on each side. This browning process is not merely for appearance; it creates flavor compounds that enhance the entire dish’s depth and complexity. Once properly browned on all sides, transfer the roast to your prepared slow cooker.
Building Your Flavor Foundation
The liquid environment within the slow cooker carries and develops flavors throughout the cooking process. Begin by creating a bed of aromatics in the bottom of your slow cooker. Sliced onions provide a natural barrier between the meat and the ceramic surface while infusing subtle sweetness into the cooking liquid.
Arrange your roast on top of this onion base, then surround it with complementary vegetables. The traditional vegetable medley includes:
- Baby carrots or chunked carrot pieces
- Red or russet potatoes, cut into two-inch pieces
- Celery stalks, chopped into three-inch segments
- Garlic cloves, minced or crushed
These vegetables will soften during the extended cooking time while absorbing the rich flavors from the meat and broth.
The Cooking Liquid and Seasoning Strategy
Pour approximately two cups of beef broth over your assembled ingredients. This liquid maintains the moist cooking environment essential for tender, juicy results. For enhanced flavor depth, consider using broth infused with herbs or selecting a premium beef stock rather than generic broth.
Season the cooking liquid with additional herbs and spices such as thyme, oregano, cumin, and chili powder, depending on your desired flavor profile. A pinch of Worcestershire sauce or balsamic vinegar can add subtle complexity. The beauty of slow-cooker cooking lies in its forgiving nature—these seasoning additions continue to develop throughout the cooking period, creating increasingly complex flavors.
Timing and Temperature Considerations
Place the lid on your slow cooker and select your cooking setting based on your schedule:
| Cooking Level | Duration | Best For |
|---|---|---|
| Low Setting | 8-10 hours | All-day cooking, overnight prep |
| High Setting | 6 hours | Same-day preparation |
The low setting produces slightly more tender results, as the gradual heat penetration allows connective tissues to break down more completely. However, the high setting delivers excellent results in approximately half the time, making it ideal when your schedule demands a quicker preparation.
Resist the urge to lift the lid frequently during cooking. Each time the lid opens, warm air escapes and the cooking time extends. If you must check on your roast, do so sparingly, and quickly replace the cover.
Creating Rich Homemade Gravy
As your roast reaches completion, the cooking liquid transforms into a flavorful base for exceptional gravy. Carefully drain the liquid from the slow cooker into a medium saucepan, leaving the cooked meat and vegetables in the cooker for the moment.
Bring the cooking liquid to a boil over medium-high heat. Add additional seasonings if desired—salt, pepper, garlic powder, and onion powder all enhance the gravy’s depth. For those preferring a richer, more traditional gravy, this is an excellent moment to incorporate beef bouillon cubes or additional broth concentrate.
Thickening the Gravy: In a separate small bowl, whisk together cornstarch and cold water to create a slurry, using approximately one tablespoon of cornstarch per quarter cup of water. The cold water prevents lumping when the mixture combines with hot liquid. Slowly add this slurry to the boiling broth while whisking continuously. Reduce the heat to medium-low and allow the gravy to simmer for three to five minutes, stirring occasionally, until it reaches your desired thickness.
The finished gravy should coat a spoon but still flow freely. If it becomes too thick, thin it with additional broth; if too thin, prepare another cornstarch slurry and repeat the thickening process.
Finishing and Presentation
Transfer your cooked roast to a large serving platter or cutting board. Using two forks, gently pull the meat apart into bite-sized pieces—the beef should be so tender that this requires minimal effort, simply falling into natural separations.
Arrange the cooked vegetables around or over the shredded meat, then ladle your prepared gravy over everything. This presentation showcases the attractive vegetables and creates an inviting, homestyle appearance that welcomes guests to the table.
Helpful Timing and Preparation Strategies
For maximum convenience, prepare your slow cooker the evening before. Combine all seasonings, arrange vegetables and meat, add broth, and refrigerate overnight. The next morning, simply place the cold slow cooker insert into the heating base and begin cooking on your desired setting. The extended time for the ingredients to reach cooking temperature is negligible and often improves flavor development.
Alternatively, assemble everything in the morning and cook throughout the day, creating a welcoming aroma that builds anticipation for dinner. This approach works particularly well for weekend family gatherings or weeknight entertaining, as your main dish essentially cooks itself while you attend to other responsibilities.
Customization and Flavor Variations
The fundamental slow-cooker beef roast provides an excellent canvas for culinary creativity. Consider these flavor variations:
- Mediterranean Style: Add sun-dried tomatoes, olives, and fresh herbs like rosemary and oregano to your cooking liquid
- Mexican-Inspired: Incorporate cumin, chili powder, and dried chile peppers, serving with cilantro garnish
- Asian Fusion: Mix soy sauce, ginger, and a splash of rice vinegar into your broth for an umami-rich option
- Classic French: Include pearl onions, mushrooms, and red wine for a coq-au-vin inspired beef version
Storage and Reheating Instructions
Slow-cooker beef roast reheats beautifully, making it an excellent option for meal preparation. Store leftovers in airtight containers for up to four days in the refrigerator. To reheat, place the roast and vegetables in a covered baking dish and warm at 325 degrees Fahrenheit for approximately thirty minutes, or until heated through. Alternatively, reheat gently on the stovetop in a large pot over medium-low heat, adding a splash of broth to maintain moisture.
For longer storage, freeze your prepared roast in freezer-safe containers for up to three months. Thaw overnight in the refrigerator before reheating using either method described above.
Frequently Asked Questions
Can I cook my beef roast without browning it first? While browning significantly enhances flavor through the Maillard reaction, you can technically skip this step for a quicker preparation. However, the resulting dish will lack the depth and complexity that searing provides.
What if my roast isn’t tender after the recommended cooking time? Older beef or particularly tough cuts may require an additional hour or two of cooking time. The slow cooker’s moist environment cannot overcook meat in the traditional sense; extended cooking simply increases tenderness.
Can I add dairy products to my gravy? Yes, for a creamy variation, stir in heavy cream or sour cream after thickening the gravy with cornstarch. Do this after removing from high heat to prevent curdling.
How do I prevent my vegetables from becoming mushy? Add vegetables during the last two hours of cooking rather than at the beginning, allowing them to soften without becoming overcooked.
References
- Guide to Beef Cuts and Their Uses — United States Department of Agriculture (USDA). 2024. https://www.usda.gov/media/blog/2019/01/10-do-you-know-your-beef-cuts
- The Maillard Reaction: Flavor Development in Cooking — Institute of Food Technologists. 2023. https://www.ift.org/news-and-publications/food-technology-magazine