Bread machines have revolutionized home baking by transforming a once-intimidating process into something accessible for anyone willing to measure ingredients and press a button. Whether you’re a seasoned baker looking to streamline your workflow or a beginner eager to create fresh, warm bread at home, understanding the fundamentals of bread machine baking is essential. This comprehensive guide covers everything you need to know to produce consistently excellent results.
Understanding Your Bread Machine: Essential Components and Functions
Modern bread machines operate on a sophisticated system designed to replicate traditional bread-making methods in an automated format. The machine handles multiple stages: ingredient mixing, kneading, bulk fermentation, and baking. Most machines offer various settings tailored to different bread types, allowing users to select between basic white bread cycles, whole wheat settings, dough-only modes, and specialized programs for enriched breads containing eggs and butter.
The capacity of your machine plays a crucial role in successful baking. Machines typically produce 1.5-pound or 2-pound loaves. Attempting to bake a larger loaf than your machine’s capacity can result in overflow, uneven baking, and potential damage to the device. Before starting any recipe, verify your machine’s maximum capacity by consulting the manufacturer’s manual.
Foundational Ingredient Selection and Measurements
Success in bread machine baking begins with precision in ingredient selection and measurement. The basic components for any white bread recipe include water, flour, yeast, salt, and a small amount of fat and sugar. However, the specific ratios and types of ingredients significantly impact the final product’s texture, flavor, and shelf life.
Water Temperature and Quality
Water serves as the vehicle for dissolving yeast and activating gluten development. The temperature of your water matters considerably—ideal water temperature ranges between 75 and 85 degrees Fahrenheit. Water that is too hot can kill yeast cells, while water that is too cold slows fermentation and may not activate yeast properly. If using tap water, allow it to sit for several minutes to reach room temperature, or measure it using a kitchen thermometer for accuracy.
Flour Selection and Proper Measuring
Flour provides structure through gluten development and significantly influences the bread’s texture. Bread flour, which contains 12-14% protein, produces stronger gluten networks and results in taller loaves with better texture compared to all-purpose flour. All-purpose flour, with 10-12% protein, works adequately but may produce slightly denser bread. When measuring flour, use the scoop-and-level method: stir the flour in its container to aerate it, scoop the flour into your measuring cup, and sweep off excess with a knife blade. This technique prevents compacting the flour and ensures consistent measurements across batches.
Yeast and Leavening Agents
Rapid-rise yeast and bread machine yeast are essentially identical products optimized for faster fermentation. These granular yeasts activate quickly and work efficiently within the bread machine’s compressed timeline. When using yeast, ensure it hasn’t expired—dead yeast will not produce the necessary lift and carbon dioxide. Store yeast in a cool, dry location or in the refrigerator for extended shelf life. A simple test involves mixing a small amount of yeast with warm water and a pinch of sugar; if the mixture becomes bubbly within ten minutes, the yeast remains viable.
Salt, Fat, and Sugar Roles
Salt strengthens gluten strands and regulates fermentation speed, preventing over-proofing. However, salt should never directly contact yeast, as it can inhibit yeast activation. Fat, whether oil or butter, tenderizes the crumb, extends shelf life, and contributes flavor. Sugar feeds yeast and promotes browning, though excessive sugar can inhibit yeast activity. Typical white bread recipes balance these elements with 1 teaspoon salt, 2 tablespoons fat, and 1-1.5 teaspoons sugar per loaf.
Core White Bread Recipe and Step-by-Step Instructions
Standard Ingredients for a 2-Pound Loaf
- 1¾ cups warm water (approximately 415 grams)
- 2 tablespoons neutral cooking oil (25 grams)
- 1½ teaspoons granulated sugar (7 grams)
- 1 teaspoon coarse kosher salt (8 grams)
- 4 cups bread flour (570 grams)
- 2 teaspoons rapid-rise or bread machine yeast (8 grams)
Preparation Process
Step One: Combining Liquid Ingredients
Begin by pouring the warm water into your bread machine pan. Add the oil, sugar, and salt to the water. These ingredients should be combined before adding flour; this ensures even distribution of salt away from direct yeast contact and allows sugar to dissolve slightly.
Step Two: Adding Dry Ingredients
Measure your flour using the scoop-and-level method described earlier. Pour the flour directly onto the liquid mixture, completely covering the water surface. This layering technique prevents premature yeast activation. Create a small well or indent in the flour’s surface, then add the yeast into this well. The yeast should remain separated from moisture until the machine begins mixing.
Step Three: Machine Cycle Selection
Select the basic white bread setting on your machine and initiate the cycle. Most machines complete a full cycle in approximately 2 to 2.5 hours. During this time, the machine automatically handles mixing (5-10 minutes), kneading (approximately 15-20 minutes), first rise (60-90 minutes), shaping, second rise (30-60 minutes), and baking (35-45 minutes).
Step Four: Cooling
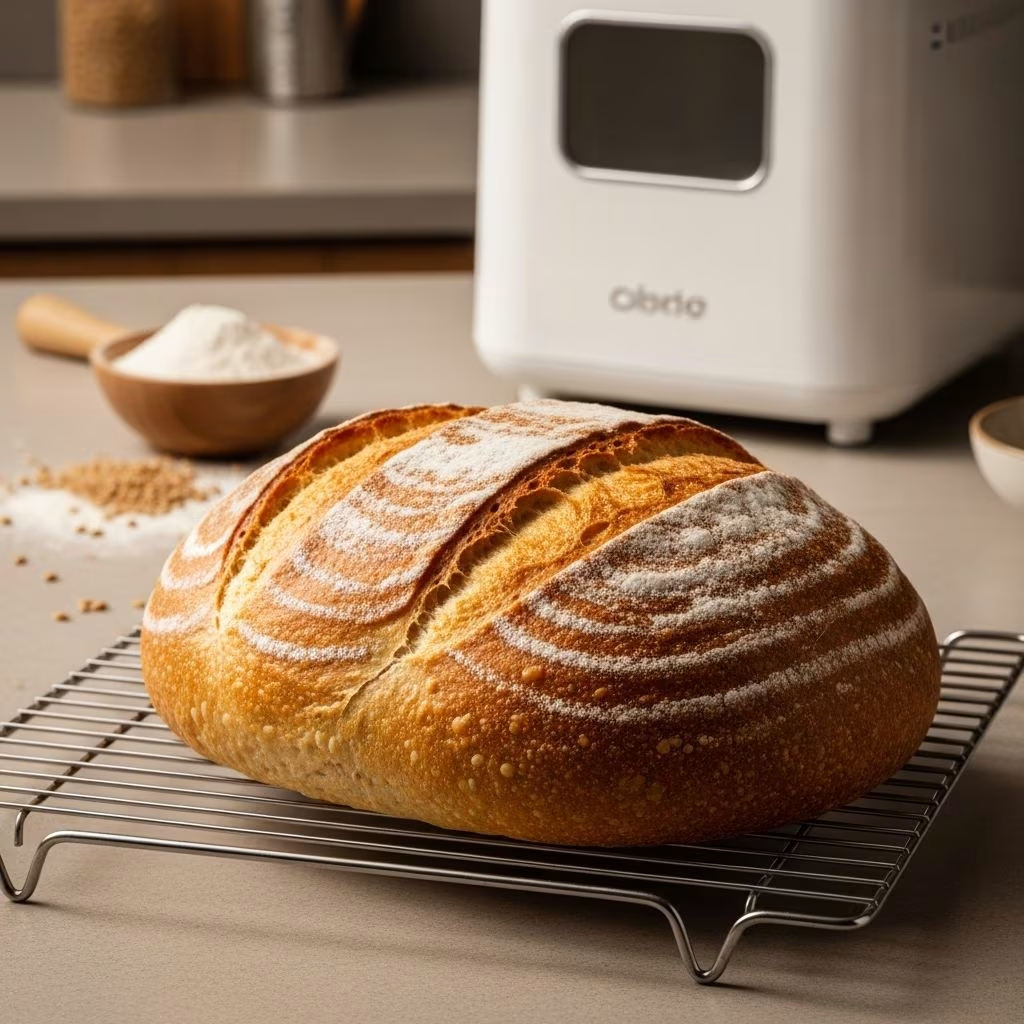
Upon completion, carefully remove the bread pan from the machine. Allow the loaf to cool in the pan for approximately 5 minutes, then gently turn it out onto a wire cooling rack. Allowing the bread to cool completely (at least one hour) before slicing prevents gumminess and allows the crumb structure to set properly.
Advanced Techniques for Enhanced Results
Enriched Bread Formulations
Beyond basic white bread, bread machines excel at producing enriched loaves containing eggs, butter, and milk. These additions create softer crumbs, richer flavor, and improved browning. When using enriched recipes, substitute a portion of water with milk (typically ⅓ to ½ cup), add one egg, and increase butter to 4 tablespoons. These modifications may require using a dough cycle (approximately 90 minutes) followed by manual shaping and oven baking for superior crust development and loaf height.
Dough-Only Cycles for Custom Shaping
Many experienced bakers utilize their bread machines exclusively for mixing, kneading, and bulk fermentation by selecting the dough setting. This approach allows manual shaping for artisanal results, customized loaf sizes, and superior crust characteristics. After the dough cycle completes, remove the dough, shape it in a traditional loaf pan or on a baking sheet, allow a second rise (30-60 minutes), and bake in a conventional oven at 375-400 degrees Fahrenheit for 25-35 minutes until golden brown.
Flour Aeration for Optimal Texture
Professional bakers recognize that loosely packed flour produces lighter, fluffier bread. Instead of simply scooping flour into measuring cups, whisk the flour in its container to incorporate air, then spoon it gently into your measuring cup before leveling. This practice prevents over-compacting and ensures consistent, lighter crumb texture.
Troubleshooting Common Bread Machine Issues
| Problem | Likely Causes | Solutions |
|---|---|---|
| Dense, Heavy Loaf | Expired yeast, water too cold, too much salt, compressed flour | Verify yeast viability, check water temperature (75-85°F), use precise salt measurements, use aeration method for flour |
| Loaf Didn’t Rise | Dead yeast, insufficient yeast amount, salt contacted yeast, machine malfunction | Test yeast with warm water and sugar, ensure correct yeast measurement, verify salt layering, consult machine manual |
| Overflow or Dough Too Wet | Machine capacity exceeded, too much water, incorrect measurements | Verify machine capacity before starting, use scale for accurate water measurement, recheck all ingredient ratios |
| Pale or Insufficient Browning | Oven temperature too low, bake time too short, insufficient sugar | Verify machine’s baking temperature, extend bake setting if available, consider dough cycle with oven finishing |
| Gummy Interior Despite Cooling | Under-baked, sliced too soon, excess moisture | Ensure full bake cycle completion, wait at least one hour before slicing, check water-to-flour ratio |
Storage and Longevity of Homemade Bread
Properly stored bread machine bread maintains quality for several days. Room-temperature storage in a paper bag or breathable container preserves crust texture better than plastic bags, which trap steam and create soggy surfaces. For extended storage, slice the bread before freezing in an airtight container or freezer bag; individual slices can be toasted directly from frozen. Properly frozen bread maintains quality for up to three months.
Frequently Asked Questions About Bread Machine Baking
Can I use all-purpose flour instead of bread flour?
Yes, all-purpose flour works acceptably in bread machines, though the resulting loaf may be slightly denser with less pronounced height compared to bread flour. All-purpose flour contains less protein (10-12% versus 12-14%), resulting in less gluten development. For optimal results with all-purpose flour, reduce water by 1-2 tablespoons and consider using the dough cycle with oven finishing.
What’s the best way to test if my yeast is still active?
Mix one teaspoon of your yeast with ¼ cup warm water (75-85 degrees Fahrenheit) and add a pinch of sugar. Within 10 minutes, the mixture should become noticeably bubbly and foamy. If no activity occurs after 15 minutes, the yeast is expired and should be replaced.
Why does my bread machine emit a loud noise during mixing?
Some noise during the mixing and kneading phases is normal as the machine processes thick dough. However, excessive grinding or squealing may indicate mechanical issues. Consult your machine’s manual; persistent noise may warrant professional service.
Can I add mix-ins like herbs or seeds to bread machine recipes?
Many bread machines include a beep signal indicating when to add mix-ins. If your machine includes this feature, add herbs, seeds, or chopped ingredients at the designated time. Otherwise, add mix-ins after the initial kneading phase by pausing the machine, lifting the lid, and adding ingredients. Resume the cycle immediately. Avoid adding delicate inclusions early, as they may be obliterated during extended kneading.
Should I always use warm water in my bread machine?
Warm water (75-85 degrees Fahrenheit) activates yeast and initiates fermentation. Cold water slows these processes significantly, potentially resulting in incomplete rising or dense bread. While not strictly necessary for all machines with warmth-generating elements, using properly warmed water ensures predictable, consistent results.
Maintenance and Care of Your Bread Machine
Proper maintenance extends your bread machine’s lifespan and ensures consistent performance. After each use, remove and hand-wash the bread pan and paddle in warm soapy water; these components are typically not dishwasher safe. Wipe the machine’s interior with a damp cloth to remove flour residue. Periodically inspect the rubber seal around the pan for cracks or wear, and replace if necessary to prevent leaking.
Store your machine in a cool, dry location with the cord wrapped loosely to prevent damage. Avoid storing the machine in humid environments, as moisture can affect electrical components. If your machine experiences prolonged non-use, run a cycle with water only before resuming regular baking to clear any accumulated dust.
Exploring Bread Machine Baking Beyond Basic White Bread
Once you’ve mastered basic white bread, bread machines accommodate numerous variations. Whole wheat bread requires slightly more water due to whole wheat flour’s higher absorption rate. Multigrain breads benefit from soaking whole grains before adding to the machine. Sweet breads incorporating dried fruit, nuts, and spices add versatility to your baking repertoire. Many bread machines include specialized cycles for these variations, making experimentation accessible even to novice bakers.
References
- Easy Bread Machine Bread Recipe — King Arthur Baking Company. 2024. https://www.kingarthurbaking.com/recipes/easy-bread-machine-bread-recipe
- The Best Bread Machine Recipe — Crave The Good. 2024. https://www.cravethegood.com/best-bread-machine-recipe/
- Easiest & Best Bread Machine Bread Recipe — The Full Hearted Home. 2024. https://thefullheartedhome.com/easiest-best-bread-machine-bread-recipe/
- Best Bread Machine Bread Recipe — Favorite Family Recipes. 2024. https://www.favfamilyrecipes.com/bread-machine-bread/
- Bread Machine Recipes Collection — Adamant Kitchen. 2024. https://adamantkitchen.com/bread-machine-recipes/