Brownies have long held a special place in the dessert world, offering comfort, indulgence, and satisfaction in a single bite. Among the many variations available, the two-layer brownie stands out as a sophisticated take on this classic treat. This particular style combines a dense, fudgy chocolate foundation with a smooth, creamy topping that creates a complex flavor profile and memorable texture contrast. Whether you’re preparing dessert for a special occasion or simply craving something extraordinary, mastering this technique will elevate your baking repertoire.
Understanding the Two-Layer Brownie Structure
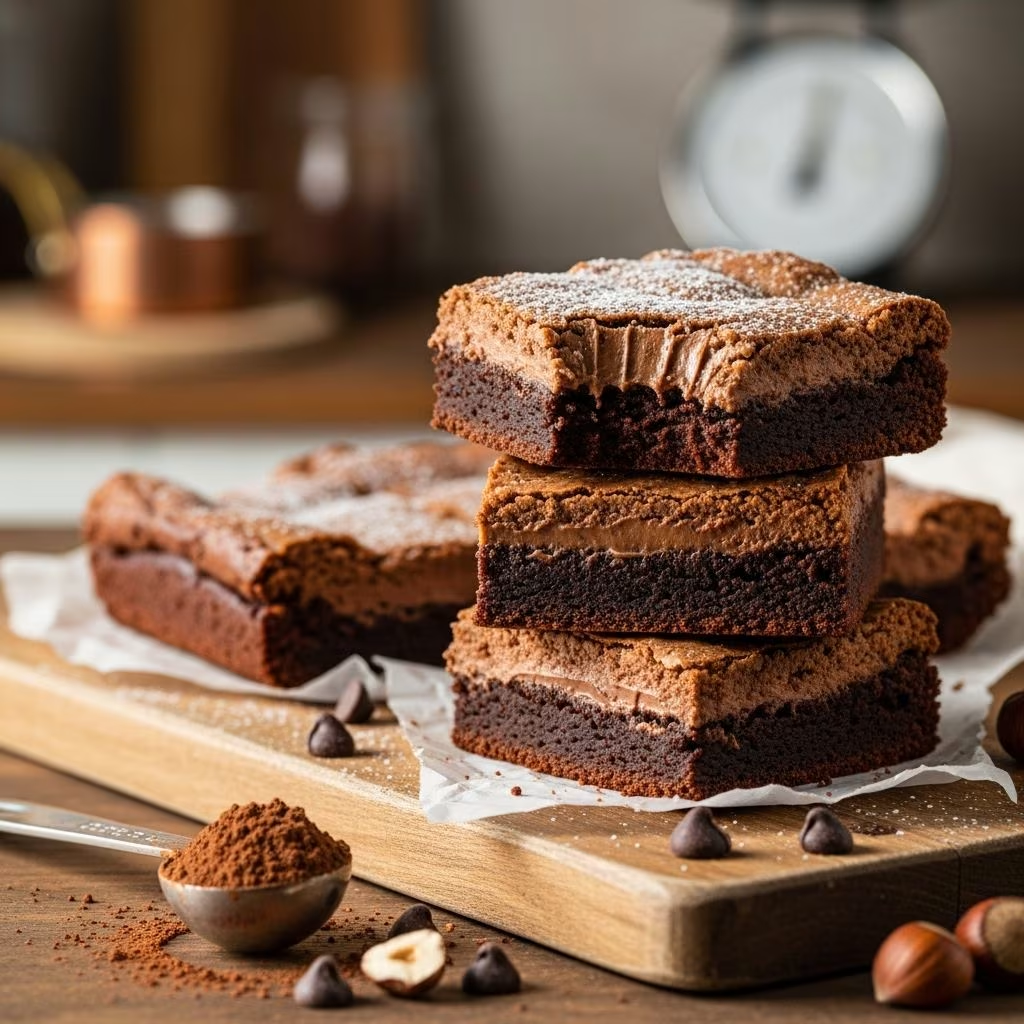
The appeal of layered brownies lies in their dual composition. The bottom layer provides the traditional brownie experience: rich, chocolatey, and satisfyingly dense. The top layer adds sophistication through a smooth, tangy element that complements the sweetness below. This architectural approach transforms a simple brownie into an elegant dessert worthy of gourmet settings.
The foundation layer relies on chocolate cake mix as its base ingredient, which streamlines preparation while delivering reliable chocolate flavor. This ingredient choice has made this style of brownie beloved by home bakers seeking professional-quality results without extensive technical skill. The topping layer introduces cream cheese, which adds both richness and a subtle tartness that balances the overall sweetness.
Essential Ingredients for Success
Creating these brownies requires a carefully selected list of components, each serving a specific purpose in the final product:
- Chocolate cake mix (10 ounces): Forms the foundation of the lower layer, providing structure and consistent chocolate flavor
- Butter (½ to 1 cup melted): Adds moisture and richness to both layers, with the amount affecting final texture
- Eggs (3 total, divided): One egg binds the base layer ingredients; two eggs create a smooth, creamy texture in the topping
- Chopped nuts (½ cup, optional): Provides textural interest and can enhance flavor complexity
- Powdered sugar (1 pound box): Sweetens the topping layer and contributes to its smooth consistency
- Cream cheese (8 ounces): The signature ingredient of the topping, offering richness, slight tang, and structural integrity
Step-by-Step Preparation Instructions
Preparing Your Baking Environment
Before combining ingredients, proper preparation of your workspace and equipment ensures optimal results. Preheat your oven to 350 degrees Fahrenheit, allowing it to reach the correct temperature before baking begins. A 13 by 9 inch baking dish serves as the ideal vessel for this recipe, accommodating both layers while ensuring even baking.
Prepare the baking dish by thoroughly buttering all interior surfaces and coating with flour. This two-step approach prevents sticking and allows for clean removal after baking. Alternatively, parchment paper provides an easy removal method that many bakers prefer for its simplicity.
Creating the Foundation Layer
The base layer begins by combining dry ingredients with butter and a single egg. Mix the chocolate cake mix with the melted butter and one egg until the mixture achieves a uniform consistency. At this stage, incorporate chopped nuts if desired, distributing them evenly throughout. The resulting mixture should be thick and paste-like.
Spread this base mixture evenly across the prepared baking dish, pressing gently to create an even layer. This step is crucial for consistent baking throughout the pan. Uneven layers can result in some portions being overdone while others remain undercooked.
Preparing and Adding the Topping Layer
While the base layer awaits the topping, prepare the cream cheese mixture. This component requires careful attention to achieve the desired smooth, spreadable consistency. Beat together the powdered sugar, cream cheese, and remaining two eggs until well combined and creamy. The mixture should be smooth without any lumps of cream cheese.
Carefully spread this topping over the base layer, working gently to avoid disrupting the foundation beneath. A spatula or butter knife helps distribute it evenly across the entire surface. The topping layer should reach all edges of the pan for consistent coverage.
Baking and Cooling
Place the prepared brownies in the preheated oven and bake for approximately 50 minutes. The brownies will be ready when a toothpick or cake tester inserted into the center comes out clean or with just a few moist crumbs. Overbaking results in a dry texture, while underbaking leaves the center too soft.
Allow the brownies to cool completely in the pan before attempting removal. This cooling period allows the layers to set properly and makes cutting cleaner. Once cooled, cut into squares of your preferred size.
Ingredient Variations and Customizations
Nut Selections
While pecans traditionally appear in this recipe, other nuts offer interesting flavor possibilities. Walnuts provide an earthier taste, while almonds offer a more delicate flavor. For those with nut allergies, omitting nuts entirely still produces delicious results. Some bakers substitute chocolate chips for a sweeter variation.
Chocolate Intensity
The base layer’s chocolate flavor can be enhanced by adding cocoa powder to the cake mix or replacing a portion of the cake mix with additional cocoa powder. This modification intensifies the chocolate character without requiring different base ingredients. Similarly, adding chocolate chips to the base layer creates pockets of extra chocolate richness.
Topping Variations
The cream cheese topping accepts various modifications. A touch of vanilla extract enhances overall flavor complexity. Some bakers add lemon zest for brightness that contrasts with the chocolate base. For decoration, a dusting of cocoa powder or chocolate shavings on top adds visual appeal.
Texture and Consistency Expectations
Understanding the desired final texture helps determine when brownies have reached perfection. The base layer should be fudgy but not gooey, with a slight firmness when pressed. The topping maintains a creamy, almost cheesecake-like consistency that contrasts beautifully with the denser base.
The butter amount significantly influences final texture. Using ½ cup produces denser, fudgier brownies, while 1 cup creates a slightly moister result. Personal preference should guide this choice, as both approaches yield satisfactory outcomes.
Storage and Serving Recommendations
Properly stored brownies maintain quality for several days. Keep them in an airtight container at room temperature, where they remain fresh for up to three days. Refrigeration extends storage to approximately one week, though cold temperatures can slightly firm the texture.
For longer storage, freeze brownies in an airtight container for up to three months. Thaw at room temperature before serving for the best texture. Individual portions freeze particularly well, allowing you to enjoy a single brownie whenever desired.
Serve at room temperature for optimal flavor and texture appreciation. Some bakers prefer a slight chill to the topping, finding it enhances the contrast with the fudgy base. Experiment to determine your preference.
Common Baking Challenges and Solutions
| Challenge | Likely Cause | Solution |
|---|---|---|
| Sunken center after cooling | Underbaked or topping too heavy | Extend baking time by 5 minutes; ensure topping is fully incorporated |
| Dry, cake-like texture | Overbaking | Reduce baking time by 5-10 minutes; test earlier |
| Topping refuses to spread smoothly | Cold cream cheese | Allow cream cheese to reach room temperature before mixing |
| Layers separate during baking | Uneven spreading or too much moisture | Press base layer firmly; spread topping gently without pressing down |
| Brownie edges too dark | Oven hot spots | Rotate pan halfway through baking; reduce oven temperature by 25°F |
Frequently Asked Questions
Can I use a different cake mix flavor?
While chocolate cake mix is traditional, dark chocolate or devil’s food varieties work excellently and may provide additional depth. Yellow or vanilla cake mixes create a different flavor profile that some find appealing, though they won’t deliver the same chocolate-forward experience.
What if my cream cheese is still cold when I need to mix it?
Cold cream cheese creates lumps that resist mixing smoothly. Remove it from refrigeration 30-45 minutes before use, allowing it to reach room temperature. Alternatively, cut it into small cubes and microwave gently for 10-second intervals until softened.
Is it necessary to use an exact-size baking pan?
A 13 by 9 inch pan is standard, but slightly larger or smaller pans work if adjusted. Smaller pans produce thicker brownies with longer baking times, while larger pans create thinner brownies that bake faster. Monitor baking carefully when using different sizes.
Can these brownies be made in a round cake pan?
Yes, though cutting into uniform pieces becomes more challenging. A 9-inch round pan accommodates this recipe adequately, producing wedge-shaped pieces rather than squares.
How do I achieve clean cuts?
Use a sharp, thin-bladed knife dipped in hot water, wiping between cuts. Some bakers use dental floss, pulling it gently through the brownies for remarkably clean lines. Cutting when brownies are slightly chilled makes cleaner cuts than cutting at room temperature.
Advanced Tips for Professional-Quality Results
Temperature precision significantly impacts outcomes. Use an oven thermometer to verify your oven maintains the correct temperature, as many home ovens run hot or cold. This simple tool eliminates guesswork and improves consistency across multiple baking sessions.
Invest in quality ingredients, particularly the cream cheese and chocolate cake mix. Premium versions deliver noticeably superior flavor. Fresh eggs and room-temperature butter also contribute to better mixing and more uniform texture.
Document your baking process by noting exact baking times and any modifications made. This record becomes invaluable for replicating successful batches and avoiding repeating unsuccessful experiments.
Consider mise en place—arranging all ingredients before beginning—to streamline the process and prevent ingredient omissions. This approach particularly helps when dividing eggs and measuring liquids.
Scaling the Recipe for Larger Quantities
This recipe easily scales for bigger batches. Doubling the recipe allows preparation of two pans simultaneously or maintains the same pan for a thicker brownie. Simply multiply all ingredients by the desired factor.
For tripling or larger multiplications, consider preparing multiple batches rather than scaling dramatically, as very large mixing bowls can make thorough incorporation difficult and may exceed some mixer capacities.
References
- Food Chemistry and Baking Science — Institute of Food Technologists. 2023. https://www.ift.org/
- The Art and Science of Baking — American Association of Cereal Chemists International. 2024. https://www.aaccnet.org/
- Professional Baking Standards and Techniques — Culinary Institute of America. 2025. https://www.ciachef.edu/
- Food Safety Guidelines for Home Bakers — U.S. Food and Drug Administration. 2024-2025. https://www.fda.gov/