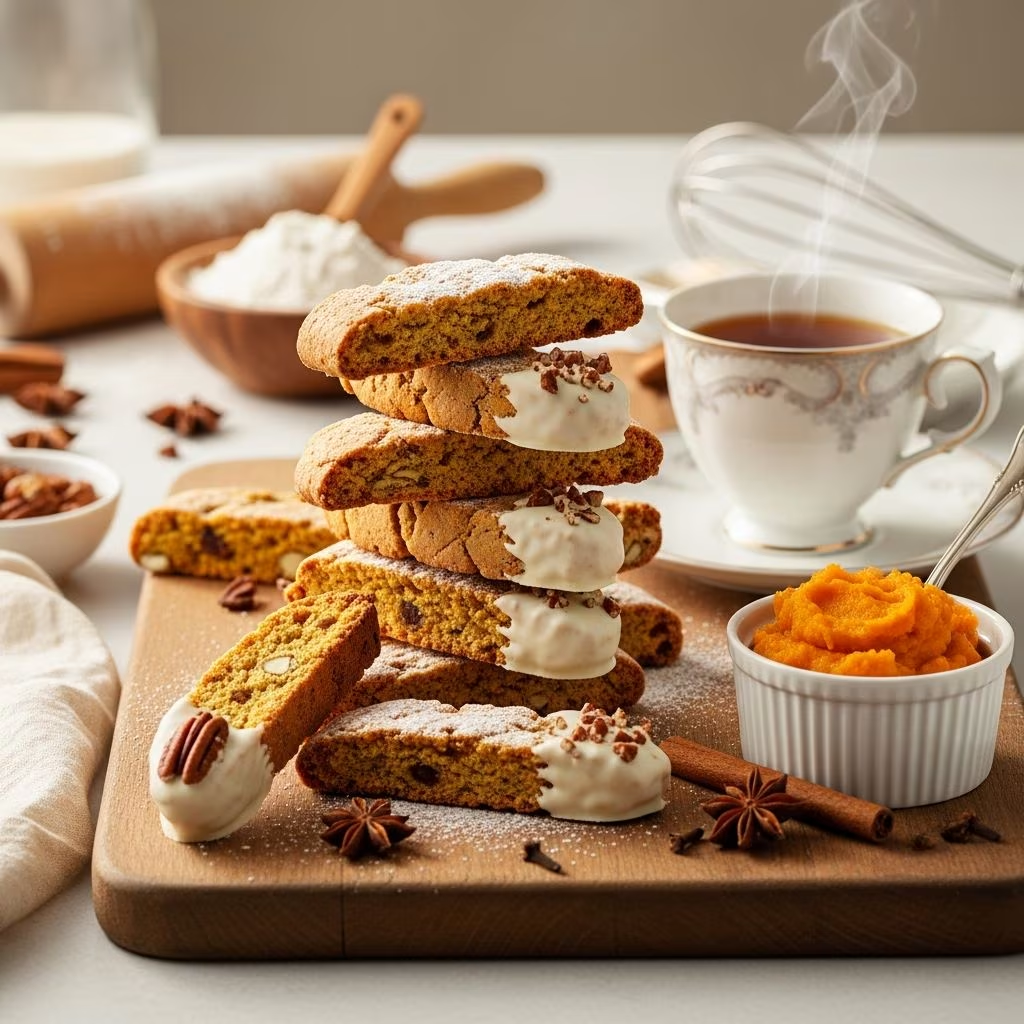
Pumpkin biscotti represents a delightful fusion of Italian tradition and autumn flavors, offering a sophisticated cookie experience that pairs beautifully with hot beverages and after-dinner coffee. These distinctive twice-baked cookies have gained popularity as a seasonal favorite, combining the rustic charm of traditional Italian biscotti with the comforting warmth of pumpkin spice. Understanding how to create these crispy, flavorful treats transforms them from a store-bought indulgence into a homemade specialty that impresses family and friends alike.
Understanding Biscotti: The Foundation of This Classic Treat
Biscotti, derived from the Italian word meaning “twice baked,” are elongated cookies with a distinctively hard and crunchy texture that makes them ideal for dunking. The name itself reveals the baking methodology that defines these cookies—they undergo two separate baking stages that create their characteristic crispness and structural integrity. This traditional Italian cookie has evolved over centuries, originally developed as a way to create long-lasting cookies that could survive long journeys or be stored without refrigeration.
The appeal of biscotti extends beyond their satisfying crunch. Their versatile nature allows for countless flavor adaptations, making them perfect vehicles for seasonal ingredients like pumpkin puree. The twice-baking process, while requiring patience, is straightforward enough for home bakers of varying skill levels, making pumpkin biscotti an accessible project for anyone interested in creating authentic Italian-inspired desserts.
Essential Ingredients for Authentic Pumpkin Biscotti
Creating exceptional pumpkin biscotti begins with assembling quality ingredients that work harmoniously to develop flavor and texture. Each component plays a specific role in achieving the desired result, from structure to taste.
The Primary Components
- All-Purpose Flour: The foundation of the dough, typically ranging from 2 to 2.25 cups, providing structure and crumb
- Pumpkin Puree: Half a cup of pure pumpkin puree (not pumpkin pie filling) delivers authentic flavor and moisture
- Butter: Four tablespoons of softened unsalted butter contributes richness and helps develop the dough’s texture
- Granulated Sugar: Between half and three-quarters cup adds sweetness and aids in browning
- Eggs: One or two large eggs bind the ingredients and provide structure
- Leavening Agents: One to one and a half teaspoons of baking powder ensures proper rise and crumb development
- Salt: Half a teaspoon balances sweetness and enhances flavor perception
Aromatic Spice Blend
The spice profile defines the character of pumpkin biscotti, combining warm, earthy flavors that evoke autumn sensations. The standard spice combination includes cinnamon (one to two teaspoons), nutmeg (one teaspoon), ground ginger (half a teaspoon), and optional cloves (quarter teaspoon). These spices work synergistically to create complexity and depth, avoiding any single flavor dominating the palate. Some recipes utilize pumpkin pie spice blends, which consolidate these flavors into one convenient ingredient.
Optional Enhancements and Toppings
Many variations incorporate additional elements to amplify the biscotti experience. White chocolate chips or drizzle adds sweetness and richness, while chopped pecans or almonds provide textural contrast and nutty undertones. Dried cranberries introduce tartness that balances the sweetness, and vanilla extract enhances the overall aroma and flavor profile.
Step-by-Step Baking Process
Preparation and Temperature Management
Success with pumpkin biscotti begins with proper preparation. Preheat the oven to between 325 and 350 degrees Fahrenheit, as temperature consistency affects baking results. Line a large baking sheet with parchment paper or a nonstick baking mat to prevent sticking and ensure even browning. Room temperature butter and eggs combine more effectively with other ingredients, creating a smoother, more homogeneous dough.
The First Stage: Dough Creation
In a large mixing bowl, combine softened butter with granulated sugar, beating with a handheld mixer or standing mixer for approximately two minutes until the mixture becomes light and fluffy. This creaming process incorporates air, which contributes to the final texture. Beat in the egg (or eggs) and pumpkin puree until thoroughly combined, ensuring no streaks of unmixed ingredients remain. The mixture should appear well-integrated and slightly airy.
In a separate bowl, whisk together all dry ingredients—flour, baking powder, salt, and spices. Gradually add the flour mixture to the wet ingredients, mixing at low speed and stirring until a sticky dough forms. The dough consistency should be workable but not overly thick, similar to cookie dough rather than bread dough.
Shaping and First Bake
Divide the dough in half and shape each portion into a log approximately ten inches long and two and a half inches wide. Place the logs on the prepared baking sheet, spacing them several inches apart to allow for expansion. Using a wet spatula or bowl scraper, smooth the tops and sides of the logs, creating uniform, neat rectangles. This attention to shape ensures even baking and consistent thickness throughout.
Bake the logs for thirty-five to forty-five minutes, depending on oven calibration and log thickness, until the exterior turns golden brown and the logs feel firm to the touch. The logs should maintain slight give when pressed gently but should not feel soft throughout.
The Second Stage: Slicing and Final Bake
After the first bake, remove the logs from the oven and allow them to cool for ten to fifteen minutes until manageable. Using a serrated knife, cut the logs diagonally into slices approximately three-quarters of an inch thick. A serrated knife prevents the biscotti from crumbling or cracking during cutting. The diagonal cut is not merely aesthetic—it increases surface area and creates attractive presentation.
Stand the slices upright on the baking sheet, creating rows of biscotti standing perpendicular to the sheet’s surface. Return to the oven and bake for an additional ten to fifteen minutes until the cut sides turn golden and the biscotti achieve a crispy texture. Some recipes recommend flipping the biscotti halfway through this second bake to ensure even browning on both sides.
Achieving the Perfect Texture
The distinction between soft cookies and true biscotti lies in achieving the correct crispness. Pumpkin biscotti should be crunchy enough to satisfy dunking in coffee or hot chocolate but never so hard that they become unpleasant to bite into. The two-stage baking process creates this balance—the first bake develops flavor and initial firmness, while the second bake removes remaining moisture and creates the signature crunch.
Storing pumpkin biscotti in an airtight container maintains their crispness and prevents them from absorbing ambient moisture. Properly stored biscotti remain fresh for up to two weeks, making them excellent candidates for gift-giving or batch preparation ahead of entertaining.
Flavor Variations and Creative Adaptations
While traditional pumpkin biscotti follow a proven formula, creative variations expand the possibilities. Adding chocolate chips introduces richness and visual appeal, while dried fruit like cranberries or cherries provides tartness. Nut additions—whether pecans, almonds, or walnuts—create textural interest and complementary flavors. Some bakers experiment with replacing a portion of all-purpose flour with whole wheat flour, increasing nutritional density and introducing subtle earthiness.
Glaze options transform the presentation and taste experience. A simple vanilla glaze made from confectioners’ sugar, vanilla extract, and milk adds subtle sweetness, while white chocolate drizzle creates elegance and richness. A cinnamon sugar topping applied before the second bake intensifies the spice profile and adds crystalline texture.
Serving Suggestions and Pairings
Pumpkin biscotti shine when served alongside hot beverages. The traditional pairing with espresso showcases the cookies’ sophistication, while coffee, hot chocolate, or chai tea provide comforting accompaniments. The slight bitterness of strong coffee balances the sweetness of the cookies, creating a harmonious taste experience. For entertaining, presenting pumpkin biscotti in small portions or gift boxes demonstrates thoughtfulness and elegance.
Storage and Longevity
One of the practical advantages of pumpkin biscotti is their extended shelf life compared to most cookies. Airtight containers, whether glass jars or ceramic tins, preserve crispness and flavor for two to three weeks at room temperature. For longer storage, pumpkin biscotti freeze exceptionally well for up to three months, thawing at room temperature without textural degradation. This longevity makes them ideal for advance preparation before holiday gatherings or as planned gifts.
Troubleshooting Common Biscotti Challenges
| Challenge | Likely Cause | Solution |
|---|---|---|
| Biscotti remain too soft | Insufficient second baking or high humidity | Extend second bake time; store in airtight container with desiccant packet |
| Biscotti taste too dry | Excessive baking or low pumpkin puree ratio | Reduce baking time slightly; serve with beverage for dunking |
| Dough difficult to work with | Dough too sticky or ingredients not properly proportioned | Refrigerate dough before shaping; add flour in small increments if needed |
| Uneven browning | Inconsistent oven temperature or uneven log thickness | Rotate baking sheet during baking; shape logs uniformly |
| Cracks appearing during slicing | Logs cooled insufficiently or knife not serrated | Wait fifteen minutes before slicing; use sharp serrated knife |
Frequently Asked Questions
Can I use fresh pumpkin instead of canned puree?
Yes, fresh pumpkin puree works well if you prepare it correctly. Roast and puree fresh pumpkin, then strain through cheesecloth to remove excess moisture. The dough consistency may require slight adjustments depending on water content.
What is the best way to slice biscotti?
A sharp serrated bread knife works best for slicing biscotti. Cut at approximately a 45-degree angle for classic presentation, and allow logs to cool for ten to fifteen minutes before slicing to prevent crumbling.
How should I store biscotti long-term?
Store in airtight containers at room temperature for up to three weeks. For longer storage, freeze in freezer-safe containers for three months. Thaw at room temperature before serving.
Can biscotti be made gluten-free?
Yes, substitute all-purpose flour with a high-quality gluten-free flour blend designed for baking. The texture may differ slightly but remains satisfactory for dunking in hot beverages.
What makes biscotti different from other cookies?
The twice-baking process creates biscotti’s distinctive hardness and crunchiness, making them ideal for dunking. This methodology extends shelf life and creates a unique eating experience distinct from traditional cookies.
References
- Baking Basics and Best Practices — King Arthur Baking Company. 2024. https://www.kingarthurbaking.com/recipes/pumpkin-biscotti-recipe
- Traditional Italian Biscotti Techniques — Marcellina in Cucina. 2023. https://www.marcellinaincucina.com/pumpkin-empanadas-for-thanksgiving/
- Homemade Cookie Storage Guidelines — University of California Cooperative Extension. 2023. https://www.shelovesbiscotti.com/pumpkin-biscotti/
- Ingredient Selection for Autumn Baking — This Italian Kitchen. 2024. https://thisitaliankitchen.com/pumpkin-biscotti/
- Pumpkin Puree Standards and Quality — Food and Drug Administration. 2024. https://www.fda.gov