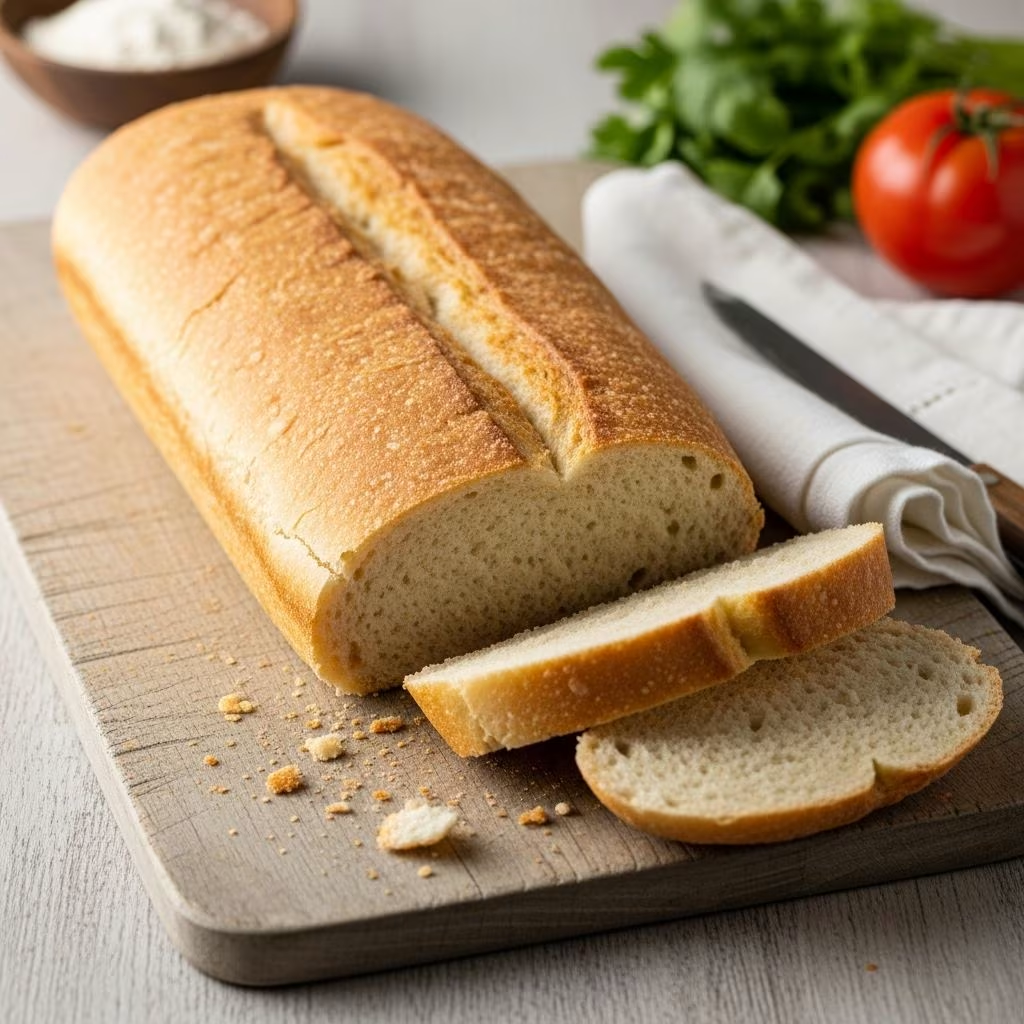
Traditional Cuban bread stands out for its unique combination of a thin, crackly crust and a soft, slightly tangy interior. Originating from Cuban immigrants in Florida, this bread is essential for the iconic Cubano sandwich but shines on its own or with simple toppings. Unlike standard white bread, it relies on a two-stage yeast process involving an overnight starter, which develops deeper flavors and better texture.
Why Cuban Bread is Special
Cuban bread, known as pan Cubano, differs from French or Italian loaves due to its specific ingredients and baking technique. It uses lard for richness, a preferment starter for chewiness, and a high hydration dough misted with water before baking to achieve that signature crust. Historically baked in long, baton-shaped loaves, it’s scored lengthwise and baked until golden.
- Crisp exterior: Created by spraying water on the dough and using steam in the oven.
- Light, airy crumb: From high hydration and double yeast activation.
- Mild tang: Developed overnight in the starter.
Ingredients for Perfect Cuban Bread
This recipe makes two 12-inch loaves, serving 8-10 people. Plan ahead as the starter needs overnight refrigeration.
Overnight Starter (Biga or Poolish Style)
- ½ cup warm water (about 100°F / 38°C)
- ½ cup all-purpose flour
- ½ teaspoon active dry yeast
Main Dough
- 1 package (2¼ teaspoons) active dry yeast
- 2 teaspoons white sugar
- ¾ cup warm water (100°F / 38°C)
- All but ¼ cup of the prepared starter (reserve for future batches)
- 3 tablespoons lard or vegetable shortening, softened
- 2 teaspoons fine sea salt
- 3 to 3½ cups bread flour (or 1½ cups all-purpose + 1½ cups bread flour)
Note: Lard provides authentic pork flavor, but shortening works for a neutral taste. Bread flour gives better structure due to higher protein content.
Step-by-Step Instructions
Day 1: Prepare the Starter
- In a small bowl, whisk together warm water, flour, and yeast until smooth—no lumps.
- Cover tightly with plastic wrap and refrigerate overnight (8-12 hours). It will bubble and develop a yeasty aroma.
Day 2: Mix and Knead the Dough
- Activate yeast: In a large mixing bowl, dissolve sugar and yeast in warm water. Let sit 10-15 minutes until foamy.
- Whisk the overnight starter until smooth, then add most of it to the yeast mixture (save ¼ cup for a new starter if desired).
- Incorporate lard, salt, and 1 cup flour. Stir with a wooden spoon until blended.
- Gradually add remaining flour, ½ cup at a time, until dough forms a shaggy mass.
- Turn onto a lightly floured surface and knead 8-10 minutes. Add flour sparingly if sticky—the dough should be soft and slightly tacky.
First Rise
Place dough in a lightly oiled bowl, cover with a damp cloth, and let rise in a warm spot until doubled, about 1-1½ hours.
Shape the Loaves
- Punch down dough and divide into two equal pieces (about 1 lb each).
- Press each into a 12×8-inch rectangle on a floured surface.
- Roll tightly from one long side into a 12-inch log, pinching seams to seal.
- Place seam-side down on a parchment-lined baking sheet or baguette pan. Score tops lengthwise with a lame or sharp knife.
Final Proof and Baking
Second Rise
- Cover loaves loosely with oiled plastic wrap. Let rise 45-60 minutes until puffy.
Bake to Golden Perfection
- Preheat oven to 400°F (200°C) with a rack in the lower third. Place a pan of hot water on the bottom rack for steam.
- Lightly mist loaves with water using a spray bottle.
- Bake 20-25 minutes, rotating pans halfway, until deep golden and hollow-sounding when tapped (internal temp 200°F / 93°C).
- Cool on a wire rack 30 minutes before slicing.
Pro Tips for Bakery-Quality Results
- Temperature control: Use a thermometer for water—too hot kills yeast, too cold slows activation.
- Flour adjustments: Humid days may require less flour; start low and add as needed.
- Steam is key: The water spray and oven steam prevent a thick, tough crust.
- Storage: Wrap in a cotton towel; best eaten same day. Freeze slices for up to 1 month.
| Issue | Cause | Solution |
|---|---|---|
| Dense crumb | Under-kneaded or insufficient rise | Knead longer; ensure warm proofing spot (75-80°F) |
| Pale crust | Lack of steam or low oven temp | Mist generously; verify oven thermometer |
| Too chewy | Over-kneaded | Knead until smooth, not tough (windowpane test) |
| Flat loaves | Over-proofed |
Variations and Substitutions
- Vegan version: Replace lard with coconut oil or vegan shortening.
- Gluten-free: Use a 1:1 GF flour blend with xanthan gum; results will differ in texture.
- Herbed loaf: Add 1 tbsp dried oregano to dough for a sandwich twist.
- Bigger batch: Double recipe; bake in batches to maintain oven steam.
Perfect Pairings: Beyond the Cubano
While Cuban bread defines the Cubano (roast pork, ham, Swiss cheese, pickles, mustard, pressed), try:
- Simple toast: Butter and garlic, broiled golden.
- Breakfast: Fried eggs and avocado slices.
- Soup dipper: With black bean or gazpacho.
- French toast: Soaks up custard beautifully due to open crumb.
Nutrition and Serving Facts
Per slice (1/12 loaf, ~50g): 140 calories, 3g fat (1.5g sat), 24g carbs (1g fiber, 1g sugar), 4g protein, 250mg sodium. Low in additives, high in satisfaction.
FAQs
Can I make Cuban bread without a starter?
The starter enhances flavor and texture, but for same-day bread, mix all ingredients at once and reduce second yeast to 1½ tsp. Expect milder taste.
How do I maintain the starter culture?
Reserve ¼ cup starter, mix with equal parts flour and water, refrigerate up to 1 week, then refresh before use.
Why use lard specifically?
Lard tenderizes dough and adds subtle richness mimicking commercial Tampa-style bakeries.
Can I bake in a Dutch oven?
Yes, for one loaf: preheat covered pot, bake 20 min covered, 10 uncovered.
Freezing instructions?
Bake, cool fully, wrap airtight, freeze up to 3 months. Thaw at room temp, refresh in 350°F oven 5 min.
History and Cultural Significance
Cuban bread evolved in Ybor City, Florida, in the late 1800s, blending Spanish pan de sala with local ingredients. Strict authenticity rules (no shortenings except lard, soft crust) were codified for competitions. Today, it’s a staple in Cuban-American cuisine, evoking immigrant heritage.
References
- Cuban Bread – Commence Operation Cubano Sandwich — Food Wishes (Chef John). 2017-01-01. https://foodwishes.blogspot.com/2017/01/cuban-bread-commence-operation-cubano.html
- How to Make Cuban Bread for Cubano Sandwiches — Food Wishes (YouTube). 2017 (approx.). https://www.youtube.com/watch?v=Qr2FlrUBs4E