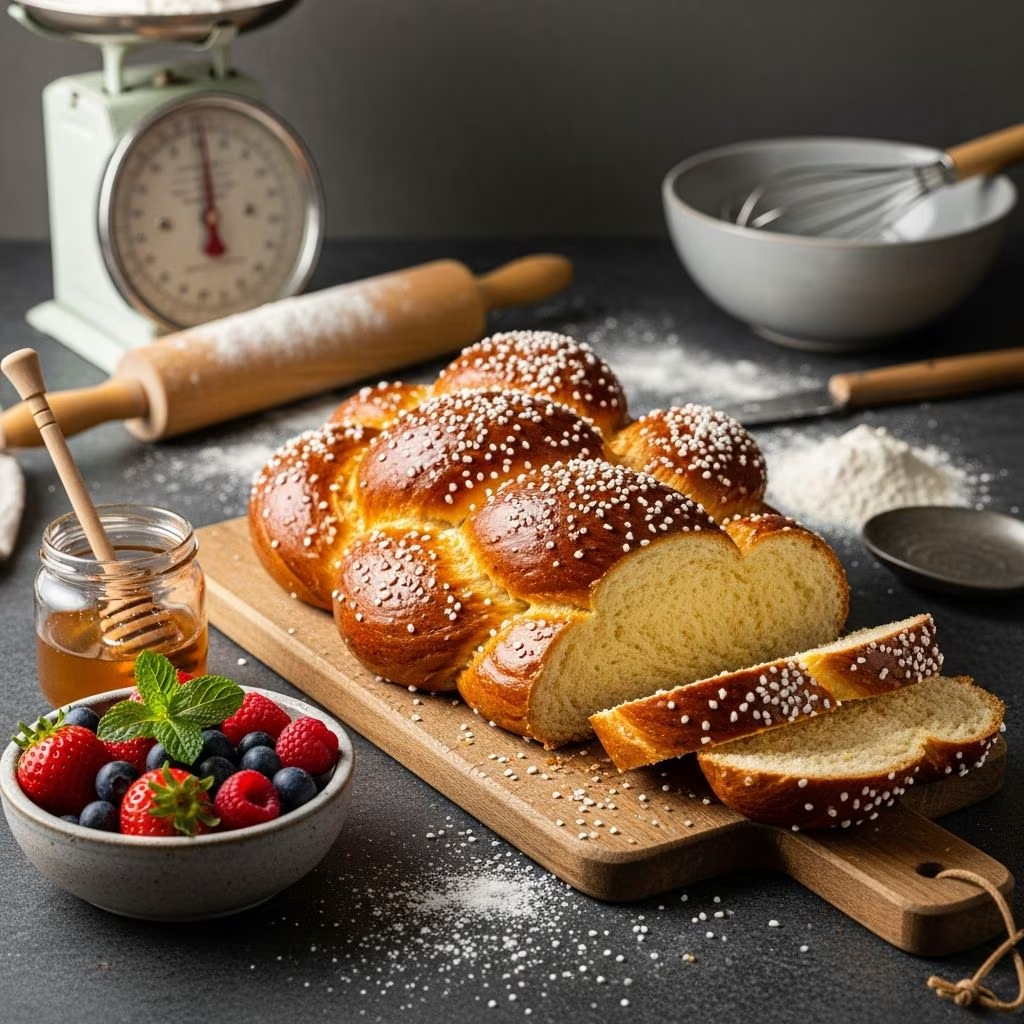
Sweet bread occupies a special place in home baking, bridging the gap between traditional bread and delicate pastries. Unlike dense commercial loaves, homemade sweet bread delivers a tender crumb, subtle sweetness, and buttery richness that transforms breakfast, afternoon tea, or dessert into something memorable. Whether you prefer the simplicity of quick breads or the rewarding complexity of yeast-based varieties, mastering sweet bread opens doors to countless flavor combinations and creative presentations.
Understanding the Foundation: Ingredients That Matter
The success of any sweet bread begins with understanding your core ingredients and their roles in the final product. Each component contributes specifically to texture, flavor, and structure.
Flour Selection and Its Impact
Flour serves as the structural backbone of your sweet bread. All-purpose flour remains the most accessible choice for home bakers, offering balanced protein content that yields tender yet stable crumbs. Bread flour, containing slightly higher protein levels, produces chewier textures ideal for yeast-based sweet breads where you want more structure and lift. For the lightest, most delicate results, some bakers prefer cake flour, though this requires adjusting liquid ratios slightly. The key is measuring flour correctly by spooning it into your measuring cup rather than scooping directly from the bag, which compacts the flour and results in denser bread.
The Sweet Elements
Granulated sugar dissolves readily and distributes evenly throughout your dough, creating uniform sweetness without grittiness. Beyond taste, sugar strengthens gluten development, extends shelf life by retaining moisture, and promotes golden browning during baking. Some recipes incorporate honey or brown sugar for deeper, more complex flavor profiles. The choice between sugars affects not only sweetness intensity but also the bread’s moisture retention and crumb structure. Typically, one-third to two-thirds cup of sugar per loaf provides noticeable sweetness without overwhelming the bread’s natural grain flavor.
Leavening Agents: Quick vs. Yeast
Quick breads rely on chemical leaveners like baking powder and baking soda, which react immediately upon mixing, requiring swift baking to capture rising gases. Yeast-based sweet breads use living microorganisms that ferment slowly over several hours, developing complex flavors and superior texture through extended rising periods. Quick breads reach the table in under an hour total, while yeast breads demand patience but reward it with superior keeping quality and sophisticated taste development.
Fats and Flavor Contributors
Butter contributes rich flavor and tender crumb structure by coating flour particles and limiting gluten network formation. Softened room-temperature butter incorporates smoothly into doughs, while melted butter requires different hydration adjustments. Some recipes use vegetable oil for more tender results and easier preparation. Eggs add richness, structure, and emulsifying properties that create fine crumbs. Milk, whether whole or buttermilk, provides moisture and subtle dairy flavor. Vanilla extract deepens sweetness perception and adds aromatic complexity that elevates even simple recipes.
Two Distinct Approaches: Quick Breads vs. Yeast Breads
The Speed and Simplicity of Quick Breads
Quick bread recipes deliver homemade results in approximately 45 minutes from start to finish. These recipes combine flour, sugar, baking powder or baking soda, salt, eggs, milk, and fat in a single bowl. The mixing process takes just minutes—only enough to combine ingredients until barely moistened. Over-mixing develops gluten excessively, resulting in tough, tunneled crumbs. Quick breads shine for their accessibility; no special equipment, timing expertise, or fermentation knowledge is required. They work beautifully as grab-and-go breakfast items, simple desserts, or gifts.
The Complexity and Reward of Yeast Breads
Yeast-based sweet breads demand more planning and attention but deliver superior flavor complexity and texture. The process begins with activating yeast in warm milk—typically heated to 110-115°F, warm enough to activate yeast without killing it. Once yeast foams, indicating viability, it combines with flour, sugar, butter, salt, and eggs. The dough then undergoes extended kneading to develop gluten fully, creating the strength needed for proper rise. After the initial rise, which typically requires 1-2 hours, bakers shape the dough into loaves, braids, rolls, or decorative forms before a final rise lasting 30 minutes to an hour. This extended fermentation allows wild yeasts and beneficial bacteria to develop complex flavors impossible to achieve through quick bread methods.
Mastering the Mixing and Kneading Process
Creating the Initial Dough
Begin yeast breads by blooming active dry yeast or instant yeast in warm milk with a small pinch of flour or honey. Wait five minutes for the mixture to become visibly foamy—this confirms yeast viability before investing other ingredients. Combine flour, sugar, and salt separately using a whisk to distribute ingredients evenly. Add the yeast mixture, along with beaten eggs and butter, stirring with a wooden spoon until a shaggy, rough dough forms. This stage requires minimal technique; your goal is simply combining ingredients, not developing structure.
Kneading Technique and Timing
Transfer the shaggy dough to a floured work surface and begin kneading using the heel of your hand to push dough away, then fold it back over itself. Rotate the dough a quarter turn and repeat rhythmically. After 5-7 minutes of hand kneading (or 4-5 minutes with a stand mixer), the dough transforms from sticky and rough to smooth, elastic, and tacky to the touch. The surface should appear slightly shiny and spring back slowly when poked. Over-kneading, while less of a concern than in quick breads, can toughen the dough if carried to extremes. The ideal endpoint is when the dough holds together cohesively yet retains slight tackiness, indicating proper gluten development without tearing.
Incorporating Butter Smoothly
For recipes requiring softened butter added mid-process, tear the cold or room-temperature butter into small chunks and knead them in gradually. This slower incorporation prevents the butter from being worked into isolated pockets; instead, it distributes evenly throughout, creating tender, uniform crumb structure. This step typically requires an additional 5-7 minutes of kneading. Some bakers find tearing the dough into chunks momentarily helps incorporate butter more efficiently.
The Rising Process: Developing Flavor and Structure
First Rise Considerations
Place kneaded dough in a lightly greased bowl, turning to coat all surfaces. Cover with a damp towel or plastic wrap and allow to rise in a warm, draft-free location for 60-90 minutes, or until doubled in bulk. A warm kitchen corner, turned-off oven, or proofing box maintains optimal temperature. Rising time varies based on ambient temperature; cooler kitchens require longer rises. The slow fermentation during this stage allows wild yeasts to contribute subtle flavor complexity and acids to develop that characteristic yeast bread tang.
Shaping for the Second Rise
Once doubled, gently punch down the dough to release excess gas. Divide into portions if creating multiple loaves or rolls. Shape each portion into a tight ball by tucking edges underneath, then roll into a rope for braiding, coil into a spiral for cinnamon roll variations, or simply place in a greased loaf pan. Proper shaping creates structural integrity for even rising and baking. If braiding, divide dough into three equal pieces by weight, roll each into a 20-inch rope, then braid tightly before placing on parchment-lined baking sheets.
Final Rise and Oven Spring
Cover shaped dough and allow a second rise of 30-60 minutes until puffy and visibly expanded. This second rise requires careful timing; over-proofed dough collapses during baking, while under-proofed dough yields dense crumbs. As a test, gently press the surface; if it springs back slowly, it’s ready. If it springs back immediately, allow more time. The dough will rise further during the initial 10 minutes of baking—called “oven spring”—so slight under-proofing is preferable to over-proofing.
Baking Temperature, Time, and Finishing Touches
Achieving the Perfect Crust and Crumb
Preheat your oven to 350°F for most sweet bread recipes. This moderate temperature allows the interior to bake through before the crust becomes too dark. Bake for 40-50 minutes depending on loaf size; smaller loaves like mini loaves bake faster (approximately 25-30 minutes), while full-size loaves require the longer duration. The bread is finished when the top is deep golden brown and the internal temperature reaches 190-195°F when measured with an instant-read thermometer inserted into the thickest part.
Enhancing Visual Appeal
Before baking, brush the surface with a simple egg wash (one egg beaten with a tablespoon of water) to create a shiny, professional finish. Sprinkle coarse sugar over the surface immediately after egg washing for a sparkly, indulgent appearance. Some bakers drizzle a glaze over cooled bread, combining powdered sugar with milk or cream for elegant finishing that adds subtle sweetness.
Cooling and Storage
Allow bread to cool in the pan for 10 minutes after removal from the oven—this sets the structure without causing the delicate interior to collapse. Turn out onto a wire rack to cool completely, allowing steam to escape and preventing soggy bottoms. Once completely cooled, store in an airtight container at room temperature for 2-3 days or wrap tightly and freeze for up to three months.
Flavor Variations and Creative Additions
Classic Enhancement Options
Vanilla extract deepens sweetness perception and adds aromatic complexity—use one to two teaspoons per loaf. Lemon zest contributes bright, fresh notes that balance sweetness beautifully. Cardamom, cinnamon, or nutmeg add warming spice complexity reminiscent of traditional European sweet breads. Almond extract in half-teaspoon quantities provides subtle depth without overpowering other flavors.
Mix-In Possibilities
Dried fruits like raisins, cranberries, or apricots absorb moisture during rising, remaining plump and flavorful in the finished loaf. Chocolate chips, chopped nuts, and fresh berries distribute throughout for pockets of flavor and textural interest. Add mix-ins after kneading, folding them gently into the dough to avoid crushing or uneven distribution. Be cautious not to add so many mix-ins that the dough’s structural integrity suffers.
Troubleshooting Common Sweet Bread Challenges
| Challenge | Likely Cause | Prevention Strategy |
|---|---|---|
| Dense, Heavy Crumb | Over-kneading, insufficient rising, or too much flour | Measure flour correctly, knead to proper elasticity only, allow adequate rising time, verify oven temperature accuracy |
| Dry Bread | Over-baking, insufficient fat or liquid, stale storage | Reduce baking time slightly, check oven thermometer accuracy, store in airtight container immediately after cooling |
| Gummy Interior | Under-baking or cooling insufficiently | Bake to proper internal temperature, cool completely on wire rack before slicing or storing |
| Sunken Top | Over-proofed dough, oven temperature too low | Reduce final rise time, verify oven temperature with independent thermometer |
| Pale Color | Oven too cool, insufficient browning time, or low egg content | Increase oven temperature by 25°F, verify oven thermometer accuracy, ensure adequate eggs and sugar |
Frequently Asked Questions
Can I make sweet bread without yeast?
Yes, quick bread recipes using baking powder or baking soda produce excellent results without yeast. These recipes sacrifice the complex fermentation flavors of yeast breads but deliver faster preparation and simpler technique. Quick breads are ideal when you lack time or yeast.
What if my yeast doesn’t foam when activated?
Non-foaming yeast indicates it’s dead or the water was too hot or too cold. Discard it and start with fresh yeast. Always verify yeast viability before mixing other ingredients. Yeast activated in water that’s too hot (above 120°F) dies. Water that’s too cool (below 100°F) won’t activate it adequately.
Can I refrigerate sweet bread dough overnight?
Absolutely. After kneading, place dough in a greased bowl, cover tightly, and refrigerate for 8-24 hours. Cold fermentation actually develops flavor more completely. When ready to bake, shape the dough while still cold, then allow it to rise at room temperature until nearly doubled before baking.
How do I know if my sweet bread is fully baked?
Insert an instant-read thermometer into the thickest part of the loaf without touching the sides; it should read 190-195°F. Additionally, the bottom should sound hollow when tapped with your knuckle, and the surface should be deep golden brown.
Why is salt important in sweet bread?
Salt strengthens gluten development, controls yeast fermentation speed, and enhances all other flavors. Bread without salt tastes flat and bland regardless of other ingredients. Don’t omit it.
Conclusion: Elevating Your Baking Repertoire
Sweet bread baking rewards patience, attention to detail, and willingness to learn from experience. Whether you choose quick breads for their accessibility or yeast breads for their complexity, understanding fundamental techniques transforms simple ingredients into memorable creations. Start with basic recipes, master the foundational skills, then experiment with variations and creative additions. Each loaf you bake teaches valuable lessons that improve subsequent efforts. The aroma of homemade sweet bread filling your kitchen, the pleasure of sharing warm slices with loved ones, and the satisfaction of creating something delicious from scratch make every minute of baking time worthwhile.
References
- Basic Sweet Yeast Dough Recipe — Chocolate with Grace. Accessed April 2026. https://chocolatewithgrace.com/basic-sweet-yeast-dough-recipe/
- Sweet Bread Recipe – Basic Sweet Yeast Dough — Let the Baking Begin. Accessed April 2026. https://letthebakingbegin.com/sweet-bread-recipe/
- Quick Sweet Bread Dough | No First Proof — Haniela’s. Accessed April 2026. https://www.hanielas.com/hanis-soft-yeast-dough/
- Old Fashioned Sweet Bread — The Southern Lady Cooks. Accessed April 2026. https://thesouthernladycooks.com/how-to-make-old-fashioned-sweet-bread/
- Sweet Bread Recipe — Julie Blanner. Accessed April 2026. https://julieblanner.com/sweet-bread-recipe/