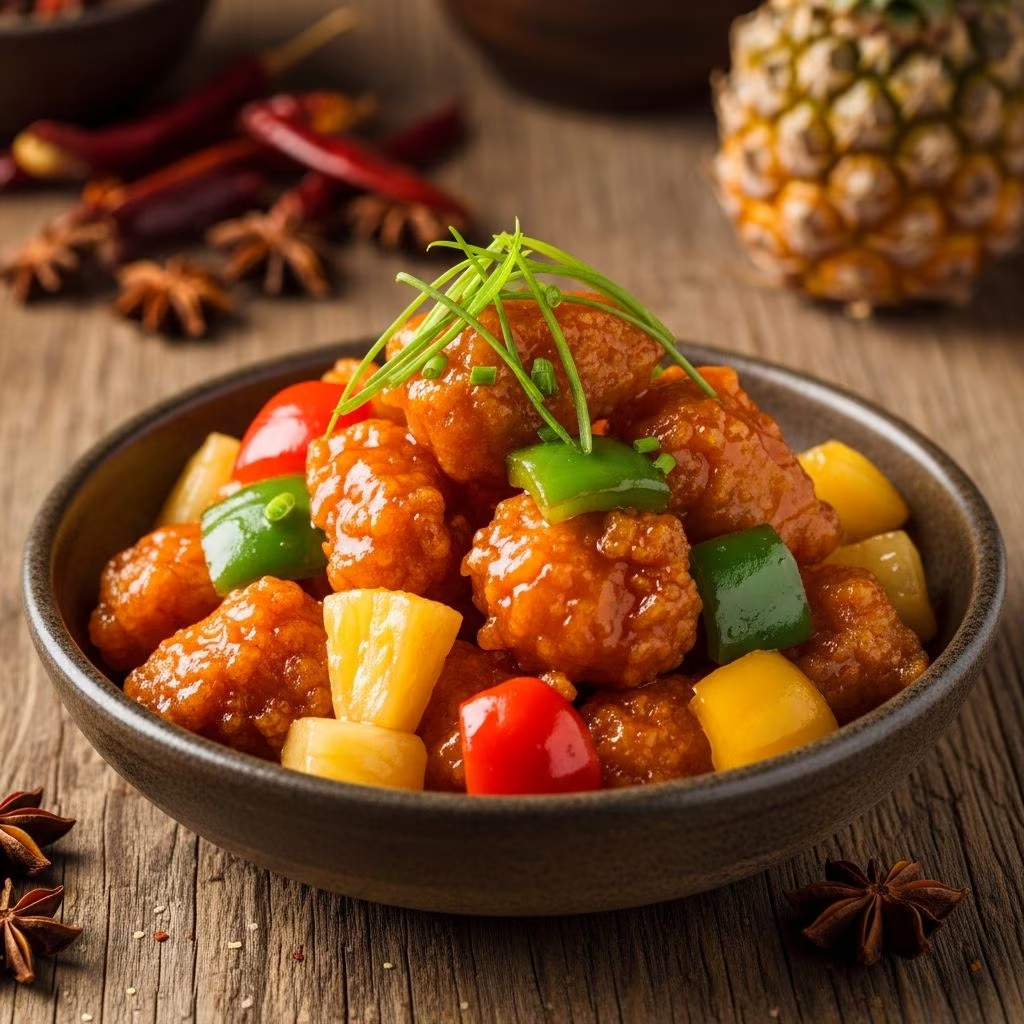
Transform your kitchen into a Chinese takeout haven with this comprehensive guide to sweet and sour chicken. This beloved dish combines tender chicken bites coated in a crunchy batter, tossed in a glossy sauce that balances sweetness, tang, and subtle savoriness. Whether you prefer deep-frying for ultimate crispiness or baking for a lighter version, you’ll find detailed methods, ingredient breakdowns, and customization ideas to suit any meal.
Why Sweet and Sour Chicken Captivates Home Cooks
The magic of sweet and sour chicken lies in its contrasts: the shatteringly crisp exterior gives way to juicy chicken, all enveloped in a sauce that’s equal parts addictive sweet from sugar or pineapple and sharp tang from vinegar. Originating from Cantonese cuisine, it has evolved in Western adaptations to include colorful bell peppers, onions, and pineapple chunks for texture and visual appeal. Home versions outperform takeout by allowing fresh ingredients and controlled seasoning.
Perfect for busy weeknights, this recipe serves 4-6 people in under an hour, making it ideal for family dinners or meal prep. Its versatility extends to using chicken thighs for richer flavor or breasts for leaner protein.
Essential Ingredients for Authentic Flavor
Great sweet and sour chicken starts with quality staples. Here’s a curated list divided by component:
- Protein: 1.5-2 lbs boneless, skinless chicken breasts or thighs, cut into 1-2 inch cubes for even cooking.
- Batter Base: Cornstarch (key for crispiness), all-purpose flour, eggs, baking powder, salt, pepper, and water or club soda for lightness.
- Sauce Essentials: Pineapple juice, white or rice vinegar, ketchup, brown sugar, soy sauce, garlic powder, and cornstarch slurry for thickening.
- Vegetables: Diced bell peppers (red, green, yellow for color), onion, and pineapple chunks (fresh or canned in juice).
- Frying Oil: Neutral vegetable, canola, or peanut oil heated to 365-375°F.
| Component | Quantity (Serves 4) | Substitution Options |
|---|---|---|
| Chicken | 1.5 lbs | Thighs for juiciness; tofu for vegetarian |
| Cornstarch (batter + sauce) | 1 cup + 2 tbsp | Arrowroot powder |
| Vinegar | 1/4-1/2 cup | Apple cider vinegar |
| Sugar/Brown Sugar | 3/4 cup | Honey or maple syrup |
| Pineapple Juice | 1 cup | Orange juice |
These measurements yield a balanced sauce; adjust sugar for less sweetness or vinegar for more zing.
Mastering the Crispy Chicken Coating
The hallmark of superior sweet and sour chicken is its batter: light, airy, and golden after frying. Two popular methods dominate: the egg-cornstarch dredge for ultra-crisp results and a wet batter for puffy texture.
Egg-Cornstarch Dredge Technique
- Cut chicken into uniform cubes and pat dry to ensure adhesion.
- Season with salt, pepper, and garlic powder.
- Dredge in cornstarch, dip in whisked eggs (vigorously beaten for airiness), then a second cornstarch layer for double crunch.
- Fry in 365°F oil for 3-4 minutes per side until golden; drain on racks, not paper towels, to preserve crispiness.
This method, seen in many takeout-style recipes, creates a shatter-proof shell that holds up in sauce.
Wet Batter Alternative
For a tempura-like puffiness, mix flour, cornstarch, baking powder, egg, and cold water into a smooth ribbon-stage batter. Let chicken marinate 15-30 minutes before frying at 375°F for 6-8 minutes. This yields thicker, lighter coating ideal for beginners.
Creating the Perfect Glossy Sauce
The sauce is the soul of the dish, simmering to a thickened glaze that clings without sogginess. Start with a base of pineapple juice, vinegar, ketchup, soy, sugar, and garlic.
- Simmer juice with aromatics like ginger, orange, or lemon slices for depth (20 minutes), then strain.
- Add sugars, vinegar, ketchup, and soy; thicken with cornstarch slurry (2 tbsp cornstarch + 2 tbsp water), stirring constantly to avoid lumps.
- Taste and tweak: more vinegar for sour, sugar for sweet, or chili flakes for heat.
For baked versions, pour sauce over browned chicken and bake at 350°F for 20-30 minutes, basting midway for caramelization.
Step-by-Step Cooking Process
Follow this foolproof sequence for restaurant results:
- Prep Chicken: Cube, season, and batter as chosen.
- Make Sauce: Simmer and thicken; set aside covered.
- Fry Chicken: In batches to maintain oil temperature; cool on racks.
- Sauté Veggies: In residual oil, cook onions and peppers 2-4 minutes until crisp-tender; add pineapple last.
- Combine: Toss fried chicken with veggies and sauce over medium heat for 1-2 minutes to coat without softening.
- Serve: Over jasmine rice, garnished with sesame seeds or green onions.
Total time: 45-60 minutes. Pro tip: Double-fry chicken (first at 325°F for 3 minutes, rest, then 375°F for 2 minutes) for extra crunch.
Healthier Baked Variation
For fewer calories, skip deep-frying: Pan-sear battered chicken in 1/4 cup oil until crisp (1-2 minutes per side), transfer to a baking dish, cover with sauce, and bake at 350°F for 20 minutes, basting twice. This method retains 80% of the crispiness with half the oil.
Vegetable Pairings and Add-Ins
Elevate with these combos:
- Classic: Red bell pepper, onion, pineapple.
- Tropical: Add mango chunks or carrots for crunch.
- Spicy: Jalapeños, crushed red pepper, or Sriracha in sauce.
- Low-Carb: Swap rice for cauliflower rice; use zucchini noodles.
Sauté veggies briefly to retain snap, enhancing the dish’s texture mosaic.
Common Mistakes and Fixes
- Soggy Chicken: Fry hotter, don’t overcrowd, or bake post-fry.
- Runny Sauce: Cook slurry longer; use cold water mix.
- Bland Flavor: Fresh garlic/ginger; marinate chicken 30 minutes.
- Overcooked Veggies: Add post-chicken; high heat quick stir.
Avoid these for takeout-level perfection every time.
Storage, Freezing, and Reheating
Store leftovers in airtight containers up to 4 days in fridge. Freeze cooked chicken and sauce separately for 2 months; thaw overnight. Reheat in 350°F oven 10-15 minutes or air fryer at 375°F for crisp revival. Microwave last resort—cover loosely to steam.
Nutritional Snapshot
| Serving (1/4 recipe) | Calories | Protein | Carbs | Fat |
|---|---|---|---|---|
| Fried Version | 550 | 35g | 60g | 20g |
| Baked Version | 420 | 38g | 55g | 12g |
Approximate values; varies by ingredients. High in protein, moderate carbs from sauce.
Frequently Asked Questions
Can I use frozen chicken?
Thaw completely and pat very dry; excess moisture ruins batter.
Gluten-Free Option?
Use rice flour or 1:1 gluten-free blend; tamari for soy sauce.
Make it Vegan?
Swap chicken for extra-firm tofu or cauliflower florets; use maple syrup.
How Spicy Can It Get?
Add 1-2 tsp chili garlic sauce or fresh chilies to sauce base.
Best Oil for Frying?
Canola or peanut for high smoke point; avoid olive oil.
Recipe Variations to Try
- Air Fryer: Spray battered chicken; 400°F for 12-15 minutes, shake halfway.
- Slow Cooker: Brown chicken, add all to cooker on low 4 hours.
- Extra Veggie: Broccoli, snap peas, or water chestnuts.
Experiment to personalize this timeless dish.
References
- Sweet and Sour Chicken — Hapanom. 2023-05-15. https://hapanom.com/sweet-sour-chicken/
- Sweet and Sour Chicken — The Cozy Cook. 2024-02-10. https://thecozycook.com/sweet-and-sour-chicken/
- Sweet and Sour Chicken Recipe — Taste and Tell Blog. 2023-11-20. https://www.tasteandtellblog.com/sweet-and-sour-chicken/
- Sweet and Sour Chicken Recipe — Small Town Woman. 2024-01-05. https://www.smalltownwoman.com/sweet-sour-chicken/
- Fast Sweet and Sour Chicken Stir Fry — Cooking Therapy. 2023-08-12. https://www.cooking-therapy.com/sweet-and-sour-chicken/
- Baked Sweet and Sour Chicken — Mel’s Kitchen Cafe. 2024-03-18. https://www.melskitchencafe.com/sweet-and-sour-chicken-updated/