Understanding Sous Vide Turkey Preparation
Sous vide cooking represents a paradigm shift in how home cooks approach poultry preparation. This precision cooking method uses controlled water temperatures to cook food evenly from edge to center, eliminating the common problems associated with traditional roasting. The technique provides consistent results because the food reaches the exact temperature you set and maintains it throughout the cooking process, preventing the overdone exterior and undercooked interior that often plagues conventional methods.
Turkey, being a large bird with varying muscle densities and thicknesses, benefits enormously from this controlled environment. The white meat cooks at a different rate than dark meat in traditional cooking, but sous vide’s uniform temperature ensures both reach the same doneness level simultaneously. This precision translates to meat that remains moist even when cooked to safe temperatures, a challenge that has frustrated home cooks for generations.
Essential Temperature Parameters for Turkey Cookery
Temperature selection stands as the most critical decision in sous vide turkey preparation. The ideal temperature range falls between 145°F (62.8°C) and 150°F (65.6°C), with 150°F (65.6°C) emerging as the consensus choice among experienced practitioners. This temperature achieves pasteurization—the elimination of harmful bacteria—while maintaining optimal tenderness and juiciness.
At 145°F, the turkey develops a slightly softer texture that appeals to those preferring a more delicate consistency. The 150°F temperature represents the sweet spot, providing both food safety assurance and the ideal balance between moistness and structural integrity of the meat fibers. Some practitioners experiment with temperatures as high as 160°F for more well-done results, though this approaches the upper boundary of the recommended range.
Understanding Cooking Durations
The cooking time depends primarily on turkey thickness rather than total weight. This fundamental principle separates sous vide methodology from traditional cooking approaches, which rely heavily on weight-based timing formulas. A properly spatchcocked turkey (flattened by removing the backbone) typically measures 3 to 4 inches thick, requiring 4 to 6 hours of cooking time at the recommended temperatures.
For whole turkeys that remain unspatchcocked, the thickest part of the breast determines the minimum cooking duration. A 12 to 16-pound turkey cooked whole may require extended times, sometimes reaching up to 24 hours, to ensure the innermost portions reach pasteurization temperature. However, the extended cooking time in sous vide differs significantly from roasting duration—the gentle, moist environment prevents meat degradation that occurs with prolonged traditional cooking.
Preparation Techniques and Pre-Cooking Procedures
Spatchcocking: The Game-Changing Preparation Method
Spatchcocking involves removing the backbone and flattening the bird completely, creating a uniform thickness that ensures even cooking. This technique offers multiple advantages: it reduces cooking time significantly, improves heat penetration, and simplifies handling within the sous vide vessel. To spatchcock a turkey, place it breast-side down, then use kitchen shears or a sharp knife to cut along both sides of the backbone and remove it entirely. Flip the bird breast-side up and press firmly to flatten.
The flattened configuration allows the turkey to lay uniformly in the cooking bag, ensuring consistent exposure to the circulating water. This preparation method proves especially valuable for home cooks with smaller sous vide equipment, as it dramatically reduces the vertical footprint required.
Seasoning Strategies and Flavor Development
Seasoning should occur before bagging to allow flavors to penetrate during the extended cooking period. Kosher salt applied to the skin and meat 6 to 24 hours before cooking acts as a dry brine, beginning the process of salt penetration and protein modification. This treatment improves moisture retention and enhances the final texture.
Traditional herbs like sage, rosemary, thyme, and fresh peppercorns can be incorporated directly into the cooking bag or placed beneath the skin. Some practitioners separate the skin from the meat using their fingers or blunt utensils, creating pockets where herbs can be positioned against the meat for maximum flavor impact. This requires careful work to avoid skin tears, though small incisions with a sharp knife facilitate this process.
Liquid Considerations for Optimal Results
While sous vide technically requires only water, incorporating complementary liquids enhances the final product and creates flavorful stock for gravy. Apple cider and chicken broth represent excellent choices, adding subtle sweetness and savory depth respectively. When using supplementary liquids, ensure the turkey remains fully submerged—this prevents uneven cooking and potential food safety issues.
The total liquid volume should fill the cavity and surround the bird completely. If insufficient liquid exists, adding water or additional stock maintains proper submersion. During the extended cooking process, periodic checks prevent evaporation from exposing portions of the turkey to air.
Bagging and Equipment Considerations
Vacuum Sealing Versus Ziploc Methods
Most home cooks use standard freezer-grade Ziploc bags or vacuum-sealable bags designed for sous vide applications. For a 14-pound turkey, a 2-gallon bag provides adequate space, while larger birds may require 3-gallon Big Bag Size L bags. The critical consideration involves ensuring bags remain fully submerged throughout cooking to prevent partial exposure and uneven results.
Double-bagging offers insurance against punctures from sharp bones protruding from the spatchcocked bird. This extra layer prevents liquid leakage and maintains the integrity of the cooking environment. When double-bagging, seal the inner bag first, then repeat with the outer bag to create redundant protection.
Managing Submersion and Evaporation
Maintaining consistent submersion requires monitoring throughout the cooking period. Water naturally evaporates during extended cooking sessions, potentially exposing portions of the turkey. Checking the bag every 1-2 hours allows for timely water top-ups that maintain proper submersion. Some practitioners use weights to ensure consistent downward positioning of the bag.
The Cooking Process and Temperature Management
Setting Up Your Sous Vide System
Begin by setting your immersion circulator to the target temperature approximately 30-45 minutes before placing the turkey in the water bath. This preheat period allows the water to stabilize at the desired temperature and ensures consistent cooking from the moment the turkey enters the environment. Use a container large enough to accommodate the bagged turkey with water covering it by several inches—typically a large stockpot or dedicated sous vide container works effectively.
Monitoring and Timing Considerations
Once the turkey enters the water bath, the primary task becomes monitoring submersion and noting the elapsed time. Set a timer to track cooking duration and check the bag periodically. For standard-sized turkeys, plan for 4 to 6 hours minimum at 150°F. Larger whole turkeys may require 24 hours to ensure complete pasteurization throughout.
The extended cooking time does not result in the progressive overcooking that occurs with traditional roasting because the temperature never exceeds the set point. The turkey reaches the target temperature and remains there, suspended in an ideal cooking state. This allows flexibility in timing—if dinner plans shift, the turkey can remain safely in the water bath for extended periods with minimal quality degradation.
Finishing Techniques for Enhanced Presentation
The Critical Cooling Phase
Upon completion of sous vide cooking, remove the bag and immediately transfer it to an ice water bath. This shock-chilling process halts the cooking process instantly, preventing carryover cooking that would otherwise continue as the turkey retains residual heat. Maintain the ice bath for 10-15 minutes until the turkey cools to approximately room temperature.
This cooling phase serves practical purposes beyond food safety. It allows the meat to reabsorb moisture into the muscle fibers, enhancing the final texture. Additionally, cooled meat handles more easily during removal from the bag and setup for the finishing step.
Skin Crisping and Browning Methods
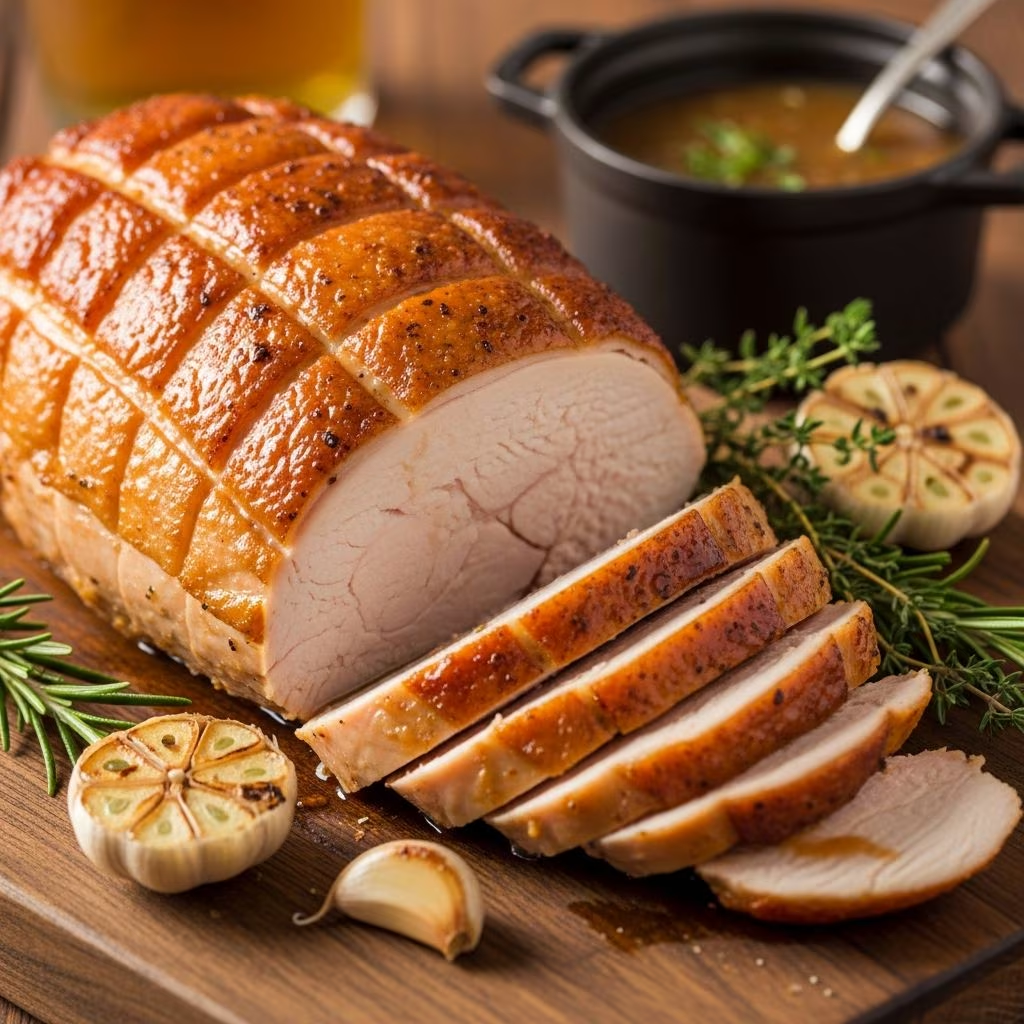
After cooling and removing the turkey from its bag, pat the skin thoroughly dry with paper towels or clean kitchen cloths. Moisture on the skin prevents browning during the high-heat finishing phase. Brush the skin lightly with oil or melted butter to facilitate even browning and promote crispness.
Finishing options include traditional roasting in a preheated 450°F to 500°F oven for 20-30 minutes, depending on turkey size. High-heat broiling or grilling provides alternative finishing methods that can brown the skin more evenly in some cases. The objective involves achieving golden-brown skin that crackles while maintaining the internal moisture and doneness achieved through sous vide cooking. The brief, high-heat exposure should not raise internal temperatures significantly—typically only 5°F to 10°F—resulting in turkey that reaches serving temperature at approximately 140°F to 145°F.
Creating Restaurant-Quality Gravy and Stock
The liquid remaining in the sous vide bag represents liquid gold for gravy preparation. This flavorful stock contains rendered turkey fat, dissolved collagen, and absorbed seasoning components. Strain this liquid through a fine-mesh sieve to remove particulates, then use it as the base for gravy preparation by incorporating a roux (equal parts fat and flour) and simmering until thickened.
For a more refined approach, separate the fat from the stock by refrigerating overnight—the fat rises to the top and solidifies, making separation straightforward. The resulting stock provides an intensely flavored foundation for gravy or can be reserved for future culinary applications including soups, sauces, and risotto preparations.
Practical Timeline for Holiday Planning
| Timeline Phase | Task | Duration Before Serving |
|---|---|---|
| Day Before (Optional) | Apply dry brine with kosher salt | 18-24 hours |
| Day Of – Morning | Prepare turkey and preheat sous vide | 7 hours |
| Sous Vide Cooking | Cook turkey at 150°F | 4-6 hours |
| Cooling Phase | Ice water bath | 15 minutes |
| Refrigeration (Optional) | Hold in refrigerator | Up to 2 days |
| Final Preparation | Oven finishing and resting | 40 minutes |
Frequently Asked Questions About Sous Vide Turkey
Can I cook a whole turkey without spatchcocking?
Yes, whole unflattened turkeys can be cooked sous vide, though the process requires significantly extended cooking times. A 12 to 16-pound whole turkey may require 18-24 hours to ensure the thickest interior portions reach pasteurization temperature. The extended duration compensates for the increased thickness that heat must penetrate. Most home cooks prefer spatchcocking to reduce cooking time while achieving identical results.
What temperature ensures food safety for turkey?
The USDA recommends turkey reach an internal temperature of 165°F to eliminate harmful pathogens. However, sous vide cooking at lower temperatures achieves pasteurization—the elimination of bacteria—through time and temperature combination. At 150°F for 6 hours, the turkey becomes safe to consume despite not reaching 165°F, as the extended exposure time eliminates pathogens just as effectively.
Can I prepare turkey sous vide days in advance?
Absolutely. After cooking and cooling, the turkey can be refrigerated for up to 2 days before the final finishing step. This flexibility allows complete separation of cooking from final preparation, reducing day-of stress. Simply reheat in a 400°F oven for 20-25 minutes to warm through and brown the skin before serving.
What size sous vide container do I need?A container large enough to hold several gallons of water and accommodate the bagged turkey with several inches of water coverage proves sufficient. Standard large stockpots work effectively, though dedicated sous vide containers provide optimal vessel design for circulator attachment and water circulation.Troubleshooting Common Issues
If the turkey appears undercooked after the finishing step, the ice bath may have cooled it excessively. Ensure the finishing oven is fully preheated to 450°F minimum before placing the turkey inside. If the skin fails to crisp adequately, pat the turkey more thoroughly dry and brush with additional oil. Conversely, if the skin browns too quickly before the turkey reaches serving temperature, reduce the oven temperature to 400°F and extend the cooking time slightly.
Should portions of the turkey appear exposed during cooking, immediately add additional water to restore full submersion. Check the bag every hour to prevent this occurrence. If the immersion circulator fails to maintain consistent temperature, verify the device’s accuracy with a secondary thermometer—equipment malfunction can affect results.
Advantages Over Traditional Roasting Methods
Sous vide turkey preparation eliminates several traditional cooking challenges simultaneously. The uniform temperature prevents the white meat from drying while dark meat cooks through. The extended gentle cooking allows for deeper seasoning penetration and collagen breakdown, resulting in more tender meat. The predictable timing allows precise coordination with side dishes and other meal components. Most significantly, the method consistently produces restaurant-quality results in a home kitchen, removing the element of chance that characterizes traditional roasting.
References
- Simple Sous Vide Whole Turkey Recipe and How To Guide — Amazing Food Made Easy. 2021-10-07. https://www.amazingfoodmadeeasy.com/sous-vide-times-temperatures/how-to-sous-vide/whole-turkey
- Sous Vide Whole Turkey — Bunsen Burner Bakery. https://www.bunsenburnerbakery.com/sous-vide-whole-turkey/
- The Foolproof Sous Vide Thanksgiving Turkey — Sous Vide Ways. https://sousvideways.com/foolproof-sous-vide-turkey/
- Sous Vide Thanksgiving Turkey — Williams Sonoma. https://www.williams-sonoma.com/recipe/sous-vide-thanksgiving-turkey.html
- Sous Vide Turkey is the ONLY Way – Juicy & Moist Meat Every Time! — YouTube. https://www.youtube.com/watch?v=5PqGUiw-wGE
- USDA Food Safety and Inspection Service: Poultry Food Safety — U.S. Department of Agriculture. https://www.fsis.usda.gov/food-safety/safe-food-handling-and-preparation/meat/poultry