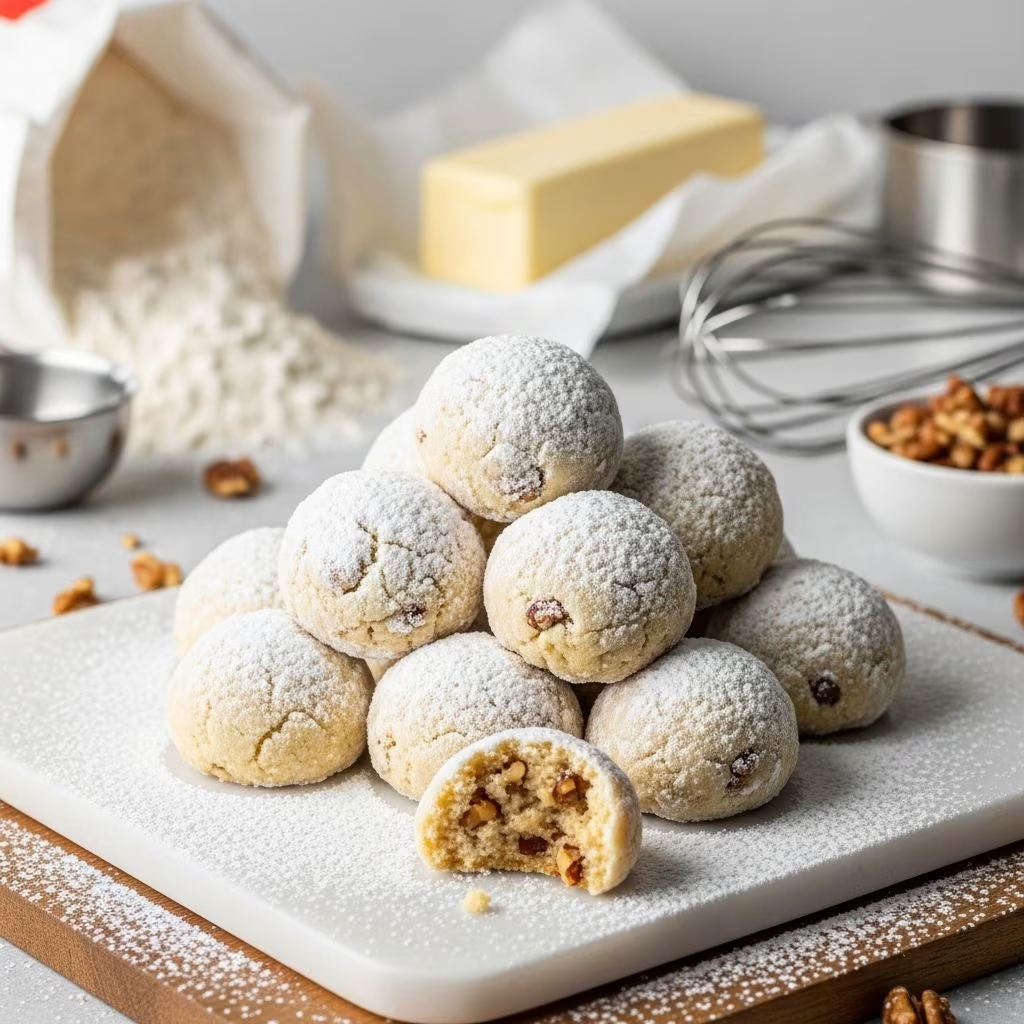
Snowball cookies represent one of the most beloved festive treats in American baking traditions. These delicate, melt-in-your-mouth confections combine a buttery shortbread base with finely chopped nuts and a generous coating of powdered sugar that gives them their distinctive snowy appearance. Whether you’re preparing for holiday celebrations or simply craving a sophisticated cookie that requires minimal ingredients, snowball cookies offer an elegant solution that impresses both family and guests.
The beauty of snowball cookies lies in their simplicity. Unlike elaborate cakes or pastries requiring specialized techniques, these cookies come together with straightforward mixing methods and basic kitchen equipment. The result is a tender, crumbly cookie with a delicate texture that dissolves on your tongue, leaving behind subtle flavors of butter, vanilla, and toasted nuts.
Understanding the Essential Ingredients
Creating authentic snowball cookies begins with understanding each ingredient’s role in the final product. The foundation of successful snowball cookies relies on quality ingredients in precise proportions.
The Role of Butter in Cookie Development
Unsalted butter serves as the primary fat component and contributes significantly to the cookie’s texture and flavor profile. Room-temperature butter incorporates more easily into the dough, creating a lighter crumb structure. Cold or partially melted butter produces inconsistent results, either creating tough cookies or preventing proper mixing. Most traditional recipes call for one cup of butter, which provides the rich, tender texture characteristic of quality snowball cookies.
Sugar Components and Their Functions
Snowball cookie recipes employ two distinct types of sugar, each serving different purposes. Granulated sugar mixed into the dough typically ranges from two tablespoons to one-third cup, depending on the recipe variation. This sugar helps create structure and provides subtle sweetness without overpowering the buttery flavor. The second component, powdered sugar, appears both in the dough (usually one-half cup) and as the exterior coating. The powdered sugar used for dusting can range from one-half cup to over one cup, depending on how thickly you prefer your snowy coating.
Nuts: Texture and Flavor Builders
Either pecans or walnuts provide essential texture and nutty depth to snowball cookies. Recipes typically call for between three-quarters cup and one cup of finely chopped nuts. Some bakers prefer lightly toasting their nuts before chopping to intensify the flavor, though this step remains optional. The size of your nut pieces matters significantly—finely chopped nuts distribute evenly throughout the dough and prevent large chunks that might break the cookie’s delicate structure.
Flavor Enhancers
Vanilla extract appears in virtually every snowball cookie recipe, with amounts ranging from one teaspoon to two teaspoons. This ingredient provides warmth and depth. Many bakers find that adding one-quarter teaspoon of almond extract alongside vanilla creates an aromatic complexity that elevates the cookie experience. Some variations incorporate hazelnut liqueur for sophisticated flavor development.
Salt and Flour: The Structural Foundation
All-purpose flour comprises the structural backbone of snowball cookies, with recipes calling for approximately two cups. Salt, added in small quantities (one-quarter to one-half teaspoon), enhances flavor perception and balances sweetness. These two ingredients work together to create a tender dough that holds together without becoming tough or dense.
Step-by-Step Preparation Process
Preparing Your Workspace and Equipment
Before beginning, preheat your oven to 350°F and line baking sheets with parchment paper. This preparation prevents sticking and ensures even browning. Gather all ingredients and measure them precisely using the spoon-and-level method for flour to avoid packing too much into your measuring cup.
Combining Dry Ingredients
In a medium mixing bowl, combine flour, finely chopped nuts, and salt. Stirring these ingredients together distributes the nuts evenly throughout, preventing clumping during the final mixing stage. This dry mixture remains ready while you prepare the wet components.
Creating the Butter Foundation
Place softened butter into your mixing bowl and beat on high speed using an electric mixer until smooth and creamy. This process, called creaming, incorporates air into the butter, creating a lighter final texture. Scrape down the sides of the bowl frequently to ensure all butter incorporates fully.
Incorporating Sugar and Flavorings
Reduce your mixer speed to medium and add granulated sugar and vanilla extract. Continue beating until the mixture becomes light, fluffy, and noticeably paler in color. This stage typically takes two to three minutes. If using almond extract or other flavor additions, incorporate them now, scraping down the bowl as needed.
Final Dough Assembly
Gradually add the flour mixture to the wet ingredients, beating on low speed to prevent over-mixing. Over-mixed dough produces tough, dense cookies rather than the tender, crumbly texture you desire. Mix only until the ingredients combine fully, then stop. If your recipe calls for chilling, cover the dough with plastic wrap and refrigerate for at least two hours, or up to two days. Chilling allows the flavors to meld and makes rolling the dough easier.
Shaping and Baking Techniques
Forming Cookie Balls
Remove chilled dough from the refrigerator and let it sit at room temperature for approximately ten minutes. This brief resting period prevents the dough from cracking while shaping. Using a small cookie scoop or tablespoon, portion the dough into balls approximately one inch in diameter. Place these balls on your prepared baking sheets, spacing them about one-and-a-half inches apart to allow for minimal spreading.
Baking Time and Temperature
Bake your shaped cookies at 350°F for twelve to fifteen minutes. The cookies should appear very lightly golden on the bottom; they will continue cooking slightly after removal from the oven. Overbaking results in crispy rather than tender cookies, so watch them carefully during the final minutes. Remove from the oven when the edges show just a hint of color.
Cooling and Handling
Allow cookies to cool on the baking sheet for five minutes, then transfer them to a wire rack to cool completely. Warm cookies remain fragile and may break during handling. Once fully cooled, these cookies become sturdy enough for coating.
The Art of Powdered Sugar Coating
Timing Your Coating
Properly coating your cookies with powdered sugar requires completely cooled cookies. Warm cookies absorb the powdered sugar unevenly, resulting in patchy coverage. Allow cookies to reach room temperature before proceeding with the coating process.
Coating Methods
Pour approximately one cup of powdered sugar into a shallow bowl. Working with a few cookies at a time, gently roll each cookie in the powdered sugar, ensuring complete coverage. For a thicker, more dramatic snowy appearance, roll the cookies twice, allowing them to rest briefly between coatings. Some bakers prefer placing powdered sugar in a sealed container with a few cooled cookies and shaking gently until fully coated.
Storage Considerations
The powdered sugar coating can absorb moisture during storage. Store finished cookies in an airtight container at room temperature for up to one week. For longer storage, freeze uncoated cookies for up to one month and apply the powdered sugar coating shortly before serving. This approach maintains the visual appeal of your presentation.
Creative Flavor Variations and Enhancements
Extract Alternatives and Combinations
Beyond traditional vanilla, various extracts offer exciting flavor profiles. Lemon or orange extract provides bright, citrusy notes. Rum or almond extract adds sophistication and depth. Experiment with single extracts or combine complementary flavors—vanilla with almond, or vanilla with a hint of peppermint extract for holiday-themed variations.
Mix-In Possibilities
The basic snowball cookie dough accepts numerous mix-ins without compromising structure. Mini chocolate chips add richness, while crushed candy canes provide festive flair. Finely chopped dried fruit, such as cranberries or apricots, contribute tartness and visual interest. Sprinkles or decorative candies can be pressed into the warm dough immediately after baking.
Stuffed Snowball Variations
For a surprising interior, consider creating stuffed snowballs. Form the dough into two thin discs, place your filling—such as a small piece of chocolate, a Rolo candy, or a teaspoon of nut butter—in the center of one disc, then carefully press the second disc on top and seal the edges. Bake as directed for a cookie that surprises with every bite.
Chocolate-Dipped Versions
After coating with powdered sugar, lightly dip the bottom half of each cookie into melted chocolate for an elegant presentation. This variation combines the delicate snowball exterior with sophisticated chocolate flavor. Allow the chocolate to set on parchment paper before stacking or storing.
Troubleshooting Common Cookie Challenges
| Problem | Possible Cause | Solution |
|---|---|---|
| Tough, dense cookies | Over-mixing dough or butter too warm | Mix only until combined; ensure butter is room temperature but not soft |
| Cookies spreading too much | Insufficient chilling or oven too warm | Chill dough longer; verify oven temperature with an oven thermometer |
| Powdered sugar coating won’t stick | Cookies still warm or coating too dry | Allow complete cooling; slightly dampen your fingers before rolling |
| Cookies browning too quickly | Oven temperature too high | Lower temperature by 25°F; check oven accuracy with thermometer |
| Cookies remain too soft after cooling | Under-baking or humidity level too high | Bake longer; store with desiccant packs in humid climates |
Frequently Asked Questions About Snowball Cookies
Can I use salted butter instead of unsalted?
While some recipes incorporate salted butter, using unsalted butter provides better control over total salt content. If substituting salted butter, reduce added salt by one-quarter teaspoon to prevent over-salting.
How should I store snowball cookies for maximum freshness?
Store cooled, coated cookies in an airtight container at room temperature for up to seven days. For extended storage, freeze uncoated baked cookies for up to one month. Apply powdered sugar coating immediately before serving for optimal appearance.
Can I prepare the dough in advance?
Yes, cookie dough can be refrigerated for up to two days or frozen for up to six weeks. Thaw frozen dough in the refrigerator overnight before shaping and baking. This advance preparation allows for fresh-baked cookies on demand.
What’s the difference between snowball cookies and wedding cookies?
These terms often refer to the same cookie—a butter and nut-based shortbread rolled in powdered sugar. Wedding cookies may occasionally include different nut varieties or slight recipe variations, but the essential preparation method remains identical.
How many cookies does a typical recipe yield?
Most snowball cookie recipes using one cup of butter produce approximately thirty to forty cookies, depending on sizing. Larger portions yield fewer cookies; smaller portions increase the total count.
Perfecting Your Snowball Cookie Experience
Creating exceptional snowball cookies requires attention to ingredient quality, precise measurement, and careful execution of each preparation stage. The combination of room-temperature butter, finely chopped nuts, and delicate handling produces cookies with the ideal texture—crispy exterior yielding to a tender, crumbly interior that dissolves on the tongue.
Whether you’re baking for holiday gatherings, gift-giving occasions, or simple personal enjoyment, snowball cookies provide a rewarding baking project that delivers impressive results with minimal complexity. The versatility of the basic recipe accommodates numerous flavor variations and creative enhancements, ensuring that these cookies remain relevant across all seasons and celebrations.
By following the comprehensive guidance provided in this article—from ingredient selection through final powdered sugar coating—you’ll develop the confidence and skills necessary to produce restaurant-quality snowball cookies in your home kitchen. Practice and experimentation with flavor variations will help you discover your preferred approach, creating a signature version that becomes your baking trademark.
References
- Buttery Snowball Cookies with Walnuts or Pecans — Beaming Baker. Accessed April 2026. https://beamingbaker.com/snowball-cookies/
- The Best Snowball Cookies Recipe – Great-Grandma’s Buttery Snowball Cookie Recipe — Kristine’s Kitchen Blog. Accessed April 2026. https://kristineskitchenblog.com/butter-snowballs/
- Classic Snowball Cookies Recipe — Bigger Bolder Baking. Accessed April 2026. https://www.biggerbolderbaking.com/snowball-cookies/
- Snowball Cookies — Half Baked Harvest. Accessed April 2026. https://www.halfbakedharvest.com/snowball-cookies/
- The ULTIMATE Guide to Snowball Cookie Recipes — Crazy for Crust. Accessed April 2026. https://www.crazyforcrust.com/snowball-cookie-recipes-guide/