Preparing meals for multiple people often feels overwhelming, especially when recipes demand constant attention and use multiple cooking vessels. Sheet pan quesadillas offer an elegant solution by consolidating the entire cooking process into a single baking vessel. This method transforms a typically time-intensive cooking technique into a straightforward assembly-and-bake affair that produces consistently crispy, evenly melted results without requiring you to stand over the stovetop.
Understanding the Sheet Pan Quesadilla Concept
Traditional quesadillas require individual attention on a skillet, flipping each one at precisely the right moment to achieve golden-brown exteriors while maintaining melted cheese interiors. Sheet pan quesadillas reimagine this process by stacking tortillas in layers on a large baking surface, creating one enormous quesadilla that gets sliced into individual servings. This approach eliminates the need for constant monitoring and allows you to prepare other components while the oven handles the cooking.
The fundamental principle involves arranging tortillas as both a base and top layer, with a flavorful filling sandwiched between them. By placing a weighted baking sheet on top during the initial baking phase, you ensure even heat distribution and proper cheese melting throughout the entire creation. The result is a uniform texture across all portions, which becomes nearly impossible to achieve when cooking individual quesadillas sequentially.
Essential Ingredients for Success
Sheet pan quesadillas begin with a foundation of soft flour tortillas, typically in the 10-inch size range. The quantity depends on your baking sheet dimensions, but most recipes require between 8 and 16 tortillas to adequately cover a standard baking surface with appropriate overlap. Avoid corn tortillas, as they become brittle when baked and don’t provide the necessary structural integrity for this cooking method.
Protein and Vegetable Components
The filling forms the heart of your sheet pan quesadilla, and this is where creativity flourishes. Cooked chicken serves as an excellent protein foundation—rotisserie chicken offers convenience, while homemade preparations provide cost savings. Ground beef mixed with taco seasoning presents an alternative that adds substantial flavor and textural variety.
Vegetables contribute both nutritional value and flavor complexity. Sautéed bell peppers and onions provide a classic combination, while jalapeños introduce heat for those preferring spicier profiles. Corn, black beans, and minced cilantro add freshness and authenticity. Some recipes incorporate bacon for smoky depth, while others include sour cream to create a creamy textural contrast against the crispy exterior.
Cheese and Seasoning Considerations
Shredded cheese acts as both a binding agent and a flavor amplifier. Most recipes call for between 2 to 3 cups of shredded cheese distributed evenly across the filling. Mild cheeses like Monterey Jack or a blend of Mexican cheeses work well without overpowering other flavors. The cheese should be loosely shredded rather than pre-packaged varieties, as the latter contain anti-caking agents that prevent proper melting.
Seasoning profiles can range from subtle to bold depending on your preferences. Common additions include garlic powder, onion powder, chili powder, cumin, salt, and pepper. Pre-made taco seasoning packets simplify this step when time constraints exist. Fresh salsa stirred directly into the filling provides moisture and flavor intensity without requiring additional preparation.
Preparing Your Workspace and Equipment
Success with sheet pan quesadillas requires proper preparation before assembly begins. Start by preheating your oven to the temperature specified in your chosen recipe—typically between 375°F and 425°F. A higher temperature produces crisper exteriors more quickly, while lower temperatures allow more gradual melting and reduce the risk of burning.
Grease your baking sheet generously with cooking spray, oil, or melted butter. Some cooks prefer parchment paper for easier cleanup and more even browning. Arrange your workspace with all ingredients measured and prepared before you begin assembling, as the actual construction happens relatively quickly once you begin laying down tortillas.
Perhaps most critically, you’ll need a second sheet pan or oven-safe baking sheet to place on top during the initial baking phase. This weighted covering proves essential for pressing the tortillas together, promoting even heating, and ensuring the cheese melts uniformly throughout rather than pooling in certain areas. The top pan should be roughly equivalent in size to your baking sheet to distribute weight evenly.
Assembly Techniques and Layering Strategies
Begin by arranging your bottom layer of tortillas across the greased sheet pan. A common approach involves placing tortillas around the perimeter with approximately one-third of each tortilla overhanging the pan’s edge. This overhang allows you to fold the edges inward after adding the filling, creating a seal that keeps the interior components contained. Place additional tortillas in the center to eliminate any gaps that might allow filling to escape during baking.
Once your bottom layer is complete, spread the prepared filling evenly across the entire tortilla surface. Work methodically to ensure consistent distribution—clumped filling creates uneven baking and texture inconsistencies. Top the filling layer with your measured cheese, again distributing it as uniformly as possible across the entire surface.
Next comes the top tortilla layer, arranged similarly to the bottom layer with overlapping pieces creating complete coverage. Fold the overhanging tortillas from the bottom layer inward, creating an envelope effect that seals the filling inside. Brush the entire top surface with melted butter or oil, which promotes browning and creates the desired crispy exterior texture.
The Baking Process and Timing Considerations
Place your weighted sheet pan on top of the assembled quesadilla and transfer both to the preheated oven. The weight of the top pan serves multiple purposes: it keeps tortillas pressed together throughout the cooking process, promotes even heat distribution, and prevents cheese from bubbling up and escaping. Bake for approximately 20 minutes, maintaining the top pan in place throughout this period.
After the initial 20-minute baking phase, carefully remove the top pan and return the quesadilla to the oven for an additional 5 minutes. This final phase allows the exposed top surface to brown and crisp without the protective barrier of the upper pan. Some recipes include a brief broil cycle at this stage to achieve deeper browning, typically lasting 1 to 3 minutes depending on your broiler’s intensity.
The quesadilla is ready when the tortillas achieve a light golden color and feel crispy to the touch. Remove it from the oven and allow it to rest for 2 to 3 minutes before cutting, which allows the cheese to set slightly and makes cutting cleaner lines significantly easier.
Slicing and Serving Your Creation
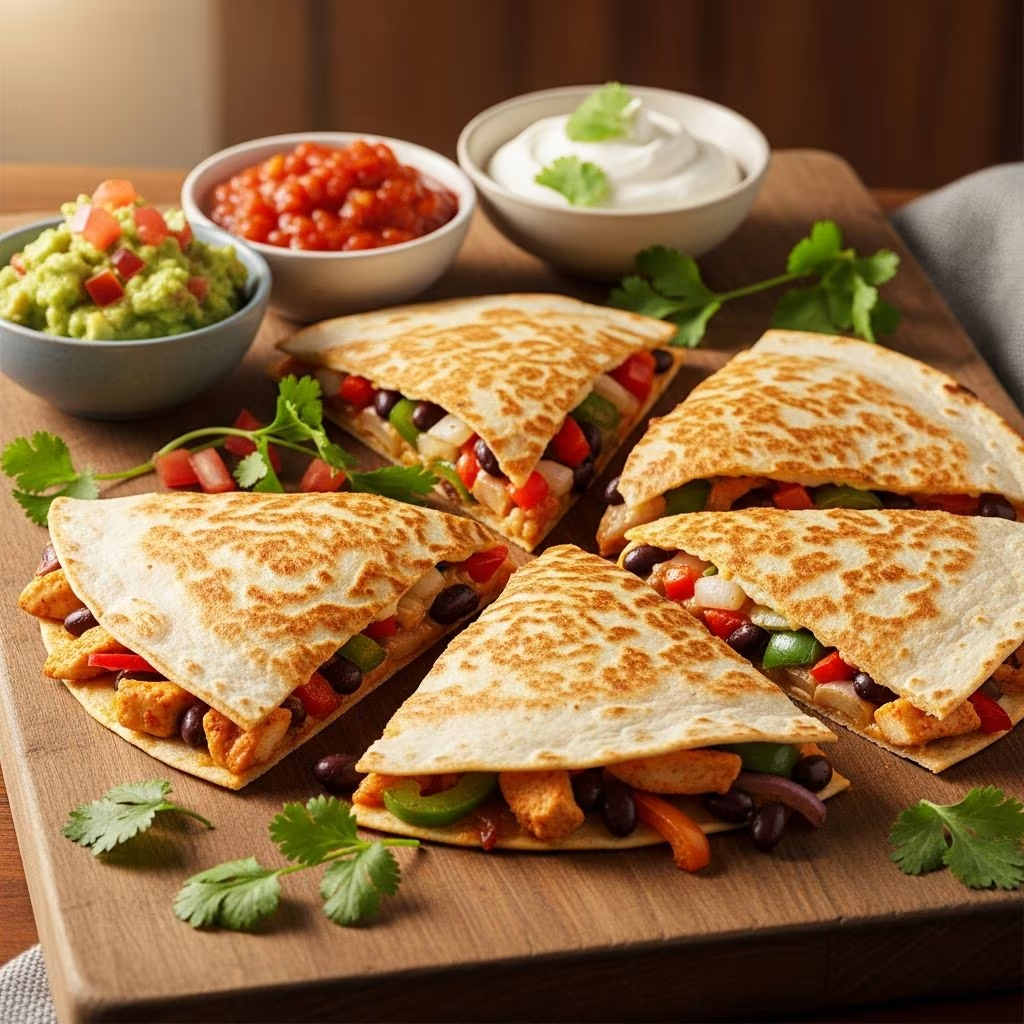
Once your sheet pan quesadilla has rested appropriately, slice it into individual servings using a sharp knife or pizza cutter. Squares provide the traditional presentation and make it simple for guests to grab individual pieces. Some people prefer triangular cuts for a more elegant presentation, while others create larger rectangular portions depending on appetite levels.
Serve your quesadilla immediately while it retains maximum warmth and crispiness. Accompany it with traditional Mexican condiments including salsa, guacamole, sour cream, and fresh cilantro. Some diners enjoy lime wedges for adding brightness, while jalapeño slices provide additional heat for those desiring intensity.
Customization Options and Variations
The beauty of sheet pan quesadillas lies in their adaptability to various dietary preferences and ingredient availability. Vegetarian versions can substitute black beans and additional vegetables for the meat component, creating substantial and satisfying results. Mushrooms, zucchini, spinach, and roasted tomatoes all contribute excellent flavors and textures.
For seafood enthusiasts, cooked shrimp mixed with lime juice and garlic creates a distinctive filling that feels special without requiring extensive preparation. Turkey provides a leaner alternative to beef or chicken while maintaining satisfying protein content. Some creative cooks experiment with breakfast applications, incorporating scrambled eggs, bacon, and hash browns for brunch occasions.
Cheese variations extend beyond standard blends—pepper jack introduces heat, smoked gouda adds sophistication, and feta brings tangy Mediterranean influences. Combining multiple cheese types creates complex flavor profiles that elevate standard recipes into memorable dishes.
Storage and Make-Ahead Strategies
Sheet pan quesadillas adapt well to advance preparation, making them ideal for busy households. Assemble your quesadilla completely but do not bake, then cover tightly with plastic wrap and refrigerate for up to 24 hours. When ready to bake, add approximately 5 minutes to the total baking time to account for the cold starting temperature.
Leftover cooked quesadillas store well in airtight containers in the refrigerator for up to 4 days. Reheat individual slices in a 350°F oven for about 5 minutes or in a toaster oven until warmed through and crispy again. Microwave reheating is possible but produces softer textures that don’t match the original crispiness.
Frequently Asked Questions
What type of tortillas work best for sheet pan quesadillas?
Flour tortillas provide the ideal texture and flexibility for this cooking method. Ten-inch sized tortillas are standard, though burrito-sized tortillas work equally well. Avoid corn tortillas, which become too brittle when baked and lack the structural integrity needed for this application.
Can I prepare sheet pan quesadillas without using a second pan for weight?
While technically possible, the weighted pan produces significantly better results by ensuring even pressure across the entire surface, promoting uniform melting and preventing filling leakage. If you don’t have a second oven-safe pan, aluminum foil-covered baking sheets or cast iron skillets work as adequate alternatives.
How do I prevent the filling from escaping during baking?
Proper folding of the overhanging tortillas creates a seal that contains the filling. Ensure no gaps exist between tortillas before adding filling, and spread filling to within about half an inch from the tortilla edges to prevent overflow. The weighted top pan further prevents any leakage.
What temperature produces the crispiest results?
Baking at 425°F yields crisper exteriors than lower temperatures, though this requires monitoring to prevent burning. For a balanced approach, 400°F provides crispy results with lower burn risk. Adjust your oven temperature based on your specific oven’s characteristics, as variations exist among different models.
Can sheet pan quesadillas be frozen for later consumption?
Yes, unbaked assembled quesadillas freeze well for up to three months when wrapped tightly in plastic wrap and placed in freezer-safe containers. Bake directly from frozen, adding 10 to 15 minutes to your total baking time. Cooked quesadillas can be frozen but will have softer textures upon thawing and reheating.
Why Sheet Pan Quesadillas Excel for Entertaining
These crowd-friendly creations solve numerous entertaining challenges simultaneously. They allow you to prepare substantial portions without devoting your entire cooking time to sequential stovetop cooking. Guests can be served quickly once the quesadilla emerges from the oven, and the single-pan requirement minimizes cleanup afterward—a significant advantage when hosting gatherings.
The visual presentation of a large cut quesadilla creates impressive impact despite straightforward preparation methods. Guests appreciate receiving warm, crispy quesadillas without the typical texture inconsistencies that occur when cooking individual portions. The option to customize fillings means accommodating dietary preferences without creating separate dishes.
References
- Easy Sheet Pan Quesadillas — Rachel Mansfield, rachLmansfield.com. Accessed April 2026. https://rachlmansfield.com/easy-sheet-pan-quesadillas/
- Chicken Sheet Pan Quesadilla — Gimme Some Oven. Accessed April 2026. https://www.gimmesomeoven.com/chicken-sheet-pan-quesadilla/
- Sheet Pan Quesadillas — The Endless Meal. Accessed April 2026. https://www.theendlessmeal.com/sheet-pan-quesadillas/
- Sheet Pan Loaded Quesadillas — Julia Pacheco, juliapacheco.com. Accessed April 2026. https://www.juliapacheco.com/sheet-pan-loaded-quesadillas/