Creating your own ginger beer transforms a simple culinary project into a rewarding beverage-making experience. Unlike commercial versions, homemade ginger beer delivers authentic spice, controlled sweetness, and the satisfaction of crafting something entirely from scratch. The fermentation process, while requiring patience, produces natural carbonation and complex flavors that store-bought alternatives struggle to match.
Understanding Ginger Beer Fundamentals
Ginger beer represents a traditional beverage category that differs significantly from ginger ale, though the terms are sometimes used interchangeably. True ginger beer undergoes fermentation, developing subtle complexity and effervescence through the action of yeast. This fermentation process converts sugars into carbonation naturally, eliminating the need for artificial carbonation methods or chemical additives. The resulting beverage carries a warming ginger bite balanced with subtle sweetness, making it exceptionally versatile for both standalone consumption and as a cocktail mixer.
The beauty of homemade ginger beer lies in its adaptability. You control the ginger intensity, sweetness level, and fermentation duration, allowing you to customize the final product precisely to your preferences. Whether you prefer a subtle ginger whisper or a pronounced spicy kick, the process remains fundamentally straightforward.
Essential Ingredients and Their Roles
Successfully brewing ginger beer requires understanding how each ingredient contributes to the final product. The following components work together to create flavor, fermentation, and carbonation:
- Fresh ginger root: The foundation of your beverage, providing the distinctive spicy-warm flavor and aromatic qualities
- Water: Filtered water prevents unwanted mineral interference that can affect fermentation and flavor clarity
- Sugar or molasses: Provides both sweetness and fermentation fuel for yeast activation
- Lemon juice: Adds brightness, balances sweetness, and contributes natural acidity that preserves the beverage
- Yeast: Initiates fermentation through sugar consumption, generating carbonation as a byproduct
- Optional flavor enhancers: Cream of tartar stabilizes flavors, while champagne yeast produces particularly clean fermentation
The proportion of ginger to other ingredients determines whether your final product tastes gently spiced or aggressively ginger-forward. Most traditional recipes use between two tablespoons and one cup of ginger per gallon of finished beverage, depending on desired intensity.
Preparing Your Ingredients
Proper ingredient preparation ensures consistent results and optimal flavor extraction. Begin by selecting firm, unblemished ginger root without soft spots or sprouting. The thin papery skin should be intact, indicating freshness.
Grating technique affects both flavor extraction and final texture. Using the fine side of a grater produces consistent particle size, facilitating better extraction during boiling and easier straining afterward. For larger batch quantities, a food processor accelerates preparation while maintaining uniform grating.
Lemon juice should always be freshly squeezed rather than bottled, as commercial lemon juice often contains preservatives that can interfere with fermentation. Squeeze your lemons immediately before adding to your mixture to preserve maximum acidity and aromatic compounds.
Water selection deserves consideration despite seeming mundane. Filtered water prevents chlorine and other municipal water additives from inhibiting yeast activity or altering flavor profiles. If your tap water contains significant chlorine, allow it to sit uncovered overnight to permit some evaporation before use.
The Core Brewing Method
The fundamental approach to ginger beer production remains consistent across variations: creating a flavorful ginger base, introducing yeast, and allowing controlled fermentation.
Phase One: Creating the Ginger Foundation
Combine grated ginger with approximately one-quarter of your total water volume in a pot. Bring this mixture to a boil, maintaining heat for several minutes to maximize ginger flavor extraction. This heating step activates the essential oils in ginger while softening the root fibers for efficient straining.
Once the mixture reaches a rolling boil, add your chosen sweetener—brown sugar produces a deeper, more complex flavor than white sugar, while molasses contributes additional richness. Add a pinch of sea salt, which enhances ginger’s natural spice while balancing overall sweetness. Continue heating and stirring until all sweetener fully dissolves, typically requiring three to five minutes.
Phase Two: Flavoring and Preparation
Remove your ginger mixture from heat and allow it to cool slightly. Pour the hot liquid through a fine-mesh strainer lined with several cheesecloth layers, pressing firmly to extract every drop of flavorful liquid from the ginger solids. This straining step removes sediment while retaining maximum ginger essence.
Once strained, combine your ginger liquid with the remaining cold water, freshly squeezed lemon juice, and yeast. Stir thoroughly to distribute yeast evenly throughout the mixture and ensure complete sugar dissolution. Proper mixing prevents yeast from settling into clumps that would ferment unevenly.
Phase Three: Fermentation
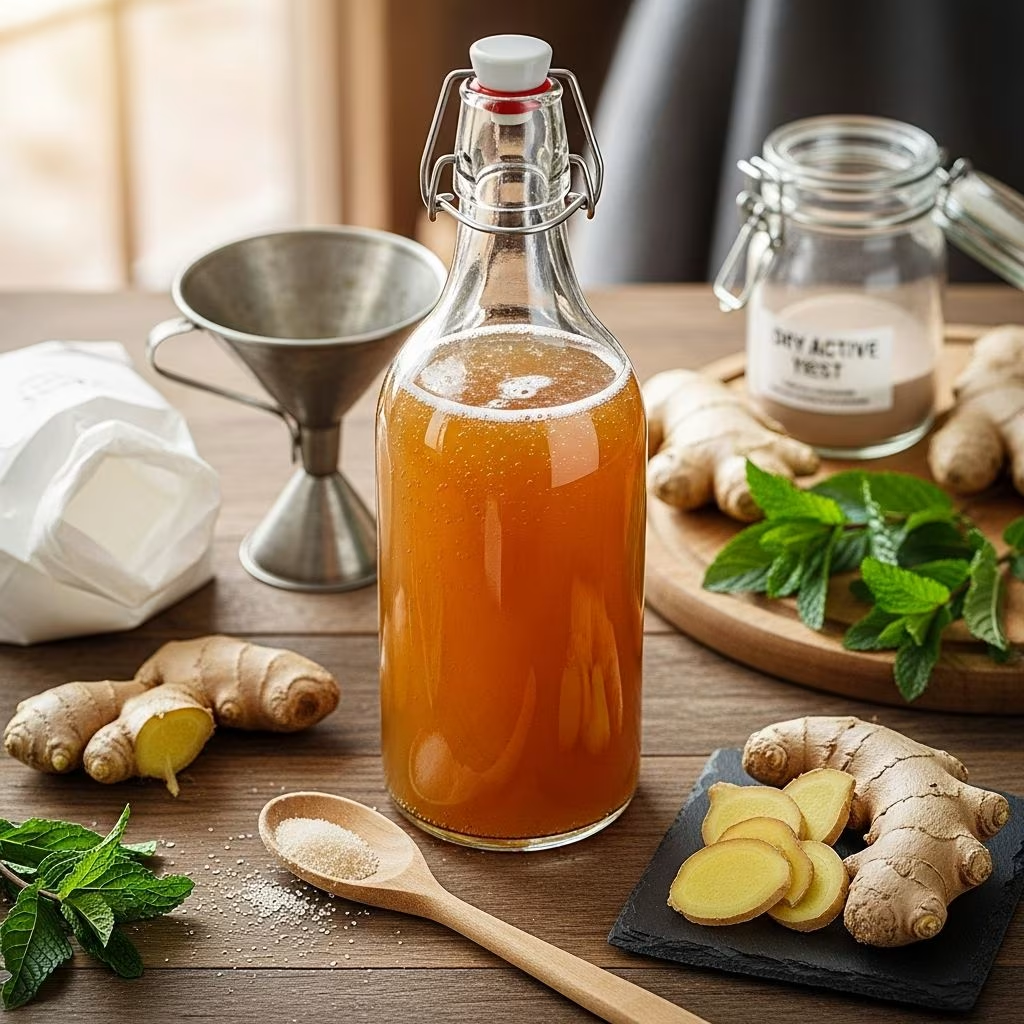
Using a funnel, carefully pour your yeast-activated mixture into clean glass bottles with secure caps, leaving one to two inches of headspace to accommodate pressure buildup from carbonation. Glass bottles with flip-top or screw caps work particularly well, as they maintain consistent pressure while remaining manageable.
Position your bottles in a room-temperature location away from direct sunlight. Over the next 48 hours, yeast consumes sugar and produces carbon dioxide gas, which becomes trapped in the liquid as carbonation. During this window, check bottles occasionally to monitor pressure buildup—gently press the caps to confirm they’re holding firm, indicating active carbonation production.
Once fermentation reaches your desired level of carbonation—typically after 48 hours—transfer bottles to the refrigerator to halt yeast activity completely. Cold temperatures slow yeast metabolism, stopping carbonation production and stabilizing your beverage.
Advanced Fermentation Approaches
For those seeking deeper control over flavor development, alternative methods employ specialized fermentation starters. The “ginger bug” technique involves cultivating wild yeast and beneficial bacteria cultures independently before incorporating them into your final beverage.
This method begins by combining water, sugar, and ginger in a separate container, allowing natural fermentation to occur over several days. Daily feedings of sugar and ginger stimulate yeast and bacterial growth until visible bubbling indicates an active culture ready for use. Once your ginger bug becomes visibly fizzy, strain the liquid and use it to ferment your main ginger beer batch, contributing both established yeast and complex flavor compounds.
This approach requires additional time but rewards patient brewers with exceptional complexity and improved digestibility through extended fermentation. The ginger bug method also reduces dependency on commercial yeast packets, though it demands more careful monitoring throughout the process.
Achieving Your Desired Carbonation Level
Carbonation intensity varies based on fermentation duration, temperature, and bottle pressure. Room temperature between 68-75°F produces optimal yeast activity and carbonation development. Warmer environments accelerate fermentation, potentially creating overly carbonated beverages with excessive pressure, while cooler temperatures slow the process substantially.
Fermentation duration ranges from 24 to 72 hours depending on your preference for mild or pronounced fizz. Begin checking for carbonation after 24 hours by gently opening a bottle cap slightly—you should hear a satisfying hiss indicating pressure buildup. Reseal immediately and return to room temperature for continued development.
If you prefer gentler carbonation, refrigerate after 24 hours. For a more assertive fizz, extend fermentation to 48-72 hours before chilling. Remember that carbonation continues developing slowly even after refrigeration, so beverages improve with one to two days of cold storage before opening.
Customizing Sweetness and Flavor
The fermentation process consumes some sugar, typically reducing overall sweetness compared to your initial mixture. Before serving, taste your chilled ginger beer and adjust sweetness to personal preference.
When adding additional sweetener—whether honey, agave syrup, additional brown sugar, or molasses—dissolve it in a small portion of the ginger beer before combining with the full batch. This prevents uneven distribution and ensures consistent flavor throughout. Close bottles tightly and shake thoroughly to incorporate sweetener evenly, but avoid opening bottles immediately after shaking, as trapped pressure may cause the cap to pop off unexpectedly.
For those preferring a less intensely spiced beverage, reduce ginger quantity to one-half tablespoon per quart, or increase overall water volume while maintaining the same ginger amount. Conversely, ginger enthusiasts can double the ginger quantity or add warming spices like cardamom, cloves, or cinnamon during the initial boiling phase.
Storage and Serving Recommendations
Properly stored ginger beer maintains quality for two to three weeks when kept refrigerated in sealed bottles. The acidic nature and carbonation inhibit bacterial growth, though bottles should remain capped to prevent carbonation loss and flavor degradation.
Serve your homemade ginger beer well-chilled over ice cubes for maximum refreshment. The beverage works beautifully as a standalone drink or as a sophisticated mixer for classic cocktails like Moscow Mules, Dark and Stormy cocktails, or creative contemporary preparations. The homemade version’s superior complexity enhances mixed drinks substantially compared to commercial alternatives.
Troubleshooting Common Issues
| Problem | Likely Cause | Solution |
|---|---|---|
| No carbonation after 48 hours | Yeast inactive or dead | Verify yeast freshness and proper storage temperature |
| Excessive carbonation or bottle pressure | Fermentation continued too long | Refrigerate immediately to halt yeast activity |
| Flat, dull flavor | Insufficient ginger or over-straining | Increase ginger quantity in next batch or strain less aggressively |
| Cloudy appearance | Inadequate straining or settled yeast | Strain through finer mesh or allow settled particles to clear |
| Off-flavors or sourness | Contamination or over-fermentation | Use sanitized equipment and reduce fermentation time |
Frequently Asked Questions
Can I use dried ginger instead of fresh?
Fresh ginger provides superior flavor complexity compared to dried ginger powder. If using dried ginger, reduce quantity significantly—approximately one-third the fresh ginger amount—as drying concentrates the spice intensity considerably.
What type of yeast works best?
Brewer’s yeast, active dry yeast, and champagne yeast all produce successful results, though champagne yeast creates particularly clean fermentation profiles. Standard baker’s yeast functions adequately but may leave yeasty flavors in the finished beverage.
Is the fermentation process safe?
Fermentation in sealed bottles is entirely safe when using food-grade yeast and clean equipment. The acidic environment from lemon juice and the fermentation byproducts prevent harmful bacterial growth.
How does homemade ginger beer differ from ginger ale?
Ginger ale typically refers to a sweetened ginger syrup mixed with carbonated water, containing no active fermentation or yeast. Ginger beer undergoes true fermentation, developing natural carbonation and more complex flavor profiles.
Can I scale this recipe up significantly?
Yes, the recipe scales proportionally for larger batches. Five-gallon batches use five times the ingredient quantities while following identical procedures. Ensure adequate bottle storage space and consistent room temperature during fermentation.
References
- Easy Homemade Ginger Beer Recipe — Happy Kitchen. Accessed April 2026. https://happykitchen.rocks/homemade-ginger-beer/
- Homemade Ginger Beer — What Should I Make For. Accessed April 2026. https://whatshouldimakefor.com/how-to/homemade-ginger-beer/
- The Old Fashioned Way: Homemade Ginger Beer — Tori Avey. Accessed April 2026. https://toriavey.com/the-old-fashioned-way-homemade-ginger-beer/
- 3 Ingredient Homemade Fermented Ginger Beer — Joshua Weissman. Accessed April 2026. https://www.joshuaweissman.com/recipes/best-homemade-ginger-beer-recipe
- Simple and Delicious Ginger Beer — Fifth Season Gardening. Accessed April 2026. https://fifthseasongardening.com/simple-and-delicious-ginger-beer