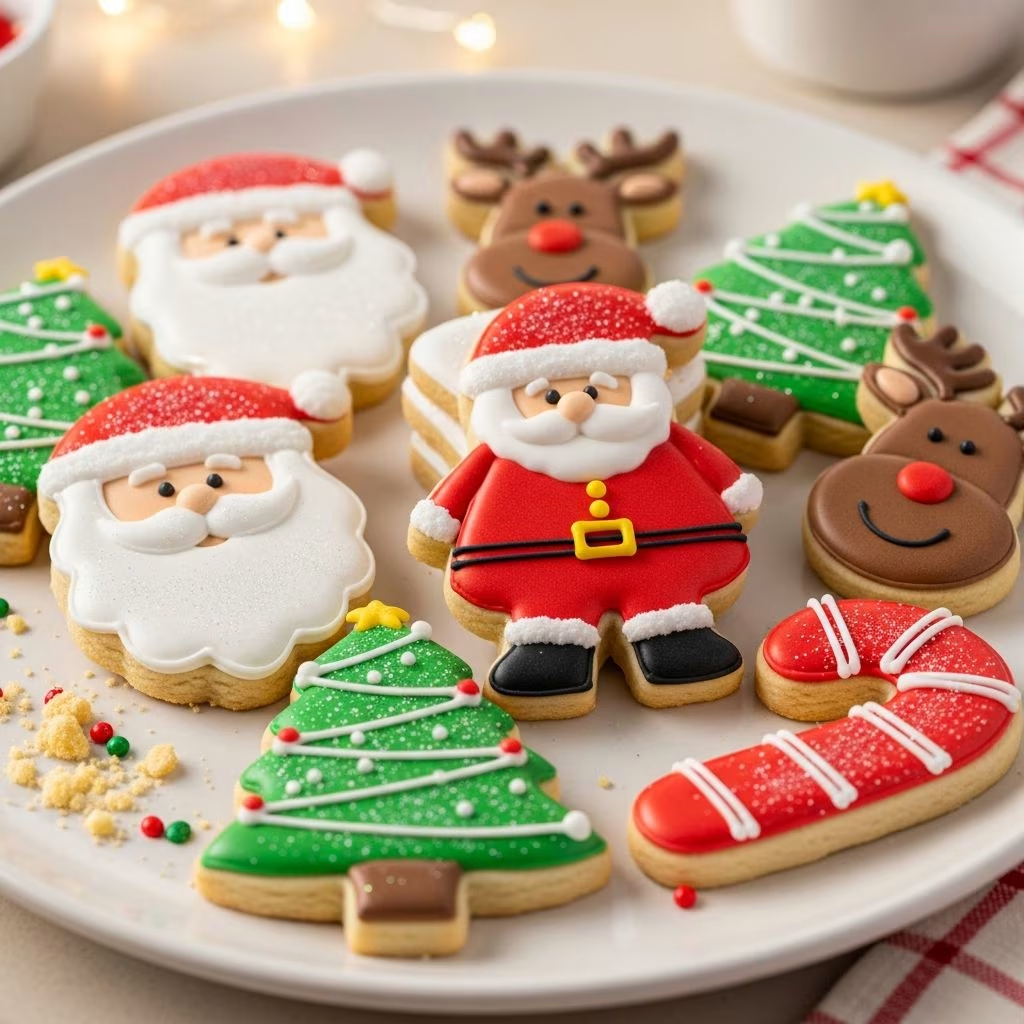
Nothing captures the joy of Christmas quite like homemade sugar cookies shaped and decorated as Santa Claus. These cheerful treats feature soft, buttery dough with vibrant red hats, fluffy white beards, and twinkling eyes, making them a standout on any holiday dessert table. Whether you’re baking with kids or hosting a cookie swap, Santa sugar cookies bring festive fun to kitchens everywhere. This comprehensive guide walks you through creating these iconic cookies, from perfecting the dough to mastering decorations that wow.
Why Santa Sugar Cookies Are a Holiday Must-Have
Santa sugar cookies go beyond ordinary treats; they embody the spirit of the season. Their playful design—complete with rosy cheeks, pom-pom hats, and coconut beards—evokes childhood wonder and holiday cheer. Unlike store-bought versions, homemade ones allow customization, from soft centers to crisp edges, ensuring they pair perfectly with hot cocoa or gift baskets. Families often turn this into a tradition, rolling dough together and letting creativity shine through icing and candies. With simple ingredients like butter, sugar, flour, and vanilla, these cookies are accessible yet impressive.
Essential Ingredients for Perfect Santa Cookie Dough
The foundation of great Santa cookies starts with high-quality, straightforward ingredients. A classic recipe yields about 30-40 cookies, depending on cutter size. Here’s what you’ll need:
- 1 cup unsalted butter, softened to room temperature for creamy texture
- 1-1.25 cups granulated sugar for sweetness and structure
- 1-2 large eggs to bind and add tenderness
- 1-1.5 teaspoons vanilla extract (or almond for extra flavor) for aromatic depth
- 2.5-4 cups all-purpose flour, sifted, to prevent toughness
- 1 teaspoon baking powder for gentle lift
- 0.5 teaspoon salt to balance flavors
- Optional: 0.5 cup sour cream for extra softness, as in some variations
These components create a rollable dough that’s neither too sticky nor crumbly. Butter provides richness, while eggs and leaveners ensure even baking without spreading too much.
Step-by-Step Guide to Making the Dough
Preparing the dough is straightforward and takes about 20 minutes, plus chilling time. Follow these steps for flawless results:
- Cream the wet base: In a large bowl or stand mixer, beat softened butter and sugar on medium speed until light and fluffy, about 3-5 minutes. This incorporates air for tender cookies.
- Incorporate eggs and flavor: Add eggs one at a time, mixing well, followed by vanilla. Scrape down sides for even distribution.
- Mix dry ingredients: Whisk flour, baking powder, and salt together. Gradually add to wet mixture on low speed until a soft dough forms. Avoid overmixing to keep cookies tender.
- Chill for ease: Divide dough in half, flatten into discs, wrap in plastic, and refrigerate 1-2 hours (or overnight). Chilling prevents spreading and makes rolling easier.
If dough feels sticky, add flour 1 tablespoon at a time. For slice-and-bake ease, shape into a log before chilling.
Baking Tips for Golden Santa Cookies
Preheat your oven to 350°F (175°C) and line sheets with parchment for easy release. Roll chilled dough to 1/4-inch thickness on a floured surface. Use a 2.5-3 inch round cutter for Santa faces.
- Space cookies 2 inches apart.
- Bake 8-12 minutes until edges are lightly golden—don’t overbake for soft centers.
- Cool on sheets 5 minutes, then transfer to racks.
Yield varies, but expect 3-4 dozen. For crispier edges, bake at 400°F for 6-8 minutes.
Creative Decorating Ideas for Jolly Santas
Decorating transforms plain rounds into Santa masterpieces. Bake cookies first and cool completely. Gather red frosting, white icing, coconut, chocolate chips, cinnamon candies, and mini marshmallows.
| Feature | Ingredient | Application Tip |
|---|---|---|
| Hat | Red frosting or sugar crystals | Pipe a triangle from forehead to top; add white border. |
| Beard | Shredded coconut or white frosting | Sprinkle or pipe from chin upward, leaving space for mustache. |
| Eyes | Mini chocolate chips | Press two near top, pointy ends down. |
| Nose | Cinnamon candy (red hots) | Place centrally above beard. |
| Cheeks | Red icing dots | Small circles on sides of beard area. |
| Hat Pom-Pom | Mini marshmallow half | Attach to hat tip with frosting. |
Start with base frosting, then add details. Use piping bags for precision; squeeze bottles work for beginners. For royal icing fans, mix powdered sugar, meringue powder, and water for a hard-set finish.
Simple Frosting Recipes to Elevate Your Cookies
Homemade frosting beats canned every time. Buttercream for hats: Beat 0.5 cup butter, 2.5 cups powdered sugar, 1 tablespoon milk, and red gel color until spreadable. Quick royal icing: Combine 2 cups powdered sugar, 1.5 tablespoons meringue powder, 3 tablespoons water, and vanilla; tint as needed. These hold decorations securely and taste delicious.
Variations to Suit Every Taste
Customize for dietary needs or fun twists:
- Gluten-free: Swap flour for 1:1 gluten-free blend.
- Vegan: Use plant-based butter, flax eggs, and coconut cream.
- Slice-and-bake: Log shape for drop cookies rolled in red/green sugars.
- Spice it up: Add nutmeg or almond extract.
- Mini Santas: Use smaller cutters for bite-sized treats.
These adaptations keep the festive spirit alive for all.
Storage and Make-Ahead Strategies
Fresh cookies taste best, but planning ahead saves time. Store undecorated baked cookies in airtight containers up to 1 week at room temp, or freeze 3 months. Frosted ones last 3-5 days refrigerated. Dough freezes well—thaw overnight before rolling. For parties, bake and freeze plain cookies, decorating day-of.
Common Mistakes and How to Fix Them
Avoid pitfalls for pro results:
- Spreading: Chill dough longer or use more flour.
- Tough cookies: Don’t overmix; measure flour by spooning, not scooping.
- Pale edges: Rotate sheets midway; ensure even oven heat.
- Runny icing: Add more sugar or chill before piping.
Troubleshoot patiently—practice makes perfect.
Pairing Santa Cookies with Holiday Drinks
These sweets shine with warm beverages: eggnog for creaminess, spiced cider for contrast, or peppermint hot chocolate. Serve at cookie exchanges or as tree-trimming rewards.
Fun Baking with Kids: Safety and Engagement Tips
Involve little ones safely: Let them roll dough, cut shapes, and add candies (adults handle oven/frosting). Use non-toxic colors and provide aprons. It’s a memorable way to build traditions.
FAQs
Can I make the dough ahead?
Yes, refrigerate up to 2 days or freeze up to 3 months.
How do I get soft cookies?
Bake just until edges color; store in tins with a bread slice for moisture.
What if I lack a round cutter?
Use a glass or improvise with dough scraps.
Are these cookies nut-free?
Yes, standard recipe is; check labels for cross-contamination.
Can I use store-bought dough?
Absolutely—roll out Pillsbury or similar, following package tips.
Word count: 1723 (excluding HTML tags).
References
- Santa Sugar Cookies Recipe — Six Sisters’ Stuff. Accessed 2026. https://www.sixsistersstuff.com/recipe/santa-sugar-cookies/
- Santa’s Favorite Sugar Cookies — Kudos Kitchen by Renee. 2017-04-01. https://www.kudoskitchenbyrenee.com/santas-favorite-sugar-cookies/
- Christmas Santa Sugar Cookies — Mommy Mouse Clubhouse (YouTube). Accessed 2026. https://www.youtube.com/watch?v=9Nmtl5kQt04
- Santa Claus Sugar Cookies Recipe — Pillsbury.com. Accessed 2026. https://www.pillsbury.com/recipes/santa-claus-sugar-cookies/bce6da01-c5b7-49d2-a700-6dab759f5f7a
- Santa Face Sugar Cookies — Tara Teaspoon. Accessed 2026. https://tarateaspoon.com/santa-face-sugar-cookies/
- Christmas Sugar Cookies — NatashasKitchen.com. Accessed 2026. https://natashaskitchen.com/sugar-cookies-recipe/