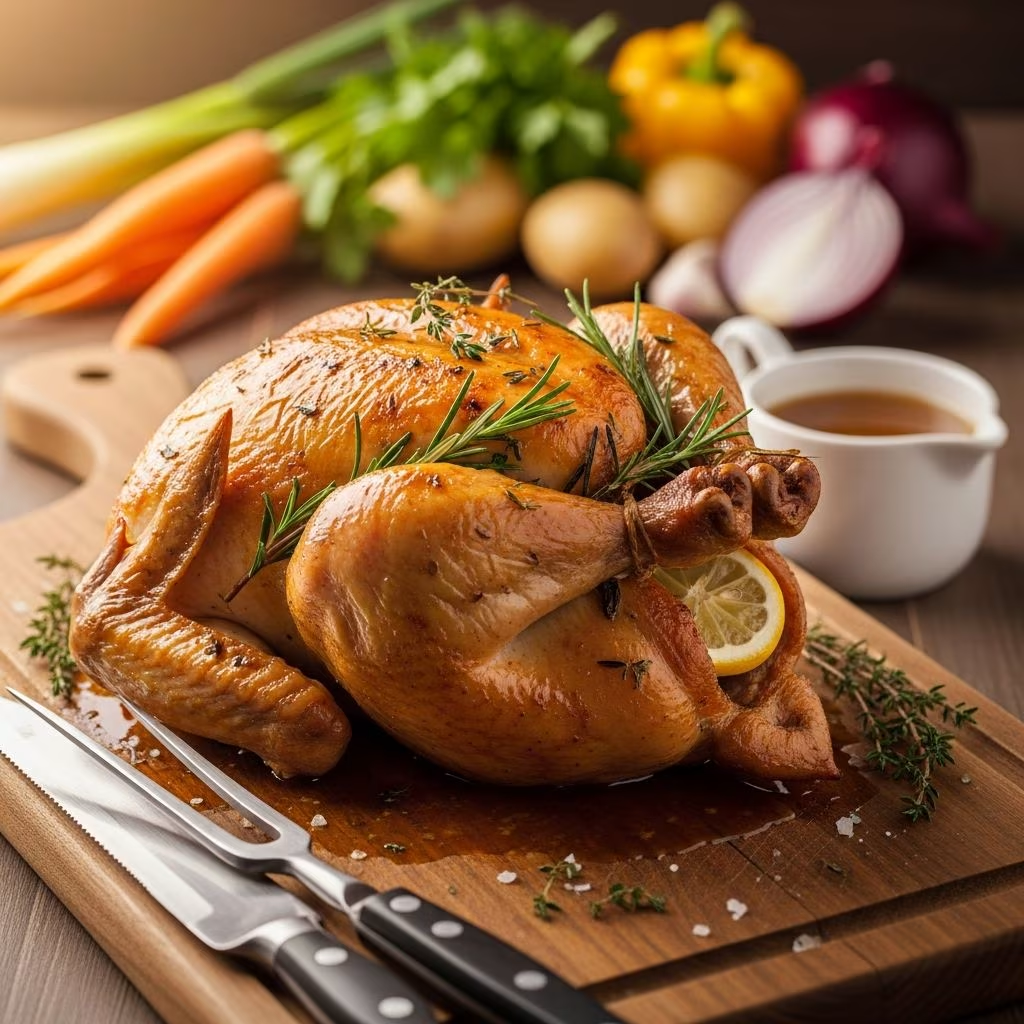
Roasting a whole chicken represents one of the most fundamental and rewarding cooking techniques in any home kitchen. The beauty of this approach lies in its elegant simplicity: with just a handful of quality ingredients and proper technique, you can create a restaurant-quality meal that impresses family and guests alike. The combination of bright citrus, pungent garlic, and rich butter creates a naturally flavorful dish that requires minimal intervention once it enters the oven.
Understanding the core principles of roast chicken preparation transforms what might seem like an intimidating task into a straightforward, repeatable process. Whether you’re a novice cook seeking confidence or an experienced kitchen enthusiast refining your skills, mastering this classical preparation opens doors to countless variations and builds a foundation for broader culinary competence.
Selecting the Right Bird: Foundation for Success
The quality and size of your chicken dramatically influence the outcome of your roasting endeavor. A whole chicken weighing between 3.5 and 4 pounds represents the optimal size for this cooking method. This weight range ensures balanced cooking, allowing the darker thigh and leg meat to reach proper doneness without the delicate breast meat becoming dry and stringy.
Chickens significantly larger than 4.5 pounds present real challenges in achieving uniform doneness across all sections. The extended cooking time required for larger birds to cook through creates a window where white meat can overcook before dark meat finishes. Conversely, smaller birds under three pounds risk drying out more easily and provide less usable meat for your effort.
When shopping, look for birds with unblemished skin and no off-putting odors. Pat the chicken completely dry with paper towels before cooking—moisture on the skin prevents proper browning and creates steam that inhibits crust formation. This step, though simple, dramatically improves your final result’s appearance and texture.
Core Ingredients: Quality Over Complexity
This recipe distinguishes itself through ingredient restraint. You need only five fundamental components, each serving a specific purpose:
Fresh lemon: The fruit provides bright acidity that cuts through richness and balances the savory elements. Halving the lemon crosswise and removing visible seeds prevents bitter flavors from developing during roasting. The lemon halves create aromatic steam inside the cavity while also infusing the exterior with subtle citrus notes.
Garlic head: Rather than individual cloves, using an entire head cut in half maintains the garlic’s structural integrity during roasting. This approach yields mild, sweet, almost nutty garlic rather than harsh, burnt notes. The garlic softens considerably, becoming spreadable and losing its sharp qualities.
Butter or olive oil: A quarter cup of unsalted butter or premium extra-virgin olive oil serves dual purposes. The fat conducts heat more effectively than dry roasting, promotes browning through the Maillard reaction, and bastes the chicken throughout cooking. Choosing unsalted butter allows you to control sodium levels more precisely than salted varieties.
Kosher salt: The larger crystal structure of kosher salt compared to table salt allows more precise seasoning and prevents over-salting. Approximately four to five generous finger pinches (roughly four teaspoons) adequately seasons a standard chicken without creating an unpalatably salty result.
Fresh black pepper: Coarsely ground pepper applied just before cooking retains more aromatic volatility than pre-ground varieties that sit in containers for months.
Preparation Techniques: Building Flavor Foundations
Begin by preheating your oven to 425 degrees Fahrenheit, positioning the rack in the center to ensure even heat circulation around the entire bird. This temperature strikes an optimal balance—high enough to crisp the skin and achieve browning without burning exterior surfaces before the interior cooks through.
After ensuring your chicken is thoroughly dry, place it breast-side up on your work surface. Using a sharp knife, carefully slice through the skin connecting the leg to the breast on both sides. This incision, approximately three inches long, exposes the thigh joint and serves multiple functions. It allows rendered fat from the thighs to flow toward the breast, providing natural basting. It also creates convenient access points for checking doneness without requiring the entire bird to be repositioned or carved prematurely.
Season every accessible surface with generous amounts of salt and pepper. Many home cooks underestimate the importance of thorough, abundant seasoning. Work salt and pepper into the skin crevices, along the backbone interior, inside the cavity, beneath the wing flaps, and along the exposed leg joints. This comprehensive approach ensures balanced flavor throughout rather than concentrated salt solely on exterior surfaces.
Arrangement and Assembly in the Roasting Vessel
Transfer your seasoned chicken to a large oven-safe skillet, positioning it breast-side up. Cast iron or heavy stainless steel skillets work exceptionally well because they retain and distribute heat evenly, promoting browning. The skillet’s sides should be high enough to contain juices but not so deep that they insulate the chicken from direct heat.
Arrange your lemon halves and garlic halves cut-side down in the space surrounding the chicken. Placing these items cut-side down allows the heat to caramelize their surfaces, intensifying their flavors and creating complex aromatics. The cut surfaces also contact the hot skillet surface, which promotes browning and flavor development.
Distribute your melted butter or olive oil across the entire surface of the chicken. This fat layer initiates browning immediately and prevents skin from drying out during the initial roasting stages. Don’t hesitate to be generous—the fat drains away and can be reserved for other culinary applications.
The Roasting Process: Monitoring and Adjusting
Transfer your prepared skillet to the preheated oven. Initial roasting typically requires 45 minutes, though larger birds may need additional time. Resist the urge to open the oven frequently; each opening drops internal temperature and extends cooking time.
After the initial 45-minute period, check for doneness using reliable methods rather than guessing. Carefully remove the hot skillet from the oven (protecting your hands from the very hot handle). Using a sharp knife, pierce the thigh joint and thickest part of the thigh meat. If clear juices flow freely, your chicken has reached safe internal temperatures. If any rosy-pink liquid appears, the bird requires additional time.
As an alternative verification method, use your knife to gently shred some meat along the thigh bone. Properly cooked chicken meat appears opaque throughout, and the muscle fibers separate easily rather than appearing translucent or stuck together. Continue roasting in five-minute increments until achieving these visual indicators.
The internal temperature should reach 165 degrees Fahrenheit at the thickest thigh point. Many experienced cooks prefer checking the thigh specifically because this dark meat section reaches doneness after the white breast meat, providing a safety margin against overcooking.
Resting and Final Preparation
Once your chicken reaches proper doneness, remove it from the oven but keep it in the skillet. Allow it to rest for a minimum of 15 minutes before carving. This resting period permits muscle fibers to relax and reabsorb juices that rose to the surface during cooking. Without adequate rest, carved meat releases its juices onto the cutting board rather than retaining them, resulting in drier finished meat.
The 15-minute rest also brings the chicken to a safe handling temperature. Despite its high initial temperature when removed from the oven, the bird remains hot enough to serve immediately after resting, eliminating concerns about food safety or temperature loss.
Finishing Touches and Service
Transfer your rested chicken to a serving platter. Pour all accumulated pan juices—those “glorious, buttery” drippings—directly over the meat. These juices represent concentrated chicken flavor along with rendered fat and browned fond from the skillet bottom. They transform from a cooking byproduct into an essential finishing sauce.
Arrange the roasted lemon and garlic halves around the platter. Guests can squeeze softened garlic from its papery skin onto their meat or use the charred lemon halves to add brightness to each bite. The roasted citrus and garlic have transformed into mild, sweet, almost caramelized versions of their raw selves.
Troubleshooting Common Challenges
Uneven browning: If your chicken browns unevenly, your oven likely has temperature hot spots. Rotating the skillet 180 degrees halfway through roasting helps achieve more uniform coloring.
Dry breast meat: This typically indicates overcooking. Reduce roasting time by five to ten minutes on your next attempt. Alternatively, consider briefly resting the chicken at a lower oven temperature (200°F) to finish cooking dark meat while white meat holds steady.
Undercooked thighs: If dark meat remains undercooked while white meat appears done, continue roasting but tent the breast area loosely with foil to prevent overcooking white meat while thighs finish.
Pale, rubbery skin: Ensure your chicken is thoroughly dried before roasting and that you’re using adequate fat. Additionally, confirm your oven temperature with an independent thermometer—ovens frequently drift from their displayed settings.
Variations and Adaptations
While this five-ingredient version provides an excellent foundation, numerous variations build upon this template. Fresh herbs like rosemary or thyme can be added to the cavity and around the skillet. Shallots or whole garlic cloves provide alternative aromatics. Some cooks substitute half the butter with rendered chicken fat for deeper poultry flavor.
Frequently Asked Questions
Can I use a rotisserie chicken instead of roasting my own? While convenient, homemade roasted chicken provides superior flavor, texture control, and the satisfaction of preparation. Rotisserie chickens often contain added sodium and lack the customization options of home roasting.
Should I stuff the cavity with additional ingredients? The lemon and garlic halves provide sufficient aromatics. Overstuffing restricts heat circulation and extends cooking time unpredictably.
What’s the best way to store leftovers? Refrigerate cooled chicken in an airtight container for up to four days. Shred meat from bones and store separately for easier use in soups, salads, and other applications.
Can I prep the chicken the day before roasting? You can season the chicken, stuff the cavity, and refrigerate it overnight. Remove it from refrigeration 30 minutes before roasting to allow it to reach room temperature, which promotes more even cooking.
Culinary Principles Demonstrated
This seemingly simple recipe actually showcases several sophisticated cooking principles. The salt-and-pepper seasoning demonstrates the importance of proper seasoning depth. Positioning aromatics in the cavity and around the bird illustrates strategic flavor placement. Checking multiple doneness indicators rather than relying on time alone reflects professional cooking methodology. The mandatory resting period emphasizes understanding carry-over cooking and juice redistribution.
Mastering this preparation builds confidence and foundational skills applicable to countless other cooking techniques. The principles transfer to roasting other poultry, vegetables, and even certain meat preparations. Once you’ve successfully executed this recipe several times, variations become intuitive rather than requiring constant reference checking.
References
- USDA Food Safety and Inspection Service – Safe Internal Temperature Guide — United States Department of Agriculture. https://www.fsis.usda.gov/food-safety/safe-food-handling-and-preparation/poultry/chicken
- The Maillard Reaction in Food — McGee, Harold. On Food and Cooking: The Science and Lore of the Kitchen. Scribner, 2004.
- Salt in Cooking: Types and Applications — Academic culinary science standards. Institute of Culinary Education.