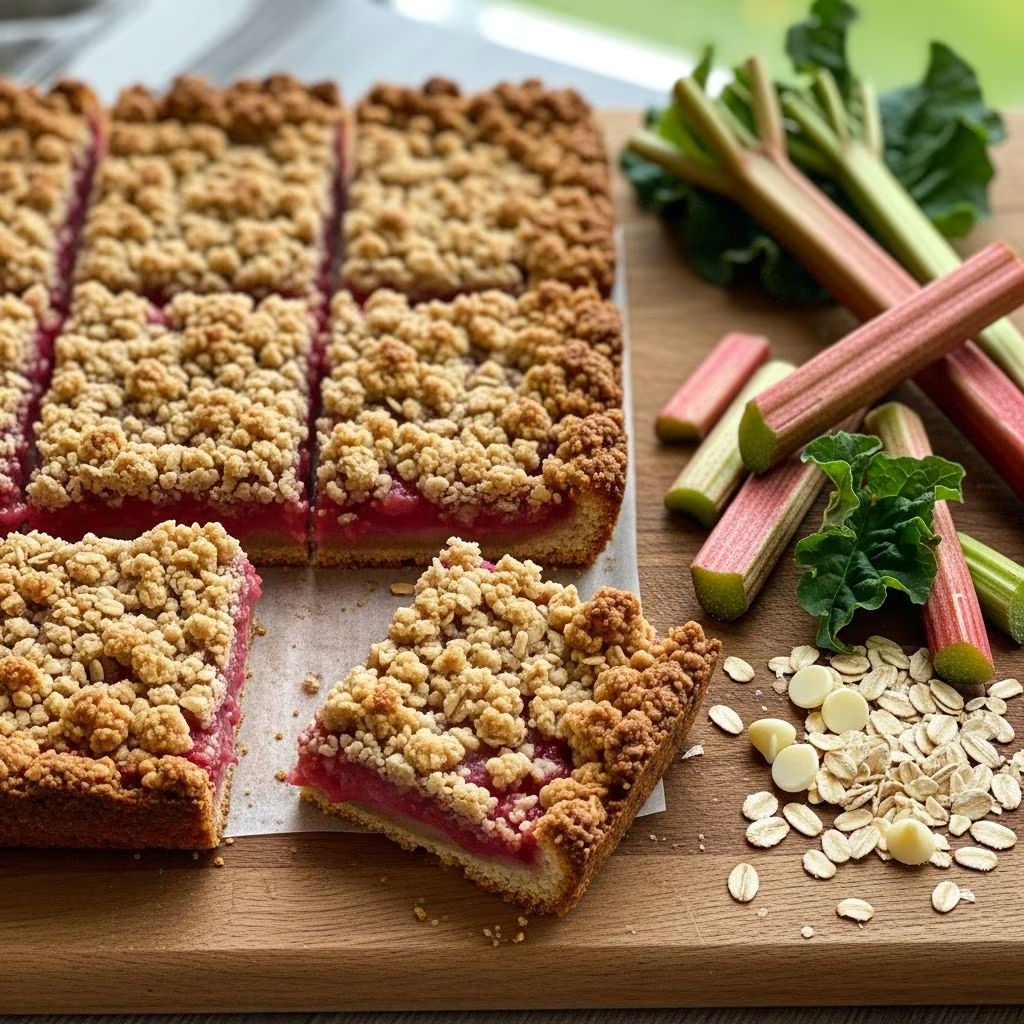
When spring arrives and fresh rhubarb appears at farmers’ markets and grocery stores, home bakers look for ways to celebrate this tart and vibrant ingredient. One dessert that captures the essence of spring baking is the rhubarb dream bar—a sophisticated yet surprisingly simple treat that has remained popular across American households for generations. This elegant layered dessert combines the rich, buttery foundation of a shortbread crust with a delicate custard-like filling that frames the bright, tangy notes of fresh rhubarb.
What makes rhubarb dream bars so appealing is their perfect balance of textures and flavors. The crumbly base provides structural support while delivering rich butter notes, the middle layer develops into a light, almost meringue-like consistency that dissolves on the tongue, and the rhubarb pieces release their natural juices during baking, creating pockets of tartness throughout. This combination creates a dessert that feels fancy enough for entertaining yet approachable enough for weeknight baking.
Understanding the Rhubarb Dream Bar Structure
The architecture of a rhubarb dream bar consists of three distinct layers that work together to create a harmonious final product. Understanding how each component functions helps bakers troubleshoot issues and adapt the recipe to their preferences.
The foundation layer is a traditional shortbread crust made from flour, butter, and powdered sugar. This base is par-baked—partially baked before the filling is added—to ensure it maintains its structure and develops a light golden color without becoming overly hard. The butter content gives the crust its signature tender, crumbly texture, while the powdered sugar dissolves during mixing, creating a smooth, workable dough that presses easily into the baking pan.
The middle layer represents the most interesting component of these bars. When eggs, sugar, and flour are beaten together and poured over the hot crust, they create a custard-like filling that transforms during baking. The eggs provide structure and lift, creating a slightly fluffy, cloud-like texture in the middle section of each bar. This layer is what gives rhubarb dream bars their distinctive character—it’s neither quite a traditional custard nor a standard cake layer, but something uniquely textured that bakers often describe as having an almost meringue-like quality.
The flavor layer comes from the chopped rhubarb, which is folded into the egg mixture just before baking. As the bars bake, the rhubarb releases its moisture and natural acids, which distribute throughout the filling. This creates a naturally sweetened juice that adds tartness and moisture to each bite.
Essential Ingredients and Their Functions
Creating successful rhubarb dream bars requires understanding how each ingredient contributes to the final result. While the recipe uses only basic pantry staples, each component plays a specific role in developing flavor and texture.
| Ingredient | Amount (8×8 pan) | Function in Recipe |
|---|---|---|
| All-purpose flour (crust) | 1 cup | Provides structure and creates tender base |
| Powdered sugar (crust) | ½ cup | Sweetens crust and dissolves for smooth texture |
| Butter (room temperature) | ½ cup | Creates richness, flakiness, and tender crumb |
| Large eggs | 2 | Provides structure, lift, and custard-like texture |
| Granulated sugar (filling) | 1 cup | Sweetens filling and eggs, creates texture |
| All-purpose flour (filling) | ¼ cup | Thickens filling and provides structure |
| Salt | ¼ teaspoon | Enhances rhubarb flavor and balances sweetness |
| Fresh rhubarb (diced) | 2 cups | Provides tartness, moisture, and primary flavor |
The distinction between powdered sugar (in the crust) and granulated sugar (in the filling) matters significantly. Powdered sugar contains cornstarch and dissolves more readily, creating a smoother crust dough. Granulated sugar in the filling helps create the characteristic texture as it partially dissolves during mixing and baking, creating tiny air pockets in the custard layer.
Selecting and Preparing Rhubarb
Since rhubarb is the star ingredient, choosing quality rhubarb and preparing it properly impacts the final result dramatically. Fresh rhubarb should have firm, crisp stalks with vibrant coloring—either the traditional ruby red or the lighter pink and green varieties. Avoid limp, browning, or mushy stalks, which indicate age or improper storage.
When purchasing rhubarb, plan to use it within a few days for peak freshness. Store stalks wrapped in plastic in the refrigerator’s vegetable crisper, where they typically keep for up to two weeks. Before using, rinse the stalks under cool running water and pat dry with paper towels.
Preparation involves trimming the ends and cutting the stalks into small, uniform pieces—typically about ¼ to ½ inch. Consistent sizing ensures even cooking throughout the bars. While some recipes recommend cutting pieces smaller, slightly larger pieces maintain more structure during baking and create textural interest in the finished bars. Remove and discard the leaves, which contain oxalic acid compounds and are not suitable for consumption.
For bars prepared using an 8×8-inch pan, two cups of diced rhubarb provides adequate filling without overwhelming the custard layer. Larger pan sizes (such as 9×13 inches) require proportionally increased ingredient quantities to maintain the balance of flavors and textures.
Step-by-Step Preparation Process
Preparing the Crust
Success with the shortbread crust begins with using room-temperature butter. Cold butter won’t distribute evenly through the flour mixture, resulting in an inconsistent texture. If butter has been refrigerated, remove it 30 minutes before baking to allow it to soften slightly.
Combine flour and powdered sugar in a large mixing bowl, then add diced room-temperature butter. Using a food processor, pastry blender, or fork, work the butter into the flour mixture until the texture resembles coarse breadcrumbs or wet sand. The mixture should hold together when squeezed but shouldn’t form a compact ball—this indicates the butter hasn’t been overmixed.
Press the mixture firmly and evenly into the bottom of a parchment-lined 8×8-inch baking pan, ensuring an even thickness. Bake at 350°F for 15 minutes. The crust should remain quite pale at this point; it’s par-baking, not fully baking. Remove from the oven and proceed to prepare the filling while the crust is still hot.
Creating the Custard Filling
In a medium bowl, lightly beat the large eggs just until combined—approximately 15 to 20 seconds. Overbeating the eggs incorporates too much air, which can create an overly puffed filling that doesn’t set properly.
Add granulated sugar, flour, and salt to the beaten eggs. Whisk these ingredients together until completely smooth, approximately one minute. Avoid excessive whisking, which again introduces too much air into the mixture. The goal is a homogeneous batter with no visible flour streaks.
Gently fold in the prepared rhubarb pieces using a spatula. Handle the mixture delicately to avoid crushing the rhubarb or incorporating excessive air. Pour the filling mixture directly onto the hot, par-baked crust. Pouring onto hot crust helps the filling set properly and prevents a soggy crust layer.
Baking the Assembled Bars
Return the pan to the 350°F oven and bake for 40 to 45 minutes. The bars are ready when the filling has set around the edges but the center still has slight give—the surface will appear set but not completely rigid. If baked too long, the custard layer becomes dry and rubbery. A slight jiggle in the very center indicates perfect doneness.
Allow the bars to cool completely in the pan at room temperature before cutting. This cooling period is crucial—attempting to cut the bars while warm results in a messy, crumbly result. Once completely cooled, use the parchment paper overhang to lift the entire baked sheet from the pan and onto a cutting board.
Cutting and Serving Considerations
Using a sharp knife dipped in hot water and wiped clean between cuts ensures neat, attractive squares. Standard bar sizes are 2-inch squares, which yields 16 bars from an 8×8-inch pan. Smaller or larger squares are acceptable depending on portion preferences and event requirements.
An optional finishing touch involves dusting the cooled bars with powdered sugar or a combination of powdered sugar and a small amount of ground cinnamon. This garnish adds visual appeal and provides subtle flavor complexity. Some bakers prefer adding cinnamon directly to the filling rather than as a garnish—approximately ¼ to ½ teaspoon mixed into the custard layer complements the rhubarb without overpowering it.
Rhubarb dream bars taste best served at room temperature or slightly chilled. They can be eaten directly from the pan or plated individually. Pairing them with whipped cream, vanilla ice cream, or a light cream cheese frosting adds richness and balances the tartness of the rhubarb.
Storage and Make-Ahead Tips
Properly stored rhubarb dream bars maintain excellent quality for several days after baking. Store cooled bars in an airtight container at room temperature for up to two days, or cover and refrigerate for up to five days. The cooler temperature actually enhances the bars’ texture, as the filling firms up and becomes easier to serve neatly.
Freezing is also viable for longer storage. Wrap individual bars or the entire pan tightly in plastic wrap, then place in a freezer-safe container. Frozen bars maintain quality for up to three months. Thaw at room temperature for approximately two hours before serving.
For advance preparation on the day of serving, the crust can be par-baked several hours ahead. Allow the crust to cool, then prepare the filling and bake when ready to serve. This flexibility makes rhubarb dream bars excellent for entertaining, as the final baking can be timed to coincide with guest arrival.
Variations and Adaptations
While the classic rhubarb dream bar recipe remains delicious in its simplicity, bakers have developed numerous variations that expand the possibilities of this dessert.
Flavor Enhancements
Adding complementary flavors to the filling creates interesting variations without compromising the original concept. A small amount of lemon zest (approximately ½ teaspoon) brightens the rhubarb’s natural tartness. Vanilla extract (¼ to ½ teaspoon) adds depth and richness. Ground ginger (⅛ to ¼ teaspoon) creates a subtle warmth that complements rhubarb beautifully. Cardamom (a tiny pinch) adds an exotic note for adventurous bakers.
Pan Size Modifications
Doubling the recipe and baking in a 9×13-inch pan works well for larger gatherings. Increase baking time by approximately 5 to 10 minutes, as the thicker pan takes longer to bake through. Conversely, halving the recipe and using a smaller pan (6×6 or 7×7 inches) is feasible but requires careful monitoring of baking time, as thinner bars cook more quickly.
Crust Variations
Some bakers replace a portion of the all-purpose flour with almond flour, oat flour, or whole wheat flour, which adds nutritional value and different flavor profiles. Brown sugar can substitute for powdered sugar in the crust, creating a slightly nuttier, caramel-like base flavor.
Common Challenges and Solutions
Soggy Crust: This occurs when the crust isn’t par-baked adequately or when filling is poured onto a cool crust. Ensure 15 minutes of par-baking at 350°F and pour the filling immediately onto the hot crust.
Overly Puffed Filling: Excessive air incorporation from overbeating eggs causes an overly risen filling that deflates during cooling. Beat eggs only until combined, approximately 15 seconds.
Underbaked or Runny Filling: Insufficient baking time prevents the filling from setting properly. Bake until the center shows only a slight jiggle when the pan is gently moved. Use an oven thermometer to verify temperature accuracy.
Dry, Rubbery Filling: Overbaking removes too much moisture from the custard layer. Watch the bars carefully during the final 5 to 10 minutes of baking and remove them when the center still has a tiny bit of movement.
Frequently Asked Questions
Can I use frozen rhubarb instead of fresh?
Yes, frozen rhubarb works in rhubarb dream bars. Thaw frozen rhubarb completely and drain excess liquid before using, as excess moisture affects the filling’s texture. The flavor remains excellent, making frozen rhubarb a convenient option for year-round baking.
What’s the difference between these bars and lemon bars?
Both desserts share a similar structure with a shortbread base and custard-like filling, but rhubarb bars feature rhubarb instead of lemon juice and use a different ratio of ingredients. The rhubarb creates a thicker, less liquid-based filling, while the tartness comes from rhubarb’s natural acids rather than citrus juice.
Can these bars be made dairy-free?
Creating dairy-free rhubarb dream bars requires substituting the butter with a dairy-free alternative like coconut oil or vegan butter. While this substitution technically works, the texture and flavor profile differ noticeably from the traditional version. Testing and adjustment may be necessary.
How do I know when the bars are perfectly baked?
The bars are done when the filling has set around the edges but the center shows only a slight jiggle—approximately the size of a quarter—when the pan is gently moved. This indicates sufficient cooking while preventing overbaking.
Why is my filling cracking on top?
Cracks typically form when the filling bakes too quickly or at too high a temperature, causing the outside to set before the inside finishes cooking. Ensure your oven maintains 350°F and avoid opening the door during baking. Cracks are cosmetic and don’t affect taste.
Conclusion
Rhubarb dream bars represent a timeless dessert that honors the spring season’s arrival and celebrates the unique qualities of fresh rhubarb. The combination of a buttery shortbread base, delicate custard middle, and tart rhubarb filling creates a sophisticated treat that impresses guests while remaining accessible to home bakers of varying skill levels. By understanding the role of each component and following careful preparation techniques, bakers can consistently create beautiful, delicious bars that capture the essence of spring baking. Whether served at casual family gatherings or formal entertaining occasions, rhubarb dream bars deliver flavor, texture, and visual appeal that justify their enduring popularity in American baking traditions.
References
- Rhubarb Dream Bars — King Arthur Baking Company. Accessed April 2026. https://www.kingarthurbaking.com/recipes/rhubarb-dream-bars-recipe
- Rhubarb: Selection and Storage — University of Minnesota Extension. https://extension.umn.edu/preserve-it-fresh/rhubarb-selection-and-storage
- Food Safety Guidelines for Home Preservation — United States Department of Agriculture (USDA) Food Safety and Inspection Service. https://www.fsis.usda.gov/food-safety