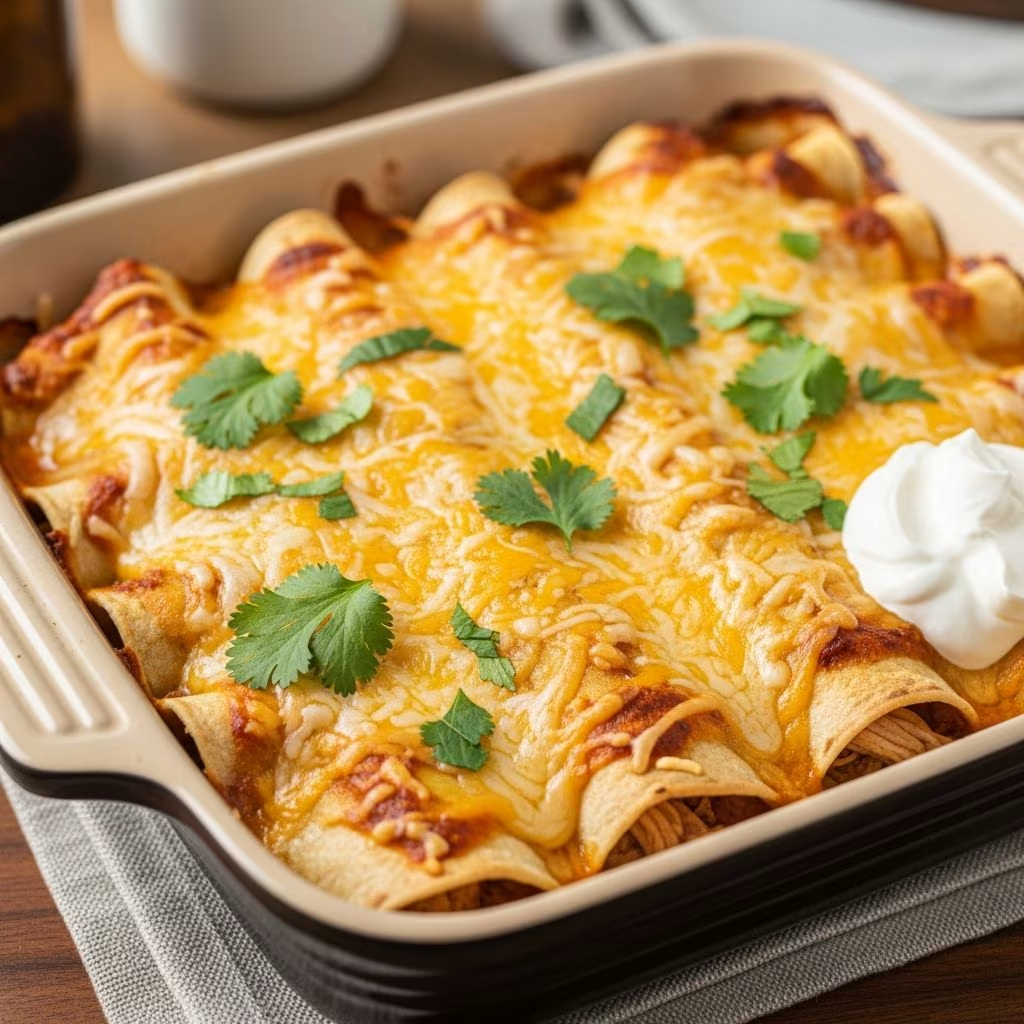
Ranch chicken enchiladas represent a beloved comfort food that merges traditional Mexican cuisine with familiar flavors that appeal to families across diverse tastes. This creamy casserole dish combines seasoned poultry, tangy ranch elements, melted cheese, and soft tortillas into a satisfying meal that works equally well for weeknight dinners or entertaining guests. Understanding the fundamental techniques and ingredient combinations will enable you to create restaurant-quality enchiladas in your own kitchen.
Understanding the Foundation: Essential Ingredients
Creating exceptional ranch chicken enchiladas begins with gathering high-quality components that work together harmoniously. The foundation consists of several key elements that define the dish’s character and flavor profile.
Protein Selection and Preparation
Chicken serves as the primary protein, and you have flexibility in how you source and prepare it. Boneless, skinless chicken breasts offer a lean option, while rotisserie chicken provides convenience and pre-cooked texture that saves preparation time. You’ll need approximately 2 to 2.5 pounds of chicken to adequately fill eight to ten tortillas, depending on how generously you stuff each one. The chicken should be fully cooked and shredded into bite-sized pieces for even distribution throughout the filling.
Tortilla Considerations
While traditional enchiladas historically feature corn tortillas, flour tortillas have become increasingly popular for this particular recipe variation. Flour tortillas provide a softer, more pliable texture that works exceptionally well when paired with ranch-based fillings and sauces. For this recipe, plan on using eight to ten medium-sized flour tortillas, adjusting the quantity based on your baking dish dimensions and desired filling density.
Dairy and Creamy Components
The creamy element distinguishes these enchiladas from more traditional variations. Ranch dressing, sour cream, and shredded cheese create the luscious sauce that binds ingredients together and adds richness to each bite. You’ll typically incorporate one-half to three-quarter cup of ranch dressing into the filling mixture, with additional dressing reserved for topping. Shredded cheddar cheese or Mexican blend cheese works beautifully, with a total of two to three cups distributed between the filling, layering, and final topping.
Flavor-Building Seasonings and Condiments
Salsa introduces tang and depth, typically ranging from three-quarter to one and one-half cups depending on your spice preference and the sauce consistency you desire. Taco seasoning packets provide convenient pre-mixed flavor profiles, though you can create custom blends using individual spices. Optional additions like green chiles, diced onions, corn, and fresh cilantro expand the flavor complexity and textural interest of your finished dish.
Preparation Methods: From Slow Cooker to Stovetop
Different cooking approaches offer various advantages, allowing you to choose the method that best fits your schedule and kitchen equipment.
Slow Cooker Technique for Minimal Hands-On Time
The slow cooker method requires minimal active preparation while delivering tender, perfectly cooked chicken. Place boneless, skinless chicken breasts in your slow cooker along with chicken broth (approximately one-half to one cup), taco seasoning, and ranch dressing mix. Cook on low for three to four hours until the chicken reaches complete tenderness and shreds easily with forks. This approach allows you to prepare the slow cooker in the morning, then focus on assembly later in the day when you’re ready to bake the enchiladas.
Stovetop Cooking for Faster Completion
For quicker preparation, cook chicken breasts on the stovetop using a skillet heated to medium-high temperature. Season the chicken with taco seasoning and any additional spices, cooking until the internal temperature reaches 165°F (approximately 6-7 minutes per side for medium-thickness breasts). Once cooked through, transfer to a cutting board and shred using two forks or by hand once the meat cools slightly.
Sautéing Supporting Vegetables
When incorporating onions or other fresh vegetables into your filling, heat a nonstick skillet over medium heat with approximately one tablespoon of oil. Sauté diced white onions for four to five minutes until they become translucent and soft, then combine with the shredded chicken, additional seasonings, green chiles, and any other filling components. Allow this mixture to simmer for a few minutes so flavors meld together cohesively.
Assembling Your Enchiladas: Step-by-Step Instructions
Proper assembly ensures even distribution of filling, sauce, and cheese throughout your dish, contributing to consistent results from first bite to last.
Preparing the Baking Vessel
Begin by preheating your oven to 350°F, allowing it adequate time to reach temperature before baking. Spray a 9×13-inch baking dish with nonstick cooking spray or lightly oil it to prevent sticking. Spread a thin base layer (approximately two to three tablespoons) of your ranch-salsa mixture across the bottom of the dish. This foundation prevents the enchiladas from sticking to the pan and allows them to absorb additional flavor as they bake.
Filling and Rolling Techniques
Lay a flour tortilla flat on a clean work surface or cutting board. Spoon approximately two to three tablespoons of the chicken filling into the center of the tortilla. Add one tablespoon or more of shredded cheese directly over the filling. Roll the tortilla firmly but gently, tucking the sides inward as you proceed to create a secure package. The filled tortilla should not be overstuffed, as excess filling can cause it to rupture during baking or roll awkwardly.
Positioning in the Baking Dish
Place each filled and rolled tortilla seam-side down in your prepared baking dish. Arranging them seam-side down prevents unraveling during the baking process. Pack them snugly together but not so tightly that they compress significantly. Depending on your tortilla size and baking dish dimensions, you’ll typically fit eight to ten enchiladas in a standard 9×13-inch dish.
Sauce Distribution and Final Topping
Pour the remaining ranch-salsa mixture evenly over all the enchiladas, ensuring adequate coverage across the top surface. The sauce will distribute slightly as the dish bakes, but spreading it initially ensures more uniform coverage. Sprinkle the reserved shredded cheese generously over the top layer, creating an appealing golden surface when baked. For extra richness, you might reserve a small amount of cheese for a final sprinkle after the initial baking period.
Baking and Finishing Techniques
The final cooking stage transforms your assembled ingredients into a cohesive, bubbling casserole with melted cheese and thoroughly heated filling.
Primary Baking Process
Place your assembled enchiladas in the preheated 350°F oven. Bake for twenty to thirty minutes, monitoring progress through the oven window if available. The enchiladas are finished when the cheese on top has melted completely and the filling has heated throughout. You’ll notice cheese beginning to bubble around the edges of the baking dish as a visual indicator of completion. The exact timing varies based on your specific oven, baking dish material (glass versus ceramic affects heat distribution), and how cold your assembled dish was when it entered the oven.
Optional Broiling for Enhanced Presentation
For a more deeply browned, visually appealing cheese topping, carefully place the baking dish under your oven’s broiler for one to two minutes after the initial baking completes. Watch closely during this step, as broiler intensity varies considerably between ovens, and cheese can burn quickly if left unattended. The broiling step remains entirely optional but produces a more restaurant-style finish if desired.
Flavor Variations and Customization Options
Ranch chicken enchiladas accommodate numerous ingredient adjustments, allowing you to tailor the dish to personal preferences and dietary requirements.
| Variation Type | Ingredient Addition | Impact on Flavor Profile |
|---|---|---|
| Vegetable Enhancement | Corn, black beans, diced bell peppers | Adds texture, nutrition, and subtle sweetness |
| Heat Level Adjustment | Jalapeños, hot salsa, cayenne pepper | Increases spiciness for those preferring more kick |
| Protein Modification | Ground turkey, shredded pork, beef | Offers different flavor profiles and nutritional content |
| Sauce Variation | Greek yogurt substitution, enchilada sauce | Reduces calories while maintaining creaminess |
| Cheese Selection | Monterey Jack, pepper jack, cotija | Creates distinct flavor characteristics and melting properties |
Serving Suggestions and Complementary Sides
Presenting your ranch chicken enchiladas thoughtfully enhances the overall dining experience and satisfaction level.
Traditional Accompaniments
Garnish the finished enchiladas with fresh cilantro for brightness and visual appeal. Serve with optional toppings including guacamole, additional sour cream, diced tomatoes, and extra salsa, allowing diners to customize their portions. A simple green salad dressed with lime vinaigrette provides refreshing contrast to the rich, creamy casserole.
Beverage Pairings
Beverages should complement rather than overwhelm the dish’s creamy, slightly tangy profile. Consider serving with limeade, iced tea, horchata, or Mexican-inspired beverages. For adult diners, light beers or crisp white wines pair pleasantly with this comfort-food style dish.
Storage and Make-Ahead Strategies
Understanding proper storage extends your ability to enjoy these enchiladas across multiple meals.
Refrigeration Guidelines
Leftover enchiladas remain safe in the refrigerator for up to three days when stored in an airtight container. To reheat, transfer individual portions to microwave-safe plates and warm on fifty percent power for two to three minutes, or cover the entire baking dish with foil and warm in a 350°F oven until heated through.
Freezing for Future Meals
Assemble enchiladas completely but wait to bake them. Cover the unbaked dish tightly with plastic wrap and aluminum foil, then freeze for up to three months. Bake from frozen, extending the baking time by ten to fifteen minutes and ensuring the center reaches adequate temperature. Alternatively, thaw overnight in the refrigerator before baking according to standard instructions.
Frequently Asked Questions
Can I use corn tortillas instead of flour tortillas?
Yes, corn tortillas work beautifully in this recipe. They provide a more traditional enchilada experience and work particularly well with the ranch-salsa sauce combination. Corn tortillas may crack slightly when rolling, so warming them briefly over a gas flame or in a warm skillet increases their pliability.
What if I don’t have ranch dressing on hand?
Create a homemade ranch mixture by combining sour cream, mayonnaise, buttermilk, and dried herbs like parsley, chives, and dill. Alternatively, use Greek yogurt mixed with ranch seasoning powder for a lighter version.
How can I make this recipe lower in calories?
Substitute Greek yogurt for some or all of the ranch dressing and sour cream. Use reduced-fat cheese or decrease the total cheese quantity. Incorporate more vegetables like diced zucchini or mushrooms to increase volume while maintaining reasonable calorie counts.
Can I prepare this dish in advance?
Absolutely. Assemble the complete dish, cover with plastic wrap and foil, and refrigerate for up to twenty-four hours before baking. Add five to ten minutes to the baking time if baking from a cold state.
What size baking dish should I use?
A standard 9×13-inch baking dish accommodates eight to ten medium flour tortillas comfortably. You might use a 9×9-inch or 8×8-inch square dish for smaller portions or fewer servings.
Nutritional Considerations
A single serving of ranch chicken enchiladas typically provides approximately 350-450 calories, with significant protein content from the chicken and cheese components. The creamy sauce contributes healthy fats that support satiety and nutrient absorption. Modifying ingredient ratios—using leaner proteins, reducing cheese quantities, or incorporating more vegetables—allows you to adjust the nutritional profile to match dietary goals and preferences.
Troubleshooting Common Issues
Understanding potential problems allows you to prevent or remedy them effectively. If enchiladas seem dry after baking, ensure you’re distributing adequate sauce across the top layer. If cheese fails to brown sufficiently, your oven temperature may run low; verify accuracy with an independent oven thermometer. Tortillas that tear during rolling often need brief warming to increase flexibility. Filling that separates from tortillas during baking suggests the enchiladas were overstuffed; reduce the filling quantity for subsequent batches.
References
- Cheesy Ranch Chicken Enchiladas — The Diary of a Real Housewife. Retrieved April 2026. https://www.thediaryofarealhousewife.com/cheesy-ranch-chicken-enchiladas/
- Ranch & Chile Chicken Enchiladas — Hidden Valley. Retrieved April 2026. https://www.hiddenvalley.com/recipe/ranch-and-chile-chicken-enchiladas/
- Easy High Protein Ranch Chicken Enchiladas — rachLmansfield. Retrieved April 2026. https://rachlmansfield.com/easy-high-protein-ranch-chicken-enchiladas/
- Slow Cooker Chicken Ranch Enchiladas Recipe — Six Sisters’ Stuff. Retrieved April 2026. https://www.sixsistersstuff.com/recipe/slow-cooker-chicken-ranch-enchiladas/
- Ranch Chicken Enchiladas Easy Recipe — Vaughnstead. Retrieved April 2026. https://www.vaughnstead.com/ranch-chicken-enchiladas-easy-recipe/
- Ranch Chicken Enchiladas Recipe — Life In The Lofthouse. Retrieved April 2026. https://life-in-the-lofthouse.com/ranch-chicken-enchiladas/
- King Ranch Chicken Enchiladas — $5 Dinners. Retrieved April 2026. https://www.5dollardinners.com/king-ranch-chicken-enchiladas/