Creating fresh, warm bread rolls from scratch doesn’t require extensive baking experience or hours of preparation. Modern rapid-rise yeast has revolutionized home baking, making it possible to produce bakery-quality rolls in a fraction of the time traditionally required. Whether you’re preparing a weeknight dinner or hosting a special meal, understanding the fundamentals of quick yeast roll preparation empowers even novice bakers to achieve consistent, delicious results.
Understanding Your Ingredients and Their Roles
The foundation of successful yeast rolls begins with comprehending how each ingredient contributes to the final product. Selecting the right components and understanding their functions ensures better outcomes and fewer disappointments during the baking process.
The Importance of Proper Yeast Selection
Yeast varieties differ significantly in their activation speed and performance characteristics. Rapid-rise yeast, also known as instant yeast or bread machine yeast, contains finer granules than traditional active dry yeast, allowing it to activate more quickly. This distinction proves crucial when you’re aiming to complete rolls in 30 to 45 minutes rather than the traditional two to three hours. The smaller particle size means the yeast can hydrate faster and begin fermenting more rapidly, reducing overall rise time without compromising flavor or texture.
When selecting yeast, always verify the expiration date on the package. Expired yeast loses its leavening power and produces disappointing, dense rolls that fail to rise properly. Store yeast in a cool, dry location or refrigerate opened packages to extend their viability. If you’re unsure whether your yeast remains active, perform a simple bloom test before committing to a full batch of dough.
Liquid Temperature: The Critical Factor
Water or milk temperature represents one of the most overlooked yet crucial elements in yeast roll preparation. The ideal temperature range falls between 105 and 110 degrees Fahrenheit, which yeast finds optimal for activation without being killed by excessive heat. Water that exceeds 120 degrees Fahrenheit will denature the yeast, rendering it inactive and resulting in rolls that won’t rise. Conversely, liquid below 80 degrees fails to activate the yeast adequately, leading to prolonged rise times and potential fermentation failures.
Using a kitchen thermometer eliminates guesswork and ensures consistent results. Simply heat your water or milk, allow it to cool if necessary, and verify the temperature before combining it with yeast. This simple practice dramatically improves success rates, particularly for beginners learning the nuances of yeast-based baking.
Fat, Sugar, and Their Functions
Butter and oil serve multiple purposes beyond adding flavor. These fats create a tender crumb structure by coating flour particles, preventing excessive gluten development that would result in tough, chewy rolls. Sugar provides food for the yeast during fermentation and contributes to browning during baking through the Maillard reaction. The combination of fat and sugar produces rolls with a desirable tender interior and golden exterior.
Flour Selection and Measuring Accuracy
All-purpose flour works well for quick yeast rolls, though bread flour produces slightly chewier results with improved structure. The critical factor lies in measuring flour accurately. Many home bakers struggle with dense, heavy rolls, a problem frequently traced to flour measurement errors. Weighing flour on a kitchen scale provides superior accuracy compared to the cup-and-scoop method, which often compacts flour and results in excess flour being incorporated.
If you lack a kitchen scale, spoon flour into your measuring cup and level it with a knife rather than scooping directly from the bag, which compacts the flour. This technique produces more consistent results than scooping alone.
Step-by-Step Preparation Process
Mastering the sequential steps ensures proper dough development and rise timing, creating rolls with optimal texture and appearance.
The Blooming Phase: Activating Your Yeast
Begin by combining warm water or milk with sugar and yeast in a large mixing bowl or stand mixer fitted with a dough hook attachment. Stir gently to combine these ingredients, then allow the mixture to rest for 5 to 10 minutes. During this blooming period, the yeast rehydrates and begins fermenting, producing visible bubbles and a characteristic yeasty aroma. This frothy, fragrant mixture indicates active, viable yeast ready to leaven your dough.
If your yeast mixture fails to become frothy or develop a noticeable smell after 10 minutes, your yeast is likely inactive. Rather than proceeding with a batch destined to fail, discard the mixture and start again with fresh yeast. This simple quality check prevents wasting time and ingredients on unsuccessful baking attempts.
Combining Remaining Ingredients
Once your yeast has bloomed successfully, add the remaining ingredients: melted butter or oil, egg, salt, and flour. If using a stand mixer, activate the dough hook and mix on low speed. If mixing by hand, use a sturdy wooden spoon or silicone spatula to combine ingredients gradually.
Add flour incrementally, beginning with most of the measured amount and reserving approximately one-half cup. This approach prevents adding excess flour, which creates dense dough prone to producing heavy, dry rolls. Mix until a soft, slightly tacky dough forms that pulls away from the bowl’s sides relatively cleanly. The dough should feel smooth and elastic but not sticky to the point of being difficult to handle.
Dough Kneading and Development
If using a stand mixer with a dough hook, knead for approximately 4 to 5 minutes on low speed. If mixing and kneading by hand, work the dough for 5 to 7 minutes until achieving a smooth, slightly tacky consistency. This kneading phase develops gluten strands, which provide the structure necessary for proper rise and a tender crumb. Avoid over-kneading, which can result in overly chewy rolls with dense texture rather than the light, pillowy consistency you’re seeking.
Shaping Techniques for Uniform Results
Properly shaped rolls bake evenly and develop an appealing presentation suitable for any table.
Preparing Your Baking Pan
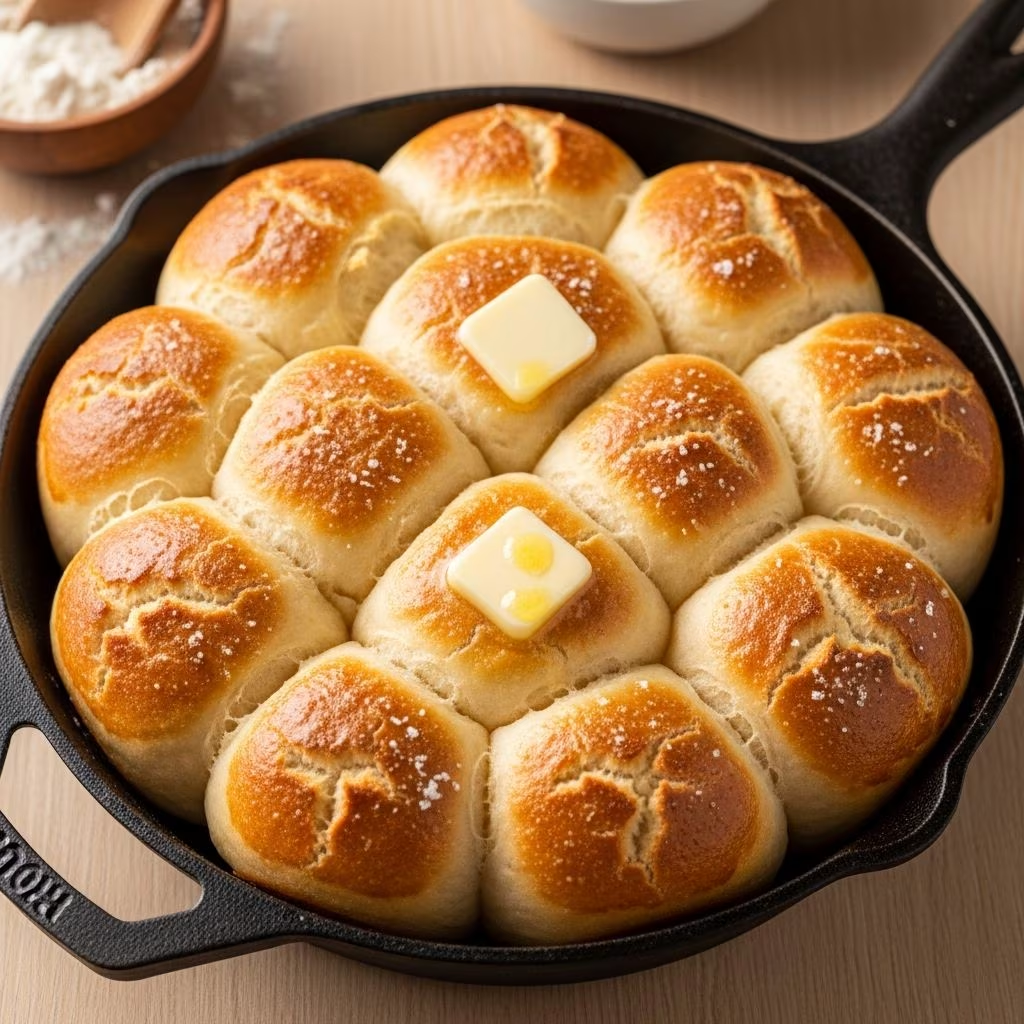
Lightly brush a 12-inch skillet or 9-by-13-inch baking pan with softened butter, ensuring complete coverage to prevent sticking and promote even browning. Some bakers prefer using parchment paper as an alternative prevention method. The choice between these approaches depends on personal preference and your desired crust characteristics, as direct contact with the buttered pan creates darker bottoms than parchment paper.
Dividing and Shaping the Dough
Divide your prepared dough into 12 equal-sized pieces for consistent cooking and presentation. To shape each piece, flatten it slightly using your palm or fingers, then fold the edges toward the center and pinch them together. Invert the shaped roll and roll it briefly on the counter with a gentle rocking motion, allowing the seams to seal underneath. This technique creates a taut surface that promotes even browning and an attractive appearance.
Arrange your shaped rolls in the buttered pan, allowing them to touch slightly but not completely crowding them. This spacing permits some expansion during rising while ensuring that neighboring rolls support each other during baking, which creates the characteristic soft sides and structured tops associated with quality dinner rolls.
Rising and Baking Timeline
Timing represents a crucial element in achieving rolls that are fully risen but not overproofed.
The Rise Period
Cover your prepared rolls with a clean kitchen towel and allow them to rise at room temperature for approximately one hour. Alternatively, if using rapid-rise yeast with express preparation techniques, some recipes achieve acceptable results with 30-minute rise periods. During this phase, the yeast ferments, producing carbon dioxide that expands within the dough, creating a light, airy structure.
Watch for rolls that have roughly doubled in size and feel soft and slightly springy when gently pressed with a fingertip. Properly risen rolls should not show indentations that remain permanently after pressing, nor should they be so puffy that they appear on the verge of bursting. This intermediate stage indicates readiness for baking.
Preparing for the Oven
Preheat your oven to 375 degrees Fahrenheit approximately 10 minutes before the rolls complete their rise. Some recipes recommend 400 degrees for slightly darker, crispier exteriors, though 375 degrees produces rolls with softer, more tender crusts. Allow your oven to reach the target temperature before baking to ensure even, consistent heat distribution.
For an attractive golden finish, brush the risen rolls with an egg wash consisting of one egg whisked with one tablespoon of water. This simple step imparts a professional appearance and enhances browning. For a slightly less glossy finish, substitute melted butter for the egg wash.
Baking Parameters
Bake your prepared rolls for 22 to 30 minutes, depending on your oven characteristics and roll size, until the tops turn golden brown and the rolls feel firm to gentle pressure. Smaller rolls may require the shorter baking time, while rolls made using larger dough portions may need additional minutes. Baking time varies slightly between ovens due to differences in temperature accuracy and heat distribution, so using visual cues in addition to time recommendations produces the most reliable results.
Common Challenges and Solutions
Understanding frequent problems and their remedies transforms frustrating baking attempts into learning opportunities.
| Problem | Likely Cause | Solution |
|---|---|---|
| Rolls don’t rise | Inactive yeast or improper liquid temperature | Check yeast expiration date; verify water temperature between 105-110°F before use |
| Dense, heavy rolls | Excess flour incorporation | Weigh flour using a kitchen scale; add flour gradually until dough reaches proper consistency |
| Rolls spread outward rather than upward | Overproofing or insufficient salt | Reduce rise time; ensure salt measurement is accurate for proper gluten structure |
| Pale, unattractive tops | Oven temperature too low or insufficient egg wash | Verify oven temperature with an oven thermometer; apply egg wash before baking |
| Overly dry rolls | Baking too long or insufficient fat in dough | Reduce baking time; verify butter measurement is accurate |
Storage and Make-Ahead Options
Quick yeast rolls adapt well to advance preparation, allowing flexibility in meal planning.
Short-Term Storage
Cooled rolls store well in an airtight container at room temperature for up to two days. Reheat gently in a 300-degree oven for approximately 10 minutes, wrapped loosely in foil to prevent over-drying. This approach restores rolls to near-fresh-baked quality without requiring additional preparation time during meal service.
Freezing for Extended Storage
Baked rolls freeze successfully for up to three months when stored in freezer-safe containers or bags. To thaw frozen rolls, remove them from the freezer and allow them to rest in a refrigerator overnight, then reheat using the gentle oven method described above. This make-ahead approach provides flexibility for busy schedules while maintaining quality comparable to freshly baked rolls.
Unbaked Dough Storage
Shaped rolls can be refrigerated for up to 24 hours before baking, allowing you to prepare rolls in advance and bake them fresh for a specific meal. Simply shape the rolls, place them in a buttered pan, cover tightly with plastic wrap, and refrigerate. When ready to bake, allow refrigerated rolls to reach room temperature for approximately 30 minutes, then proceed with baking according to recipe instructions. This approach provides ultimate flexibility for meal planning while delivering the incomparable satisfaction of fresh-baked bread.
Frequently Asked Questions
Can I substitute milk with water?
Yes, water produces acceptable results, though milk creates slightly softer, more tender rolls with richer flavor due to proteins and lactose in the milk.
What’s the difference between instant yeast and rapid-rise yeast?
Rapid-rise yeast contains finer particles and ferments slightly faster, reducing rise time by 10 to 15 minutes compared to standard instant yeast. Both produce excellent results; rapid-rise simply accelerates the process.
Why is my yeast mixture not getting frothy?
Your yeast is likely inactive due to expired product, liquid temperature outside the optimal range, or inactive ingredients. Discard and begin with fresh yeast and properly heated liquid verified with a thermometer.
Can I make rolls without a stand mixer?
Absolutely. Mix and knead by hand using a sturdy spoon or wooden spatula, then knead the dough on a clean counter surface for 7 to 10 minutes until smooth and elastic. The process requires slightly more effort but produces identical results.
How do I know when rolls are properly baked?
Rolls should display golden-brown tops and feel firm to gentle pressure. Tap the bottom of a roll; a hollow sound indicates proper baking. If unsure, bake an additional 2 to 3 minutes.
References
- Quick Yeast Dinner Rolls — Jo Cooks. Accessed 2026-04-10. https://www.jocooks.com/recipes/quick-yeast-dinner-rolls/
- 30 Minute Rolls — Your Homebased Mom. Accessed 2026-04-10. https://www.yourhomebasedmom.com/30-minute-rolls/
- No-Knead Quick Dinner Rolls (45 Minute Yeast Rolls) — Savory Experiments. Accessed 2026-04-10. https://www.savoryexperiments.com/easy-dinner-rolls/
- One Hour Yeast Rolls (Easy, Fluffy Dinner Rolls Recipe) — Amy Bakes Bread. Accessed 2026-04-10. https://amybakesbread.com/one-hour-or-less-yeast-rolls/
- Easy Yeast Rolls for Beginners (With A Video) — Fresh April Flours. Accessed 2026-04-10. https://freshaprilflours.com/easy-yeast-rolls/