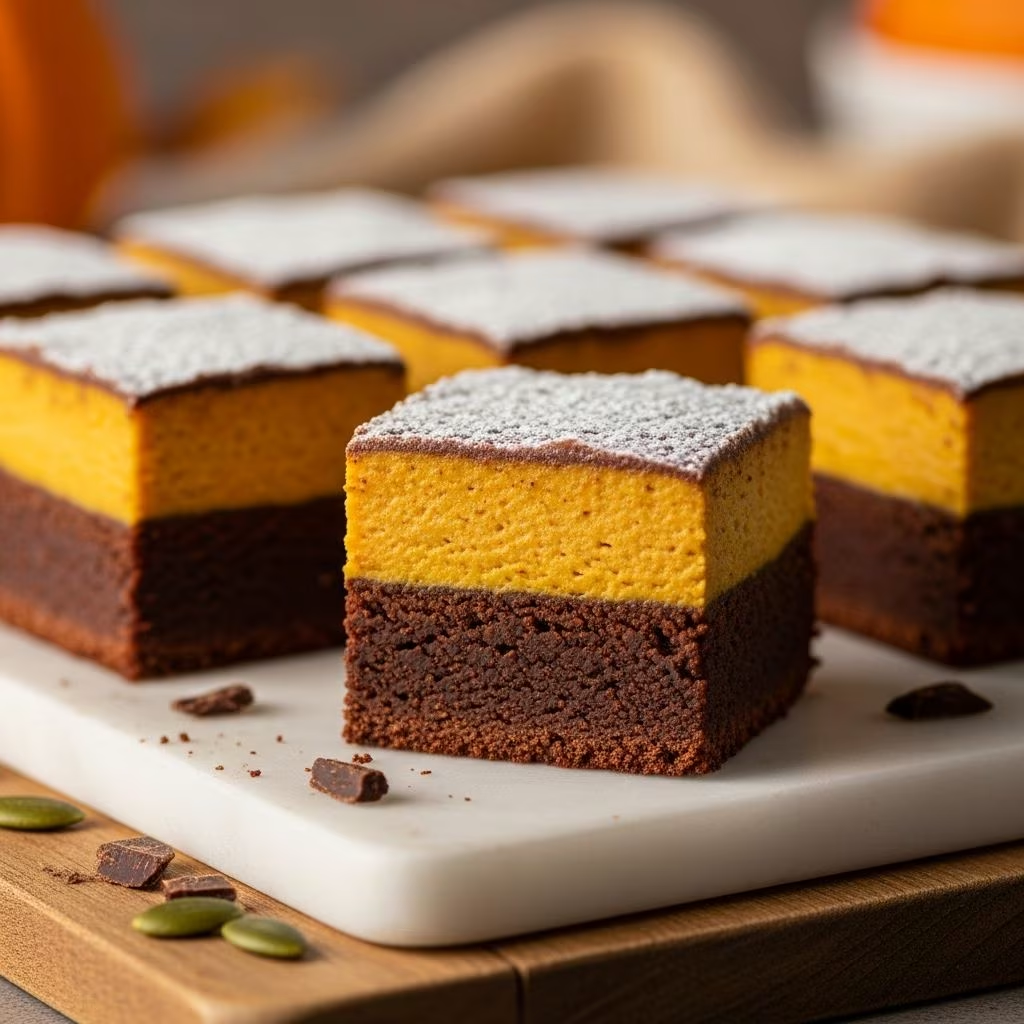
When autumn arrives, bakers everywhere seek ways to celebrate the season with warm spices and beloved seasonal ingredients. One dessert that perfectly encapsulates fall flavors while maintaining the indulgent appeal of brownies is the combination of rich chocolate and spiced pumpkin in a single pan. This technique of layering creates not only a visually striking treat but also delivers contrasting textures and complementary flavors that make each bite memorable.
The marriage of pumpkin and chocolate has long been a trusted pairing in seasonal baking, yet when executed as marbled layers within a brownie format, the result becomes something more sophisticated than either flavor alone could achieve. The dense, fudgy chocolate base provides an earthy counterpoint to the lighter, more delicate pumpkin layer, while the swirling technique creates beautiful patterns that make these treats worthy of gift baskets or celebration platters.
Understanding the Ingredient Foundation
Creating successful pumpkin and chocolate swirl brownies begins with understanding each component’s role in the final product. The foundation relies on a balance of wet and dry ingredients that must be measured accurately for optimal results.
The chocolate base starts with quality ingredients: Unsalted butter and premium dark chocolate form the foundation of richness. The butter, typically one stick (four ounces), melts together with six ounces of finely chopped bittersweet chocolate to create a smooth, glossy mixture. This combination provides the depth of flavor that distinguishes these brownies from ordinary versions.
The dry mixture includes: All-purpose flour serves as the structural base, typically two cups in most recipes. Baking powder or baking soda, ranging from one teaspoon to a partial teaspoon depending on the variation, helps the brownies achieve the desired rise. A small pinch of cayenne pepper, often around one-eighth to one-quarter teaspoon, adds subtle warmth that enhances both the chocolate and pumpkin elements without creating obvious heat.
Sweetening and binding elements: Granulated sugar, typically between one and three-quarters cups, dissolves into the egg mixture to create a light, foamy base. Large eggs, usually four of them, provide both binding and lift when beaten thoroughly. Pure vanilla extract, at one tablespoon, rounds out the flavor profile with subtle vanilla notes that support rather than compete with the dominant flavors.
The pumpkin mixture components: Solid-pack pumpkin puree, approximately one and one-quarter cups, forms the second batter. Vegetable oil, typically one-quarter cup, keeps this layer moist and prevents it from becoming dry during baking. Ground spices—cinnamon, nutmeg, and sometimes pumpkin pie spice blends—bring the characteristic autumn warmth that makes this dessert feel seasonally appropriate.
The Preparation and Mixing Process
Success with these layered brownies depends heavily on proper technique and sequential steps that build the two distinct batters.
Initial preparation sets the stage: Begin by preheating your oven to 350 degrees Fahrenheit, allowing adequate time for it to reach proper temperature before baking begins. Prepare a nine-inch square baking pan by buttering it generously and dusting it with flour, or alternatively, line it with parchment paper, which makes removal significantly easier after baking. Some bakers prefer spraying with nonstick baking spray as an all-in-one solution.
Melting the chocolate requires gentle heat: Combine the butter and chopped dark chocolate in a heatproof bowl. Using a microwave method, heat the combination on high power in 30-second intervals, stirring thoroughly between each interval until completely smooth and glossy. Alternatively, use the double-boiler method by setting a heatproof bowl over a pot of simmering water, stirring occasionally until the mixture melts evenly. Avoid overheating, which can cause chocolate to become grainy or lose its silky texture.
Building the base batter requires precision: In a separate mixing bowl, whisk together the flour, baking powder, salt, and cayenne pepper. In the bowl of an electric mixer, combine sugar, eggs, and vanilla extract. Beat this mixture on medium speed for three to five minutes until it becomes light, fluffy, and pale in color. This step incorporates air into the batter, which contributes to the final brownie texture. Reduce the mixer speed to low and gradually add the flour mixture, mixing just until combined without overmixing.
Creating two distinct batters: Divide the main batter in half, reserving one portion in the mixer bowl and transferring the other half to a separate bowl. Into the first bowl with the mixer still running, pour the melted chocolate mixture and beat until fully incorporated and the batter becomes smooth. This chocolate batter typically has a thicker consistency than its pumpkin counterpart.
In the remaining batter, fold in the pumpkin puree, vegetable oil, and the chosen spice blend—whether individual ground spices or a prepared pumpkin pie spice mixture. Stir gently until the pumpkin is evenly distributed and the color becomes uniform throughout. This batter should have a slightly thinner consistency than the chocolate version.
The Layering and Swirling Technique
The visual appeal and flavor complexity of these brownies depend on proper layering and swirling execution.
Building the layers: Pour half of the chocolate batter into the prepared pan, using a spatula to spread it evenly across the bottom. Layer half of the pumpkin batter over the chocolate, smoothing gently. Repeat this process with the remaining chocolate batter, then finish with the final layer of pumpkin mixture on top.
Creating the swirl effect: Using a small spatula, table knife, or skewer, gently drag it through both layers in a figure-eight or zigzag pattern. Some bakers prefer creating lines in one direction, then dragging perpendicular lines through them. The key is working quickly with light pressure—overmixing destroys the distinct layers and creates muddy colors rather than beautiful marbling. Aim to make only a few decisive strokes, as this preserves the contrast between the two batters while creating visual interest.
Optional finishing touches: Before baking, some bakers sprinkle the top with chocolate chips, chopped nuts like pecans or hazelnuts, or chocolate sprinkles. These additions provide textural variation and extra richness to the final product.
Baking and Cooling Guidelines
Proper baking time and temperature ensure brownies achieve the desired texture—fudgy inside while set on the outside.
Bake at 350 degrees Fahrenheit for 40 to 45 minutes, depending on your oven’s accuracy and the pan’s material. A brownie baked in a dark metal pan may need slightly less time than one in a light-colored or glass pan. Insert a toothpick or cake tester near the center; it should come out with a few moist crumbs clinging to it rather than being completely clean. Overbaking results in dry, cake-like brownies, while underbaking creates an unset center that may be too soft to cut cleanly.
Allow brownies to cool completely in the pan before cutting or removing. This cooling period, which may take one to two hours, allows the structure to set properly. Once fully cooled, use the parchment paper overhang to lift the entire brownie slab from the pan if you used parchment, or run a knife around the edges before inverting onto a cutting board. Cut into 16 squares using a sharp knife, wiping the blade between cuts for cleaner edges and more attractive presentation.
Storage and Make-Ahead Considerations
These brownies maintain their quality well when stored properly, making them excellent for advance preparation.
- Room temperature storage: Keep brownies in an airtight container at room temperature for up to five days. They often taste even better on the second or third day as flavors meld and mature.
- Refrigerator storage: Sealed containers in the refrigerator extend shelf life to approximately one week. Allow brownies to come to room temperature before serving for optimal flavor and texture.
- Freezing for long-term storage: Wrap individual brownies in plastic wrap and place them in a freezer-safe container. They keep well for up to three months. Thaw at room temperature for about 30 minutes before eating.
Customization and Variation Ideas
While the classic pumpkin and chocolate combination is wonderful on its own, numerous variations allow personalization based on preference and ingredient availability.
Spice modifications: Beyond traditional cinnamon and nutmeg, consider adding ground ginger, cloves, or allspice to deepen autumn warmth. The cayenne pepper addition remains optional for those who want subtle heat without distinctive spiciness.
Mix-ins and toppers: Chopped nuts such as pecans, walnuts, or hazelnuts add crunch and richness. Chocolate chips mixed into either batter increase indulgence. White chocolate chips provide an interesting contrast to the dark chocolate batter.
Texture variations: For thicker brownies with more substantial pumpkin presence, reduce the baking pan size to eight inches square, understanding that baking time will increase. For thinner, more delicate brownies, use a larger pan.
Serving Suggestions and Presentation
These brownies deserve presentation that showcases their beautiful marbling and autumnal appeal.
Dust the finished brownies with powdered sugar for an elegant finish that highlights the color contrast. Serve at room temperature with a cup of coffee, hot apple cider, or hot chocolate during fall months. These brownies make exceptional gifts when wrapped in decorative paper or arranged in gift boxes, particularly appreciated during Halloween, Thanksgiving, or as autumn entertaining centerpieces.
For entertaining purposes, arrange brownies on platters alongside other fall-themed treats, or package them individually as part of a dessert sampler. The visual appeal of the pumpkin-chocolate swirl makes them more visually interesting than uniform-colored brownies.
Frequently Asked Questions
Can I use canned pumpkin pie filling instead of pure pumpkin puree?
Pure pumpkin puree is recommended because pie filling contains added spices and sugar that would alter the recipe’s balance. If you only have pie filling available, reduce or omit the added spices and adjust sugar if needed.
What if my chocolate batter is too thick to layer easily?
Add a few tablespoons of the original base batter to the chocolate mixture to thin it slightly. This restores pourable consistency without diluting chocolate flavor significantly. Similarly, if the pumpkin batter seems too thin, let it rest a few minutes for starches to absorb excess moisture.
Why did my brownies turn out cake-like instead of fudgy?
Overbaking is the most common cause. Bake until a toothpick emerges with moist crumbs, not clean. Additionally, ensure you’re not using too much flour, which can be prevented by spooning flour into measuring cups rather than scooping directly.
Can I make these brownies without eggs?
These brownies rely on eggs for structure and binding, making substitution difficult. Egg replacers exist for certain baking applications, but results with brownies tend to be less satisfactory than with the original recipe.
Do these brownies need to be refrigerated?
Refrigeration is not necessary, though some people prefer brownies chilled. Room temperature storage in airtight containers works perfectly for several days.
Troubleshooting Common Issues
Understanding what goes wrong and how to prevent it improves success rates with these brownies.
Muddy swirling: This occurs from overmixing the layers. Use only a few decisive strokes when creating the swirl pattern. Light pressure and speed minimize disruption to the distinct layers.
Uneven baking: Dark pans bake faster than light ones. Rotate the pan halfway through baking if you notice uneven browning. Oven hot spots also contribute to uneven results, so rotating remains advisable.
Dry texture: Overbaking remains the primary cause of dry brownies. Remove from the oven when a toothpick still shows moist crumbs. Additionally, ensure ingredients are measured accurately, particularly flour, which when packed too tightly adds more to the recipe than intended.
Spreading or running during baking: Ensure your oven temperature is accurate by using an oven thermometer. If batter seems unusually loose before baking, refrigerate it for 15 minutes before proceeding.
Why This Recipe Endures in Seasonal Baking
Pumpkin and chocolate swirl brownies have become a beloved autumn staple because they successfully balance indulgence with seasonality. The recipe respects the integrity of both flavor components—chocolate’s deep richness and pumpkin’s subtle spiced warmth—while creating something more visually compelling and texturally interesting than either element alone. The layering technique transforms a simple brownie into something worthy of special occasions and entertaining occasions, while the straightforward ingredients and achievable technique keep it accessible to bakers of varying skill levels. Whether prepared for personal enjoyment, shared with friends, or gifted during autumn months, these brownies deliver consistent satisfaction and undeniable appeal.
References
- Baking Soda and Baking Powder Difference — U.S. Food & Drug Administration. 2024. https://www.fda.gov/
- Pumpkin Nutrition and Food Safety — USDA FoodData Central. 2024. https://fdc.nal.usda.gov/
- Chocolate Chemistry and Tempering — Cook’s Science, America’s Test Kitchen. 2024. https://www.cooksscience.com/
- Oven Temperature Accuracy and Baking Success — Serious Eats Baking Guide. 2023. https://www.seriouseats.com/
- Food Storage and Freezing Guidelines — University of Georgia Cooperative Extension. 2023. https://extension.uga.edu/