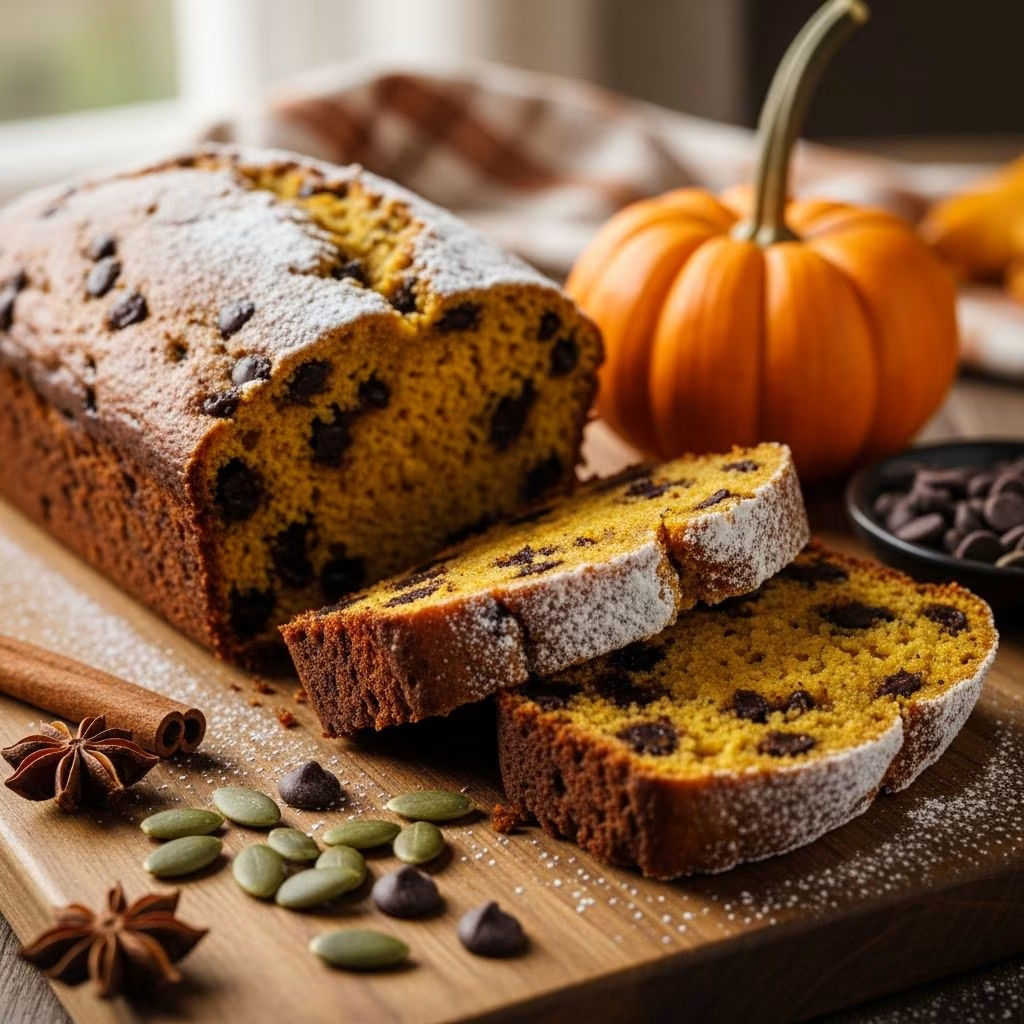
Pumpkin chocolate chip bread stands as one of the most beloved autumn baked goods, bringing together the warmth of seasonal spices with the indulgence of melted chocolate. This classic treat transcends the typical breakfast bread category, serving equally well as a dessert, snack, or gift for friends and family. The combination of pumpkin puree, aromatic fall spices, and sweet chocolate morsels creates a texture that remains moist and flavorful long after baking.
Whether you are an experienced baker or just beginning your culinary journey, this comprehensive guide will walk you through every aspect of creating restaurant-quality pumpkin chocolate chip bread in your own kitchen. From understanding ingredient selection to mastering baking techniques, you will discover the secrets that transform simple pantry staples into an extraordinary loaf.
Essential Ingredients for Superior Results
The foundation of exceptional pumpkin chocolate chip bread rests upon selecting quality ingredients and understanding how each component contributes to the final product. While the basic ingredient list remains relatively straightforward, the choices you make significantly impact flavor, texture, and moisture retention.
The Core Components
Pumpkin puree forms the heart of this bread, providing natural moisture, subtle sweetness, and characteristic flavor. Using pure pumpkin puree rather than pumpkin pie filling ensures you control the spice levels and sugar content. A standard 15-ounce can typically yields approximately one and three-quarter cups of puree.
All-purpose flour serves as the structural base for your bread. Most recipes call for between one and three-quarter to two and three-quarter cups, depending on desired density and moisture levels. Measuring flour by spooning it into your measuring cup rather than scooping directly from the bag prevents over-packing and ensures consistent results.
Leavening agents create the airy crumb structure that prevents your bread from becoming dense and gummy. The combination of baking soda and baking powder works synergistically: baking soda reacts immediately with acidic ingredients, while baking powder provides additional rise during baking.
Fats and oils contribute moisture and richness to your finished loaf. Traditional recipes often employ butter, while others substitute vegetable oil or olive oil. Each option produces slightly different results: butter creates a more tender crumb, while oils typically yield exceptionally moist bread that maintains softness for several days.
Sweeteners balance the earthiness of pumpkin and complement fall spices. Most recipes combine granulated sugar with brown sugar, where brown sugar adds moisture and deeper caramel notes.
Spices That Define Autumn Flavor
The spice selection transforms basic pumpkin bread into an aromatic autumn experience. Essential spices include cinnamon, nutmeg, ginger, and cloves. These warm spices pair naturally with pumpkin and chocolate, creating complex flavor layers that develop and intensify as the bread cools.
Ground cinnamon, typically the most prominent spice, provides warm vanilla-like notes. Nutmeg adds subtle earthiness and complexity. Ginger contributes slight heat and brightness, while cloves deliver deep, peppery undertones. Some recipes employ pre-mixed pumpkin pie spice as a convenient alternative.
Chocolate Chip Selection
Chocolate chips represent the crowning element of this bread, providing pockets of indulgence throughout each slice. Semi-sweet chocolate chips remain the traditional choice, offering balanced sweetness without overwhelming the pumpkin and spice flavors. Some bakers prefer dark chocolate for deeper, less sweet results, while others choose milk chocolate for additional sweetness.
A helpful technique involves coating chocolate chips lightly with flour before folding them into the batter. This prevents the chips from sinking to the bottom of the loaf during baking, ensuring more even distribution throughout.
Step-by-Step Preparation Process
Preparation and Oven Setup
Begin by preheating your oven to 350 degrees Fahrenheit. This moderate temperature allows the interior to bake fully while the exterior develops a golden-brown crust without burning. While the oven heats, prepare your baking vessel by lining the bottom with parchment paper and coating all surfaces with cooking spray. This dual approach prevents sticking from both the bottom and sides.
You may bake in one or two loaf pans depending on your recipe and preferences. Standard loaf pans measure either 9 by 5 inches or 8.5 by 4.5 inches. Some bakers prefer creating multiple mini loaves, which reduce baking time and allow for convenient portioning or gifting.
Combining Wet Ingredients
In a medium-sized bowl, begin by creaming together fats and sugars using an electric mixer or vigorous hand-mixing. This incorporation of air creates a lighter, more tender crumb structure. Continue beating for several minutes until the mixture achieves a pale, fluffy consistency.
Introduce eggs one at a time, beating well after each addition to fully incorporate. Add vanilla extract, pumpkin puree, and any liquid components (milk, oil, or Greek yogurt) specified in your chosen recipe. Beat until the mixture reaches a smooth, uniform consistency with no visible lumps.
Mixing Dry Ingredients
In a separate bowl, combine all flour, leavening agents, salt, and spices. Whisking these ingredients together ensures even distribution of baking soda and baking powder, preventing bitter spots or areas with insufficient rise.
Combining Wet and Dry Components
Rather than mixing all dry ingredients into wet ingredients at once, alternate between the two mixtures, beginning and ending with dry ingredients. This technique prevents overdevelopment of gluten, which would produce tough, dense bread. Start with approximately one-third of the flour mixture, then add half the remaining milk or liquid. Continue this pattern until all ingredients combine.
Use a rubber spatula or wooden spoon rather than a mixer for this final combining step. Mix until the batter just comes together; small lumps remaining at this stage will disappear during baking. Over-mixing at this point creates undesirable toughness in the finished product.
Incorporating Chocolate Chips
Gently fold in chocolate chips by hand, ensuring even distribution throughout the batter. If using the flour-coating technique, combine chips with a quarter cup of reserved flour in a small bowl before adding to the batter. This final folding step requires a gentle hand to maintain the air incorporated during earlier mixing stages.
Baking Techniques for Perfect Results
Batter Distribution and Topping
Pour the batter evenly into your prepared pan or pans, smoothing the surface gently with a spatula. Some bakers prefer topping their loaves with extra chocolate chips or a light sprinkle of turbinado sugar for added texture and visual appeal.
Baking Duration and Temperature Monitoring
Standard loaves bake for 45 to 55 minutes at 350 degrees Fahrenheit, though specific timing depends on your particular oven, loaf pan dimensions, and batter thickness. Mini loaves require significantly less time, typically 25 to 35 minutes.
Begin checking for doneness around the 40-minute mark by inserting a toothpick into the center of the loaf. The toothpick should emerge clean or with only a few moist crumbs attached; if batter clings to the toothpick, return the bread to the oven for additional minutes.
Cooling Procedures
Allow the bread to cool in the baking pan for several minutes after removing from the oven. This brief cooling period allows the structure to set slightly, preventing collapse when you turn the loaf out. After 10 to 15 minutes, invert the bread onto a wire cooling rack and allow complete cooling before slicing. Slicing warm bread may result in crumbling; complete cooling allows the crumb to firm and hold together properly.
Variation Options and Customization
While the traditional pumpkin chocolate chip bread remains beloved, numerous variations accommodate different preferences and dietary considerations. Some bakers substitute nuts such as chopped pecans or walnuts for chocolate chips, creating a textural contrast. Others incorporate Greek yogurt for added moisture and protein while reducing fat content.
For those seeking alternative sweetening options, some recipes successfully utilize coconut sugar or maple syrup alongside traditional granulated sugar. Experimenting with spice ratios allows customization to personal preference: those favoring ginger may increase its proportion, while spice-sensitive palates may reduce cloves.
Storage and Preservation Methods
Properly stored pumpkin chocolate chip bread remains fresh and moist for several days. At room temperature, wrapped tightly in plastic wrap or stored in an airtight container, the bread maintains excellent quality for three to four days. For extended storage, wrap completely cooled loaves in plastic wrap, then aluminum foil, and freeze for up to three months. Thaw at room temperature for several hours before unwrapping to prevent condensation.
Frequently Asked Questions
Can I make pumpkin chocolate chip bread without an electric mixer?
Absolutely. While an electric mixer simplifies the process, vigorous hand-mixing with a wooden spoon or whisk accomplishes the same results. The key lies in ensuring all ingredients combine thoroughly without over-working the batter during final assembly.
What causes my pumpkin bread to sink in the middle?
Middle sinking typically results from insufficient baking time, oven temperature variations, or opening the oven door too frequently during baking. Ensure your oven maintains a steady 350 degrees Fahrenheit and avoid opening the door during the first 30 minutes of baking.
Can I substitute canned pumpkin with fresh pumpkin puree?
Yes, though fresh pumpkin puree often contains more moisture than canned varieties. If substituting, you may need to increase flour slightly or reduce additional liquid ingredients to maintain proper batter consistency.
How do I prevent chocolate chips from sinking?
Coating chocolate chips with a light dusting of flour before folding them into the batter significantly reduces sinking. The flour creates friction that slows the chips’ descent through the batter.
Why is my pumpkin bread dry?
Over-baking represents the most common cause of dry pumpkin bread. Begin checking for doneness at the 40-minute mark and remove the bread as soon as a toothpick shows clean or with minimal moist crumbs. Additionally, ensure you are not over-measuring flour by spooning it into your measuring cup rather than scooping.
Conclusion
Creating homemade pumpkin chocolate chip bread requires understanding fundamental baking principles combined with attention to ingredient quality and technique. By following these comprehensive guidelines, measuring ingredients accurately, and respecting baking times and temperatures, you will consistently produce moist, flavorful loaves that rival professional bakery offerings. Whether sharing with loved ones or enjoying personally, this timeless autumn treat brings warmth, comfort, and satisfaction to every table.
References
- Tastes Better From Scratch – Pumpkin Chocolate Chip Bread — Tastes Better From Scratch. 2024. https://tastesbetterfromscratch.com/pumpkin-chocolate-chip-bread/
- Salt & Baker – Pumpkin Chocolate Chip Bread — Salt & Baker. 2024. https://saltandbaker.com/pumpkin-chocolate-chip-bread/
- Katiebird Bakes – Chocolate Chip Pumpkin Bread — Katiebird Bakes. 2024. https://www.katiebirdbakes.com/chocolate-chip-pumpkin-bread/
- Sally’s Baking Addiction – Pumpkin Bread Recipe — Sally’s Baking Addiction. 2024. https://sallysbakingaddiction.com/pumpkin-chocolate-chip-bread/
- Sugar Hero – Pumpkin Chocolate Chip Bread — Sugar Hero. 2024. https://www.sugarhero.com/pumpkin-chocolate-chip-bread/