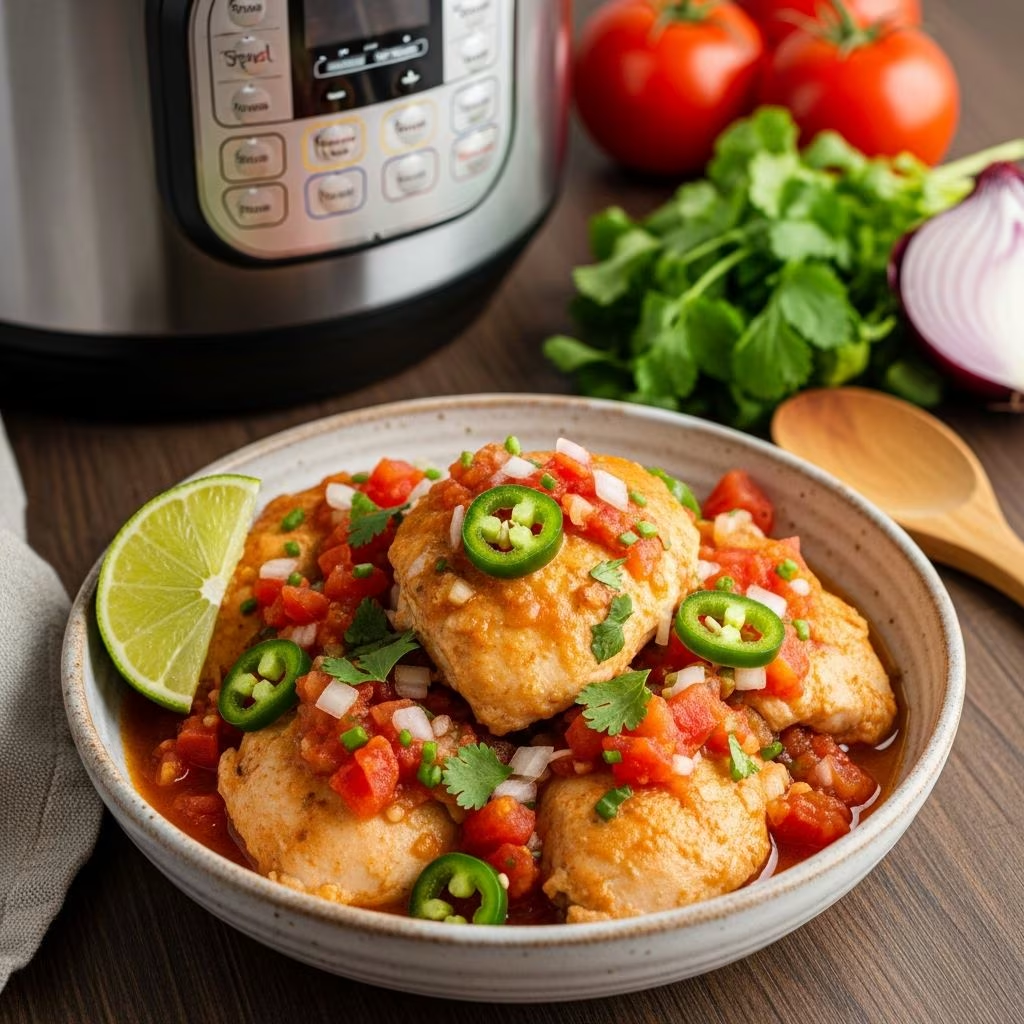
When it comes to weeknight dinners that require minimal effort but deliver maximum flavor, few dishes compare to pressure cooker salsa chicken. This versatile protein solution has become a staple in modern kitchens, offering busy cooks a way to prepare restaurant-quality shredded chicken in a fraction of the time it would take using traditional cooking methods. The beauty of this dish lies in its simplicity—combining just a handful of ingredients with the power of pressure cooking to create tender, moist chicken infused with bright salsa flavors.
Why Pressure Cookers Transform Salsa Chicken
Pressure cooking works by trapping steam inside a sealed vessel, which raises the internal temperature above boiling point and dramatically reduces cooking time. For chicken, this means what normally takes 30-45 minutes in a conventional oven can be accomplished in just 8-20 minutes depending on your method. The high-pressure environment breaks down collagen in the chicken fibers more efficiently than traditional cooking, resulting in incredibly tender meat that shreds easily with a fork.
The combination of salsa with pressure cooking is particularly effective because the acidic tomatoes and peppers in salsa work synergistically with the moist heat environment. Unlike oven-roasted chicken that can sometimes dry out, pressure-cooked chicken surrounded by salsa retains its natural juices while absorbing the bold flavors of garlic, jalapeño, and spices. This method ensures that every strand of shredded chicken carries the complete flavor profile throughout.
Essential Ingredients and Substitutions
The foundation of a successful salsa chicken dish starts with understanding your ingredient options. While the classic recipe calls for specific components, understanding each element allows for customization based on dietary preferences and pantry availability.
Protein Selection
Boneless, skinless chicken breasts are the most commonly recommended cut, typically requiring 10-15 minutes of high-pressure cooking. However, chicken thighs offer a juicier alternative due to their higher fat content, though they may require slightly extended cooking time of 12-18 minutes. The choice between breasts and thighs ultimately depends on your preference for lean protein versus more flavorful, forgiving meat that resists drying out.
Salsa Varieties
The type of salsa dramatically influences the final dish’s character. Fresh salsa from the refrigerated section of grocery stores tends to be thinner and more delicate, requiring minimal additional liquid. Jarred salsas vary in consistency—some chunky varieties work wonderfully for texture, while smooth versions integrate more seamlessly into the cooking liquid. Heat level matters significantly: mild salsa creates a family-friendly base, medium adds noticeable spice, and hot versions appeal to those who enjoy considerable heat. Some cooks enhance store-bought salsa with fresh lime juice, cilantro, or additional jalapeños for complexity.
Seasoning Components
A typical seasoning profile combines onion powder, garlic powder, ground cumin, and oregano (Mexican oregano provides authentic flavor). Chili powder adds depth without significant heat, while paprika contributes subtle smokiness. Fresh garlic and jalapeños layered on top of dried spices create dimensional flavor impossible to achieve with powder alone. Salt serves as a flavor amplifier and should be added carefully, as many salsa brands contain sodium.
Step-by-Step Cooking Process
Preparation Phase
Begin by placing your Instant Pot’s stainless steel inner pot into the base unit. While some recipes recommend using a trivet (steamer rack), others skip this step depending on the amount of liquid present. Pour salsa into the bottom of the pot—approximately 1 to 1.5 cups depending on your recipe variation. Layer the boneless chicken on top of the salsa, arranging pieces so they’re relatively flat for even cooking.
Sprinkle your seasoning mixture directly over the chicken: onion powder, garlic powder, cumin, oregano, and kosher salt. Add fresh minced garlic and jalapeño pieces distributed across the chicken surface. If using a thinner salsa consistency, add approximately ¼ cup water to ensure sufficient liquid reaches pressure requirements. Toss gently with tongs to coat the chicken in salsa and spices, ensuring seasonings distribute evenly.
Pressure Cooking Execution
Secure the lid firmly and move the pressure valve to the “Sealing” position. Select the Pressure Cook (or Manual, depending on your model) setting at high pressure. Cooking times vary by chicken cut and starting temperature: thawed chicken breasts cook for 10-15 minutes, while frozen breasts require 20-25 minutes. The Instant Pot requires 10-12 minutes to build pressure before cooking officially begins, so total time from start to eating ranges from 22-40 minutes.
Pressure Release Strategy
Upon completion, you’ll encounter two pressure release options. Natural pressure release (NPR) allows pressure to drop gradually—typically 10 minutes—without manual intervention. This method is gentler on the meat and results in slightly more tender chicken. Quick release involves manually opening the valve to vent steam immediately, reducing total time but requiring careful handling to avoid steam burns. Many home cooks prefer a hybrid approach: 10 minutes natural release followed by manual quick release of remaining pressure.
Post-Cooking Refinement Techniques
Shredding and Sauce Reduction
Once pressure has fully released, carefully transfer chicken to a large bowl using a slotted spoon, leaving behind the cooking liquid. Using two forks or a shredding tool, pull the chicken apart into desired size strands—finer shreds work better for tacos and nachos, while chunkier pieces suit bowls and salads. Return the shredded chicken to the pot containing the flavorful cooking liquid.
At this point, assess your sauce consistency. If the liquid appears thin or watery, engage the Sauté function on your Instant Pot and allow the liquid to reduce for 8-12 minutes, stirring occasionally to prevent sticking. This reduction concentrates flavors and creates a more cohesive sauce that clings to the chicken rather than pooling at the bottom. The finished sauce should coat the shredded chicken without excessive moisture.
Final Flavor Adjustments
Before serving, taste your creation and adjust seasonings as needed. Fresh cilantro stirred in at the end adds brightness that complements the salsa base. Sliced scallions provide textural contrast and mild onion notes. A squeeze of fresh lime juice balances richness and enhances the overall flavor profile. These finishing touches elevate the dish from functional to exceptional.
Versatile Serving Applications
The beauty of salsa chicken lies in its remarkable versatility across numerous cuisines and meal types. Serve it over fluffy white or cilantro-lime rice with black beans for a complete one-pot meal concept. Layer it into warm flour or corn tortillas with shredded cheese, avocado, and sour cream for authentic-style tacos. Create protein-loaded salad bowls by combining salsa chicken with crisp lettuce, cherry tomatoes, corn, black beans, tortilla strips, and ranch dressing.
For breakfast enthusiasts, the shredded chicken transforms into breakfast burritos when combined with scrambled eggs, cheese, and potatoes. Mix it into enchilada sauce and layer with tortillas for a crowd-pleasing casserole. Top nachos with salsa chicken, melted cheese, jalapeños, and cilantro for entertaining or game day snacks. Stuff into quesadillas alongside cheese and peppers for quick lunch solutions.
Meal Preparation and Storage Strategies
Make-Ahead Advantages
Salsa chicken’s peak utility emerges when prepared during meal prep sessions. Cook a double or triple batch on Sunday afternoon, then divide into portion-sized containers for grab-and-go meals throughout the week. The chicken maintains quality in refrigerator storage for 3-4 days, allowing weekday meals to come together in minutes rather than from scratch.
Freezer-Friendly Storage
This dish freezes exceptionally well, lasting up to 3 months in a standard freezer. Portion into freezer-safe containers or resealable bags before freezing to prevent ice crystal formation and freezer burn. Thaw overnight in the refrigerator before reheating, or reheat directly from frozen using the Instant Pot’s pressure cook function for approximately half the original cooking time. The salsa acts as a protective medium that preserves moisture and prevents oxidation.
Nutritional Considerations and Modifications
A typical serving of salsa chicken provides substantial protein content—approximately 25-30 grams per 4-ounce portion—with minimal carbohydrates from the salsa and minimal added fat. Selecting light or low-sodium salsa varieties accommodates dietary restrictions and sodium-conscious eaters. For those following ketogenic diets, serve salsa chicken over cauliflower rice instead of traditional rice to maintain carbohydrate restrictions while maintaining satiety.
Dairy-free modifications are straightforward—simply eliminate cheese toppings and use dairy-free sour cream alternatives if desired. Gluten-sensitive individuals should verify their salsa brand contains no thickening agents, though most commercial salsas prove naturally gluten-free. Those managing spice levels can select mild salsa and reduce jalapeño quantity, making this dish accommodating for various heat preferences within a single household.
Common Challenges and Solutions
Preventing Dry Chicken
The most frequent complaint involves overcooked, dry chicken resulting from excessive cooking time. Remember that residual heat continues cooking the meat after pressure releases, so slightly undercooking is preferable to overcooking. Using chicken thighs instead of breasts naturally produces juicier results due to higher fat content. Ensuring adequate liquid surrounds the chicken during cooking—particularly when using a trivet—prevents drying from insufficient steam generation.
Managing Excessive Liquid
If your finished dish contains too much liquid, resist the temptation to add thickening agents like cornstarch. Instead, engage the Sauté function to evaporate excess moisture. If you prefer a saucier consistency for serving over rice, leave some liquid intact; the flavorful stock enhances rice preparation immensely. The decision ultimately depends on your intended application.
Frequently Asked Questions
Can you cook frozen chicken directly in the Instant Pot?
Yes, frozen chicken requires extended cooking time—typically 20-25 minutes at high pressure compared to 10-15 minutes for thawed chicken. The Instant Pot requires additional time to reach pressure with frozen protein, so total elapsed time increases accordingly. Many cooks appreciate this capability for spontaneous meal preparation when thawing wasn’t anticipated.
What’s the difference between Manual and Pressure Cook settings?
Modern Instant Pot models use “Pressure Cook” while earlier versions labeled this function “Manual.” Both designations refer to the same high-pressure cooking function. If your model lacks a Pressure Cook button, the Manual button provides identical functionality. Your user manual specifies which terminology applies to your specific unit.
Should salsa chicken always use salsa as the cooking liquid?
Salsa provides the primary flavoring liquid, but some variations incorporate chicken broth or even water. Chicken broth creates a more savory profile with less tomato presence, while water allows seasonings to shine more prominently. The liquid must be sufficient to generate steam and reach pressure, typically at least ½ cup regardless of choice.
How does this recipe adapt for dietary restrictions?
This recipe inherently accommodates numerous dietary needs. It contains no grains, making it keto and paleo-friendly when served appropriately. Naturally dairy-free until toppings are added, it suits lactose-intolerant individuals. Gluten appears only in potential taco seasoning blends, so homemade seasoning mixtures or certified gluten-free blends solve this concern. The adaptability extends to accommodating low-sodium, sugar-conscious, and allergen-specific needs through ingredient substitutions.
Conclusion
Salsa chicken prepared in a pressure cooker represents a modern solution to the perennial challenge of providing nutritious, flavorful meals within time constraints. By understanding the mechanics of pressure cooking, selecting quality ingredients, and mastering basic techniques, anyone can transform simple components into restaurant-quality dishes suitable for any occasion. Whether serving a family dinner, preparing meals for the upcoming week, or creating components for elaborate recipes, this versatile protein delivers consistent results with minimal fuss. The combination of speed, flavor, and adaptability ensures that salsa chicken earns its place as a kitchen staple worth perfecting.
References
- How Pressure Cookers Work — National Center for Home Food Preservation, University of Georgia. 2024. https://nchfp.uga.edu/
- Sodium in Processed Foods — U.S. Food and Drug Administration. 2024. https://www.fda.gov/food/nutrition-facts-label/sodium-foods