The humble hard-boiled egg is one of the most versatile ingredients in any kitchen, yet many home cooks struggle to achieve consistent, satisfying results. Whether you’re preparing eggs for salads, appetizers, or simply want a quick protein-rich snack, understanding the fundamentals of egg preparation can transform your cooking. This guide explores the essential techniques, ingredient combinations, and practical tips that separate mediocre results from exceptional ones.
Understanding the Foundation: Core Ingredients and Ratios
Creating perfectly hard-boiled eggs begins with understanding the role each ingredient plays in the cooking process. While water is the primary cooking medium, the addition of salt and vinegar serves important functions that extend beyond simple seasoning.
Salt plays a dual role in this preparation method. First, it elevates the boiling point of water, which allows for more precise cooking control. Second, it strengthens the egg white structure, making shells less likely to crack during cooking. The standard ratio incorporates one tablespoon of salt per six cups of water, which creates an optimal environment for cooking without over-seasoning the final product.
Vinegar acts as a chemical buffer in the cooking process. Distilled white vinegar, specifically, helps prevent egg whites from leaking if the shell cracks during cooking. The acidity interacts with the egg proteins, creating a slight seal that contains any potential leakage. Using one-quarter cup of vinegar per six cups of water provides sufficient acidity without imparting noticeable flavor to the eggs themselves.
Water serves as the heat transfer medium and should be carefully measured to ensure proper cooking conditions. Six cups of water provides adequate volume for eight eggs, allowing for consistent heat distribution throughout the batch.
The Sequential Cooking Process Explained
The methodology for achieving perfect hard-boiled eggs differs significantly from conventional approaches and relies on understanding heat transfer principles.
Step One: Preparation and Heat Generation
Begin by combining all liquid ingredients—salt, vinegar, and water—in a large pot. The container should be substantial enough to accommodate the eggs without crowding. Place the pot over high heat and allow the mixture to reach a rolling boil. This initial phase typically requires five to eight minutes depending on your stove’s power and the pot’s material.
While waiting for the liquid to heat, remove eggs from refrigeration if possible. Room-temperature eggs experience less thermal shock when entering hot liquid, reducing the likelihood of cracks. However, if you prefer working with cold eggs straight from the refrigerator, the method still produces excellent results—the timing may require slight adjustment.
Step Two: Introducing the Eggs
Once the liquid reaches a vigorous boil, carefully add eggs one at a time rather than all at once. This sequential approach prevents temperature fluctuations that could disrupt cooking consistency. Lower each egg gently into the boiling liquid by tilting it slightly against the pot’s interior wall, allowing it to roll rather than drop directly. This technique minimizes the risk of shell cracking and ensures even heat exposure.
The boiling action should remain gentle yet consistent. Excessive boiling causes unnecessary movement and potential collision between eggs, while insufficient heat fails to provide uniform cooking.
Step Three: Cooking Duration and Heat Adjustment
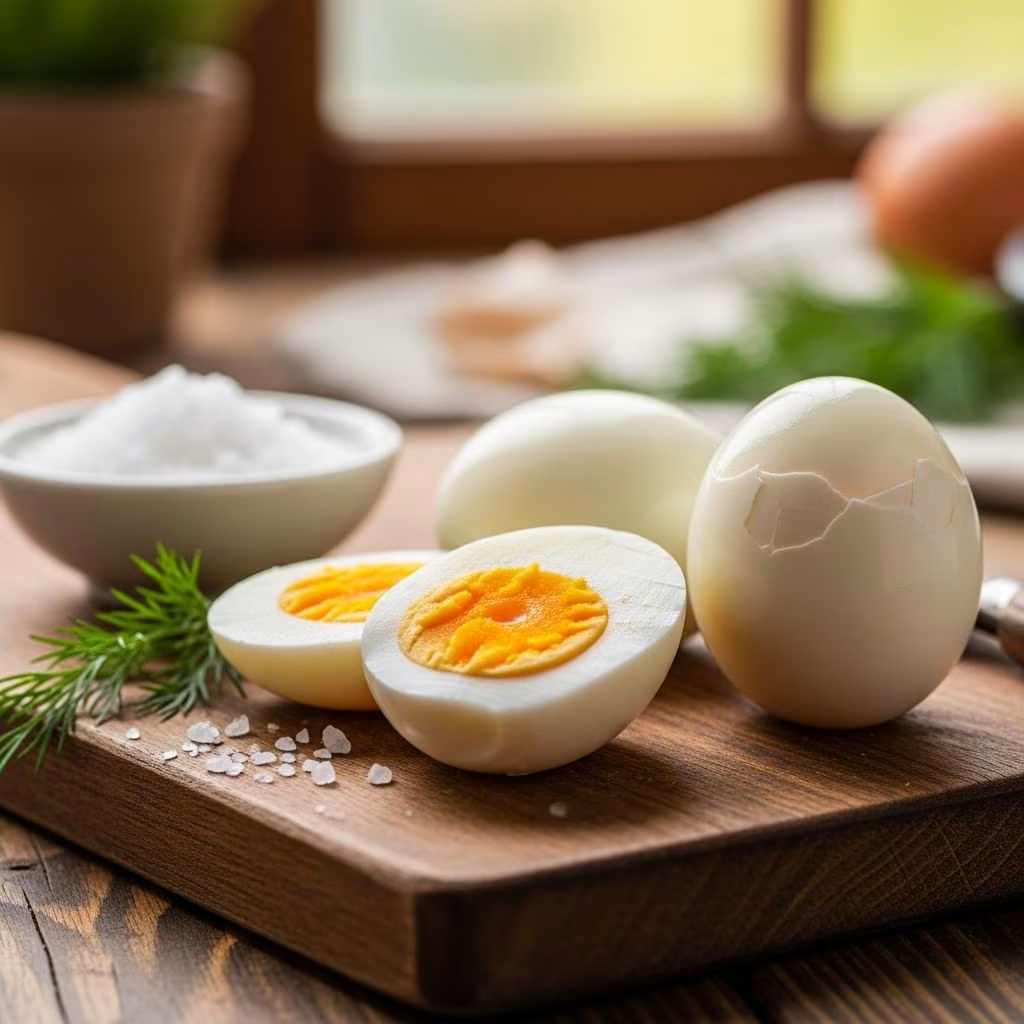
Once all eggs have been added to the boiling liquid, reduce the heat to maintain a gentle, steady boil. The cooking duration of fourteen minutes is specifically calibrated for large eggs. Cooking time may vary slightly based on egg size—medium eggs may require one to two minutes less, while extra-large eggs might need an additional minute. The fourteen-minute window represents the ideal balance point where the yolk reaches complete doneness without developing the undesirable gray-green ring that indicates overcooking.
Step Four: The Cooling Phase
Immediately after the timer signals completion, remove eggs from the hot liquid using a slotted spoon. Transfer them directly into a prepared ice bath—a container filled with ice water chilled to approximately thirty-five degrees Fahrenheit. The rapid temperature reduction stops the cooking process instantly, halting the chemical reactions that produce that gray-green discoloration around the yolk.
Allow eggs to remain in the ice bath for a minimum of five minutes, though fifteen minutes provides superior peel-ability. The cold temperature causes the egg to contract slightly within the shell, creating microscopic separation between the membrane and the white that facilitates cleaner peeling.
Peeling Techniques and Practical Methods
Even perfectly cooked eggs prove frustrating if the shell removal process proves difficult. Several techniques improve the peeling experience considerably.
The Rolling Method: After removing eggs from the ice bath, gently roll each egg on a hard surface while applying light to moderate pressure. This action creates small cracks across the entire shell surface. Begin rolling at the broader end where the air pocket resides—this area naturally separates more easily from the white.
Water-Assisted Peeling: Peel eggs under a gentle stream of cool running water. The water helps separate the membrane from the egg white, making removal easier. Many cooks find that peeling under water produces cleaner whites with fewer small divots.
The Half-Shell Method: Crack the shell at both ends, then gently roll the shell back and forth between your palms, creating fracture lines. From this point, you can typically insert a small spoon between the shell and the membrane, allowing you to separate them more efficiently.
Customization Options for Different Uses
While the fourteen-minute standard produces excellent all-purpose hard-boiled eggs, various applications benefit from slight modifications.
| Cooking Duration | Yolk Consistency | Best Uses |
|---|---|---|
| 10-11 minutes | Bright golden, slightly creamy center | Deviled eggs, appetizers |
| 12-13 minutes | Golden with minimal soft center | Egg salads, mixed dishes |
| 14-15 minutes | Fully set, pale yellow center | General-purpose, meal prep |
| 16+ minutes | Very pale, chalky texture | Extended storage, pickling |
These variations allow you to customize the final product according to your specific culinary requirements. Understanding these options enables you to troubleshoot outcomes and adjust future attempts based on personal preferences.
Troubleshooting Common Challenges
Difficulty Peeling: The most frequent complaint stems from shells adhering stubbornly to the white. This issue typically indicates insufficient ice bath time or inadequate cooling. Ensure you submerge eggs for at least fifteen minutes in ice water. Additionally, verify that your water was truly boiling when eggs entered—room temperature or warm water prevents proper shell separation.
Gray-Green Ring Around Yolk: This discoloration results from prolonged cooking or delayed cooling. Either reduce cooking time by one minute or ensure you transfer eggs to ice immediately after completion. Never leave cooked eggs sitting in hot water.
Cracked Shells During Cooking: Cracks typically occur from thermal shock or mechanical damage. Ensure eggs are room temperature before cooking, add them gently rather than dropping them forcefully, and verify that the liquid reaches a true boil before introducing eggs.
Runny Yolks: If yolks fail to achieve full doneness, the cooking duration was insufficient or heat wasn’t maintained adequately. Increase the cooking time by one minute and verify that water maintained a gentle but consistent boil throughout cooking.
Advanced Preparation Strategies for Meal Planning
Hard-boiled eggs store exceptionally well, making them valuable for meal preparation and batch cooking. Store unpeeled eggs in the refrigerator for up to one week in an airtight container. Peeled eggs stored in the same manner remain fresh for three to four days. For extended storage, consider submerging peeled eggs in a brine solution of one tablespoon salt per cup of water, which preserves them for up to two weeks.
Many home cooks prepare a double or triple batch at the beginning of the week, then portion eggs into containers for convenient protein additions throughout the week. This strategy provides quick nutrition for breakfast, snacks, or lunch components without additional cooking time.
Flavor Enhancement and Serving Suggestions
While perfectly cooked plain hard-boiled eggs satisfy most applications, numerous preparation methods enhance their versatility. Create deviled eggs by combining mashed yolks with mayonnaise, mustard, and seasonings. Prepare egg salad by chopping the entire egg and mixing with mayo, celery, and herbs. Season eggs immediately after peeling with sea salt and cracked black pepper for a straightforward snack.
For more adventurous applications, incorporate hard-boiled eggs into salads, grain bowls, sandwiches, or curry preparations. The mild flavor profile and substantial protein content make them compatible with virtually any cuisine.
Frequently Asked Questions
Can I use brown eggs instead of white eggs?
Yes. Shell color has no impact on cooking outcomes or final results. Both brown and white eggs respond identically to this cooking method. Choose based on availability, cost, or personal preference.
Does using older eggs improve results?
Age plays an extremely minimal role in boiled egg outcomes. Fresh eggs and older eggs cook identically using this method. The age consideration matters primarily for fried or poached eggs where membrane integrity affects presentation, but boiled eggs show no noticeable difference.
Can I double the recipe?
Yes, but maintain proper ratios. For sixteen eggs, use two tablespoons salt, half cup vinegar, and twelve cups water. Cooking time remains the same if eggs fit in a single layer. If multiple layers become necessary, increase cooking time by two to three minutes.
Why is ice bath duration important?
The ice bath halts cooking immediately and allows thermal contraction that separates the shell from the membrane. Shorter ice baths result in more difficult peeling and increased risk of the gray-green ring forming.
What if my eggs crack during cooking?
Cracked eggs remain safe to consume. The salt and vinegar in the cooking liquid help seal small cracks. The egg white may cook slightly faster near the crack, but the overall result remains edible and typically acceptable.
References
- The Splendid Table: J. Kenji Lopez-Alt’s Perfect Hard Boiled Eggs — Splendid Table/American Public Media. 2022-11-22. https://www.splendidtable.org/story/2022/11/22/j-kenji-lopezalts-perfect-hard-boiled-eggs
- Experimental Epicurean: Foolproof Hard-Boiled Eggs – An Experiment — Experimental Epicurean. https://experimentalepicurean.com/foolproof-hard-boiled-eggs-experiment/
- Perfect Boiled Eggs | Kenji’s Cooking Show — YouTube/Kenji’s Cooking Show. https://www.youtube.com/watch?v=hb0Elaa6gxY
- Funky Radish: Ken’s Perfect Hard Boiled Egg (And I Mean Perfect) — Funky Radish. https://www.funkyradish.com/recipe/ken’s-perfect-hard-boiled-egg-(and-i-mean-perfect)