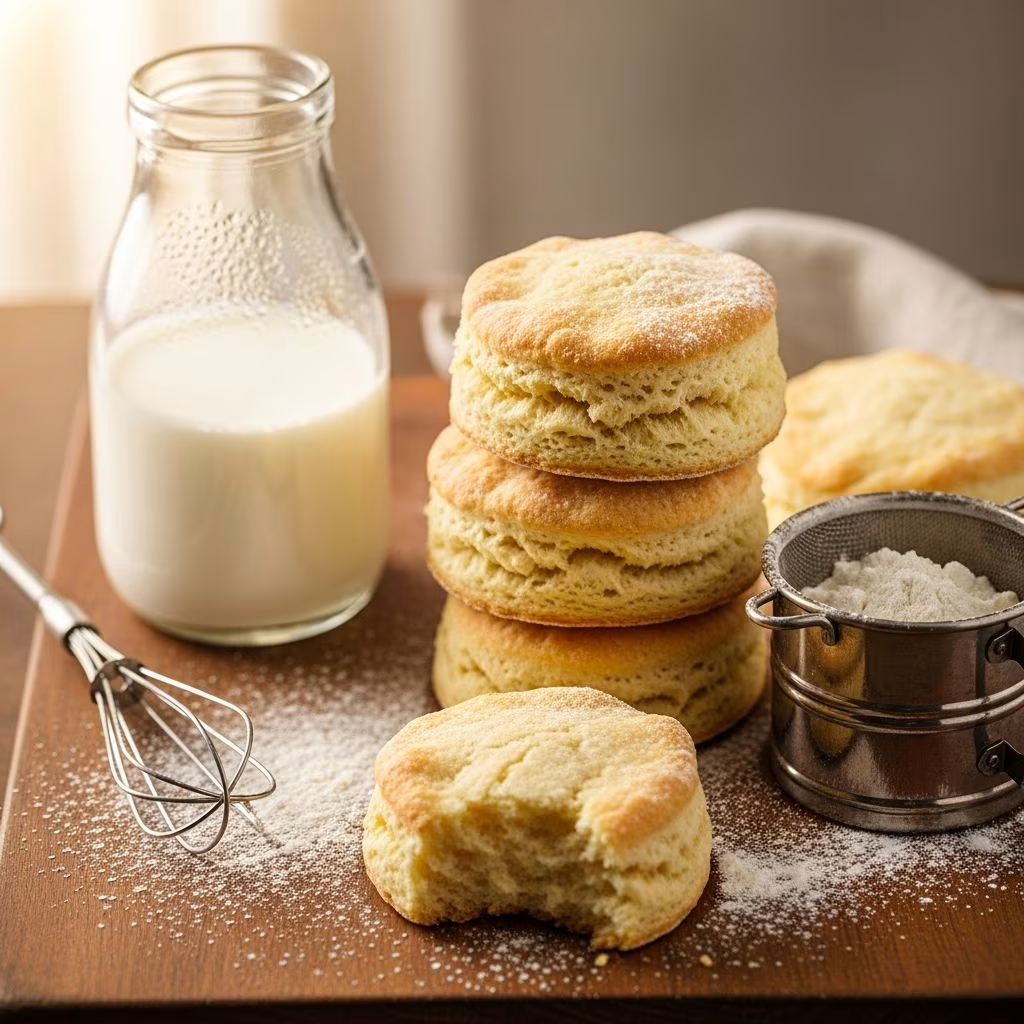
Creating bakery-quality biscuits at home doesn’t require an extensive list of ingredients or advanced culinary skills. The minimalist approach to biscuit-making has gained popularity among home cooks seeking straightforward recipes that deliver impressive results without unnecessary complexity. This method relies on a fundamental principle: combining just two pantry staples creates a dough that transforms into golden, fluffy biscuits suitable for any meal.
Understanding the Foundational Ingredients
The success of this simplified biscuit formula depends entirely on selecting the correct flour variety and cream product. Self-rising flour serves as the cornerstone of this recipe, containing pre-mixed leavening agents that eliminate the need for separate baking powder or baking soda measurements. This specialized flour includes salt and leavening components distributed throughout, meaning home bakers achieve consistent rise without additional steps.
Heavy whipping cream functions as both the liquid binding agent and the fat component typically provided by butter or shortening in traditional recipes. The high fat content in heavy cream contributes to the tender, flaky texture characteristic of well-made biscuits. Using heavy cream rather than milk or buttermilk streamlines the process while delivering superior results through its fat composition.
The mathematical precision of combining these two ingredients is crucial. Standard proportions involve two cups of self-rising flour to approximately one and one-half cups of heavy whipping cream, though slight variations occur based on humidity, flour density, and personal preference for biscuit thickness.
Preparation Methodology: From Bowl to Oven
Beginning with the correct equipment and workspace setup establishes the foundation for successful biscuit production. A large mixing bowl and wooden spoon provide adequate tools for combining ingredients, as electric mixers tend to overdevelop the dough and result in tough biscuits. The mixing process requires restraint—combining ingredients just until the cream moistens the flour creates a slightly shaggy dough texture.
After mixing, transferring the dough to a lightly floured work surface begins the crucial lamination process. This technique, borrowed from professional pastry work, involves folding and pressing the dough multiple times to create distinct layers that contribute to flakiness. Bakers should fold the dough onto itself approximately three to four times, adding minimal flour as needed if stickiness develops during handling.
The thickness of the flattened dough significantly impacts final biscuit dimensions and texture. Gentle patting with floured hands creates an even thickness of approximately three-quarters to one inch across the entire dough mass. Thinner dough yields smaller biscuits with less height, while thicker dough produces taller, more substantial biscuits.
Cutting Techniques for Optimal Results
Biscuit cutters typically measure between two and two and one-half inches in diameter, and the cutting method directly influences how high biscuits rise during baking. The cardinal rule involves cutting straight down and pulling directly upward without twisting the cutter—this prevents sealing the dough edges and ensures maximum vertical expansion. Dipping the cutter in flour before each cut prevents sticking while maintaining clean edges.
Arranging cut biscuits on parchment-lined baking sheets requires spacing them one to two inches apart, allowing room for expansion without biscuits touching during the baking process. Crowding biscuits prevents proper air circulation and can result in uneven browning or flattened shapes.
Baking Parameters and Temperature Considerations
High oven temperatures are essential for achieving proper rise and golden-brown exteriors. Most recipes recommend preheating to between 475 and 500 degrees Fahrenheit, with baking times ranging from ten to twelve minutes depending on biscuit size and individual oven characteristics. The rapid heat encourages the dough to rise quickly before the exterior sets, creating the desirable fluffy interior texture.
Visual cues provide the most reliable indicators of doneness. Biscuits are ready when the tops achieve a light to medium golden-brown color, indicating proper moisture evaporation and interior coagulation without excessive drying. Opening the oven door before the minimum baking time has elapsed can cause biscuits to collapse, so patience during the initial baking period is important.
Enhancement Techniques and Finishing Touches
While the basic recipe requires only two ingredients, home bakers frequently apply finishing touches that elevate the final product. Brushing warm biscuits with melted butter immediately after removing them from the oven adds richness and promotes browning. Some bakers prefer brushing with additional heavy cream before baking to create a slightly richer exterior.
Seasoning variations allow customization without compromising the minimalist philosophy. Sprinkling coarse sea salt on unbaked biscuit tops creates texture and enhances flavor perception. Herbal additions like dried chives, garlic powder, or Italian seasoning can be folded into the dough during initial mixing for savory variations. Sweet applications might include cinnamon and sugar combinations applied after butter brushing.
Common Challenges and Troubleshooting
Flat, dense biscuits typically result from either overmixing the dough or cutting with a twisting motion rather than straight downward pressure. Overmixing develops gluten excessively, resulting in tough, compact biscuits rather than the desired tender crumb. Similarly, twisting the cutter seals the dough edges and prevents proper vertical expansion.
Excessively sticky dough during handling indicates too much cream relative to flour, though this situation is easily remedied by dusting with additional self-rising flour. Conversely, dry, crumbly dough that won’t hold together suggests insufficient cream and requires very gentle addition of cream in small increments.
Uneven browning across multiple biscuits may indicate oven temperature fluctuations or uneven rack positioning. Rotating the baking sheet halfway through cooking can compensate for hot spots in certain ovens. Using an oven thermometer helps verify that actual temperatures match dial settings.
Scaling and Yield Variations
The standard recipe using two cups flour and one and one-half cups cream produces approximately six to twelve biscuits depending on cutter size and dough thickness. Home bakers can easily scale the recipe by maintaining the approximate ratio of one and one-third parts cream to two parts flour. Halving the recipe produces a manageable batch for smaller households, while doubling is suitable for feeding larger groups.
Using different cutter sizes alters both the number of biscuits and the time required for complete baking. Smaller cutters produce more individual biscuits requiring slightly less cooking time, while larger cutters yield fewer biscuits that may need an additional minute or two in the oven for complete interior cooking.
Storage and Reheating Strategies
Freshly baked biscuits taste best consumed immediately or within a few hours of baking. For storage, cooled biscuits should be placed in an airtight container at room temperature, where they maintain acceptable quality for up to two days. Refrigerating biscuits accelerates staling, so room-temperature storage is preferable unless longer preservation is necessary.
Reheating stored biscuits can partially restore their initial texture and warmth. Wrapping biscuits loosely in aluminum foil and warming at 350 degrees Fahrenheit for five to ten minutes revives them without excessive drying. Microwave reheating, while quick, often results in rubbery texture and is generally not recommended.
Frequently Asked Questions
Can all-purpose flour substitute for self-rising flour?
While possible, all-purpose flour requires adding leavening agents separately. The standard approach involves adding one tablespoon of baking powder and one-half teaspoon of salt per two cups of all-purpose flour, essentially creating a homemade self-rising flour substitute.
What happens if I use light cream instead of heavy cream?
Light cream contains lower fat content and may not provide sufficient richness or binding power. Heavy whipping cream’s fat content is essential for achieving the tender, flaky texture characteristic of quality biscuits. Using light cream typically results in denser, less flavorful biscuits.
Why shouldn’t I use a rolling pin for this recipe?
Rolling pins can compress the dough too extensively, squeezing out air pockets and resulting in dense biscuits. Gentle hand-patting preserves the air structure while achieving even thickness.
How do I prevent my biscuits from spreading sideways?
Adequate spacing on the baking sheet prevents biscuits from touching and spreading into each other. Additionally, ensuring your oven temperature is accurately calibrated prevents uncontrolled spreading caused by insufficient initial heat.
Can I prepare biscuit dough in advance?
Biscuit dough is best used immediately after preparation. Refrigerating unbaked biscuits for later baking is generally not recommended, as the cream oxidizes and loses some rising capability. However, cut biscuits can be frozen before baking and baked directly from frozen with a slight increase in cooking time.
Variations and Creative Adaptations
The fundamental two-ingredient formula accommodates numerous variations and creative interpretations. Cheese enthusiasts can fold shredded sharp cheddar into the dough before cutting, creating savory biscuits perfect for serving alongside soups or stews. Bacon bits, sautéed mushrooms, or caramelized onions provide additional savory options.
Sweet applications might include folding chocolate chips into the dough or creating a cinnamon-sugar topping applied after brushing with melted butter. These adaptations expand the recipe’s versatility while maintaining the simplicity of the base formula.
The recipe also serves as an excellent foundation for understanding core biscuit-making principles. Home bakers who master this simplified version develop confidence and technique that transfers to more complex recipes incorporating traditional ingredients like butter and buttermilk.
Why This Recipe Endures
The popularity of this minimalist biscuit recipe stems from several practical advantages beyond mere ingredient reduction. The lack of butter eliminates the need for cold ingredient handling and cutting techniques traditional recipes require. Heavy cream provides both moisture and fat in a single ingredient, simplifying both shopping and measurement processes.
For busy home cooks, students in dormitories, or anyone seeking quick results without compromise on quality, this recipe delivers restaurant-quality biscuits in approximately fifteen to twenty minutes from start to table. The minimal ingredient list reduces preparation barriers and makes biscuit-baking accessible to novice bakers who might feel intimidated by traditional recipes.
References
- 2-Ingredient Cream Biscuits — Plain Chicken. Accessed April 2026. https://www.plainchicken.com/2-ingredient-cream-biscuits/
- Two Ingredient Biscuits — My Country Table. Accessed April 2026. https://mycountrytable.com/two-ingredient-biscuits/
- 2 Ingredient Biscuits From Scratch — Grits and Gouda. Accessed April 2026. https://gritsandgouda.com/2-ingredient-biscuits-from-scratch/