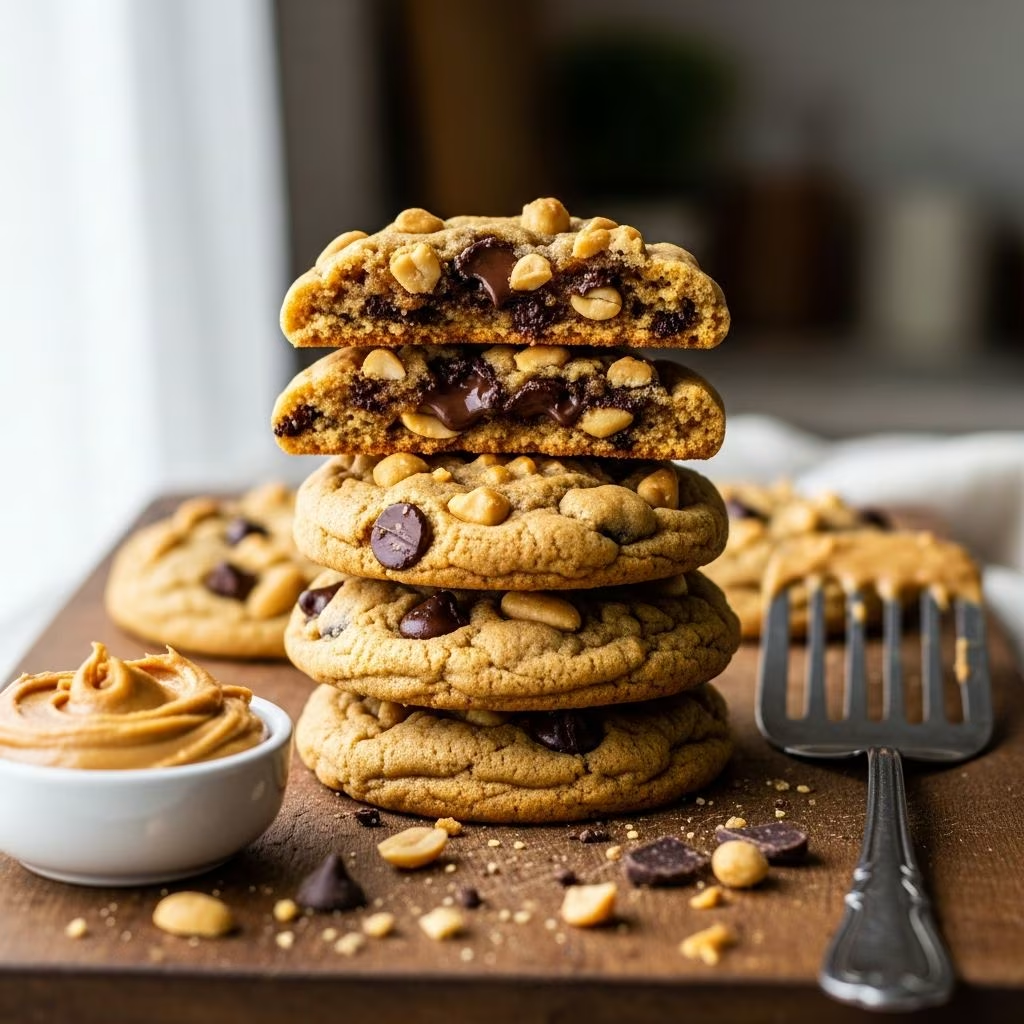
The combination of peanut butter and chocolate represents one of the most timeless flavor pairings in the baking world. When these two complementary tastes are brought together in cookie form, the result is an indulgent treat that appeals to both casual snackers and serious dessert enthusiasts. The key to achieving the perfect texture lies in understanding the science of ingredient interactions and employing proven baking techniques that deliver consistent, satisfying results.
Understanding the Foundation: Essential Ingredients and Their Roles
Creating exceptional peanut butter and chocolate chip cookies begins with selecting high-quality ingredients that work harmoniously together. Each component serves a specific purpose in developing the cookie’s texture, flavor, and structure.
The Base Components
Softened butter forms the foundation of these cookies, providing fat that creates richness and tenderness. Brown sugar contributes moisture and a subtle molasses undertone that enhances the overall flavor complexity. The combination of brown and granulated sugars creates a balanced sweetness while influencing the cookie’s final texture—brown sugar promotes chewiness while granulated sugar supports spread and crispness at the edges.
Eggs serve as both a binding agent and a moisture provider, while vanilla extract amplifies the chocolate flavor and adds depth to the peanut butter taste. Creamy peanut butter works best for achieving a uniform texture throughout the dough, though chunky varieties can be used if you prefer added texture variation.
Dry Ingredients and Their Impact
All-purpose flour provides structure and gluten development, which gives cookies their characteristic bite. Baking soda acts as a leavening agent, creating lift during baking and promoting the development of those desirable crispy edges. Salt enhances all the sweet flavors and balances the richness of the peanut butter and chocolate.
Many successful recipes incorporate cornstarch in the dry mixture, which reduces gluten development and contributes to a softer, more tender crumb. This ingredient is particularly valuable when you’re aiming for that perfect chewy center contrasted with slightly firmer edges.
Preparation Method: Building Flavor and Texture
The Creaming Technique
The foundation of cookie success begins with properly creaming butter and sugars together. This process, typically lasting 2-3 minutes with a stand mixer on medium-high speed, incorporates air into the mixture and creates a fluffy, light base. The creaming stage determines whether your finished cookies will have a dense or lighter crumb structure.
After the initial creaming, egg and vanilla are added gradually, with thorough mixing between additions. This ensures even distribution and helps create an emulsion that keeps ingredients properly combined. Following the egg incorporation, peanut butter is folded in carefully, maintaining the airiness created during the creaming stage.
Combining Wet and Dry Components
Dry ingredients should be whisked together separately before being added to the wet mixture. This pre-combining step ensures even distribution of baking soda and salt throughout the dough. When introducing the dry mixture to the wet ingredients, mix on low speed just until combined—overmixing at this stage develops excess gluten, which results in tough, dense cookies rather than the desired tender texture.
Incorporating Mix-Ins
Chocolate chips and other mix-ins should be folded in by hand after the flour is fully incorporated. Hand-mixing prevents the mechanical action of the mixer from breaking down chocolate chunks, which helps preserve their distinct pieces throughout the cookie. Semi-sweet chocolate chips offer a balanced sweetness that complements peanut butter without overwhelming it, though dark chocolate provides a sophisticated alternative for those preferring less sweetness.
The Chilling Factor: Why Resting Dough Matters
One of the most significant steps in cookie preparation that many home bakers overlook involves chilling the dough before baking. Depending on the specific recipe and desired results, dough should rest in the refrigerator for anywhere from 30 minutes to 2 hours.
During the chilling period, several important developments occur at the microscopic level. The flour continues to hydrate, allowing starches to fully absorb moisture and creating a more stable dough. Flavors meld together, creating a more cohesive taste profile. Additionally, chilled dough spreads more slowly in the oven, allowing the peanut butter and chocolate flavors to develop fully before the structure sets, resulting in cookies with more pronounced flavor characteristics.
Chilled dough also responds more predictably during baking, producing more uniform cookie sizes and shapes, which is particularly valuable when achieving bakery-quality presentation.
Optimal Baking Parameters and Temperature Management
Temperature Considerations
Most peanut butter chocolate chip cookie recipes call for oven temperatures between 350°F and 375°F, with 350°F being increasingly popular among contemporary bakers. Lower temperatures allow cookies to bake through gently without browning edges too quickly, preserving the chewy center while developing just enough crust for textural contrast.
The specific temperature you select may depend on your oven’s characteristics and your personal preference regarding crispness. Ovens vary considerably in their actual temperature compared to dial settings, so using an oven thermometer helps ensure consistency across baking sessions.
Timing and Doneness Assessment
Baking time typically ranges from 10-15 minutes, depending on cookie size, oven temperature, and desired texture. Smaller cookies bake more quickly, while larger, bakery-style portions require additional time. The visual cue for doneness involves observing golden brown edges while the center remains slightly soft and underbaked in appearance.
This slight underbaking is intentional—residual heat continues cooking the cookie after removal from the oven, and allowing cookies to rest on the baking sheet for 2-3 minutes before transferring to a cooling rack helps them set properly without becoming overly hard.
Ingredient Ratio Comparison: Understanding Recipe Variations
| Ingredient | Standard Recipe | Alternative Formula | Impact on Results |
|---|---|---|---|
| Butter | ½ cup | 1 cup | Higher butter content increases richness and spread |
| Brown Sugar | 1 cup | ½ cup | More brown sugar enhances chewiness and molasses flavor |
| Peanut Butter | ½ cup | 1 cup | Increased peanut butter intensifies flavor significantly |
| Chocolate Chips | 1 cup | 2 cups | More chips create texture variation and chocolate distribution |
| Flour | 1¼ cups | 2¾ cups | Additional flour creates denser texture and reduces spread |
Achieving the Perfect Texture Balance
Creating Chewy Centers
Achieving that coveted chewy center while maintaining crispy edges requires attention to multiple factors working in concert. The inclusion of cornstarch in the dry mixture significantly contributes to chewiness by limiting gluten development. Brown sugar’s hygroscopic properties—its ability to attract and retain moisture—also play a crucial role in maintaining softness.
Underbaking remains essential to preserve chewiness. Removing cookies from the oven when the center appears slightly underdone, then allowing carryover cooking to complete the process, prevents the interior from becoming dry and hard.
Developing Crispy Edges
The contrast between a chewy center and crispy edges comes from several interrelated factors. Proper spacing on baking sheets allows heat circulation around each cookie, promoting edge browning. The use of parchment paper facilitates even heat distribution across the bottom of each cookie, preventing burning while allowing sufficient browning.
Higher oven temperatures near the upper end of the recommended range promote more pronounced edge crisping, though care must be taken to avoid burning. Watching the cookies during the final few minutes of baking and removing them when edges turn golden brown but the center remains slightly soft produces the optimal result.
Troubleshooting Common Baking Challenges
Cookies Spreading Too Much
Excessive spreading often indicates inadequately chilled dough, insufficient flour, or oven temperature that’s too low. Extending the chilling time to at least one hour, ensuring precise flour measurements (using the spoon-and-level method rather than scooping directly from the bag), and verifying oven temperature with a thermometer typically resolves this issue.
Cookies Too Dense or Cake-Like
Overmixing during flour incorporation develops excess gluten, resulting in tough, dense cookies. Additionally, using too much flour or pressing down on cookie dough balls before baking reduces airiness. Mixing only until flour is barely incorporated and avoiding any pressure on scooped dough balls helps maintain the desired texture.
Uneven Browning
Oven hot spots cause uneven browning across baking sheets. Rotating sheets halfway through baking and ensuring adequate spacing between cookies promotes uniform results. Using two racks simultaneously requires more attention, so baking one sheet at a time produces more consistent browning patterns.
Storage and Longevity: Preserving Quality
Properly stored peanut butter chocolate chip cookies maintain quality for several days. Room-temperature storage in an airtight container with a slice of bread helps preserve chewiness by maintaining moisture levels. The bread gradually dries while the cookies absorb moisture, creating an exchange that prevents cookies from becoming either stale or overly soft.
Freezing unbaked dough balls allows for freshly baked cookies on demand. Dough balls can be frozen for up to three months, then baked directly from frozen with minimal time adjustments—typically adding 1-2 minutes to the standard baking time.
Customization Options and Creative Variations
The basic peanut butter chocolate chip cookie framework accommodates numerous creative additions. Incorporating peanut butter chips alongside semi-sweet chocolate chips intensifies the peanut flavor. Adding pretzels, toffee bits, or crushed candy provides textural contrast. Reducing chocolate chips in favor of other mix-ins like nuts or dried fruit creates flavor variations while maintaining the recipe’s fundamental structure.
Experimenting with different peanut butter varieties—honey roasted, natural, or chunky—allows for flavor personalization, though natural peanut butters may require additional modification to achieve optimal results due to their different moisture content and oil composition.
Frequently Asked Questions
Can I use natural peanut butter in this recipe?
Natural peanut butter, which contains separated oil and is less processed, may cause dough consistency issues. Standard commercial peanut butter with added stabilizers works best for achieving reliable, consistent results. If using natural peanut butter, stir the oil back into the main mass before measuring and potentially reduce other liquid components slightly.
What distinguishes chewy cookies from cakey cookies?
Chewy cookies contain higher ratios of brown sugar and fat, use underbaking techniques, and often incorporate cornstarch to limit gluten development. Cakey cookies result from additional flour, more eggs, higher leavening agent concentrations, and full baking until centers are fully set.
Should cookie dough always be chilled?
While not absolutely mandatory, chilling dramatically improves results by preventing excessive spreading, developing flavor complexity, and creating more predictable outcomes. Even a 30-minute chill produces noticeable improvements over unbaked dough.
How do I prevent edges from burning while maintaining a chewy center?
Lower oven temperatures (around 350°F), careful underbaking, and allowing cookies to rest on baking sheets briefly before cooling all contribute to achieving this balance.
Can this recipe be doubled?
Yes, doubling quantities works well, though mixing may require using a stand mixer due to dough volume. Ensure all ingredients are precisely measured and fully incorporated before baking.
References
- The Science of Cookies: How Ingredients Affect Texture and Taste — America’s Test Kitchen. 2023. https://www.americastestkitchen.com/articles/2102-the-surprising-science-behind-the-perfect-cookie
- Cookie Chemistry: Understanding Sugar’s Role in Baking — King Arthur Baking Company. 2024. https://www.kingarthurbaking.com/learn/articles/baking-chemistry-sugar
- Baking Science: The Effects of Resting and Chilling Dough — Sally’s Baking Addiction. 2022. https://www.sallysbakingaddiction.com/how-to-chill-cookie-dough/