Raisin pie represents a cherished dessert tradition that has graced American tables for generations. This humble yet sophisticated treat transforms simple ingredients—dried fruit, sugar, spices, and pastry—into a warm, comforting dessert that appeals to both traditionalists and modern home bakers. Whether you’re preparing a holiday meal, hosting a family gathering, or simply craving homemade pie, understanding the fundamentals of raisin pie preparation will help you achieve consistently delicious results.
Understanding the Foundation: What Makes Raisin Pie Special
Raisin pie occupies a unique position in American dessert culture. Unlike fruit pies that rely on fresh seasonal produce, raisin pie depends on dried fruit that’s available year-round, making it a practical choice for any time of year. The beauty of this dessert lies in its simplicity and the way the filling develops complex flavors through cooking.
The filling features plump raisins that absorb liquid and release their natural sugars, creating a rich, concentrated flavor profile. When combined with warm spices like cinnamon and balanced with subtle acidic notes from vinegar or citrus, the result is a filling that tastes far more sophisticated than its ingredient list suggests. The pastry crust provides textural contrast—crisp and buttery against the soft, jammy filling.
Essential Ingredients and Their Roles
Creating authentic raisin pie requires understanding how each ingredient contributes to the final product:
- Raisins: The star ingredient, typically using three cups of dried raisins. These plump when boiled, creating the pie’s characteristic texture and natural sweetness.
- Water: Used to reconstitute the raisins and create the liquid base for the filling. Recipes typically call for two to three cups.
- Brown Sugar: Adds depth and molasses notes that enhance the raisins’ flavor. Half to three-quarters cup provides appropriate sweetness without overwhelming the filling.
- Thickening Agents: Cornstarch or all-purpose flour prevents the filling from becoming too runny. Two to three tablespoons typically suffices.
- Spices: Ground cinnamon and sometimes salt bring warmth and balance. Optional additions include nutmeg or cloves for added complexity.
- Acidic Components: Vinegar, lemon juice, or lemon zest brightens the filling and prevents it from tasting one-dimensional.
- Butter: One to two tablespoons enriches the filling and adds a luxurious mouthfeel.
- Pie Crust: Either homemade or store-bought pastry for a double crust nine-inch pie.
Step-by-Step Preparation Process
Successful raisin pie preparation follows a logical sequence that ensures proper flavor development and texture:
Preparing the Raisin Filling
Begin by combining raisins with water in a medium saucepan. Bring the mixture to a boil over medium-high heat and maintain a gentle boil for five to ten minutes. This process softens the raisins, allowing them to release their sugars into the liquid and expand to their full, juicy potential. During this stage, you’ll notice the water becoming darker and more flavorful.
While the raisins cook, prepare your thickening mixture separately. In a small bowl, whisk together brown sugar, cornstarch or flour, ground cinnamon, and salt. This dry mixture ensures even distribution of these ingredients when added to the hot raisin liquid, preventing lumps and ensuring consistent results throughout the filling.
Once the raisins have softened appropriately, add your thickening mixture to the hot liquid. Stir constantly and continue cooking until the filling transforms from cloudy to clear—typically one to two minutes. This visual change indicates that the cornstarch has fully hydrated and the filling has reached proper consistency. The mixture should coat the back of a spoon without running off immediately.
Finishing Touches
Remove the filling from heat and immediately stir in your acidic component, whether vinegar, lemon juice, lemon zest, or a combination. Add butter and stir until fully incorporated. Allow the filling to cool for ten to fifteen minutes at room temperature before assembling the pie. This cooling period prevents crust sogginess and makes the filling easier to handle.
Crust Preparation and Assembly
Place your bottom pie crust in a nine-inch pie pan, ensuring it covers the bottom and sides evenly. Many bakers prefer refrigerating the crust-lined pan while preparing the filling, which helps prevent shrinkage during baking.
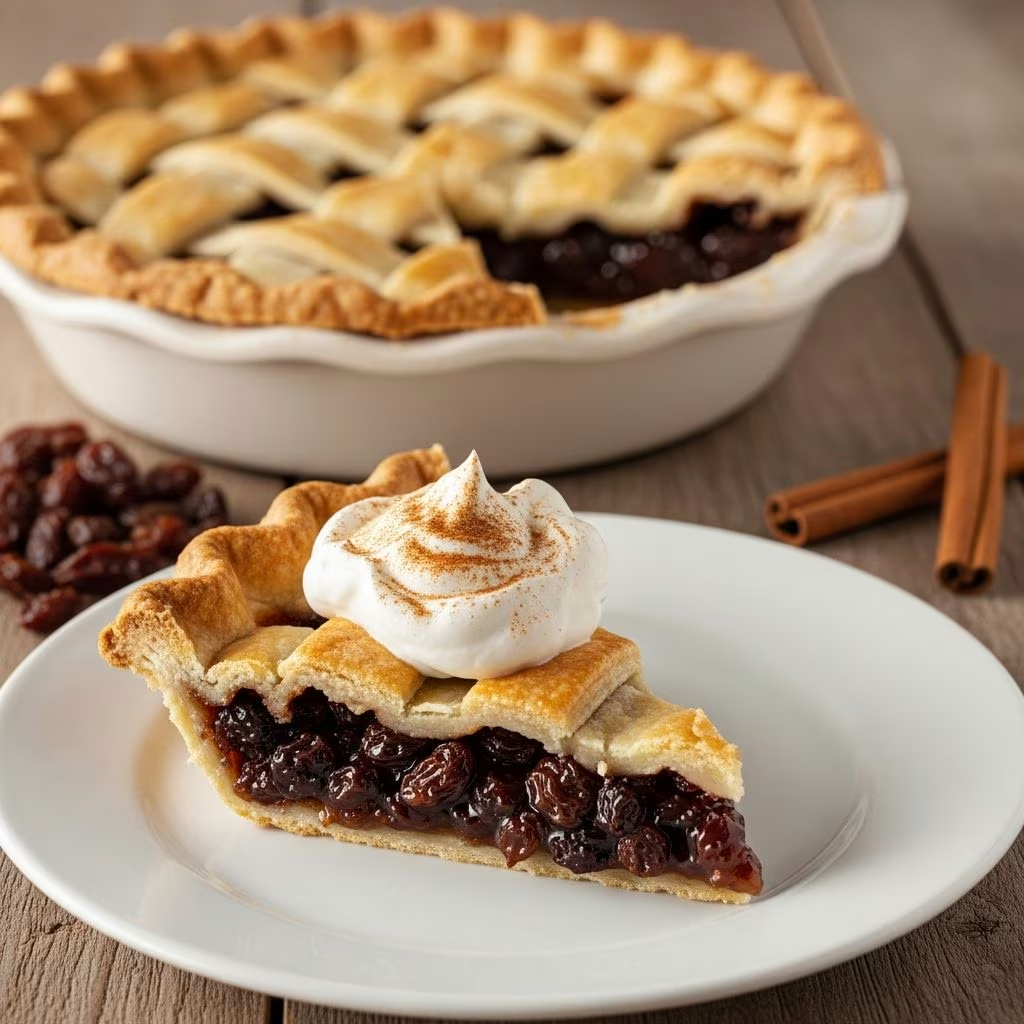
Pour the cooled filling into the crust, distributing it evenly. For a traditional presentation, cut the top crust into strips and arrange them in a lattice pattern over the filling. Alternatively, use the top crust as a solid covering with decorative vents cut into the surface. Crimp the edges decoratively using your fingers or a fork, creating both an attractive appearance and a seal that prevents filling from leaking.
Baking Techniques for Optimal Results
Preheat your oven to 425 degrees Fahrenheit. Place the assembled pie on the middle oven rack and bake for thirty to forty minutes, depending on your oven’s characteristics and the pie’s depth. The crust should turn golden brown, indicating proper cooking of the pastry. If the edges brown too quickly, loosely tent them with aluminum foil during the final stages of baking.
The pie is done when the crust achieves deep golden color and the filling no longer bubbles at the edges. Note that the filling will appear slightly soft when the pie first emerges from the oven—this is normal and desired. As the pie cools, the filling firms up and develops the proper slice-ability.
Cooling and Serving Suggestions
Allow your baked pie to cool at room temperature for at least one to two hours before slicing. This resting period allows the filling to set properly, making clean slices possible. If you attempt to serve the pie while it’s still warm, the filling will run rather than hold together.
Raisin pie pairs beautifully with vanilla ice cream, whipped cream, or a simple cream cheese whip. Many traditionalists prefer serving it slightly warm with a generous scoop of cold ice cream, which creates a pleasant temperature contrast. For a more elegant presentation, add a thin lemon glaze over the cooled pie.
Variations and Creative Adaptations
While the classic recipe remains timeless, several variations can personalize your raisin pie. Some bakers incorporate chopped pecans or walnuts into the filling for added texture and nutty flavor. A tablespoon of rum or brandy (or a teaspoon of extract) adds sophisticated depth without pronounced alcohol flavor after baking.
French-style raisin pies sometimes use a custard-based filling created by creaming butter and sugar, then adding eggs to create a richer, denser texture. Lemon zest and juice, becoming increasingly popular additions, brighten the filling and complement the raisins beautifully. Experimenters might try golden raisins for a subtly different flavor profile or combine regular and golden raisins for complexity.
Storage and Make-Ahead Tips
Baked raisin pie keeps well when properly stored. Cover leftover pie loosely with plastic wrap or aluminum foil and refrigerate for up to four days. The flavors actually deepen slightly as the pie sits, making it excellent for advance preparation.
For even longer storage, freeze unbaked assembled pies for up to one month. Bake directly from frozen, adding five to ten minutes to the baking time and monitoring the crust to prevent over-browning. You can also freeze baked pie, though the crust texture changes slightly upon thawing.
Troubleshooting Common Baking Challenges
Understanding potential issues helps prevent disappointment:
- Runny Filling: Indicates insufficient thickening agent or under-cooking of the filling. Ensure you cook the mixture until clear and use the full recommended amount of cornstarch.
- Tough Crust: Results from over-working the dough or excessive heat. Handle pastry gently and ensure oven temperature accuracy.
- Soggy Bottom Crust: Prevented by using a preheated baking sheet under the pie pan and ensuring filling isn’t too wet before baking.
- Crust Browning Too Quickly: Cover edges with foil strips to slow browning while the filling cooks through.
- Bland Flavor: Verify spice freshness and don’t skip the acidic component, which brightens and balances the filling.
Why Raisin Pie Deserves a Place in Your Baking Repertoire
Raisin pie represents more than just a recipe—it’s a connection to culinary traditions and a celebration of simple ingredients transformed through skill and patience. The pie’s accessibility, combining readily available ingredients with straightforward techniques, makes it suitable for bakers of all experience levels. Whether you’re introducing this classic to a new generation or returning to a cherished family favorite, raisin pie offers the satisfaction of homemade baking and the joy of creating something both delicious and nostalgic.
Frequently Asked Questions
Can I make raisin pie without eggs?
Yes, the traditional raisin pie filling doesn’t require eggs. However, some French-style variations do use eggs. The standard version relies on cornstarch or flour for thickening.
How do I prevent my pie crust from shrinking?
Chill the crust-lined pie pan for at least thirty minutes before filling. Avoid stretching the dough when placing it in the pan, and use pie weights or dried beans if pre-baking the crust.
What’s the best vinegar to use in raisin pie?
Apple cider vinegar is traditional and adds pleasant apple undertones, though white vinegar works perfectly well. Some recipes use lemon juice instead for a brighter flavor profile.
Can I use golden raisins instead of regular raisins?
Absolutely. Golden raisins provide a slightly more delicate, fruity flavor compared to regular raisins. You can use either exclusively or combine them for complexity.
How long does raisin pie stay fresh?
Covered properly and stored in the refrigerator, raisin pie maintains quality for three to four days. Room temperature storage is appropriate for the first day only.
References
- Old Fashioned Raisin Pie — The Southern Lady Cooks. Accessed April 2026. https://thesouthernladycooks.com/old-fashioned-raisin-pie/
- Old Fashioned Raisin Pie — Farmer Owned. Accessed April 2026. https://farmerowned.com/featuredRecipe/1450/Old-Fashioned-Raisin-Pie/
- Old Fashioned Raisin Pie — Cooking With Carlee. Accessed April 2026. https://cookingwithcarlee.com/old-fashioned-raisin-pie/
- Raisin Pie Recipe — The Kitchen Magpie. Accessed April 2026. https://www.thekitchenmagpie.com/introducing-the-inaugural-happy-pie-day-raisin-pie/