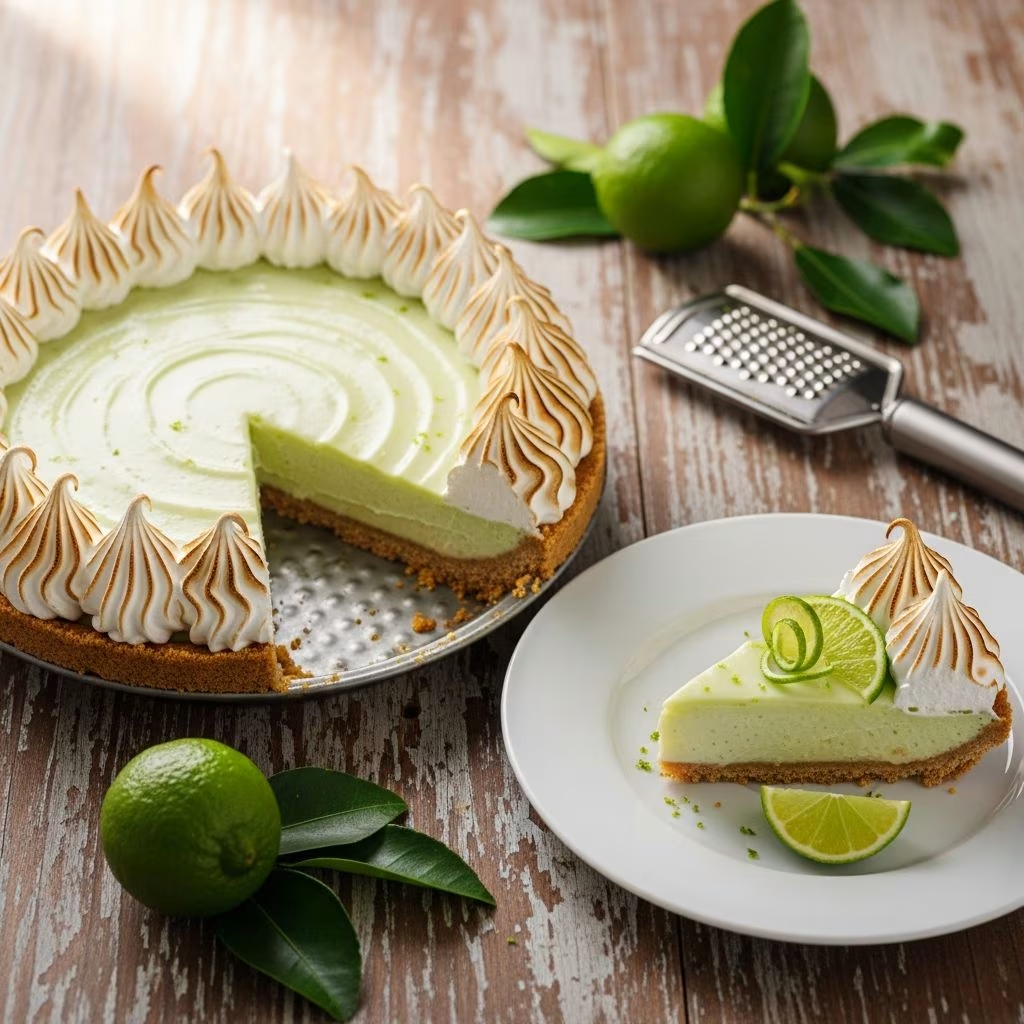
Key lime pie stands as a timeless dessert, celebrated for its striking balance of tart lime flavor and sweet, creamy richness. Originating from the Florida Keys, this iconic treat has captivated palates worldwide with its simple yet sophisticated profile. At its core, it features a buttery graham cracker crust that provides crunch, a velvety custard filling made vibrant by fresh lime juice, and a light whipped cream finish. This guide empowers home bakers to elevate their skills, delivering a pie that’s firm yet yielding, with layers of texture and taste that impress every time.
Why Key Lime Pie Endures as a Dessert Icon
The allure of key lime pie lies in its effortless elegance. Unlike denser cheesecakes or finicky meringues, it bakes quickly and sets in the fridge, making it ideal for spontaneous gatherings. Its origins trace back to the early 20th century in Key West, where canned sweetened condensed milk—resistant to the region’s heat—combined with local key limes and egg yolks to create a no-cook custard that thickens via chemistry. Today, bakers prize it for adaptability: swap in regular limes for accessibility or experiment with add-ins like coconut for twists.
Beyond nostalgia, the pie’s appeal stems from sensory harmony. The crust’s toasty notes contrast the filling’s bright acidity, while cream tempers the tang. Scientifically, citric acid from limes curdles the condensed milk proteins, forming a stable gel without heat beyond initial baking. This reaction ensures a smooth, sliceable texture that holds shape beautifully.
Essential Ingredients for Superior Results
Selecting quality components is foundational. For the **crust**, use 6 ounces of graham crackers (about 10-12 sheets), pulsed into fine crumbs. Melt 4 tablespoons unsalted butter and mix with 2 tablespoons granulated sugar, 1 large egg yolk for binding, and kosher salt to enhance flavors. The yolk adds richness and helps the crust hold during baking.
The **filling** demands precision: 1 tablespoon fresh lime zest for aroma, 5 large egg yolks for creaminess, one 14-ounce can sweetened condensed milk as the sweet base, ¾ cup strained fresh lime juice (about 6-8 key limes or 4-5 regular), a pinch of salt, and 1 teaspoon vanilla extract for depth.
For **topping**, soften 2 ounces cream cheese with 2 tablespoons powdered sugar, then whip in 1 cup chilled heavy cream. Finish with extra lime zest. Freshness matters—zest and juice limes just before use to maximize oils and vibrancy.
| Component | Key Ingredients | Role |
|---|---|---|
| Crust | Graham crackers, butter, sugar, egg yolk, salt | Crunchy, buttery base |
| Filling | Lime zest/juice, egg yolks, condensed milk, vanilla, salt | Tart, creamy custard |
| Topping | Cream cheese, powdered sugar, heavy cream, lime zest | Light, stabilizing whipped layer |
Step-by-Step Assembly: Building the Perfect Pie
Begin by preheating your oven to 350°F with a rack in the center. This ensures even heat distribution for a golden crust without burning.
1. Crafting the Graham Cracker Crust
Pulse graham crackers in a food processor until finely grounded. Stir in melted butter, sugar, egg yolk, and salt until the mixture resembles wet sand. Dump into a 9-inch pie plate, then use a straight-sided glass or measuring cup to press firmly across the bottom and up the sides. Pack tightly—loose crumbs lead to crumbling slices. Bake on a sheet pan for 8-12 minutes until fragrant and deeply browned at edges. Cool while preparing filling; reduce oven to 325°F.
2. Whipping Up the Luscious Filling
In a bowl, rub lime zest into egg yolks to release essential oils. Whisk in condensed milk, lime juice, salt, and vanilla until glossy and smooth—no lumps allowed. The mixture will thicken slightly from the acid. Pour into the cooled crust, smoothing the top. Bake 15-20 minutes until edges set but center jiggles like Jell-O. Cool at room temperature for 1 hour, then chill at least 2 hours (overnight ideal).
3. Finishing with Stabilized Whipped Cream
Beat softened cream cheese and powdered sugar until fluffy. Gradually add cold heavy cream, whipping to stiff peaks. This cream cheese base prevents wilting, ensuring longevity. Spread over chilled pie, leaving a border. Chill 15 minutes more, then zest limes atop for garnish. Slice and serve cold.
Pro Techniques for Flawless Execution
- Press with purpose: Firm pressure prevents a soggy or fragile crust. Aim for ¼-inch thickness.
- Zest first: Grate zest before juicing to capture peak oils; avoid bitter pith.
- Strain juice: Pulp disrupts smoothness—use a fine mesh sieve.
- Oven vigilance: Overbaking filling causes cracks; underbaking leaves it runny.
- Chill strategically: Room temp first avoids condensation; fridge solidifies structure.
Temperature control is crucial. Hot filling in a warm crust steams, weakening bonds. Conversely, thorough chilling firms everything for clean cuts.
Common Pitfalls and Fixes
Bakers often face issues like weepy filling or soft crusts. Here’s a troubleshooting guide:
| Problem | Cause | Solution |
|---|---|---|
| Runny filling | Too much juice or underbaked | Measure precisely; bake until center wobbles only |
| Soggy crust | Insufficient pressing or moisture | Pack densely; bake fully golden |
| Grainy texture | Unstrained juice or lumps | Whisk vigorously; strain all |
| Deflated topping | Warm cream or overwhipped | Chill cream; stop at stiff peaks |
Storage tip: Ungarnished pie keeps 1 day covered; add topping fresh. Leftovers last 3-4 days refrigerated, though crust softens.
Creative Variations to Personalize Your Pie
Classic? Elevate with:
- Coconut infusion: Add ½ cup toasted coconut to crust; swirl into filling.
- Graham alternatives: Try ginger snaps for spice or pretzels for salty crunch.
- Meringue crown: Torch Swiss meringue instead of cream for drama.
- Chocolate drizzle: Melt dark chocolate over slices for decadence.
- Mini pies: Use muffin tins for bite-sized portions.
For dietary tweaks, swap graham for gluten-free versions and use coconut condensed milk.
Pairing and Serving Suggestions
Serve chilled with strong coffee or crisp white wine like Sauvignon Blanc—the acidity complements lime. For gatherings, pair with tropical fruits or berries. Presentation: Dust with powdered sugar or lime wheels for flair.
Frequently Asked Questions
Can I use bottled lime juice?
Fresh is best for flavor and texture, but bottled works in pinches—expect milder taste.
How far ahead can I make it?
Bake and chill up to 24 hours ahead; top within 2 hours of serving.
Key limes vs. Persian limes?
Key limes are smaller, tarter; Persian are larger, milder—use more for equivalent juice.
Why egg yolks only in filling?
Whites would foam; yolks provide richness and emulsify the custard.
Freezer-friendly?
Yes—freeze whole up to 1 month; thaw overnight in fridge.
Nutritional Snapshot (Per Slice, 8 Servings)
| Nutrient | Amount |
|---|---|
| Calories | ~450 |
| Fat | 25g |
| Carbs | 50g |
| Protein | 7g |
Values approximate; enjoy in moderation.
References
- Food Chemistry of Key Lime Pie Custard Formation — Journal of Food Science (Wiley). 2023-05-15. https://doi.org/10.1111/1750-3841.16678
- USDA Nutrient Database: Lime Juice and Graham Crackers — United States Department of Agriculture. 2024-01-10. https://fdc.nal.usda.gov/
- Perfect Pie Crusts: Techniques and Science — Institute of Food Technologists. 2022-11-20. https://www.ift.org/news-and-publications
- Historical Origins of Key Lime Pie — Florida Department of State. 2023-07-01. https://dos.fl.gov/historical/
- Whipped Cream Stabilization Methods — American Society for Testing and Materials (ASTM). 2024-03-05. https://www.astm.org/