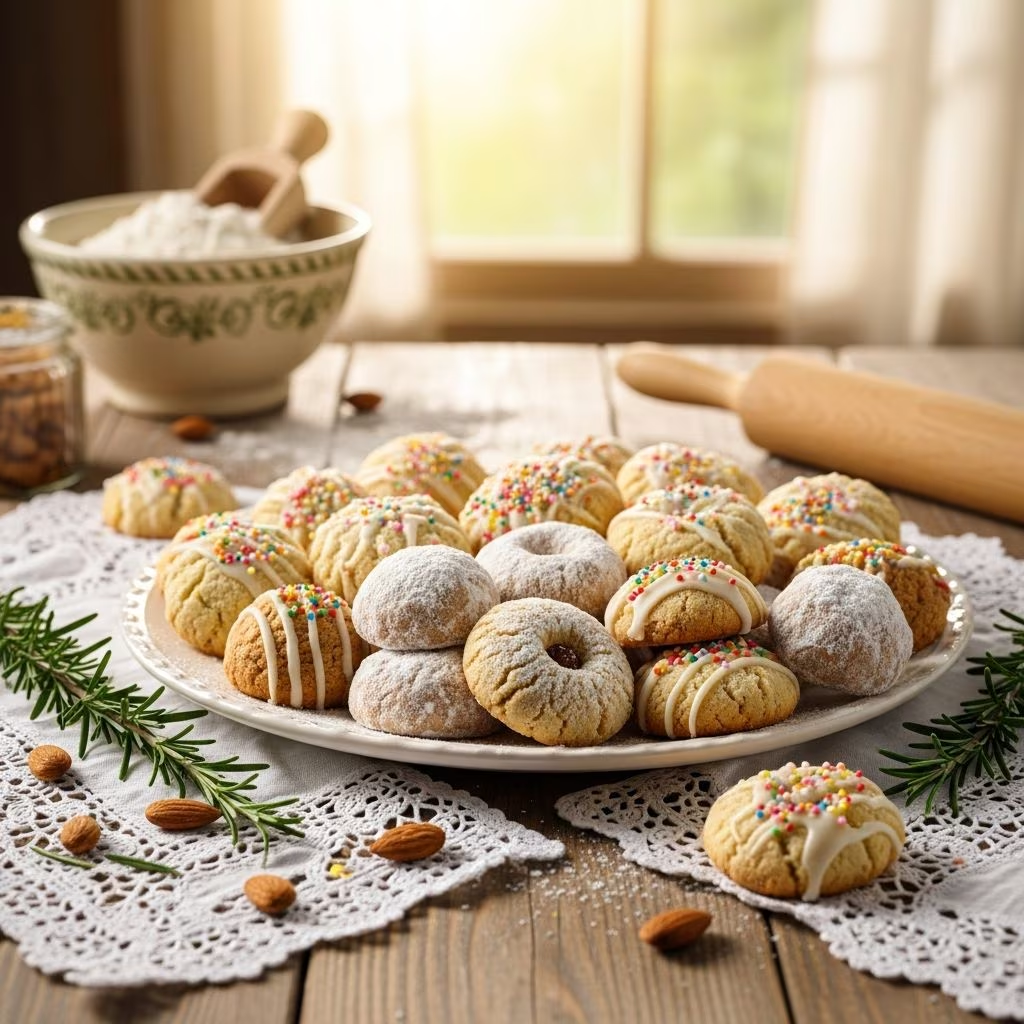
Italian Wedding Cookies represent one of the most beloved confections in the world of holiday baking and festive celebrations. These delicate, snowball-like treats have earned their place on dessert tables for centuries, gracing wedding receptions, holiday gatherings, and afternoon tea services with their elegant simplicity and irresistible texture. Despite their name suggesting an Italian origin, these cookies have become a cherished tradition across many cultures, each bringing their own regional variations and interpretations to this timeless recipe.
Understanding the Character of Italian Wedding Cookies
The hallmark of authentic Italian Wedding Cookies is their tender, crumbly texture that practically melts on the tongue. These cookies distinguish themselves through their rich buttery base combined with finely ground nuts, creating a sophisticated flavor profile that appeals to both novice bakers and experienced pastry chefs. The exterior coating of powdered sugar gives them their distinctive snowball appearance, which not only provides visual appeal but also adds a subtle sweetness and elegant presentation to any dessert spread.
What makes these cookies particularly special is their versatility. While many associate them specifically with weddings, they have transcended their original purpose to become year-round favorites. From Christmas celebrations to Valentine’s Day gifts, baby showers to bridal events, Italian Wedding Cookies adapt beautifully to any occasion where an elegant, homemade treat is desired.
Essential Ingredients and Quality Considerations
Creating superior Italian Wedding Cookies begins with understanding each ingredient’s role and selecting the highest quality options available. The foundation of these cookies relies on a careful balance of a few key components that work in harmony to produce the desired texture and flavor.
Butter: The Foundation of Flavor
Butter serves as the primary ingredient, typically comprising between one and one-and-a-half cups depending on your specific recipe. Room temperature butter is crucial for achieving the proper creaming consistency. Cold or melted butter will compromise the texture and result in cookies that lack the characteristic tender crumb. When selecting butter, opt for high-quality, preferably salted varieties, as this contributes to the overall flavor development and reduces the need for additional salt in your recipe.
Powdered Sugar and Nuts
Powdered sugar serves dual purposes: it sweetens the dough and contributes to the tender texture by preventing gluten development. Ground nuts—whether almonds, walnuts, pecans, or hazelnuts—provide the distinctive nutty flavor and contribute to the crumbly texture. Many bakers prefer to grind their own nuts from whole nuts rather than purchasing pre-ground varieties, as this ensures maximum freshness and flavor.
Flour Selection
All-purpose flour works perfectly for these cookies, typically requiring around two to three cups depending on the ratio of other ingredients. Some bakers prefer to lightly spoon and level their flour to avoid compacting it, which can result in drier cookies. Sifting flour before combining it with other ingredients can create an even lighter, more tender final product.
Flavor Enhancers
Vanilla extract and almond extract are traditional additions that amplify the nutty character of these cookies. Some recipes incorporate a small amount of brandy or other spirit, which adds sophistication and depth to the flavor profile without being overtly alcoholic in the finished product.
Step-by-Step Preparation Process
Preparing Your Workspace and Ingredients
Success with Italian Wedding Cookies begins before you even start mixing. Preheat your oven to approximately 320-350°F, depending on your specific recipe and oven characteristics. Line your baking sheets with parchment paper to ensure even baking and easy removal. If working with whole nuts, toast them lightly for five to ten minutes to enhance their natural flavors and crack the skins if using almonds.
Creaming Butter and Sugar
Using an electric mixer or wooden spoon, beat together softened butter and powdered sugar until the mixture becomes light, fluffy, and pale in color. This process, known as creaming, typically takes one to two minutes with an electric mixer. The goal is to incorporate air into the mixture, which contributes to the light, tender texture of the finished cookies.
Incorporating Additional Components
Add vanilla extract, almond extract, or any optional spirits to your butter mixture, beating until well combined. Gradually add your finely ground nuts, mixing thoroughly. Some recipes recommend slightly chilling the dough at this point—approximately ten to fifteen minutes—to make it easier to handle. While not absolutely necessary, this step can prevent sticking and help maintain uniform cookie size.
Combining Dry Ingredients
Add your flour gradually, mixing on low speed just until combined. Overmixing at this stage can develop gluten, resulting in tougher cookies rather than the desired tender crumb. The dough should come together without being sticky or overly dry.
Shaping and Baking Techniques
Using a small ice cream scoop or rounded tablespoon, portion the dough into balls approximately the size of golf balls or slightly smaller. Place these portions on your prepared baking sheets, ensuring they don’t touch each other, as they will spread slightly during baking. Some bakers prefer to roll the dough between their palms to create perfectly uniform spheres.
Bake for approximately fifteen to twenty minutes, depending on your oven’s characteristics and the size of your cookies. The cookies should appear barely golden on the bottom and still quite pale on top when removed from the oven. They will continue to cook slightly from residual heat, so avoid overbaking, which can result in dry, crumbly cookies rather than tender ones.
The Critical Final Step: Coating and Cooling
Allow your cookies to cool for a few minutes—approximately three to five minutes—until they can be handled but are still warm. This timing is crucial. Cookies that are too hot will have difficulty holding the powdered sugar coating, while those that are completely cool will not allow the sugar to adhere properly. Pour powdered sugar into a shallow bowl and gently roll each warm cookie, ensuring it becomes evenly coated. Place coated cookies on a wire rack or serving platter to cool completely.
Recipe Variations and Creative Adaptations
| Variation Type | Key Modifications | Flavor Profile |
|---|---|---|
| Almond-Based | Use finely ground almonds as primary nut component | Delicate, sophisticated almond flavor |
| Walnut Blend | Combine walnuts with hazelnuts for complexity | Rich, earthier nutty character |
| Pecan Version | Substitute pecans for traditional almonds | Buttery, slightly sweeter nut profile |
| Chocolate Dipped | Dip portion of cooled cookie in melted chocolate | Enhanced richness with chocolate accent |
| Citrus-Infused | Add lemon or orange zest to dough | Bright, refreshing citrus notes |
Troubleshooting Common Baking Challenges
Cookies Spreading Too Much or Too Little
Excessive spreading typically indicates that your butter was too warm or your dough insufficiently flour-based. Ensure your butter is at proper room temperature and consider chilling the dough briefly before portioning. Conversely, if cookies remain too compact and dense, your butter may have been too cold, or you may have overmixed the flour.
Texture Issues: Too Dry or Too Crumbly
If your finished cookies crumble excessively, you likely overbaked them or included too much flour relative to butter. Measure flour carefully by spooning and leveling rather than scooping directly from the bag. Reduce baking time by one to two minutes in future batches.
Powdered Sugar Not Adhering
Proper timing is critical for sugar coating adherence. Ensure cookies are warm but not scalding hot when coated. If sugar still won’t stick adequately, very lightly brush cookies with beaten egg white before rolling in sugar.
Flavor Concerns
If cookies taste too bland, ensure you’re using quality extracts and considering the addition of brandy or almond extract for depth. If nuts taste stale or flat, toast them briefly before grinding to revive their natural flavors.
Storage and Shelf Life Guidance
Properly stored Italian Wedding Cookies maintain their quality for up to two weeks when kept in an airtight container at room temperature. Layer cookies between parchment paper to prevent sticking and protect the powdered sugar coating. For longer storage, these cookies freeze beautifully for up to three months. Thaw at room temperature before serving, refreshing the powdered sugar coating if desired by very lightly dusting with additional powder sugar.
Frequently Asked Questions
Can I Use Oil Instead of Butter?
While oil might work in some cookies, butter is essential for the authentic texture and flavor of Italian Wedding Cookies. Butter provides the richness and contributes to proper structure, whereas oil would result in a different consistency entirely.
How Many Cookies Does One Batch Yield?
Most recipes produce between forty and fifty-five cookies, depending on how carefully you portion the dough. Using a uniform scoop or measuring tool helps ensure consistent sizing and yield.
Are These Cookies Naturally Gluten-Free?
Standard recipes use all-purpose wheat flour, making them unsuitable for gluten-free diets. However, you can substitute with quality gluten-free flour blends designed for baking, though texture may vary slightly from the traditional version.
What Temperature Should Butter Be?
Butter should be at cool room temperature—soft enough to press your finger into easily but still holding its shape. This typically means seventy to seventy-two degrees Fahrenheit.
Can I Make These Cookies Without Nuts?
While possible, nuts are integral to the authentic character of these cookies. If omitting nuts due to allergies, consider reducing flour slightly and adding extra vanilla extract for compensation.
Conclusion: Mastering This Timeless Classic
Italian Wedding Cookies represent the perfect intersection of simplicity and sophistication in the baking world. With a handful of quality ingredients and careful attention to technique, anyone can create these elegant treats that impress family and friends alike. Whether you’re baking for a special occasion or simply indulging in a cherished tradition, these cookies deliver consistent results when you understand the role of each ingredient and maintain proper timing throughout the process. Experiment with variations, perfect your technique through practice, and enjoy sharing these timeless treasures with those you care about most.
References
- Italian Wedding Cookies Recipe — Ciao Florentina. 2024. https://ciaoflorentina.com/italian-wedding-cookies-recipe/
- Melt-In-Your-Mouth Italian Wedding Cookies — The Clever Carrot. 2024. https://www.theclevercarrot.com/2024/12/melt-in-your-mouth-italian-wedding-cookies/
- Italian Wedding Cookies (anginetti) — Feeling Foodish. https://feelingfoodish.com/italian-cookies-anise-almond/
- Italian Wedding Cookies — About a Mom. https://www.aboutamom.com/italian-wedding-cookies/
- Delicious Greek Kourabiedes: Italian Wedding Cookies Recipe — Marcellina In Cucina. https://www.marcellinaincucina.com/delicious-greek-kourabiedes/