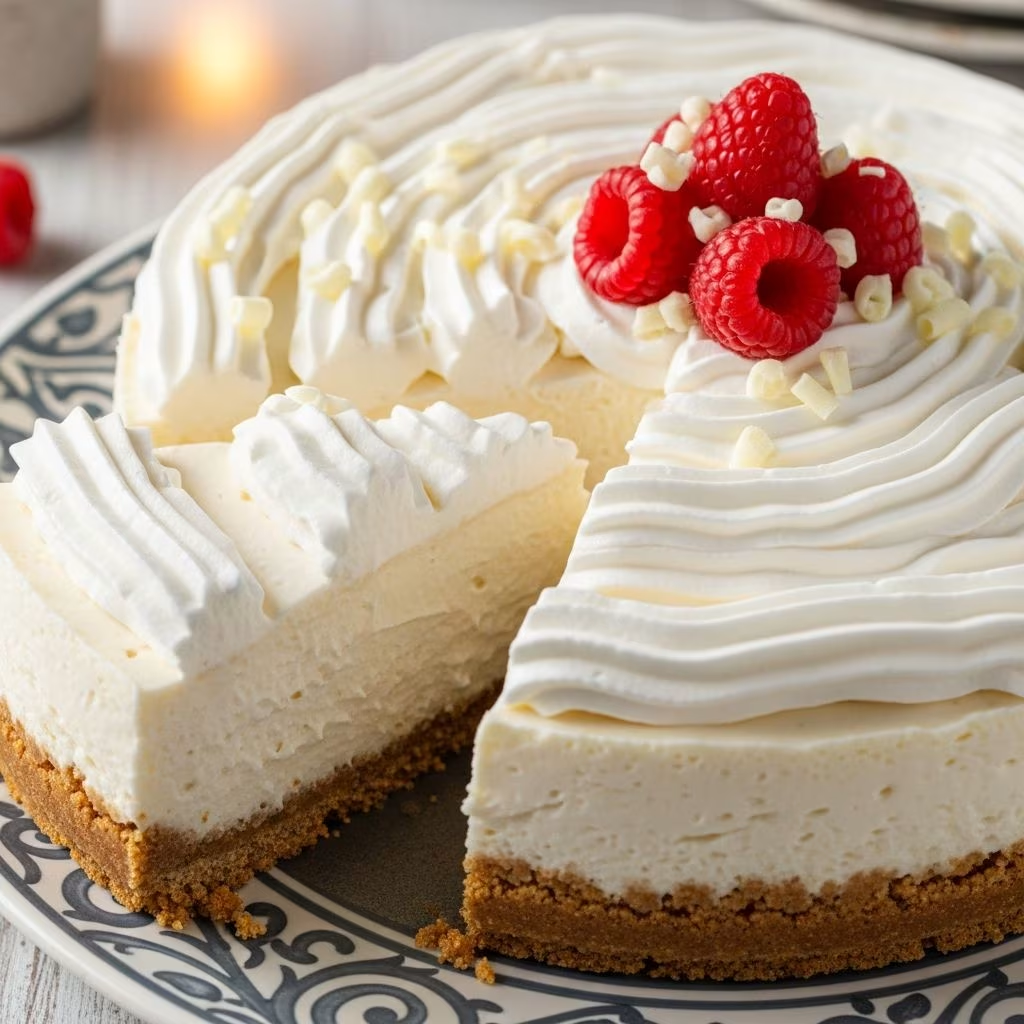
Creating an impressive cheesecake without turning on your oven is one of the most rewarding culinary accomplishments for home cooks. The no-bake cheesecake with Cool Whip has become a beloved dessert for countless households because it delivers authentic cheesecake texture and flavor with minimal effort. This method transforms simple pantry staples into a sophisticated treat that rivals traditional baked varieties, making it ideal for warm weather gatherings, busy schedules, or anyone looking to impress guests without the stress of oven baking.
Understanding the Foundation: Why No-Bake Cheesecake Works
The beauty of a no-bake cheesecake lies in its straightforward science. Unlike baked versions that rely on heat to set the custard-like filling through protein denaturation, no-bake varieties depend on the structural support provided by whipped cream components and refrigeration. When you incorporate Cool Whip—a stabilized whipped topping—into a cream cheese mixture, you create an airy, voluminous filling that firms up as it chills without requiring any oven time. This approach preserves the delicate flavor of quality cream cheese while creating a lighter, fluffier texture that many people actually prefer to traditional dense cheesecake.
The combination of cream cheese’s tangy richness with Cool Whip’s cloud-like texture creates an almost mousse-like consistency that feels luxurious on the palate. The refrigeration process allows the flavors to meld together while the mixture gradually sets, resulting in a dessert that tastes better after a few hours of chilling than it does immediately after assembly.
Essential Ingredients and Their Roles
Selecting the right ingredients is crucial for creating a no-bake cheesecake that achieves the perfect balance of flavor and texture. Each component serves a specific purpose in the final product.
Cream Cheese: The Star Component
Full-fat cream cheese at room temperature forms the backbone of your cheesecake filling. Room temperature cream cheese combines smoothly with other ingredients, preventing lumps that can compromise texture. Typically, recipes call for 16 to 24 ounces depending on desired richness and pan size. Cold or partially softened cream cheese will create an uneven mixture with chunks that won’t blend properly, so advance preparation is essential. Allow cream cheese to sit on your counter for at least 30 minutes before mixing.
Cool Whip and Whipped Cream Alternatives
Cool Whip serves as the leavening agent that gives no-bake cheesecake its signature fluffy consistency. One 8-ounce container typically works for most recipes, though some variations use up to 16 ounces for an even airier texture. An important distinction: thaw Cool Whip completely if frozen, as clumpy topping won’t fold smoothly into the cream cheese mixture. Alternatively, you can substitute heavy whipping cream (about 2 cups) whipped to stiff peaks, though this requires more effort and a stand mixer for best results.
Sweeteners and Flavor Enhancers
Powdered sugar (typically 3/4 to 1 cup) dissolves more readily than granulated sugar, creating a smoother filling without the grainy texture that granulated varieties might produce. Vanilla extract (1-2 teaspoons) adds depth and complexity, while lemon juice (1-2 teaspoons) provides brightness and cuts through the richness of the cream cheese. Some recipes incorporate sour cream (1/4 cup) to enhance tanginess and add subtle sophistication.
The Crust: A Buttery Foundation
A graham cracker crust provides textural contrast and traditional cheesecake flavor. Most recipes use a store-bought 9-inch pie crust for convenience, though homemade versions combine melted butter (1/2 cup), graham cracker crumbs (2 cups), and powdered sugar (1/4 cup) pressed into the pan base.
Step-by-Step Preparation Method
Phase One: Preparing Your Equipment and Ingredients
Success begins with advance preparation. Remove cream cheese from refrigeration and allow it to reach room temperature—this typically takes 30-45 minutes depending on kitchen temperature. If using frozen Cool Whip, place it in the refrigerator to thaw completely; partially thawed Cool Whip contains ice crystals that won’t incorporate smoothly. Gather all ingredients and measure them before beginning to avoid mid-process scrambling. Have your pie crust ready in its pan, whether store-bought or homemade.
Phase Two: Creating the Filling Base
Place softened cream cheese in a large mixing bowl and beat with an electric mixer on medium speed for 2-3 minutes until completely smooth and creamy. This initial beating removes lumps and creates a uniform base. Scrape down the sides of the bowl with a spatula periodically to ensure all cream cheese gets properly incorporated.
Add powdered sugar gradually—this slow incorporation prevents overmixing and ensures even distribution. Continue beating until all sugar dissolves and the mixture becomes light and fluffy. Add vanilla extract and lemon juice, mixing on low speed until just combined. At this stage, if you’re using sour cream, fold it in gently to maintain the mixture’s airiness.
Phase Three: Incorporating the Whipped Topping
This is the most critical step and where many home cooks encounter problems. Using a rubber spatula, gently fold the thawed Cool Whip into the cream cheese mixture—never use an electric mixer for this stage. Vigorous mixing breaks down the whipped topping’s airy structure, resulting in a dense, deflated filling. Folding means using your spatula to cut down through the center of the mixture, then pulling the bottom portion up and over the top, rotating the bowl slightly with each motion. Continue until no white streaks of Cool Whip remain, but stop as soon as the mixture appears uniform.
Phase Four: Chilling and Setting
Spoon the filling into your prepared crust and smooth the top with a spatula. Cover the pan loosely with plastic wrap and refrigerate for at least 3-4 hours, though overnight chilling produces superior results and ensures complete firmness. The filling continues to set as it rests, and flavors deepen and meld together during this time. After chilling, the cheesecake will have a creamy yet stable texture that slices cleanly.
Pro Tips for Achieving Excellence
Temperature Matters
Cream cheese consistency directly impacts mixing success. Rather than guessing, cut a small piece from your cream cheese block—if it bends without cracking, it’s ready. Conversely, if it remains rigid or cold, additional counter time is necessary.
The Folding Technique
Many texture problems stem from improper Cool Whip incorporation. If you use a mixer, the whipped topping deflates, resulting in a dense filling instead of the desired fluffy consistency. Invest time in learning proper hand-folding technique—your results will noticeably improve.
Crust Preparation
If making a homemade crust, ensure butter is fully melted and the mixture is evenly moistened before pressing into the pan. A dry or unevenly moistened crust can separate from the filling during storage.
Clean Slicing Technique
For picture-perfect slices, wipe your knife with a warm, damp napkin between each cut. This prevents filling from smearing across the slice surface. A serrated knife works better than straight-edge varieties for clean cheesecake slicing.
Flavor Variations and Creative Additions
The basic formula serves as a foundation for endless customization. Cherry topping adds fruity sweetness and visual appeal. Chocolate lovers might swirl chocolate sauce into the filling before chilling or add chocolate crumbs to the crust. Fresh berries, lemon zest, or even a layer of fruit preserves transform the basic recipe into unique creations. Espresso powder creates a sophisticated coffee-flavored version, while almond extract adds subtle nuttiness.
Common Questions and Troubleshooting
What if my filling turned grainy or lumpy?
This typically results from cream cheese that wasn’t properly softened before mixing. Ensure future cream cheese reaches room temperature, and consider briefly microwaving (5-10 seconds at a time) cold cream cheese to speed the process.
Why is my cheesecake too dense?
Overmixing the Cool Whip is the primary culprit. Use only the hand-folding method, and stop as soon as the mixture appears uniform. Avoid using an electric mixer for any portion of the whipped topping incorporation.
How long can I store no-bake cheesecake?
Properly refrigerated no-bake cheesecake keeps for 3-4 days covered. It can be frozen for up to 2 weeks, though some slight texture changes may occur upon thawing.
Can I use whipped cream instead of Cool Whip?
Yes, heavy whipping cream whipped to stiff peaks provides an excellent alternative. The resulting cheesecake will be slightly less stable but will have a more authentic, less sweet flavor profile.
What’s the best way to transport this dessert?
Leave the cheesecake in its springform pan and keep it refrigerated until serving time. Transport in a cooler if traveling long distances.
Nutritional Considerations
No-bake cheesecake with Cool Whip contains significant amounts of dairy and sugar, making it a rich dessert best served in modest portions. A typical slice contains approximately 350-400 calories, with most coming from fat and carbohydrates. Those seeking lower-fat alternatives might substitute reduced-fat cream cheese or Cool Whip varieties, though this affects texture and richness. Portion control remains important despite the dessert’s appealing, light appearance.
Serving Suggestions and Occasions
This dessert’s versatility makes it appropriate for virtually any gathering. Summer picnics benefit from a no-bake option that requires no oven time during warm months. Holiday celebrations showcase its elegant presentation without demanding oven space when multiple dishes need baking. Dinner parties impress guests with homemade sophistication prepared entirely in advance, freeing you to focus on other preparations. Family reunions and potlucks appreciate a dessert that transports well and serves many people from a single pan.
Making It Ahead: Planning and Storage
One tremendous advantage of no-bake cheesecake is complete advance preparation capability. Assemble the entire dessert up to 24 hours before serving, allowing you to focus on other party preparation tasks. The flavors actually improve as the filling sets, making overnight preparation ideal. Store covered in the refrigerator, and bring to room temperature for 15 minutes before serving to showcase the filling’s creamy texture optimally.
References
- No Bake Cherry Cheesecake with Cool Whip — Feels Like Home Blog. Accessed April 2026. https://feelslikehomeblog.com/no-bake-cherry-cheesecake-with-cool-whip/
- How to Make No Bake Cheesecake — Chocolate with Grace. Accessed April 2026. https://chocolatewithgrace.com/how-to-make-no-bake-cheesecake/
- COOL WHIP 2 Step Creamy Cheesecake — Kraft Heinz. Accessed April 2026. https://www.kraftheinz.com/en-CA/kraft-cool-whip/recipes/538513-cool-whip-2-step-creamy-cheesecake
- How to Make No-Bake Cheesecake with Cool Whip — Allrecipes. Accessed April 2026. https://www.youtube.com/watch?v=FuFCjxEPnlY
- No Bake Cheesecake with Cool Whip — Sugar and Soul. Accessed April 2026. https://www.sugarandsoul.co/no-bake-cheesecake/
- No Bake Cheesecake with Cool Whip — Meatloaf and Melodrama. Accessed April 2026. https://www.meatloafandmelodrama.com/no-bake-cheesecake-with-cool-whip/