Understanding the Heritage Behind These Beloved Treats
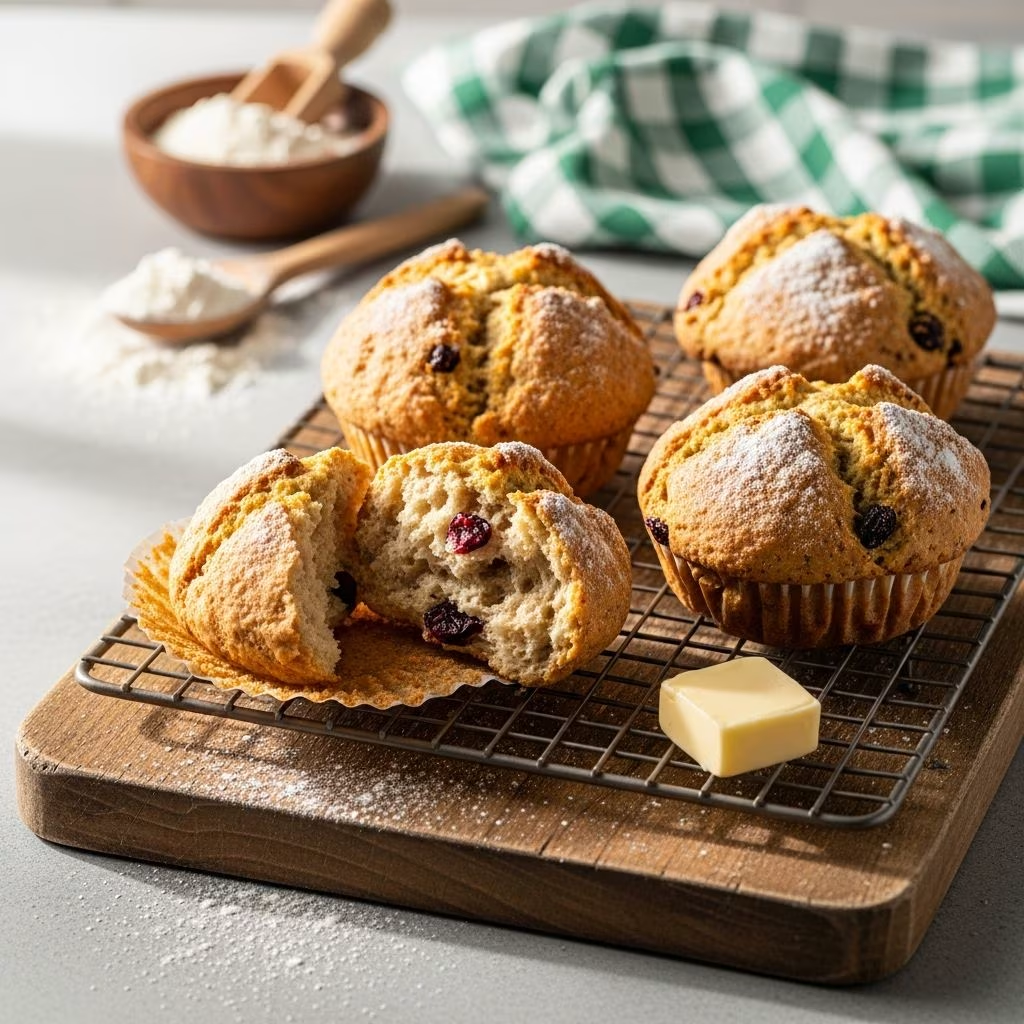
Irish soda bread holds a special place in culinary tradition, representing generations of baking wisdom passed down through families across Ireland and beyond. What makes this classic loaf particularly interesting is how it has evolved from a simple staple into various modern interpretations. One such adaptation that has gained considerable popularity is the muffin version, which captures all the authentic flavors of traditional soda bread while offering the convenience and portion control that contemporary home bakers appreciate.
The transformation from loaf to muffin format represents more than just a shape change. It reflects how traditional recipes can be reimagined to fit modern lifestyles without compromising on taste or cultural significance. These muffins deliver the characteristic tang, tender crumb, and distinctive flavor profile of their loaf-based predecessor, making them an excellent choice for busy mornings, special occasions, or whenever you crave that authentic Irish baking experience.
The Essential Components: What Goes Into Your Batter
Foundational Dry Ingredients
Creating successful Irish soda bread muffins begins with understanding each ingredient’s role in the final product. The foundation starts with all-purpose flour, which provides structure and body to your muffins. Most recipes call for approximately two and a half cups of flour, though some bakers prefer substituting a portion with whole wheat flour for added nutrition and earthier flavor.
The leavening system deserves particular attention. Unlike traditional cakes that rely solely on baking powder, Irish soda bread muffins employ a combination of baking soda and baking powder. This dual-leavening approach creates a specific texture characteristic of authentic soda bread—a tender interior with a slightly dense crumb that differs from typical muffins. The baking soda reacts with the acidic dairy components in your wet ingredients, while baking powder provides additional rise during baking.
Signature Flavor Elements
What distinguishes Irish soda bread muffins from ordinary muffins are the traditional flavor components that define the category. Caraway seeds contribute a distinctive, slightly earthy and licorice-adjacent flavor that has been used in Irish baking for centuries. These seeds add complexity and authenticity to your muffins, though some home bakers omit them based on personal preference.
Dried currants or raisins represent another critical component. These small, dried fruits provide pockets of sweetness throughout your muffins and contribute moisture to the crumb. Traditional recipes specifically call for currants, which are smaller and more tart than raisins, but either works well. Some bakers soak their dried fruits briefly in hot water to plump them up, enhancing their texture and flavor intensity.
Wet Ingredients and Binding Elements
The wet ingredients matrix typically includes buttermilk, which provides the acidic component necessary for the baking soda to activate. Buttermilk also contributes tenderness and a subtle tang that characterizes authentic soda bread. If you don’t have buttermilk on hand, creating a substitute is straightforward: add lemon juice or white vinegar to regular milk and let it sit for several minutes until it curdles slightly.
An egg serves as the binding agent, helping hold all components together while contributing richness. Some recipes include an additional egg yolk for enhanced flavor and a more luxurious crumb. Melted butter provides richness and helps create a tender texture, though some variations use softened butter that’s creamed with sugar to incorporate air into the batter.
The Mixing Method: Technique Matters
Combining Dry Ingredients Properly
Success with Irish soda bread muffins begins long before the oven preheats. Start by whisking together all dry ingredients—flour, baking powder, baking soda, salt, sugar, caraway seeds, and dried currants. This whisking process accomplishes several objectives: it evenly distributes the leavening agents throughout the flour, ensuring consistent rise; it breaks up any clumps in the baking soda or powder that might otherwise create bitter spots; and it distributes the caraway seeds and currants uniformly so every muffin receives these flavorful components.
Preparing Your Wet Mixture
In a separate bowl, combine your egg, buttermilk, and melted butter. Some bakers recommend whisking these ingredients thoroughly to ensure the egg is fully incorporated and the butter is evenly distributed. This step is particularly important if you’re using cold buttermilk and melted butter, as the temperature difference might cause uneven mixing. Allowing these ingredients to reach room temperature before combining helps create a more homogeneous mixture.
The Critical Combination Step
The moment when wet and dry ingredients meet represents a crucial juncture in your baking process. Pour the wet ingredients over the dry mixture and gently combine using a spatula or wooden spoon. This is where restraint becomes essential. The mixing technique that works perfectly for other baked goods will ruin your soda bread muffins.
Overmixing develops gluten strands, resulting in tough, dense muffins with poor crumb structure. Instead, mix just until the dry ingredients are moistened—your batter should look slightly lumpy and rough. As a helpful guideline, the entire mixing process should take only a few stirring motions. If you’re tempted to keep mixing until everything looks perfectly smooth, resist that urge. Those small lumps will disappear during baking, and you’ll be rewarded with tender, crumbly muffins instead of hockey pucks.
Preparation and Baking Essentials
Setting Up Your Muffin Pan
Proper pan preparation prevents sticking and makes removal easier. You have several options: line your muffin cups with paper liners, which makes cleanup effortless and helps prevent sticking; grease each cup thoroughly with butter or cooking spray; or use a combination approach, lining the cups and then lightly greasing the liners. Each method works well, so choose based on your preference and what you have available.
Filling and Topping Techniques
Distribute your batter evenly among the muffin cups, filling each about three-quarters full. This level allows room for the muffins to rise without spilling over the edges. Some bakers prefer a slightly less full cup if they want to add a topping. Speaking of toppings, sprinkling coarse sugar (such as turbinado, Demerara, or sanding sugar) on top of each muffin before baking creates an attractive appearance and adds a pleasant crunch when eaten.
Oven Baking Guidelines
Bake your muffins at 375 to 400 degrees Fahrenheit for 18 to 22 minutes, depending on your oven and the size of your muffin cups. The baking time variation reflects differences in oven temperature accuracy and muffin size. Start checking for doneness around the 18-minute mark by inserting a toothpick or cake tester into the center of a muffin. When it comes out clean or with just a few moist crumbs clinging to it, your muffins are perfectly baked.
Watch for visual cues as well: your muffins should develop a light golden-brown exterior and appear nicely domed. Overbaked muffins will be dry and tough, while underbaked ones will be gummy and fall apart. Finding that sweet spot takes a bit of trial and error with your specific oven, so take notes on baking times for future reference.
Cooling and Storage Strategies
Immediately after removing your muffins from the oven, tilt the pan slightly so air can circulate under the muffins and prevent the bottoms from becoming soggy. Allow them to cool in the pan for about five minutes before transferring to a wire cooling rack. This brief rest period helps them set while remaining tender.
Once completely cooled, store your muffins in an airtight container at room temperature for up to three days. For longer storage, freeze them in a freezer-safe bag or container for up to one month. To reheat, simply place a muffin in the microwave for 20 to 30 seconds, or wrap it in foil and warm in a 350-degree oven for about 10 minutes.
Serving Suggestions and Variations
Classic Accompaniments
Irish soda bread muffins shine when served warm with simple accompaniments. Butter—either salted or unsalted—melts beautifully into the warm crumb. Jam or preserves add sweetness and brightness, with berry varieties particularly complementing the subtle tang of the muffins. Some people enjoy spreading honey for a touch of natural sweetness.
Creative Flavor Adaptations
While traditional recipes honor the classic flavor profile, you can experiment with variations. Some bakers add dried cranberries or dried cherries alongside or instead of currants for different flavor notes. Others incorporate a small amount of orange zest for citrus brightness. These adaptations maintain the essential character of soda bread muffins while personalizing them to your taste preferences.
Troubleshooting Common Baking Challenges
| Problem | Possible Cause | Solution |
|---|---|---|
| Dense, Heavy Muffins | Overmixing batter | Mix just until dry ingredients are moistened; lumpy batter is correct |
| Muffins Don’t Rise | Expired baking soda or powder | Check expiration dates; replace if necessary |
| Dry, Crumbly Texture | Overbaking | Reduce baking time; check for doneness starting at 18 minutes |
| Soggy Bottoms | Muffins cooling directly on pan | Transfer to cooling rack immediately after brief pan rest |
| Currants Sink to Bottom | Batter too thin or currants too heavy | Coat currants lightly in flour before adding; ensure thick batter |
Frequently Asked Questions
Can I Make These Muffins Without Caraway Seeds?
Absolutely. While caraway seeds provide traditional flavor, they’re not essential. If you dislike their distinctive taste, simply omit them. Your muffins will still be delicious, though slightly less authentic in character. Some bakers substitute fennel seeds or increase the amount of citrus zest for alternative flavor dimensions.
What If I Don’t Have Buttermilk?
Create a substitute by combining one tablespoon of lemon juice or white vinegar with enough regular milk to fill one cup. Let this mixture sit for five to ten minutes until it thickens and curdles slightly. This acidic mixture provides the necessary tang and chemical reaction with baking soda.
How Far in Advance Can I Prepare These Muffins?
You can prepare the dry ingredients several days in advance, storing them in an airtight container. Keep wet ingredients separate and mix them just before combining with dry ingredients for best results. The complete batter should be baked immediately after mixing to ensure optimal rise and texture.
Are These Muffins Suitable for Freezing?
Yes, both unbaked batter and baked muffins freeze well. For batter, portion it into muffin cups, freeze until solid, then transfer to freezer bags for storage up to one month. Bake from frozen, adding a few extra minutes to baking time. Baked muffins freeze for up to one month and reheat beautifully.
Can I Substitute Whole Wheat Flour?
Partially substituting whole wheat flour works well. Many bakers use one and a half cups all-purpose flour combined with one cup whole wheat flour successfully. This substitution adds nutrition and earthier flavor while maintaining the characteristic soda bread texture. Avoid using all whole wheat flour, as the denser flour produces a different texture.
References
- King Arthur Baking Company Irish Soda Bread Muffins Recipe — King Arthur Baking Company. Retrieved April 2026. https://www.kingarthurbaking.com/recipes/irish-soda-bread-muffins-recipe
- Whole Wheat Irish Soda Bread Muffins — Skinnytaste. Retrieved April 2026. https://www.skinnytaste.com/whole-wheat-irish-soda-bread-muffins/
- Irish Soda Bread Muffins — If You Give a Blonde a Kitchen. Retrieved April 2026. https://www.ifyougiveablondeakitchen.com/irish-soda-bread-muffins/
- Irish Soda Bread Muffins — Kara Lydon. Retrieved April 2026. https://karalydon.com/recipes/irish-soda-bread-muffins/