Apple crisp represents one of the most beloved comfort desserts in American culinary tradition. This simple yet elegant dish combines tender, spiced apples with a golden, buttery crumb topping that delivers both textural contrast and satisfying warmth. Unlike its cousin apple pie, which requires pastry skills and patience, apple crisp offers an accessible pathway to homemade dessert success. The beauty of this dish lies in its straightforward preparation and remarkable ability to transform humble orchard fruit into an impressive conclusion to any meal.
Understanding the Foundation of Apple Crisp
At its core, apple crisp consists of two essential components: the fruit base and the topping layer. The fruit foundation relies on fresh apples that have been peeled, cored, and sliced into manageable pieces. The selection of apple variety significantly influences the final outcome. Tart varieties such as Granny Smith apples provide excellent acidity that balances the sweetness of the topping and prevents the overall dish from becoming cloying. Medium to large apples, typically yielding between 5 to 10 pieces per fruit, work best for even cooking and consistent texture throughout the baking process.
The fruit layer receives its character from a combination of granulated sugar, which dissolves during baking to create a sauce-like consistency, and warm spices including cinnamon and nutmeg. These spices enhance the natural flavors of the apples rather than overpowering them. A small quantity of flour, usually between 1 to 3 tablespoons, serves a practical purpose by thickening the juices released by the apples during baking, creating a cohesive filling that neither remains watery nor becomes overly dense.
Crafting the Perfect Topping Layer
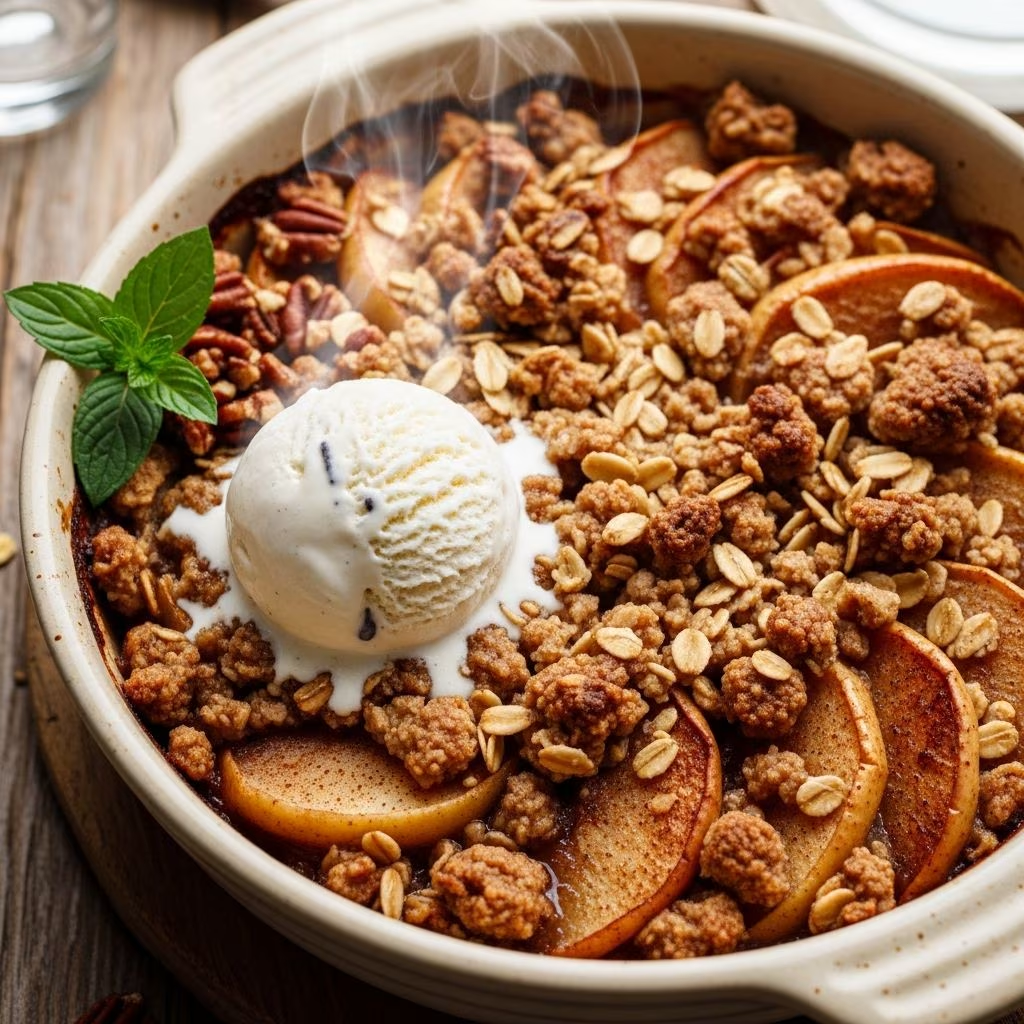
The crisp topping distinguishes this dessert from other baked apple preparations. This component combines old-fashioned rolled oats with flour, brown sugar, butter, and a pinch of salt to create a mixture that bakes into a golden, crunchy exterior while maintaining a slightly moist interior. The oats provide both structural integrity and textural interest, while brown sugar adds depth and subtle molasses notes that enhance the overall flavor profile.
The preparation of this topping requires attention to detail. Cold butter, cut into small cubes, must be worked into the dry ingredients using either a pastry blender, two knives, or fingertips until the mixture resembles coarse breadcrumbs or sand. This technique ensures that small pockets of butter remain distributed throughout the topping, which then melt during baking to create the characteristic crispy exterior. Rushing this step or using warm butter results in a dense, cakey topping rather than the desired crumbly texture.
Essential Ingredients and Quantities
| Component | Ingredient | Standard Amount | Purpose |
|---|---|---|---|
| Apple Filling | Fresh apples (Granny Smith preferred) | 5-10 large apples | Provides fruit base and natural sweetness |
| Apple Filling | Granulated sugar | 3/4 cup | Sweetens fruit and creates sauce consistency |
| Apple Filling | Ground cinnamon | 1 teaspoon | Adds warm spice flavor |
| Apple Filling | Ground nutmeg | 1/4 teaspoon | Provides depth and complexity |
| Apple Filling | All-purpose flour | 1-3 tablespoons | Thickens apple juices |
| Crisp Topping | Old-fashioned rolled oats | 3/4 cup | Creates crispy texture and structure |
| Crisp Topping | Brown sugar | 1 cup | Sweetens topping with molasses depth |
| Crisp Topping | All-purpose flour | 3/4 cup | Binds topping ingredients |
| Crisp Topping | Cold unsalted butter | 1/2 cup | Creates crispy, flaky texture when baked |
| Crisp Topping | Salt | Pinch | Enhances all flavors |
Step-by-Step Preparation Method
Initial Setup and Apple Preparation
Begin by preheating your oven to 350 to 375 degrees Fahrenheit, allowing sufficient time for the oven to reach full temperature before baking commences. Simultaneously, prepare your baking vessel by lightly coating a 9×13-inch baking dish with non-stick cooking spray or butter. Select firm, unblemished apples that feel heavy for their size, as these typically contain more juice and flavor. Wash the apples under cool running water, then peel them using a vegetable peeler or paring knife. Remove the core using an apple corer or by carefully cutting around the central seed cavity with a knife. Slice the prepared apples into uniform pieces approximately 1/4-inch thick, ensuring consistency for even cooking.
Building the Fruit Layer
Transfer the sliced apples to a large mixing bowl and add the granulated sugar, flour, cinnamon, nutmeg, and any additional flavorings such as vanilla extract or almond extract. Toss the mixture thoroughly until every apple slice receives an even coating of the sugar-spice blend. This step ensures uniform flavor distribution and promotes consistent browning during baking. Once combined, transfer the seasoned apple mixture into the prepared baking dish, spreading it into an even layer.
Creating and Applying the Topping
In a separate medium-sized bowl, combine the oats, flour, brown sugar, and salt using a fork or whisk to break up any clumps in the brown sugar and ensure even distribution of dry ingredients. Cut the cold butter into small cubes directly into this mixture. Using your fingertips or a pastry blender, work the butter into the dry ingredients with deliberate, pressing motions. Continue this process until the mixture resembles coarse sand or breadcrumbs with small visible pieces of butter distributed throughout. This intermediate texture is crucial—incomplete mixing results in a cakey topping, while over-mixing creates a dense, oily layer that fails to crisp properly during baking.
Distribute the topping mixture evenly across the apple layer, using your hands to sprinkle it gently and avoid pressing down, which would compact the topping and prevent proper crisping.
Baking Process and Temperature Control
Transfer the assembled crisp to the preheated oven and bake for 35 to 45 minutes, depending on your oven’s characteristics and the thickness of your apple layer. The dish reaches optimal doneness when the topping achieves a golden-brown color and the apple mixture bubbles visibly around the edges and at any exposed areas within the filling. The bubbling indicates that the apples have softened sufficiently and the sugars have begun to caramelize, creating the sauce that accompanies each serving.
If you notice the topping browning too quickly before the apples reach the proper consistency, reduce the oven temperature by 25 degrees and extend the baking time by approximately 10 minutes. Conversely, if the apples soften but the topping remains pale, increase the temperature slightly for the final few minutes to achieve the desired golden color.
Cooling and Serving Recommendations
Resist the temptation to serve the crisp immediately upon removal from the oven. Allow it to rest for at least 30 minutes before serving, which permits the filling to set slightly and makes portioning significantly easier. This cooling period also enhances the eating experience, as the temperature becomes more comfortable and the flavors fully develop. The crisp can be served still-warm or at room temperature, depending on personal preference.
Traditional presentation includes a generous scoop of vanilla ice cream placed directly onto each warm serving, allowing the ice cream to melt slightly into the apple filling and create a luxurious combination of temperatures and textures. Alternatively, whipped cream, Greek yogurt, or caramel sauce provide excellent complementary accompaniments that enhance rather than mask the fundamental apple and spice flavors.
Ingredient Selection and Quality Considerations
Choosing the Right Apples
The apple variety selected significantly influences the final result. Granny Smith apples remain the preferred choice due to their firm texture, natural tartness, and ability to maintain their structure during baking without becoming mushy. However, other tart varieties such as Pink Lady, Honeycrisp, or a combination of different types can produce excellent results. Sweet apple varieties like Red Delicious or Gala should be avoided or used sparingly in combination with tart varieties, as they may create an excessively sweet dessert that becomes cloying.
Oat Selection and Texture
Old-fashioned rolled oats provide the ideal texture for the crispy topping, offering a substantial bite without the denseness of steel-cut oats or the fine texture of quick oats. If using quick oats as a substitute, expect a slightly more compact topping with a diminished crispness factor. Instant oatmeal should be avoided entirely, as it produces an undesirably mushy texture incompatible with achieving the desired crumb.
Common Mistakes and Solutions
- Watery Filling: Insufficient flour in the apple mixture prevents proper thickening. Increase the flour to 3 tablespoons if excess liquid accumulates during baking.
- Soggy Topping: Over-mixing the topping or using warm butter creates density rather than crispness. Ensure butter remains cold and work it in using brief, distinct motions.
- Unevenly Cooked Apples: Inconsistent slice thickness results in some apple pieces remaining firm while others become mushy. Maintain uniform 1/4-inch thickness throughout.
- Excessive Browning: Reduce oven temperature if the topping darkens too quickly, and cover loosely with foil if browning continues while apples remain undercooked.
- Bland Flavor: Ensure spices haven’t expired and measure carefully to avoid under-seasoning. The cinnamon-to-apple ratio should provide noticeable warmth without overwhelming the fruit flavor.
Storage and Make-Ahead Options
Baked apple crisp maintains excellent quality for up to three days when stored in an airtight container at room temperature. Refrigeration extends shelf life to approximately five days but may soften the topping slightly. For longer storage, freeze the baked crisp in a freezer-safe container for up to three months. Thaw at room temperature for 2 to 3 hours before serving, then warm gently in a 300-degree oven for 10 to 15 minutes to restore the topping’s crispness.
Alternatively, assemble the crisp completely without baking, cover it tightly with plastic wrap, and refrigerate for up to 24 hours before baking. This strategy allows preparation well in advance of entertaining, with baking commencing only when convenient. No adjustment to baking time is necessary when baking a chilled crisp; simply ensure the oven has reached full temperature before placing the cold dish inside.
Flavor Variations and Creative Adaptations
Spice Enhancements
Beyond the traditional cinnamon and nutmeg combination, consider incorporating additional spices such as allspice, cardamom, or a small amount of ginger to create more complex flavor profiles. A splash of vanilla extract, almond extract, or even a hint of maple extract adds subtle depth that complements the apple base without creating obvious flavoring.
Alternative Fruits and Combinations
While apples form the traditional foundation, apple crisp adapts beautifully to combinations with other fruits. Pears provide a subtle sweetness that pairs wonderfully with apples, while berries add tartness and visual appeal. Rhubarb creates a more assertive flavor profile that appeals to those preferring less sweetness.
Topping Modifications
Add texture to the crisp topping by incorporating chopped nuts such as pecans, walnuts, or almonds into the oat mixture. These additions provide crunch and nutritional benefits. For enhanced richness, substitute a portion of the flour with finely grated coconut or ground flaxseed.
Frequently Asked Questions
Can I use canned or frozen apples?
Fresh apples provide superior texture and flavor, but frozen apples work acceptably if thawed and drained thoroughly to remove excess moisture. Canned apples, typically packed in heavy syrup, should be avoided as they lack structural integrity and introduce excessive liquid.
What if I don’t have brown sugar?
Substitute granulated sugar for brown sugar in the topping, understanding that the molasses depth will be reduced. Alternatively, mix white sugar with a small amount of molasses if available.
Can apple crisp be made in a slow cooker?
Yes, apple crisp adapts well to slow cooker preparation. Assemble the dish in a slow cooker insert, cover, and cook on low for 4 to 6 hours or high for 2 to 3 hours. The topping will not achieve the same level of crispness as oven-baked versions but delivers excellent flavor and texture.
How far in advance can I prepare apple crisp?
Assemble the complete crisp up to 24 hours ahead of baking and refrigerate until ready to bake. Do not bake in advance and attempt to reheat, as the topping loses its desirable crispy quality.
Nutritional Considerations
Apple crisp provides fiber through the apple flesh and oats, contributing to digestive health and satiety. The natural sugars from apples combine with added sugar and butter to create a moderately indulgent dessert best enjoyed in reasonable portions. Serving size recommendations typically range from 1/2 cup to 1 cup per person, depending on accompaniments and overall meal context.
This timeless dessert celebrates the simplicity of fresh fruit elevated through thoughtful preparation and quality ingredients. Whether prepared for family gatherings, casual weeknight finales, or formal entertaining, homemade apple crisp consistently delivers satisfaction and warmth that resonates across generations and occasions.
References
- Tart Apples for Baking: Selection and Preparation — University of Maine Cooperative Extension. 2024. https://extension.umaine.edu/food-preservation/recipes/baking-apples/
- Essential Techniques in Fruit Crisps and Cobblers — America’s Test Kitchen. 2023. https://www.americastestkitchen.com/guides/how-to-make-fruit-crisp