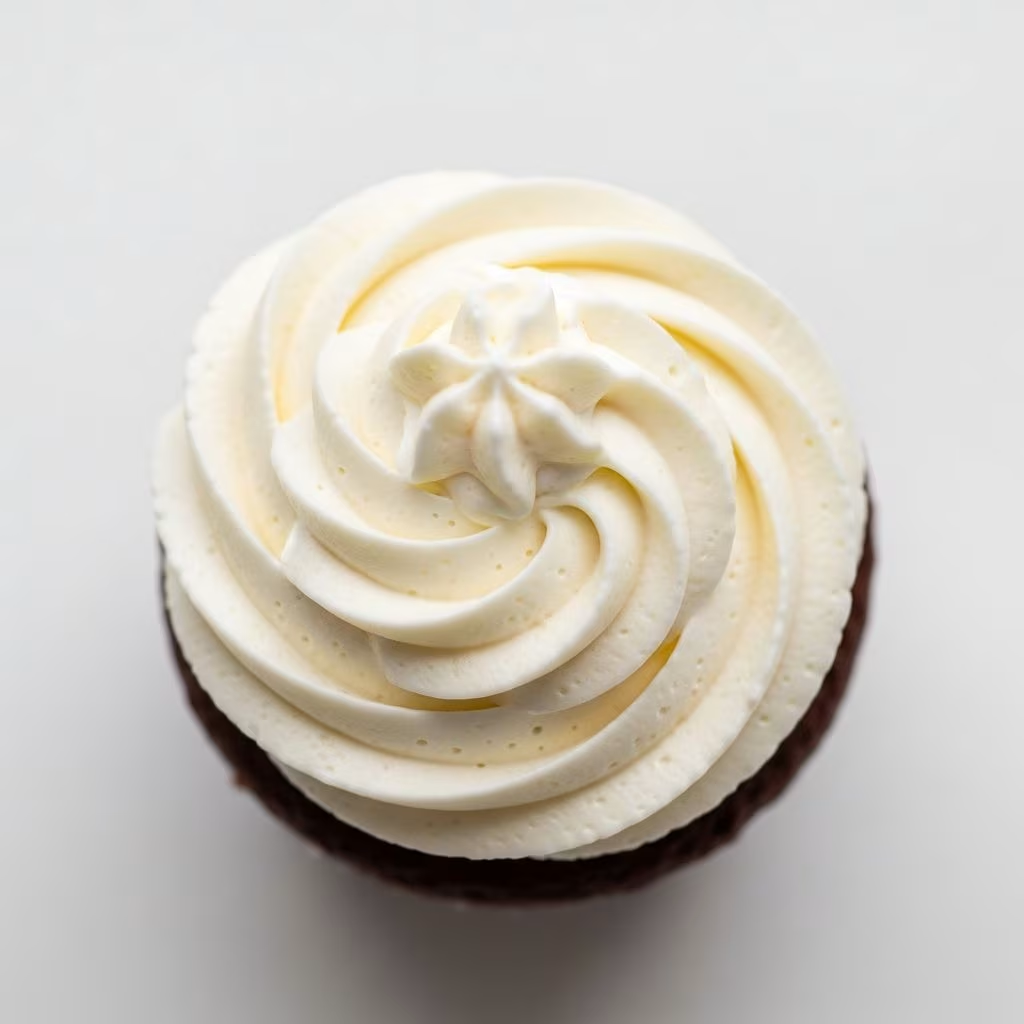
Traditional whipped cream frosting offers a light, airy texture that many bakers love, but it comes with a significant drawback: it tends to lose its shape and structure over time. Whether you’re preparing for a special event or simply want frosting that maintains its piped decorations throughout the day, understanding how to create a reinforced whipped cream frosting is essential. This comprehensive guide explores multiple techniques for achieving a frosting that remains stable, holds its peaks, and delivers that luxurious whipped cream flavor everyone adores.
Understanding the Challenge with Regular Whipped Cream
Regular whipped cream is essentially air incorporated into heavy cream through mechanical beating. While this creates an incredibly light and fluffy texture, the structure is inherently fragile. The tiny air bubbles are surrounded by a thin layer of fat, which gradually breaks down when exposed to room temperature, moisture, or pressure. This natural breakdown causes weeping—when liquid separates from the whipped cream—and eventually, your beautiful frosting collapses into a puddle.
Bakers who need frosting to last beyond a few minutes require reinforcement. This is where stabilization techniques become invaluable. By introducing ingredients that strengthen the protein and fat matrix of whipped cream, you can create frosting that maintains its structure for hours, making it suitable for intricate piping work, layer cake assembly, and advance preparation.
The Three Primary Stabilization Methods
Professional and home bakers rely on three main approaches to reinforce whipped cream frosting. Each method offers distinct advantages, and your choice depends on flavor preference, ingredient availability, and intended use.
Gelatin-Based Stabilization
Gelatin remains one of the most popular stabilizers in professional kitchens. This protein-based ingredient works by forming a gel network throughout the frosting, essentially creating a structural scaffold that prevents the whipped cream from collapsing. The gelatin method produces frosting with an exceptionally firm texture that holds sharp piped peaks without any softening.
How gelatin stabilization works: When gelatin dissolves in liquid and cools, it forms a protein matrix. When incorporated into whipped cream, these proteins trap the air bubbles more effectively than fat alone, creating superior structural support. The result is frosting that maintains its shape for extended periods without becoming grainy or developing an undesirable texture.
To use this method, you’ll dissolve unflavored gelatin in cold water, allow it to bloom for several minutes, then gently warm it until completely liquid. This cooled gelatin mixture is slowly drizzled into partially whipped cream while mixing on low speed, ensuring even distribution without overworking the frosting.
Cream Cheese Method
The cream cheese approach offers stabilization with the added benefit of a subtle tang and richer flavor profile. Full-fat cream cheese contains enough protein and fat content to strengthen whipped cream considerably while adding a sophisticated taste dimension. This method is particularly popular for red velvet cakes, carrot cakes, and other desserts where cream cheese frosting is a traditional complement.
This technique requires softened cream cheese beaten until completely smooth before incorporating the whipped cream. The key is combining the two components gently to avoid deflating the delicate whipped cream structure. Many bakers prefer whipping the cream cheese and powdered sugar first, then folding in pre-whipped heavy cream rather than gradually adding cream to the cheese mixture.
The resulting frosting has a denser texture than gelatin-stabilized versions but remains remarkably light. It’s ideal for layer cakes where the frosting needs to support the cake’s weight without compromising the eating experience.
Instant Pudding Powder Method
The pudding powder approach offers remarkable simplicity and works through the cornstarch and tapioca starch present in instant pudding mixes. These starches absorb moisture and thicken the frosting while contributing subtle flavor undertones. This method requires no additional cooking steps and produces excellent results with minimal fuss.
Simply combining cold heavy cream, powdered sugar, vanilla extract, and instant vanilla (or other flavored) pudding powder in a mixing bowl creates stabilized frosting within minutes. The starches immediately begin absorbing the cream’s moisture, creating a thicker consistency that holds peaks without any special techniques.
Essential Ingredients and Their Functions
| Ingredient | Purpose | Key Considerations |
|---|---|---|
| Heavy Whipping Cream | Base ingredient providing fat content for whipping and flavor | Must be cold; higher fat content yields better results than regular whipping cream |
| Powdered Sugar | Sweetener and mild thickening agent | Sift before use to eliminate lumps; use fine granulated varieties for best texture |
| Vanilla Extract | Flavor enhancement | Pure extract recommended over imitation for superior taste |
| Gelatin (unflavored) | Protein-based structural reinforcement | Must be fully dissolved and cooled before incorporation to prevent lumps |
| Cream Cheese | Added stability with tangy flavor | Block form essential; avoid whipped or tub varieties containing additives |
| Instant Pudding Powder | Starch-based thickener and stabilizer | Choose flavors complementing your dessert; adds subtle taste profile |
The Critical Importance of Temperature Control
Temperature management represents one of the most overlooked factors in successful frosting preparation. Cold heavy cream whips more efficiently because the cold temperatures maintain the fat in solid form, allowing air bubbles to be incorporated more effectively. As temperature increases, fat liquefies, reducing the frosting’s ability to hold peaks.
Recommended temperature practices:
- Refrigerate your mixing bowl and beaters for at least 15 minutes before beginning
- Use heavy cream directly from the refrigerator without allowing it to warm
- If your kitchen is warm, place the mixing bowl over ice during preparation
- Avoid leaving finished frosting at room temperature for extended periods
- Store frosting in the refrigerator until immediately before use
Some bakers use stainless steel bowls specifically because metal conducts temperature better than glass or ceramic, maintaining optimal cold conditions throughout mixing.
Step-by-Step Preparation Techniques
Gelatin Method Instructions
Preparation phase: Sprinkle 2½ teaspoons of unflavored gelatin over 3 tablespoons of cold water in a small bowl. Allow this mixture to bloom for five minutes, during which the gelatin absorbs the water and softens. Gently warm the bloomed gelatin—either by placing the bowl over hot water or microwaving in short intervals—until completely liquefied and transparent. Avoid boiling, which can damage gelatin’s structural properties.
Whipping phase: While gelatin cools to room temperature, combine 2 cups of cold heavy cream, ½ cup of powdered sugar, and 1 teaspoon of vanilla extract in a chilled bowl. Begin mixing on low speed until the mixture becomes foamy, then increase to medium speed. Watch carefully as soft peaks begin forming—this is the critical stopping point for adding gelatin.
Integration phase: Reduce mixer speed to low and slowly drizzle the cooled gelatin mixture into the partially whipped cream. Once fully incorporated, increase speed back to medium-high and continue beating until stiff peaks form—peaks that stand upright without drooping when you lift the beater.
Cream Cheese Method Instructions
Preparation phase: Allow 4 ounces of block cream cheese to soften to room temperature. This typically requires 30 minutes on the counter. Block cream cheese is essential; whipped cream cheese or cream cheese from a tub contains additives that prevent proper stabilization.
Beating phase: Beat softened cream cheese on medium speed for 2-3 minutes until completely smooth and creamy, with no visible lumps. Add ¾ cup of powdered sugar and continue mixing until fully incorporated. Set this mixture aside.
Cream whipping phase: In a separate chilled bowl, whip 2 cups of cold heavy cream on medium-high speed until stiff peaks form. This requires approximately 3-4 minutes of continuous beating.
Combination phase: Gently fold the cream cheese mixture into the whipped cream using low mixer speed, adding 1 tablespoon of vanilla extract during this process. Be extremely cautious not to overbeat, as this deflates the whipped cream and creates a dense, undesirable texture.
Pudding Powder Method Instructions
All-in-one approach: Combine 2 cups of cold heavy cream, ½ cup of powdered sugar, 1 teaspoon of vanilla extract, and 3 tablespoons of instant vanilla pudding powder in a single bowl. Using an electric mixer on medium speed, beat the combined ingredients for 3-4 minutes until stiff peaks form. The pudding powder’s starches immediately begin working, so you’ll notice the mixture thickens faster than traditional whipped cream.
Common Mistakes and How to Avoid Them
Overbeating the frosting: Continuing to beat beyond stiff peaks transforms whipped cream into sweet butter. Stop mixing as soon as the frosting reaches your desired consistency—the peaks should stand firm without becoming grainy or separating.
Using warm ingredients: Warm cream won’t whip properly and produces soft, unstable frosting. Always verify that cream, bowls, and beaters are thoroughly cold before beginning.
Incorporating gelatin unevenly: Adding gelatin too quickly creates lumps that won’t incorporate properly. Always drizzle slowly on low speed to ensure even distribution throughout the frosting.
Choosing the wrong cream cheese: Whipped or tub cream cheese contains ingredients that compromise stabilization. Block cream cheese is the only acceptable choice.
Using granulated sugar instead of powdered: Granulated sugar doesn’t dissolve effectively in whipped cream, creating a grainy texture. Powdered sugar integrates smoothly and contributes to proper stabilization.
Storage and Shelf Life Considerations
Stabilized whipped cream frosting maintains its quality significantly longer than regular whipped cream, though proper storage remains important. Refrigerate finished frosting in an airtight container for up to three days. Before frosting cakes or cupcakes, allow refrigerated frosting to come to spreadable consistency if needed—typically 10-15 minutes at room temperature.
If frosting becomes too soft during use, return it to the refrigerator for brief chilling rather than remixing, which can destroy the carefully created structure.
Flavor Variations and Applications
Stabilized whipped cream frosting serves as a versatile base for countless flavor combinations. Consider adding:
- Almond or coconut extract for subtle flavor complexity
- Lemon zest and juice for bright, citrus-forward frosting
- Cocoa powder for chocolate-flavored variations
- Liqueurs or extracts for adult-themed desserts
- Fresh fruit purees for natural color and flavor
- Espresso powder for sophisticated coffee-infused frosting
This frosting excels on layer cakes, cupcakes, cream pies, and fruit-based desserts. Its stability allows for elaborate piping work, intricate designs, and advance preparation without compromising appearance.
Frequently Asked Questions
Can I make stabilized whipped cream frosting in advance?
Yes, all three methods produce frosting that stores well in the refrigerator for up to three days when kept in airtight containers. Gelatin-stabilized versions hold up best for extended storage.
What’s the difference between heavy cream and heavy whipping cream?
These terms are largely interchangeable, though heavy whipping cream typically contains slightly higher fat content. For stabilized frosting, either works effectively.
Can I freeze stabilized whipped cream frosting?
Freezing is possible but not recommended, as thawing can produce a weepy, separated texture regardless of stabilization method. Use refrigeration instead.
Why did my frosting turn into butter?
Overbeating caused the fat globules to separate from the whipped cream, producing butter. Always stop mixing as soon as stiff peaks form.
Which stabilization method tastes best?
This depends on personal preference. Gelatin provides pure cream flavor, cream cheese adds richness and tang, and pudding powder contributes subtle vanilla undertones. Choose based on your dessert’s flavor profile.
Professional Tips for Perfect Results
Professional bakers emphasize several critical techniques for consistently excellent frosting:
- Sift powdered sugar before use to eliminate lumps that won’t dissolve properly
- Use a kitchen thermometer to verify gelatin reaches proper temperature
- Reserve a small amount of cream to add at the end if frosting becomes too thick
- Choose a metal mixing bowl for superior temperature control
- Work quickly with cooled gelatin to prevent it from setting before incorporation
- Keep all equipment scrupulously clean—any fat residue compromises whipping ability
References
- Stabilized Whipped Cream Frosting — Bites by Bianca. 2024. https://bitesbybianca.com/stabilized-whipped-cream-frosting/
- Stabilized Whipped Cream Frosting – Three Methods — Pies and Tacos. 2024. https://www.piesandtacos.com/stabilized-whipped-cream-frosting/
- Sturdy Whipped Cream Frosting — Major Hoff Takes A Wife. 2024. https://www.majhofftakesawife.com/sturdy-whipped-cream-frosting/
- Stabilized Whipped Cream Frosting — Sugar Spun Run. 2024. https://sugarspunrun.com/stabilized-whipped-cream-frosting/