Sugar cookies represent one of the most beloved desserts across cultures, offering a versatile canvas for creative decorating and flavor experimentation. However, achieving that perfect balance of softness, tenderness, and structural integrity requires understanding both ingredient selection and proper baking technique. This comprehensive guide explores the fundamental principles behind creating exceptional soft sugar cookies that rival those from professional bakeries.
Understanding the Foundation: Essential Ingredients
The magic of soft sugar cookies lies in how each ingredient contributes to the final texture and taste. Rather than viewing these components as mere measurements, understanding their individual roles transforms you into a more confident baker.
Butter: The Flavor and Texture Base
Unsalted butter serves as the foundation for cookie dough, providing richness and enabling proper creaming. The butter should be at room temperature—ideally around 67°F—to ensure optimal incorporation of air during the creaming process. If your butter is too warm, it cannot hold air bubbles effectively, resulting in cookies that spread excessively during baking. Conversely, cold butter resists proper mixing. Softened butter should yield slightly to finger pressure while maintaining its shape.
Sugar: Beyond Sweetness
Granulated sugar does far more than sweeten your cookies. When creamed with butter, sugar crystals create tiny air pockets that contribute to a lighter, fluffier crumb structure. These air pockets expand during baking, creating a tender interior. The typical ratio uses approximately equal parts butter and sugar by weight, creating the ideal balance for structure and sweetness.
Eggs: Moisture and Binding
Eggs provide moisture, binding power, and contribute to browning during baking. Many professional recipes incorporate an extra egg yolk beyond a whole egg. This additional yolk increases fat content and moisture, resulting in noticeably softer and chewier cookies. Room-temperature eggs integrate more smoothly into the batter, creating a homogeneous mixture without lumps.
Flour: Structure Provider
All-purpose flour provides the primary structural framework for your cookies. Accurate measurement proves critical—using too much flour creates dense, dry cookies that lack the desired tender quality. Weighing flour by grams rather than using volume measurements ensures consistency across batches.
Leavening Agents: Creating Lift
Baking powder serves as the primary leavening agent in soft sugar cookies, providing lift without excessive spread or browning. Some recipes incorporate both baking powder and baking soda, which works through acid-base reactions to create additional lift. Salt amplifies sweetness perception and balances flavors, preventing one-dimensional sweetness.
Vanilla and Optional Extracts
Pure vanilla extract adds warmth and depth to cookie flavor. Some bakers incorporate almond extract as an optional enhancement, adding subtle complexity without overwhelming the vanilla notes. High-quality extracts make a noticeable difference in the final product.
Mixing Method: Technique Matters
The sequence and manner of combining ingredients directly impacts your cookie texture. Understanding why each step matters elevates your baking results.
Step One: Creaming Butter and Sugar
Begin by combining room-temperature unsalted butter with granulated sugar in a large mixing bowl. Using an electric mixer on medium speed, beat these ingredients for 1-3 minutes until the mixture becomes light and fluffy with a pale appearance. This creaming process incorporates air into the mixture, which expands during baking and creates tender cookies. Proper creaming should transform the mixture from a dense paste into something resembling fluffy frosting.
Step Two: Incorporating Wet Ingredients
Add eggs one at a time, beating well after each addition to ensure complete incorporation. If using the extra egg yolk technique, add it along with the whole egg. Follow with vanilla extract (and any optional extracts), mixing until the batter achieves a creamy, smooth consistency. This step should take approximately one minute and result in a uniform mixture without visible egg streaks.
Step Three: Combining Dry Ingredients
In a separate bowl, whisk together flour, baking powder, salt, and any baking soda. Whisking the dry ingredients prevents lumps and ensures even distribution of leavening agents throughout the dough.
Step Four: Final Assembly
Gradually add the dry ingredient mixture to the wet mixture, mixing on low speed or using a spatula to fold ingredients together. Overmixing at this stage develops gluten unnecessarily, resulting in tougher cookies. Mix only until the ingredients combine into a cohesive dough. The finished dough should appear thick and only barely sticky—moist enough to hold together but not so wet that it sticks excessively to your hands.
Shaping and Preparing for Baking
How you shape and position your cookies influences both their appearance and texture during baking.
Rolling and Coating
Roll dough portions into balls using approximately 1-1.5 tablespoons of dough per cookie. A cookie scoop ensures consistent sizing across your batch. Roll each dough ball in granulated sugar before placing on the baking sheet, which creates a sparkly exterior and adds textural contrast to the soft interior.
Spacing Considerations
Place dough balls 2-3 inches apart on parchment-lined baking sheets. This spacing allows for modest spreading without cookies merging together. Parchment paper prevents sticking and enables easy removal after baking.
Baking Strategy for Maximum Softness
The baking phase represents the most critical point for achieving soft cookies, requiring careful temperature management and timing.
Temperature and Duration
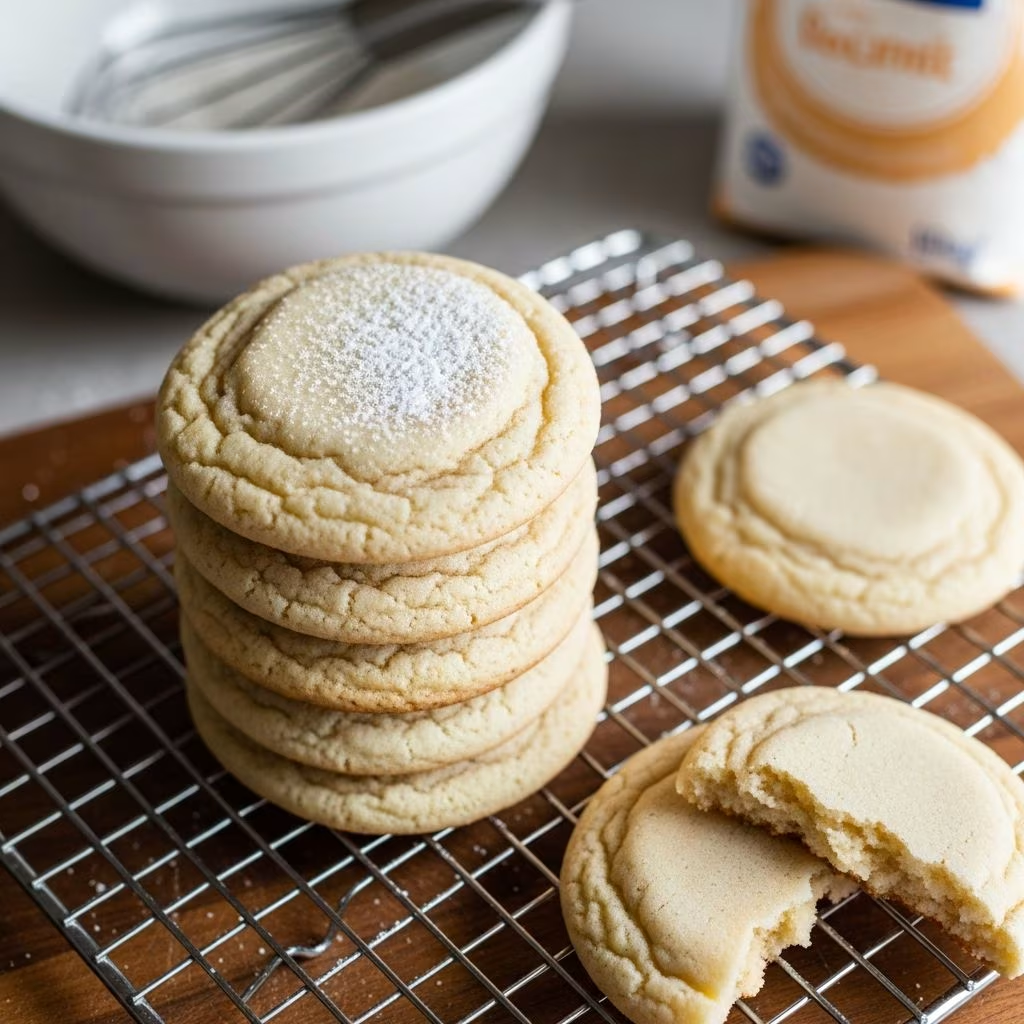
Preheat your oven to 350°F (175°C). Bake cookies for 8-10 minutes, watching carefully for visual cues rather than relying solely on time. The cookie tops should appear set and begin showing slight cracks around the edges, yet the centers should still look slightly underbaked—almost wet in appearance. This underbaking technique proves essential; cookies continue cooking on the hot baking sheet after removal from the oven.
The Critical Overbaking Problem
Overbaking represents the primary cause of hard, disappointing cookies. Remove cookies from the oven when they still appear slightly soft in the center. As they cool on the baking sheet for a few minutes before transferring to a wire rack, they set to the perfect tender consistency. Cookies that look fully baked in the oven will become hard and dry as they cool.
Cooling and Storage
Proper cooling and storage techniques help maintain your cookies’ softness over multiple days.
Cooling Process
Allow cookies to rest on the baking sheet for 3-5 minutes after removal from the oven. This resting period allows the structure to set slightly without the cookies hardening. Transfer cookies to a wire cooling rack where air circulates freely around each cookie, promoting even cooling.
Storage Methods
Store completely cooled cookies in an airtight container at room temperature. To maintain softness, some bakers place a slice of bread in the container—the bread absorbs ambient moisture, keeping cookies tender. Replace the bread slice every few days if storing cookies longer than a week. Properly stored soft sugar cookies remain fresh for up to one week.
Troubleshooting Common Issues
Understanding why cookies sometimes disappoint helps you adjust your technique for consistent success.
Cookies Spread Too Much
Excessive spreading typically indicates butter temperature issues or insufficient flour. Ensure butter reaches exactly room temperature without becoming too warm. Verify flour measurements using a scale rather than volume measurements. Some recipes include a small amount of baking soda, which can increase spread—adjust this ingredient carefully.
Cookies Turn Out Hard and Dry
This common problem results from overbaking or excess flour. Remove cookies from the oven earlier, while centers still appear slightly underdone. Remeasure flour using weight rather than volume to eliminate this variable. The extra egg yolk technique also helps mitigate dryness.
Inconsistent Cookie Sizes
Using a cookie scoop ensures consistent sizing and more uniform baking. Weighing dough portions on a kitchen scale provides the ultimate consistency, though scoops offer practical convenience for most home bakers.
Recipe Variations and Customizations
The basic soft sugar cookie recipe accommodates numerous creative variations while maintaining its characteristic softness.
Flavor Enhancements
Almond extract complements vanilla beautifully, adding subtle complexity. Lemon zest or peppermint extract offer seasonal variations. Cardamom, nutmeg, or cinnamon create sophisticated spiced versions.
Mix-In Options
Crushed candies, chocolate chips, or colorful sprinkles can be folded into the dough before baking. Start with small quantities (¼ to ½ cup) to avoid significantly altering the recipe’s balance.
Decorating Possibilities
Soft sugar cookies provide an excellent base for royal icing decoration. The tender crumb accepts icing beautifully, and cookies remain soft enough to bite through even when decorated.
Yield and Serving Information
Most soft sugar cookie recipes yield 36-40 cookies depending on size and scooping method. These cookies work beautifully for gift-giving, special occasions, or simple everyday enjoyment. The straightforward recipe requires no chilling time, allowing bakers to move from mixing to freshly baked cookies within approximately 30 minutes total time.
Frequently Asked Questions
Can I make the dough in advance?
Yes, cookie dough can be prepared up to 24 hours ahead and refrigerated in an airtight container. The dough may firm slightly, requiring brief sitting at room temperature before scooping.
Why does my dough feel sticky?
Sticky dough typically results from warm conditions or excess moisture. Refrigerate the dough for 15-30 minutes before scooping. Ensure all ingredients, especially eggs and butter, started at room temperature as specified.
Can I freeze these cookies?
Baked cookies freeze beautifully for up to three months in an airtight container. Thaw at room temperature for 30-60 minutes before serving. Cookie dough also freezes successfully; thaw slightly before baking, adding 1-2 minutes to the baking time.
What’s the difference between soft and chewy cookies?
Soft cookies have a tender, gentle crumb that dissolves on the tongue. Chewy cookies maintain more structure and resistance when bitten. The extra egg yolk technique creates more chewy results, while standard recipes produce purely soft texture.
Do I need a stand mixer?
A hand mixer works equally well, though it requires more arm effort during the creaming phase. A stand mixer offers convenience for longer mixing periods but isn’t essential for success.
References
- Soft Sugar Cookies — The Toasty Kitchen. Accessed April 10, 2026. https://thetoastykitchen.com/soft-sugar-cookies/
- Soft and Chewy Sugar Cookies Recipe — Kristine’s Kitchen Blog. Accessed April 10, 2026. https://kristineskitchenblog.com/soft-chewy-sugar-cookies/
- Best Soft Sugar Cookies Recipe — The Pioneer Woman. Accessed April 10, 2026. https://www.thepioneerwoman.com/food-cooking/recipes/a62843505/soft-sugar-cookies-recipe/
- The Best Sugar Cookies (Recipe & Video) — Sally’s Baking Addiction. Accessed April 10, 2026. https://sallysbakingaddiction.com/best-sugar-cookies/
- BEST Sugar Cookie Recipe | Soft, Chewy Drop-Style Cookies — Handle the Heat. Accessed April 10, 2026. https://handletheheat.com/soft-chewy-sugar-cookies/