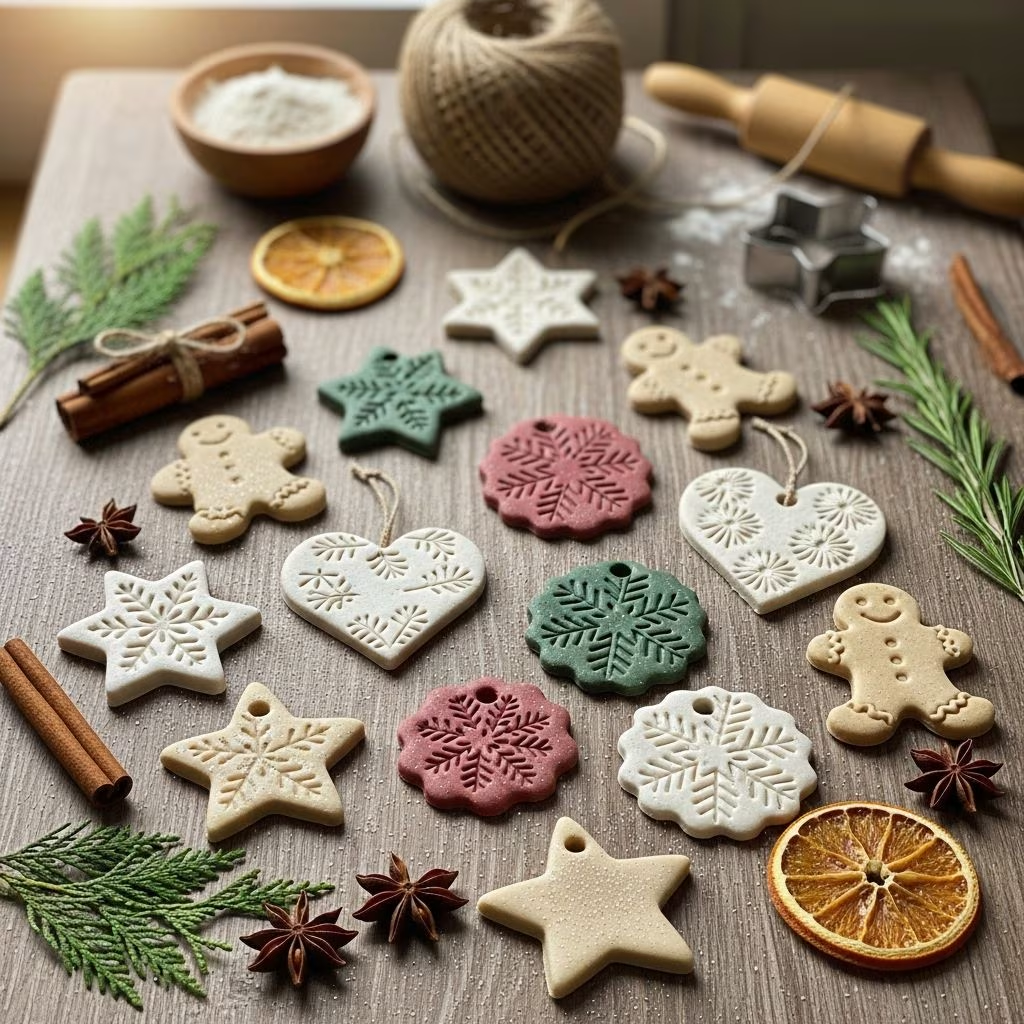
Salt dough ornaments offer a delightful way to blend creativity with tradition, producing durable decorations that capture precious moments. These simple crafts, made from everyday kitchen staples, allow families to fashion personalized tree hangings, handprint mementos, and festive shapes that withstand years of holiday cheer.
Why Choose Salt Dough for Your Holiday Creations
Salt dough stands out for its accessibility and versatility in crafting. Requiring just flour, salt, and water, it forms a pliable material ideal for children and adults alike. The salt acts as a natural preservative, drawing out moisture to harden the dough into sturdy pieces without cracking. Unlike clay or purchased ornaments, salt dough invites customization, from intricate cutouts to imprinted memories, fostering bonding during festive seasons.
These ornaments excel in durability when properly baked and sealed, often lasting decades as heirlooms. They evoke nostalgia, with handprints or footprints marking growth over time, turning annual crafting into a treasured ritual.
Essential Ingredients and Proportions
The beauty of salt dough lies in its minimalism. A reliable base recipe uses equal parts flour and salt by volume, adjusted with warm water for optimal texture.
| Ingredient | Amount | Notes |
|---|---|---|
| All-purpose flour | 1-2 cups | Use plain flour; avoid self-rising to prevent rising during baking. |
| Table salt | 1/2-1 cup | Iodized table salt works best for preservation; fine grain mixes smoothly. |
| Warm water | 1/2-1 cup | Start with less, add gradually for dough that holds without stickiness. |
Optional additions like cinnamon lend a warm hue and scent, enhancing aesthetic appeal without compromising structure. Scale recipes as needed; smaller batches suit quick sessions with young children.
Step-by-Step Dough Preparation Guide
- Mix dry ingredients: Combine flour and salt in a large bowl. Stir thoroughly to distribute salt evenly, preventing weak spots in finished ornaments.
- Incorporate water: Pour in warm water incrementally while mixing with a wooden spoon. Warmth helps salt dissolve, yielding smoother dough.
- Knead to perfection: Once shaggy, transfer to a surface and knead 3-5 minutes until smooth and elastic, like playdough. Avoid overworking to retain pliability.
- Rest if needed: Wrap dough in plastic and let sit 15-30 minutes for easier rolling, especially in dry climates.
Achieving the right consistency is crucial: too dry, and it cracks; too wet, and it puffs during baking. Test by pressing; it should hold shape firmly.
Shaping Techniques for Stunning Results
Roll dough between parchment sheets to 1/8 to 1/4 inch thick for even baking and lightweight ornaments. Thinner for delicate shapes, thicker for handprints.
- Cookie cutter designs: Press cutters firmly, wiggle gently to release. Popular motifs include stars, trees, hearts, and snowflakes.
- Handprint and footprint impressions: Use 4-5 inch rounds; press child’s hand gently into dough. Smooth edges for polished look.
- Freeform creativity: Pinch shapes or use stamps for textures like bark or patterns.
- Hanging holes: Poke with skewer, straw, or lollipop stick near top, ensuring 1/4 inch from edge to avoid tearing.
Gently peel excess dough, re-rolling scraps to maximize yield. Keep pieces on parchment for seamless transfer to baking sheets.
Optimal Baking Methods for Durability
Low, slow baking dehydrates without browning. Preheat oven to 200-250°F.
- Arrange on parchment-lined sheets.
- Bake 2-4 hours, flipping midway for uniform drying. Larger pieces like handprints may need 3-5 hours.
- Test doneness: firm, no soft centers. Cool completely on racks; residual heat finishes drying.
Avoid high temperatures to prevent warping or bubbling. Air-drying alternative takes 3-7 days but risks fragility.
Creative Decoration Ideas to Personalize
Baked ornaments invite endless embellishment once fully cooled.
Painting Techniques
Acrylic paints adhere best; apply thin layers, dry between coats. Seal first with Mod Podge for longevity.
- Metallics for shimmer: gold, silver on stars.
- Earth tones for naturals: greens, browns on trees.
- Glitter dips: Brush glue, sprinkle generously.
Textural Enhancements
Forks create ridges, rubber stamps add motifs, steel wool distresses for vintage effect.
Natural Accents
Embed bells, beads, or cinnamon sticks before baking for dimension.
Preservation Strategies for Longevity
To ensure ornaments endure, apply sealant post-decoration.
- Mod Podge or varnish: Multiple coats, drying fully between. Water-based options non-toxic.
- PVC spray: Lightweight protection against humidity.
- Storage tips: Layer in tissue paper boxes, cool dry place away from sunlight. Avoid plastic bags to prevent moisture trap.
Properly sealed, pieces resist fading and breaking, suitable for annual display.
Fun Variations for Every Season
Beyond holidays, adapt for year-round crafting.
- Valentine hearts: Red paints, heart cutters.
- Easter eggs: Pastels, egg shapes.
- Pet paw prints: Smaller scales for animal lovers.
- Monogram medallions: Carve initials with toothpick.
Gluten-free flour swaps maintain inclusivity.
Troubleshooting Common Issues
| Problem | Cause | Solution |
|---|---|---|
| Cracking | Too dry dough or rapid cooling | Add water sparingly; cool slowly in oven. |
| Puffing/Bubbling | High heat or thick dough | Bake lower/slower; roll thinner. |
| Soggy centers | Insufficient baking | Extend time; test firmness. |
| Jagged edges | Rough cutting | Smooth pre-baking with wet finger. |
Family Crafting Session Tips
Involve kids safely: supervise tools, provide aprons. Divide dough for individual stations. Capture process photos for albums. These sessions build skills and memories, with ornaments as tangible takeaways.
Frequently Asked Questions
Can salt dough ornaments be eaten?
No, due to high salt content; strictly decorative.
How long do they last?
Sealed properly, 10+ years or indefinitely with care.
Gluten-free option?
Yes, substitute all-purpose gluten-free flour.
No oven? Alternatives?
Air-dry 3-7 days in warm spot.
Best paint type?
Acrylics; seal with Mod Podge.
References
- The Best Salt Dough (for Ornaments and Crafting!) — Yummy Toddler Food. 2023. https://www.yummytoddlerfood.com/the-best-salt-dough-ornaments/
- Best Salt Dough Recipe for Ornaments and Keepsakes — Crafty Morning. 2022. https://www.craftymorning.com/best-salt-dough-recipe-for-ornaments-and-keepsakes/
- Easy Salt Dough Ornaments Recipe for Handprints, Shapes and … — Homestead and Chill. 2024. https://homesteadandchill.com/easy-salt-dough-ornaments-recipe/
- How to Make Simple Salt Dough Ornaments — The Purposeful You. 2023. https://www.thepurposefulyou.com/blog/how-to-make-simple-salt-dough-ornaments
- Salt Dough Ornaments: Easy Recipe! — Wholefully. 2023. https://wholefully.com/make-salt-dough-ornaments/
- Easy Salt Dough Ornament Recipe — One Little Project (YouTube). 2022. https://www.youtube.com/watch?v=IWgASl5fl2c