The resurgence of home baking has transformed kitchens across the globe into personal bakeries where families can create fresh, aromatic loaves from scratch. Whether you’re a novice baker seeking straightforward recipes or an experienced cook aiming to refine your craft, understanding fundamental bread-making principles and exploring diverse recipes can elevate your baking endeavors. This comprehensive guide covers essential techniques, popular bread varieties, and proven recipes to help you achieve consistent success with homemade bread.
Understanding the Fundamentals of Bread Making
Successful bread baking begins with comprehending how basic ingredients interact to create structure, flavor, and texture. The primary components—flour, water, yeast, and salt—work together in precise proportions to develop gluten networks that trap gases, creating the characteristic crumb structure of quality bread.
Yeast Activation represents a critical first step in many bread recipes. Active dry yeast requires proper hydration in warm water between 100 and 110 degrees Fahrenheit to activate successfully. When yeast is dissolved in adequately heated water with a small amount of sugar, it begins metabolizing, producing carbon dioxide and alcohol that contribute to flavor development and rise. The yeast should become visibly frothy within approximately ten minutes, indicating successful activation. This visual confirmation ensures your yeast remains viable before combining with other ingredients.
Ingredient Integration follows a specific sequence to develop optimal dough characteristics. After activating yeast, incorporate salt, which strengthens gluten development and regulates fermentation speed. Adding fats such as vegetable oil or butter contributes richness and improves moisture retention throughout the baking process. Flour addition should occur gradually, allowing each portion to fully incorporate before adding more, ensuring uniform hydration and preventing lumps.
The Art of Dough Development and Kneading
Kneading represents the physical process through which gluten proteins align and bond, creating elasticity and strength within the dough. Proper kneading develops the network necessary to support gas production during fermentation and achieve optimal texture in the finished loaf.
After combining dry ingredients with wet components, turn the dough onto a lightly floured work surface. Begin kneading by pushing the dough away from yourself using your palm heel, folding it back over itself, rotating a quarter turn, and repeating this motion continuously. Kneading typically requires eight to ten minutes of consistent effort, though some enriched doughs may require slightly longer development time. The dough should transform from a shaggy, rough mass into a smooth, elastic ball that springs back when gently pressed.
Environmental conditions significantly influence kneading duration and dough behavior. Cooler kitchens may require extended kneading time, while warm environments accelerate gluten development. Many bakers perform a simple elasticity test by gently stretching a small portion of dough; properly developed dough stretches without tearing immediately, demonstrating adequate gluten formation.
Fermentation and Rising: Building Flavor and Structure
The rising period, commonly called bulk fermentation, allows yeast to produce gases that expand dough volume while simultaneously developing complex flavors through slow fermentation. This stage profoundly influences the final bread’s taste, texture, and digestibility.
Place kneaded dough in a lightly oiled bowl, turning it to coat all surfaces. Cover the bowl with a damp cloth, which prevents surface drying while allowing controlled moisture loss. Proper rising conditions occur in draft-free environments maintained between 70 and 75 degrees Fahrenheit. Under these conditions, bulk fermentation typically requires approximately one hour until the dough roughly doubles in volume, though cooler environments may necessitate extended timing.
Rather than relying solely on time estimates, experienced bakers employ the poke test to determine fermentation completion. Gently press your finger into the dough; if the indentation slowly springs back partially but doesn’t completely disappear, fermentation has reached the optimal stage for shaping. If the dough springs back immediately, it requires additional rising time. If the indentation remains permanently, over-fermentation has likely occurred.
Shaping and Final Proof Techniques
After bulk fermentation completes, proper shaping redistributes yeast and creates surface tension necessary for controlled oven-spring and attractive loaf structure. Shaping also determines the final loaf’s dimensions and crumb distribution.
Gently press the fermented dough to release excess gas, then divide into portions as required by your recipe. For traditional round loaves, shape by folding the dough’s edges toward the center, rotating slightly with each fold until a round ball forms with surface tension. For oval loaves, shape by rolling the dough into a rectangle, then tightly rolling it from one end to create an elongated form.
Place shaped dough into prepared pans—greased with shortening or cooking spray to prevent sticking. Cover the pans with damp cloths for the final proof, typically lasting 30 to 45 minutes. During this stage, dough rises above the pan’s rim by approximately one to two inches. The final proof duration depends on room temperature and dough composition; in cooler environments, this stage may extend slightly longer.
Classic Sandwich Bread: A Foundational Recipe
Traditional sandwich bread represents an excellent starting point for home bakers, offering consistent results and straightforward techniques. This reliable recipe yields two well-structured loaves with fine crumb and excellent toast characteristics.
Ingredients
- Two-thirds cup granulated sugar
- Two-thirds cup warm water (100-110°F)
- One and one-half teaspoons active dry yeast
- One and one-half teaspoons salt
- One-quarter cup vegetable oil
- Six cups bread flour
Preparation Instructions
Begin by dissolving sugar in warm water, then sprinkle yeast over the surface and allow it to activate for approximately ten minutes until noticeably frothy. Add salt and vegetable oil to the yeast mixture, stirring thoroughly. Gradually incorporate bread flour, mixing until a shaggy dough forms. Transfer to a floured surface and knead for eight to ten minutes until the dough achieves smooth, elastic consistency.
Place the kneaded dough in an oiled bowl, cover with a damp cloth, and allow bulk fermentation for approximately one hour until doubled. Punch down the fermented dough, divide into halves, and shape each portion into a loaf. Place shaped loaves in greased 9×5-inch loaf pans, cover, and allow final proof for 30 to 40 minutes until dough rises one to two inches above pan rims.
Preheat your oven to 350 degrees Fahrenheit and bake for approximately 30 minutes until the crust achieves golden-brown coloration and the bottom sounds hollow when tapped with a knife handle. Cool loaves in pans for ten minutes before turning onto wire racks for complete cooling.
Specialty Bread Varieties Worth Exploring
Beyond basic sandwich bread, numerous specialty varieties offer opportunities to expand your baking repertoire and explore diverse flavor profiles and techniques.
Braided Breads introduce visual appeal and traditional craftsmanship to your baking presentation. These breads require dividing fermented dough into three equal strands, which are then carefully braided together before final proof and baking. Once shaped and risen, traditional braiding receives topping with poppy seeds or sesame seeds before baking, adding texture and visual distinction.
Enriched Sweet Breads incorporate additional fats, eggs, and sugars to create tender crumbs and complex sweetness. These breads suit breakfast service or afternoon tea accompaniment, often featuring mix-ins such as dried fruits or nuts. Proper technique for enriched doughs requires careful temperature management, as excess warmth can compromise butter incorporation and dough structure.
Bundt Pan Breads offer creative presentation alternatives, particularly for sweet varieties. Cinnamon and sugar mixtures layered throughout the dough create attractive swirled interior patterns while adding complementary flavoring. Similarly, pecans or raisins mixed with brown sugar create textured, flavorful components that appeal across family preferences.
Monkey Bread: A Crowd-Pleasing Favorite
Monkey bread exemplifies interactive eating experiences where family members can pull apart individual pieces, each coated in sweet brown sugar sauce. This recipe transforms basic bread dough through creative shaping and presentation techniques.
Prepare standard bread dough following the classic sandwich bread recipe through the first rise. After punching down the fermented dough, cut it into bite-sized pieces and roll each piece into smooth balls. Prepare a coating mixture combining melted brown sugar with margarine or butter, then dip each dough ball into this mixture.
Arrange coated dough balls in a Bundt pan, creating multiple layers. Some recipes incorporate raisins or nuts between layers for additional texture and flavor complexity. Allow the assembled bread final proof until the dough fills the pan and rises above the rim by approximately one inch.
Bake at 350 degrees Fahrenheit for 35 to 45 minutes until the exterior achieves deep golden-brown color. Cool briefly before inverting onto a serving plate, allowing the sweet coating and any accumulated sauce to cascade over the bread. The interconnected structure allows diners to break off individual pieces rather than cutting slices.
Equipment and Tools for Successful Bread Baking
While bread baking predates modern kitchen equipment, certain tools enhance consistency and reduce learning curves for developing bakers.
- Kitchen Thermometer: Ensures water reaches the precise temperature range required for optimal yeast activation
- Dough Scraper: Facilitates efficient dough manipulation and kneading without excessive flour addition
- Bench Knife: Aids in dough division and pre-shaping before final shaping
- Loaf Pans: Standard 9×5-inch dimensions accommodate most traditional bread recipes
- Dutch Oven: Creates steam during baking, promoting crust development and oven-spring
- Wire Cooling Racks: Allows air circulation beneath cooling loaves, preventing soggy bottoms
Troubleshooting Common Bread Baking Challenges
Even experienced bakers occasionally encounter issues that compromise bread quality. Understanding common problems and their solutions accelerates skill development.
Dense, Gummy Crumb typically results from insufficient fermentation time, under-baking, or excessive moisture in the dough formulation. Ensure adequate bulk fermentation and maintain accurate oven temperature using an oven thermometer. Reduce water content in subsequent batches if persistent dampness occurs.
Flat Loaves indicate over-fermentation during bulk rising or final proof. The dough’s gluten structure weakens from extended fermentation, reducing its ability to support gas and maintain shape during baking. Monitor fermentation stages more closely, utilizing the poke test rather than relying solely on time estimates.
Pale Crust suggests insufficient oven temperature, inadequate fermentation resulting in insufficient sugars for browning, or premature oven removal. Verify oven temperature accuracy and extend fermentation stages if necessary to develop adequate browning capacity.
Irregular Crumb with Large Holes typically results from insufficient kneading during dough development or uneven shaping before final proof. Develop adequate gluten through consistent kneading techniques and maintain careful attention during shaping to create uniform gas cell distribution.
Bread Storage and Preservation Strategies
Proper storage extends bread quality and allows strategic use of cooling capacity during high-production periods.
Room Temperature Storage maintains optimal quality for approximately three to four days when bread is stored in cloth bags or paper containers that permit limited air circulation. Avoid plastic bags for room temperature storage, as they trap moisture and accelerate mold development.
Refrigerated Storage extends shelf life to approximately one week. However, refrigeration accelerates starch crystallization, potentially compromising texture. Reserve refrigeration for situations requiring extended storage beyond two days.
Freezer Storage maintains bread quality for up to three months when properly wrapped. Allow completely cooled loaves to cool before wrapping tightly in plastic wrap, then placing in freezer-safe containers or bags. Individual slices can be toasted directly from frozen, eliminating complete thawing requirements.
Advanced Techniques for Experienced Bakers
Once foundational techniques become comfortable, numerous advanced approaches can further refine bread quality and expand creative possibilities.
Autolyse Method involves combining flour and water before yeast addition, allowing enzymes to enhance gluten development and flavor complexity over 30 to 60 minutes. This technique requires minimal additional time investment while significantly improving bread characteristics.
Cold Fermentation places shaped dough in refrigeration overnight or longer, dramatically enhancing flavor development through extended yeast activity and enzymatic processes. This technique accommodates busy schedules while producing superior-quality bread.
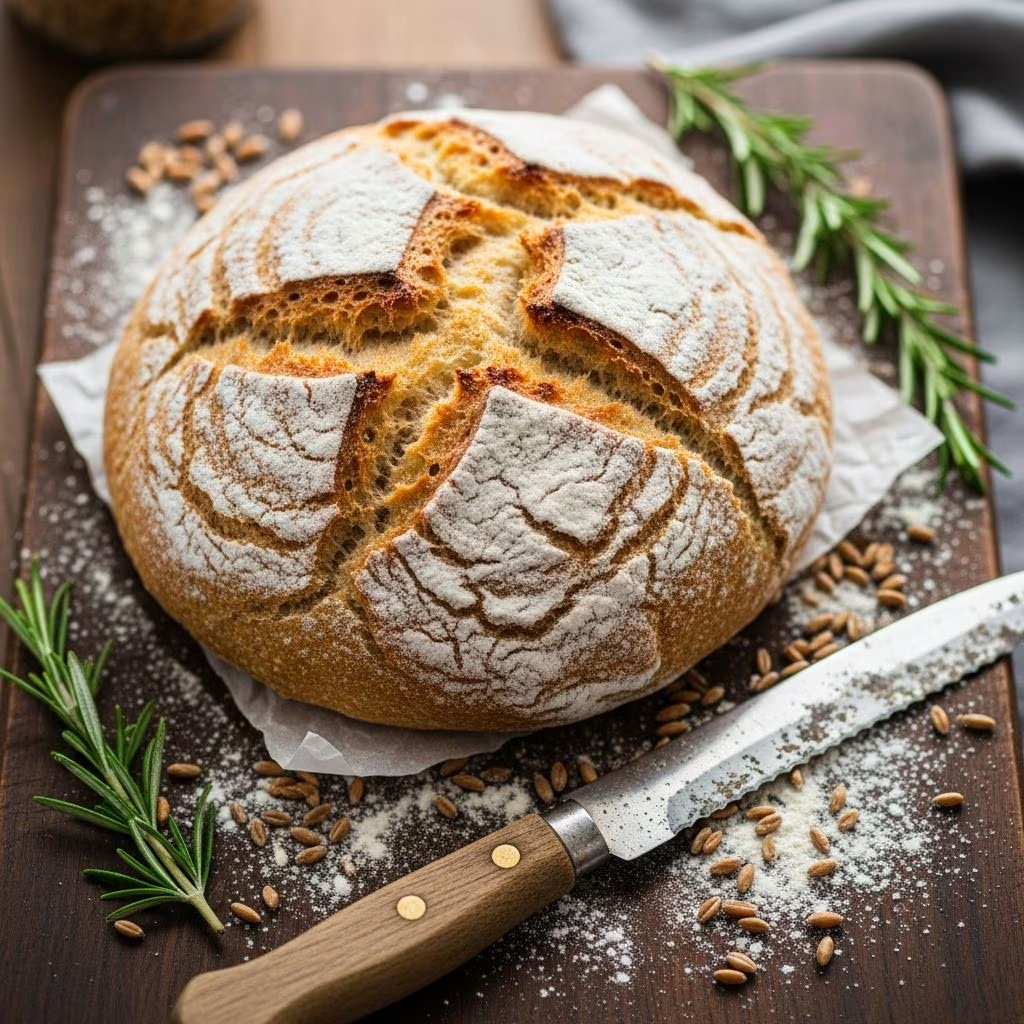
Customized Hydration adjusts water percentages to achieve specific crumb structures; lower hydration produces tighter, finer crumbs suitable for sandwich bread, while higher hydration creates open, irregular structures characteristic of artisan loaves.
Frequently Asked Questions About Bread Baking
Can I use all-purpose flour instead of bread flour?
All-purpose flour contains slightly less protein than bread flour, resulting in marginally less gluten development and potentially denser crumbs. While adequate for most recipes, bread flour produces superior results for sandwich loaves and other yeasted breads requiring strong gluten networks.
What temperature should my kitchen be for optimal bread baking?
Ideal fermentation temperatures range from 70 to 75 degrees Fahrenheit. Cooler temperatures slow fermentation, requiring extended rising times, while warmer environments accelerate fermentation potentially compromising flavor development if rising completes too rapidly.
How do I know if my yeast is still viable?
Activate yeast in warm water with a small amount of sugar; viable yeast becomes noticeably foamy within ten minutes. If no foam develops, the yeast has lost viability and requires replacement.
Can I use a bread machine for these recipes?
Most bread recipes can be adapted for bread machine preparation, which handles mixing, kneading, and initial fermentation automatically. Follow your machine’s instructions for ingredient sequencing and settings, though hand-shaped loaves typically offer superior crust development compared to machine-baked bread.
Why did my bread crack on top during baking?
Surface cracks indicate rapid steam escape during oven-spring. This commonly results from dough fermentation being either insufficient or excessive, or from inadequate steam generation during early baking stages. Utilizing a Dutch oven or steam-injection method can minimize surface cracking.
Building Your Bread Baking Confidence
Bread baking combines science and artistry, rewarding patience and careful attention with consistently excellent results. Beginning with straightforward recipes such as classic sandwich bread establishes foundational understanding before progressing toward specialty varieties and advanced techniques. Each batch provides valuable experience, regardless of whether results meet expectations or reveal opportunities for refinement. Maintaining detailed notes about fermentation times, oven temperatures, and environmental conditions accelerates skill development and enables rapid problem-solving when challenges arise.
The sensory experience of fresh-baked bread—the aroma filling your kitchen, the satisfying hollow sound of a properly baked loaf, the steam rising from a fresh slice—transforms ordinary baking into genuine culinary achievement. Whether creating simple weekday loaves or special-occasion specialty breads, homemade bread elevates family meals while providing genuine satisfaction from successful handcraft.
References
- The Kitchn — Bread Baking Guide — The Kitchn Editorial Team. 2024. https://www.thekitchn.com/baking/bread-baking-guides
- Flour Water Salt Yeast: Fundamentals of Artisan Bread and Pizza — Ken Forkish. W.W. Norton & Company, 2012. https://www.wwnorton.com/books/9780393081541
- King Arthur Baking Company — Bread Baking Science — King Arthur Baking Company. 2024. https://www.kingarthurbaking.com/learn/guides/bread-baking
- Modernist Bread: The Art and Science — Nathan Myhrvold et al. The Cooking Lab, 2017. https://www.modernistbread.com/
- University of Minnesota Extension — Safe Food Handling and Storage — University of Minnesota. 2023. https://extension.umn.edu/preserving-and-preparing/food-storage