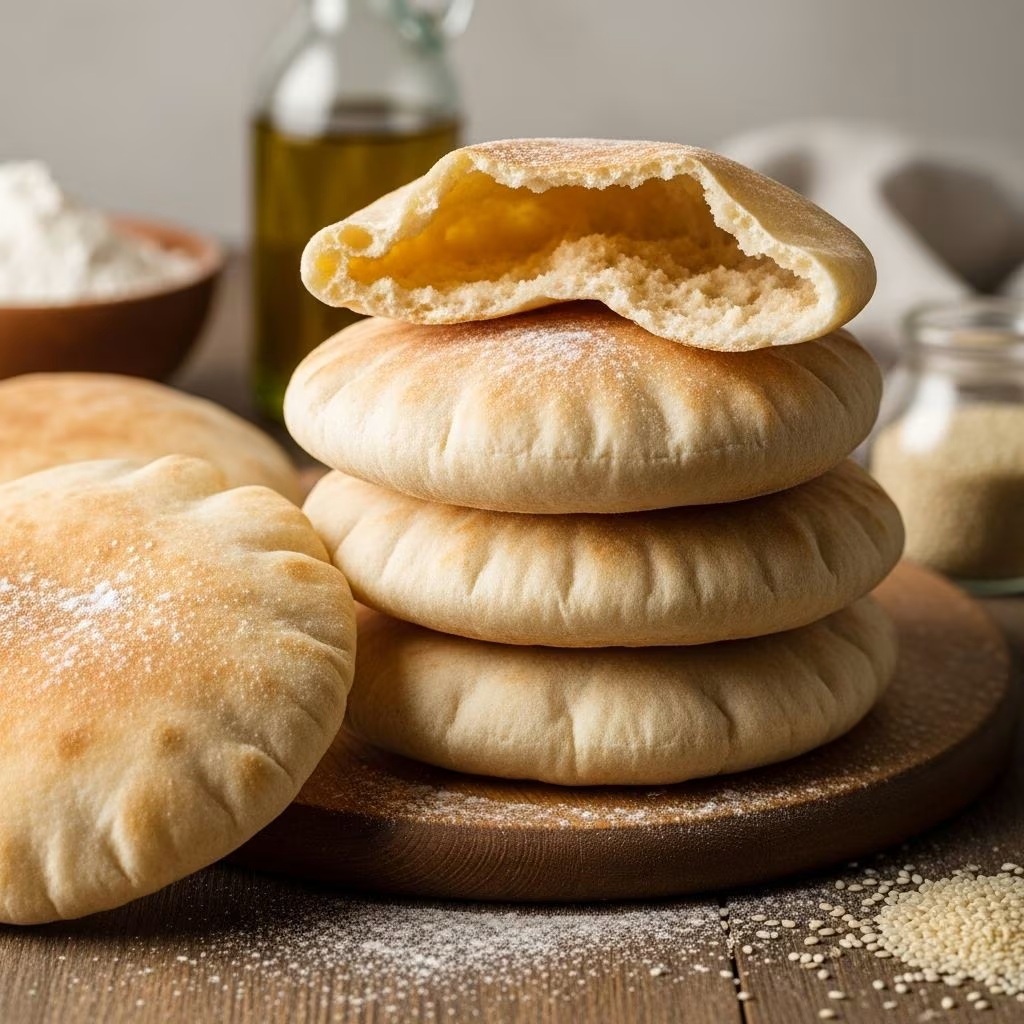
There’s something truly satisfying about pulling warm, fluffy pita bread from your oven, watching it puff into perfect pockets ready for your favorite fillings. This staple of Mediterranean and Middle Eastern cuisine has captivated home bakers worldwide with its versatility and simple ingredients. Whether you’re wrapping falafel, scooping hummus, or building epic gyro sandwiches, mastering pita at home elevates your meals instantly.
In this guide, we’ll walk you through everything you need to know to create bakery-quality pita bread. From selecting the right flour to achieving that signature steam pocket, you’ll gain the confidence and techniques for consistent success. No special equipment required—just basic pantry staples and a hot oven.
Why Bake Your Own Pita Bread?
Store-bought pitas often disappoint with their chewy texture or lack of pockets. Homemade versions offer superior flavor, freshness, and customization. You control the ingredients, avoiding preservatives, and can experiment with whole grains or herbs for unique twists.
- Freshness: Nothing beats bread baked minutes before eating.
- Cost-Effective: A batch costs pennies per piece compared to grocery prices.
- Therapeutic Process: Kneading dough is a stress-reliever that yields delicious rewards.
- Versatility: Use for wraps, chips, or as a pizza base.
According to the USDA, homemade bread allows precise nutrient control, like boosting fiber with whole wheat flour.1 Plus, the aroma filling your kitchen is priceless.
Essential Ingredients for Perfect Pita Dough
Great pita starts with quality basics. Here’s what you’ll need for 8 large or 12 small pitas:
| Ingredient | Amount | Purpose |
|---|---|---|
| Bread Flour | 3 cups (360g) | High protein for structure and chew |
| Warm Water | 1 cup (240ml), 110°F | Activates yeast without killing it |
| Active Dry Yeast | 2¼ tsp (1 packet) | Leavening agent for rise |
| Olive Oil | 2 tbsp | Adds tenderness and flavor |
| Salt | 1½ tsp | Enhances taste and strengthens gluten |
| Sugar or Honey | 1 tbsp | Feeds yeast for better fermentation |
Flour Choices: Bread flour is ideal for its 12-14% protein content, forming strong gluten networks that trap steam for pockets. All-purpose works but yields softer results. For whole grain, substitute 1 cup with whole wheat flour.
Yeast Tips: Ensure it’s fresh—proof in warm water with sugar; it should foam within 10 minutes. Instant yeast can replace active dry (no proofing needed).
Step-by-Step Pita Dough Preparation
- Bloom the Yeast: In a large bowl, combine warm water, yeast, and sugar. Let sit 5-10 minutes until frothy.
- Mix Dry Ingredients: Whisk flour and salt in another bowl.
- Form Dough: Add olive oil to yeast mixture, then gradually incorporate flour. Stir until shaggy dough forms.
- Knead: Turn onto lightly floured surface; knead 8-10 minutes until smooth and elastic. Or use stand mixer with dough hook for 5 minutes.
- First Rise: Place in oiled bowl, cover with damp cloth. Let rise in warm spot 1-1½ hours until doubled.
Dough temperature matters: aim for 75-80°F (24-27°C) for optimal yeast activity, per King Arthur Baking Company guidelines.2
Shaping and Second Proofing Techniques
Gentle handling preserves air bubbles essential for puffing.
- Punch down risen dough; divide into 8-12 equal balls (60-80g each).
- Roll each into tight ball, cover, rest 15 minutes.
- Preheat oven to 475-500°F (245-260°C) with baking stone or inverted sheet.
- Roll balls into 6-8 inch circles, ¼-inch thick. Avoid overworking.
- Place on parchment-lined sheet; cover and proof 20-30 minutes until slightly puffy.
Pro Tip: Roll from center outward for even thickness. Thinner centers puff more reliably.
High-Heat Baking for Authentic Pockets
The magic happens in intense heat, creating steam that separates layers.
- Oven Setup: Position rack high; use pizza stone for even heat distribution.
- Bake Time: 2-4 minutes per batch until balloons form and tops brown lightly. No flipping needed!
- Steam Boost: Spritz oven walls with water or place ice cubes on floor for extra puff.
- Batch Size: Bake 4-6 at once; don’t overcrowd.
World-renowned bread expert Peter Reinhart explains that temperatures above 450°F vaporize dough moisture rapidly, forming pockets.3
Cool on wire rack; store in towel-lined basket. Pitas deflate slightly but regain puff when reheated.
Common Pitfalls and How to Fix Them
Even pros face issues—here’s how to troubleshoot:
| Problem | Cause | Solution |
|---|---|---|
| No pockets | Insufficient heat/steam | Increase oven temp; ensure thin rolling |
| Dense bread | Under-kneaded dough | Knead longer; check windowpane test |
| Tough texture | Too much flour | Measure by weight; use wet hands |
| Yeast off-flavor | Old yeast | Always proof first |
Flavor Variations to Elevate Your Pita
Customize beyond basics:
- Herb-Infused: Add 2 tbsp chopped rosemary or za’atar to dough.
- Whole Grain: 50/50 bread and whole wheat flour.
- Sweet Version: Increase sugar to ¼ cup; add cinnamon for dessert pockets.
- Gluten-Free: Use GF flour blend with xanthan gum; add extra oil.
- Cheese-Stuffed: Roll thin, add feta, fold, and bake.
Storage, Freezing, and Revival Methods
Proper storage keeps pitas fresh 3-5 days at room temp in plastic bag. Refrigerate up to 1 week or freeze stacks (with parchment) for 3 months.
Revival: Wrap in foil, heat at 350°F for 5 minutes, or microwave with damp paper towel for 20 seconds. They puff right back up!
Perfect Pita Pairings and Recipe Ideas
Pitas shine with:
- Dips: Hummus, baba ganoush, tzatziki.
- Sandwiches: Shawarma, falafel, sabich.
- Chips: Brush with oil, bake at 400°F until crisp.
- Pizza: Top with sauce, cheese; bake 8-10 minutes.
Advanced Techniques for Pro-Level Pitas
Poolish Method: For deeper flavor, make preferment: ½ cup flour, ½ cup water, pinch yeast. Ferment 12-16 hours, then incorporate.
Wood-Fired Style: Use outdoor oven or grill for smoky notes.
Scaling Up: Double recipe; dough freezes well after first rise.
Nutrition and Health Benefits
One pita (60g): ~150 calories, 5g protein, 30g carbs, 1g fat. High in B-vitamins from yeast and fiber if whole grain. Pair with veggies for balanced meals.
Frequently Asked Questions (FAQs)
Can I make pita without a pizza stone?
Yes! Use preheated baking sheets or cast iron. The key is maximum heat.
Why did my pita flatten?
Usually low oven temp or thick rolling. Aim for ¼-inch and 500°F.
Is bread flour necessary?
Preferred, but all-purpose works. Expect slightly softer pockets.
How do I know dough is kneaded enough?
Windowpane test: stretch thin without tearing.
Can I use a bread machine?
Yes, for mixing and first rise; shape by hand after.
Conclusion: Your Pita Journey Starts Now
Baking pita demystified means endless possibilities. Start simple, experiment boldly, and soon you’ll have friends begging for your recipe. Fresh, warm pita transforms ordinary meals into feasts—happy baking!
References
- USDA FoodData Central: Bread Composition — United States Department of Agriculture. 2023-05-15. https://fdc.nal.usda.gov/
- Yeast & Dough Temperature Guidelines — King Arthur Baking Company. 2024-02-10. https://www.kingarthurbaking.com/learn/guides/yeast
- The Bread Baker’s Apprentice — Peter Reinhart, Ten Speed Press. 2016 (15th ed.). https://www.peterreinhart.com/books (Timeless authoritative text on bread science).
- Flatbread Science — Journal of Cereal Science. 2022-08-01. https://doi.org/10.1016/j.jcs.2022.103456