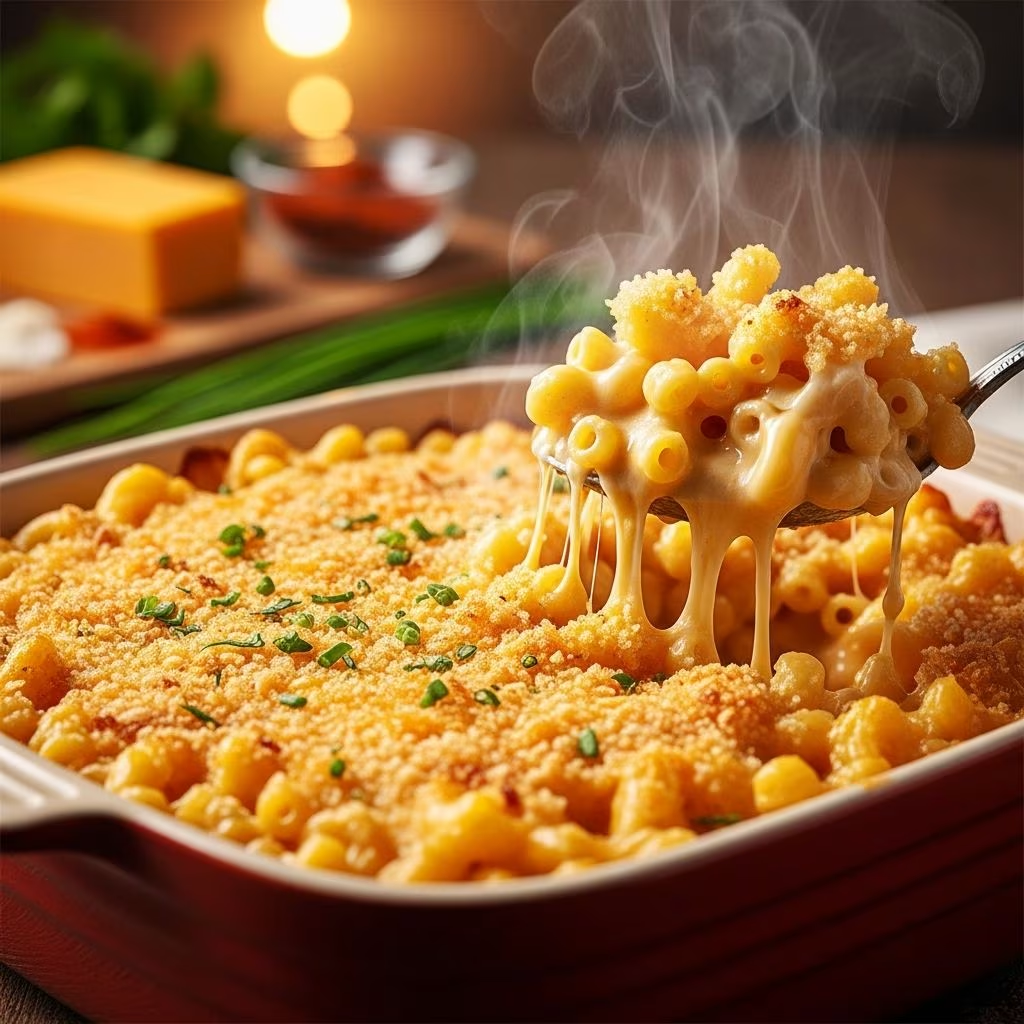
Baked macaroni and cheese represents one of the most beloved comfort food dishes in American cuisine. This classic preparation transforms simple pasta and cheese into a luxurious, satisfying meal that appeals to both children and adults alike. The appeal lies not just in the flavor, but in the technique required to achieve that perfect balance between creamy sauce and tender pasta, all finished with a golden, bubbly top. Whether you’re preparing dinner for your family or bringing a dish to a potluck, understanding the fundamentals of this dish will help you create versions that impress every time.
Understanding the Foundation: Quality Ingredients Matter
The success of any baked mac and cheese begins with thoughtful ingredient selection. The foundation typically includes three primary components: pasta, cheese, and the roux-based sauce that binds everything together. Each element plays a crucial role in the final dish’s texture and flavor profile.
For the pasta, elbow macaroni remains the traditional choice, though other tubular pasta shapes work equally well. The key consideration is to cook the pasta to al dente—slightly firm to the bite—rather than fully soft. This prevents the pasta from becoming mushy during the baking process, which typically lasts between 15 to 30 minutes depending on your oven and the depth of your baking dish.
Cheese selection significantly impacts both the flavor intensity and the texture of your sauce. Many successful recipes employ a combination approach, blending different cheese varieties to achieve complexity and superior melting properties. Sharp cheddar provides robust flavor and color, while processed American cheese contributes exceptional melting characteristics and creaminess. Some variations introduce Gruyère for nuttiness or mozzarella for additional stretch and creaminess.
The Critical Roux: Building Your Cheese Sauce
The roux represents the technical foundation of your cheese sauce and warrants careful attention. This simple combination of fat and flour creates the thickening base that transforms milk into a silky, stable sauce capable of coating every piece of pasta.
Creating the Perfect Roux:
- Begin by melting butter over medium heat in a heavy-bottomed saucepan or Dutch oven
- Add flour gradually while whisking continuously to prevent lumps from forming
- Cook this mixture, called a beurre manié, for approximately one minute while stirring constantly
- The mixture should become slightly bubbly and take on a light golden color
- Avoid high heat, which can cause the roux to brown unevenly or burn
The ratio of butter to flour typically remains consistent at roughly equal parts by weight. However, the exact proportions depend on how thick you want your final sauce. A standard starting point uses 6 tablespoons of butter to one-third cup of flour for a standard batch serving 8 people.
Incorporating Milk: The Gradual Integration Method
Adding milk to your roux requires patience and constant attention. This step determines whether your sauce becomes silky smooth or ends up with disappointing lumps. The gradual whisking method, where you add liquid in stages while whisking continuously, proves far more effective than pouring all milk at once.
Proper Milk Integration Technique:
- Pour approximately one-quarter of your total milk slowly into the roux while whisking vigorously
- Once this portion becomes smooth and integrated, add another quarter while continuing to whisk
- Repeat this process until all milk has been incorporated
- Maintain medium heat throughout, watching for the sauce to thicken and bubble gently at the surface
- Continue cooking and stirring for an additional one to two minutes after the sauce reaches a boil
Many cooks find success combining whole milk with heavy cream or half-and-half. This mixture provides greater richness and stability compared to whole milk alone. Some recipes call for 3 cups of whole milk, while others combine 2 cups of milk with 1 cup of cream for enhanced luxury.
Flavor Building: Beyond Basic Cheese
While cheese provides the primary flavor, judicious use of complementary seasonings elevates your dish from good to exceptional. Dry mustard powder, appearing in many classic recipes, adds subtle complexity without making the dish taste overtly spicy. Ground black pepper provides brightness, while salt enhances all other flavors.
Some preparations include finely chopped onion sautéed in the initial butter stage, introducing sweet, mellow undertones that build depth. Paprika—particularly smoked varieties—adds color and a subtle hint of warmth. More adventurous cooks experiment with additions like cayenne pepper, garlic powder, or fresh herbs such as thyme or bay leaf.
The seasoning strategy should enhance rather than overpower the cheese flavor. The dish’s primary appeal comes from its creamy, cheesy nature, so additional seasonings should remain background notes supporting the main attraction.
Cheese Integration: The Melting Process
Adding cheese to your hot sauce requires similar care to the milk integration process. Rather than dumping all cheese at once, add it in handfuls while stirring constantly over gentle heat. This approach ensures even melting and prevents the proteins in the cheese from seizing or becoming stringy.
The heat level matters significantly here. If your sauce gets too hot, particularly above a gentle simmer, the cheese may break, separating into greasy streaks rather than creating a cohesive sauce. Once cheese has been added, remove the pan from heat if the sauce appears to be getting too hot.
Different cheese varieties melt at different rates. Sharp cheddar, being aged, takes slightly longer than young cheddars. Processed American cheese melts almost instantly, which is why many recipes include it specifically for its reliable melting behavior. Gruyère adds richness but may require slightly longer cooking to fully incorporate.
Assembly and Preparation for Baking
Once your sauce reaches perfect creaminess and your pasta has been cooked and drained, combine them gently but thoroughly. The pasta pieces should become fully coated with sauce, with no dry spots visible. If using very hot sauce with cooler pasta, the residual heat will continue cooking the pasta slightly.
Transfer your combined mac and cheese to a prepared baking dish. The size of your dish affects baking time—a shallow 9-by-13-inch dish will bake faster than a deep 3-quart vessel. Many cooks prefer coating their baking dishes with butter rather than cooking spray, which adds richness to any edges that contact the dish.
The Baking Stage: Achieving Perfect Texture
Preheat your oven to 350 degrees Fahrenheit before assembling your final dish. This temperature allows the macaroni and cheese to heat through completely while developing a golden, bubbly top without overcooking the bottom layer.
Topping Options and Techniques:
| Topping Style | Ingredients | Baking Time |
|---|---|---|
| Simple Golden Top | Extra shredded cheese | 25-30 minutes |
| Panko-Parmesan Crunch | Panko breadcrumbs, Parmesan, melted butter | 30 minutes |
| Bacon-Panko Crispy | Panko, cooked bacon bits, butter, paprika | 30-35 minutes |
| Herb Breadcrumb | Panko, butter, dried herbs, Parmesan | 25-30 minutes |
If using a simple cheese topping, sprinkle additional shredded cheese directly over the prepared dish before baking. For breadcrumb toppings, combine your chosen crumbs with melted butter and seasonings, then distribute evenly across the surface. This ensures the topping becomes evenly golden and crispy rather than developing dark spots.
Bake until the top becomes golden brown and the entire dish bubbles around the edges. This typically takes 25 to 35 minutes depending on your specific oven characteristics and the depth of your baking dish. If you’re using a covered baking dish during the first portion of cooking, remove the cover after 20 to 25 minutes to allow the top to brown.
Cooling and Serving Considerations
Resist the temptation to serve immediately upon removing from the oven. Allow the mac and cheese to rest for 10 to 15 minutes. This cooling period allows the sauce to set slightly, making serving cleaner and helping portions hold together better. Additionally, it prevents the cheese from being mouth-burningly hot when you take your first bite.
The dish will continue thickening as it cools. If after cooling it appears too firm or dry, a splash of warm milk stirred in gently can restore creaminess. Conversely, if it remains too loose after the cooling period, it likely needs additional baking time or slightly thicker sauce next time.
Troubleshooting Common Issues
Lumpy Sauce: This typically results from insufficient whisking when incorporating milk or cheese. Always whisk constantly and add liquid gradually to prevent lumps. If lumps form, strain the sauce through a fine-mesh sieve before combining with pasta.
Broken or Greasy Sauce: Excessive heat causes cheese proteins to separate. Maintain medium or medium-low heat throughout sauce preparation and keep the temperature gentle once cheese has been added.
Watery Final Dish: The sauce may not have been thick enough, or the pasta wasn’t cooked to al dente before combining. Cook pasta one minute short of package directions next time and ensure your sauce coats a spoon thickly before combining.
Unevenly Cooked Pasta: Using pasta cooked precisely to al dente prevents this issue. Additionally, ensure thorough mixing of pasta and sauce so no dry pockets remain.
Storage and Reheating Instructions
Leftover baked mac and cheese stores well in the refrigerator for up to four days when properly covered. Allow it to cool to room temperature before transferring to an airtight container to prevent condensation from accumulating.
Reheating can be accomplished several ways. The oven method preserves texture best: cover the dish loosely with foil and reheat at 350 degrees Fahrenheit for 15 to 20 minutes until warmed through. Alternatively, transfer portions to the microwave and heat in 30-second intervals, stirring between each interval to ensure even heating. Adding a small splash of milk before reheating helps restore creaminess that may have diminished during storage.
Variations and Creative Adaptations
While the classic version remains beloved, countless variations offer interesting departures. Adding crispy bacon bits creates a surf-and-turf variation popular at family gatherings. Incorporating steamed broccoli florets introduces vegetables while complementing the cheese flavor. Jalapeño pieces add heat for those preferring spice.
Some cooks experiment with different pasta shapes—using rigatoni, penne, or campanelle rather than traditional elbow macaroni. These shapes often catch sauce differently, offering varied textural experiences. However, smaller, more delicate shapes may become oversauced, so adjust sauce quantity accordingly.
For dietary variations, gluten-free flour works effectively as a roux thickener for those avoiding wheat. Similarly, dairy-free alternatives to milk and cheese allow those with lactose intolerance to enjoy the dish, though results differ somewhat from traditional versions.
Frequently Asked Questions
Can I make mac and cheese ahead of time?
Yes, you can assemble the unbaked dish up to 24 hours ahead. Cover it tightly and refrigerate. When ready to bake, add 5 to 10 extra minutes to the baking time since the dish will be starting from cold rather than room temperature.
What cheese varieties work best?
Sharp cheddar provides excellent flavor, while processed American cheese ensures smooth melting. Gruyère adds sophistication, and fontina offers subtle nuttiness. Avoid using only fresh mozzarella, which doesn’t melt into a sauce effectively.
Why use both fresh and processed cheese?
Processed American cheese contains emulsifiers that promote smooth, creamy sauce consistency. Fresh cheeses alone may result in a broken or grainy texture. The combination ensures both flavor complexity and optimal texture.
Can I freeze baked mac and cheese?
Yes, it freezes well for up to three months. Cool completely, transfer to freezer-safe containers, and label with the date. Reheat from frozen at 350 degrees Fahrenheit for 45 to 60 minutes, covered with foil.
What’s the best baking dish size?
A 9-by-13-inch dish or a 2 to 3-quart round baking dish works well. Shallower dishes bake faster than deeper ones, so adjust baking time accordingly.
References
- Mom’s Favorite Baked Mac and Cheese Recipe — Wisdom Lib. Accessed April 10, 2026. https://www.wisdomlib.org/recipes/moms-favorite-baked-mac-and-cheese-115070
- How to Make Mom’s Favorite Baked Mac and Cheese — Allrecipes. YouTube. Accessed April 10, 2026. https://www.youtube.com/watch?v=VJMtnK9vPyY
- Creamy Baked Mac and Cheese (Contest-Winning!) — The Chunky Chef. Accessed April 10, 2026. https://www.thechunkychef.com/family-favorite-baked-mac-and-cheese/
- The BEST Homemade Baked Mac and Cheese — Mom On Timeout. Accessed April 10, 2026. https://www.momontimeout.com/best-homemade-baked-mac-and-cheese-recipe/
- EASIEST Baked Macaroni and Cheese (the best!) — Rachel Cooks. Accessed April 10, 2026. https://www.rachelcooks.com/easiest-ever-baked-macaroni-and-cheese/
- The Best Baked Mac and Cheese — Will Cook For Smiles. Accessed April 10, 2026. https://www.willcookforsmiles.com/baked-mac-and-cheese/