Understanding Your Sweet Butter Creation
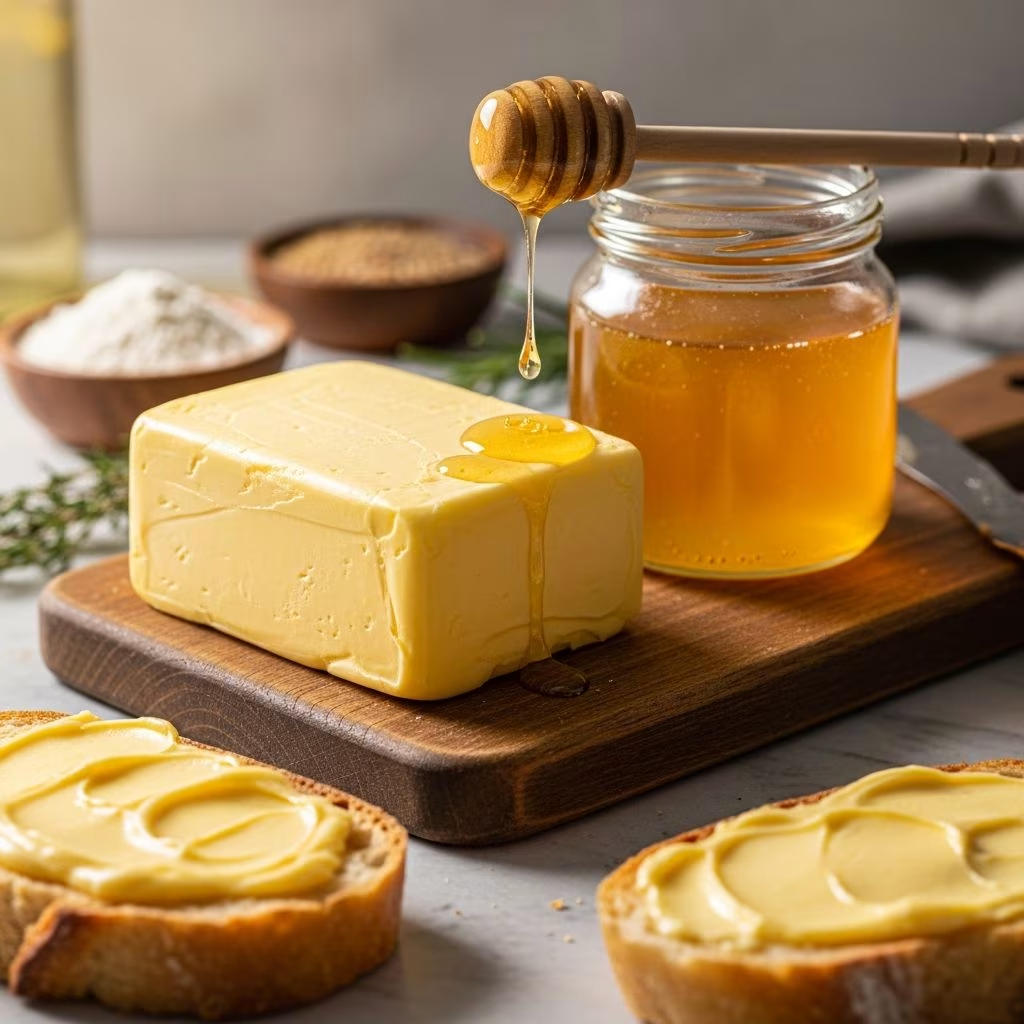
Honey butter represents one of the most straightforward culinary combinations you can prepare in your kitchen. At its foundation, this spread merges the creamy richness of softened butter with the natural sweetness and complexity of honey. The result is a versatile topping that elevates everything from warm breakfast items to fresh-baked goods. Unlike traditional butter alone, honey butter brings an additional dimension of flavor that makes ordinary toast or biscuits feel like something special.
The beauty of this condiment lies in its simplicity and adaptability. Whether you prefer a traditional version or want to experiment with complementary flavors, the basic technique remains consistent and achievable for cooks of all skill levels. The entire process typically requires just a few minutes of active preparation time.
Essential Components for Success
Creating quality honey butter begins with selecting appropriate ingredients. The foundation of your spread depends on the butter you choose, which will constitute the bulk of your final product. Unsalted butter offers the advantage of allowing you to control the salt content precisely, though salted varieties work equally well if you adjust other ingredients accordingly. When shopping, look for butter with good quality standards—European-style butter, which contains a higher butterfat percentage than standard American butter, produces an exceptionally rich and creamy result.
Temperature matters significantly in the preparation process. Your butter should reach room temperature before you begin mixing, typically after sitting out for thirty minutes to an hour. Cold butter resists mixing and creates lumps rather than a smooth, unified spread. If you’re short on time, cutting the butter into smaller pieces accelerates the softening process.
Honey serves as both sweetener and flavor enhancer. The specific variety you select influences the final taste profile of your spread. Raw honey, wildflower honey, clover honey, or Tupelo honey each contribute slightly different flavor notes while maintaining the essential sweetness your spread requires. There’s no single “correct” honey choice—select based on your personal preference or what you have available in your pantry.
A pinch of salt balances the sweetness and enhances the overall flavor complexity. Sea salt or kosher salt works particularly well because these varieties offer a cleaner taste compared to table salt. The salt remains optional, but most recipes benefit from its subtle inclusion.
Core Recipe Components
| Ingredient | Standard Amount | Measurement Notes |
|---|---|---|
| Unsalted Butter | 1 cup (2 sticks) | Softened to room temperature |
| Honey | 1/4 to 1/2 cup | Adjust to taste preference |
| Sea Salt | Pinch to 1/4 teaspoon | Optional but recommended |
Step-by-Step Preparation Method
Begin by placing your softened butter into a mixing bowl. Using an electric mixer—either a hand-held model or stand mixer—beat the butter alone for approximately three minutes. During this beating phase, the butter transforms from a dense mass into a fluffy, light substance. Air incorporation during this stage creates the foundation for a luxurious texture.
Once your butter reaches the appropriate consistency, gradually add your honey while continuing to mix. Rather than dumping the honey in all at once, a gradual addition allows the mixer to incorporate it evenly throughout. This prevents pockets of unmixed honey that would create an inconsistent spread. Continue beating for an additional minute until the honey fully distributes and the mixture achieves a uniform color and texture.
Introduce your salt choice at this stage if using it. A pinch suffices for most applications, though some preferences lean toward a more pronounced salty note. Taste the mixture before finalizing, as you can always add more salt but cannot easily remove it once incorporated.
The total active preparation time rarely exceeds five minutes, making this one of the quickest spreads you can produce. Transfer your finished honey butter to serving dishes, ramekins, or airtight containers depending on your intended use.
Alternative Preparation Approach
For those interested in making butter completely from scratch before transforming it into honey butter, an alternative method exists that requires only heavy cream. This approach involves beating heavy cream in a food processor on high speed for five to eight minutes, during which the cream first transforms into whipped cream before naturally separating into butter solids and buttermilk.
Once the butter forms, carefully drain off the accumulated buttermilk and press the butter with paper towels to remove excess moisture. Some cooks prefer wrapping the butter in cheesecloth and squeezing to extract additional liquid more efficiently. After this preparation, incorporate your honey into the freshly made butter following the standard mixing process described previously.
Flavor Variations and Customizations
The basic honey butter formula provides an excellent foundation for creative experimentation. Adding one-half teaspoon of vanilla extract alongside the honey introduces subtle depth and warmth to your spread. Ground cinnamon—approximately one-quarter teaspoon—pairs beautifully with honey, especially during autumn and winter months when cinnamon-spiced flavors resonate more strongly with seasonal preferences.
For those seeking alternatives to the honey component, substituting maple syrup produces a distinctly different yet equally delicious result, particularly when spreading on whole wheat pancakes. Confectioners’ sugar can supplement the honey in some recipes, adding a smoother texture and slightly different sweetness character.
Extending the mixing time on high speed introduces additional air into the mixture, creating an even fluffier consistency that some prefer. This “whipped” variation requires beating for at least five minutes with an electric mixer equipped with a whisk attachment but results in an exceptionally light and airy spread.
Storage and Serving Recommendations
Honey butter keeps well under standard refrigeration for extended periods. Most preparations maintain quality for several weeks when stored in sealed containers, though the spread tastes freshest when consumed within the first two weeks of preparation. If you’ve made more than you anticipate using immediately, dividing the batch into smaller portions allows you to freeze portions for future use.
When ready to serve, remove the honey butter from refrigeration approximately fifteen to twenty minutes beforehand, allowing it to return to a spreadable consistency. Some cooks prefer serving it at room temperature from the start, particularly when entertaining guests or preparing special breakfast presentations.
Presentation possibilities extend beyond simple spreading. Drizzling additional honey over the top of prepared honey butter creates an attractive garnish that reinforces the ingredient and adds visual appeal. A light sprinkle of flaky sea salt on the surface provides textural contrast that discerning palates appreciate.
Ideal Applications and Uses
This golden spread shines across numerous applications throughout your day. Warm bread, dinner rolls, and biscuits receive particular enhancement from a generous dollop of honey butter, which melts into the warm surface and permeates the interior. Pancakes, waffles, and muffins benefit equally from this topping, where the honey butter both flavors and enriches each bite.
Cornbread—a Southern staple—transforms when served alongside honey butter rather than plain butter alone. The natural cornbread sweetness combines beautifully with the honey butter’s complexity. Even simple crackers become sophisticated when paired with this spread, making it suitable for cheese boards and appetizer presentations.
Coffee and afternoon tea services gain an elegant element when honey butter accompanies freshly baked scones or tea cakes. The spread’s versatility means it works equally well as an unexpected addition to sweet potato dishes or grilled vegetables seeking additional flavor dimension.
Equipment and Tools Needed
Minimal equipment requirements make honey butter accessible to nearly every kitchen. A mixing bowl—any size large enough to accommodate your ingredients—provides your working surface. An electric mixer, whether handheld or stand-mounted, accelerates the blending process significantly compared to manual stirring, though determined cooks can produce honey butter using vigorous manual mixing if electric equipment isn’t available.
A silicone spatula helps scrape down bowl sides during mixing, ensuring all ingredients incorporate evenly. Glass or ceramic ramekins, small bowls, or airtight containers serve for storage and serving. For from-scratch butter preparation, a food processor becomes essential, as it churns the heavy cream efficiently into butter solids.
Frequently Asked Questions
Can I use salted butter instead of unsalted?
Yes, absolutely. Simply reduce or eliminate the added salt in your recipe to account for the salt already present in the butter. Taste your finished product and adjust if needed.
How long does homemade honey butter last?
Properly stored in an airtight container, honey butter maintains quality for 2-3 weeks in the refrigerator and can be frozen for up to three months for longer-term storage.
Can I use liquid honey or must it be crystallized?
Liquid honey works best and mixes more smoothly into softened butter. Crystallized honey can be used if you first warm it gently to restore its fluid consistency, but this adds an extra step.
What if my honey butter seems grainy or separated?
This typically indicates insufficient mixing. Return the mixture to your bowl and beat for an additional minute or two until all ingredients fully incorporate and reach a uniform consistency.
Is honey butter suitable for dietary restrictions?
Since honey butter contains only butter and honey, it’s vegetarian. For vegan adaptations, substitute dairy-free vegan butter, which performs similarly to traditional butter in this application.
Tips for Perfect Results Every Time
Ensure your butter reaches true room temperature rather than simply appearing soft on the exterior. Properly softened butter mixes evenly without lumps that result from partially cold butter. If you forget to plan ahead, cutting butter into tablespoon-sized pieces dramatically reduces the time needed for softening.
Add honey gradually rather than all at once. This controlled introduction ensures even distribution throughout the butter and prevents the honey from pooling in certain areas. When the mixture appears nearly uniform, stop adding additional honey even if you haven’t reached your target amount—you can always add more but cannot remove excess honey easily.
Don’t over-mix beyond the point of full ingredient incorporation. Extended mixing beyond what’s necessary can cause separation as excessive air incorporation and mechanical action pushes liquid elements apart. Once everything appears fully combined with uniform color, your honey butter is complete.
Taste your creation before serving or storing. This allows you to adjust salt, sweetness, or additional flavor elements based on your preferences. Different honey varieties produce varying sweetness levels, so this final tasting ensures your specific batch matches your desired flavor profile.
References
- How to Make Honey Butter from Scratch — Baking Bites. 2018-03-15. https://bakingbites.com/2018/03/make-honey-butter-from-scratch/
- Honey Butter Recipe — NatashasKitchen.com. 2024. https://natashaskitchen.com/honey-butter-recipe/
- Homemade Honey Butter — Sally’s Baking Addiction. 2024. https://sallysbakingaddiction.com/homemade-honey-butter/
- 3-Minute Homemade Honey Butter — The Bojon Gourmet. 2024. https://bojongourmet.com/honey-butter/