The journey from purchasing expensive bottles of vanilla extract at premium prices to creating your own superior version at home is simpler than most home cooks realize. With only two ingredients and basic kitchen equipment, you can produce a vanilla extract that surpasses most commercial alternatives in flavor depth and richness. This comprehensive guide walks you through the entire process, from selecting quality vanilla beans to properly storing your finished extract.
Understanding the Science Behind Vanilla Extraction
Vanilla extract creation relies on a fundamental principle of chemistry: alcohol’s ability to act as a solvent. When high-proof alcohol comes into contact with vanilla beans, it gradually extracts the hundreds of aromatic compounds and flavor molecules contained within them. These compounds, including vanillin and other volatile organic compounds, dissolve into the alcohol over time, transforming a clear liquid into a complex, deeply flavored extract.
The process is not instantaneous; rather, it develops gradually through a process known as maceration, where the vanilla beans and alcohol remain in contact, allowing the flavor compounds to migrate from the bean into the surrounding liquid. This infusion process explains why homemade extracts often develop superior flavor compared to industrially produced versions, which may use shortcuts or artificial flavoring compounds.
Essential Ingredients and Equipment
The beauty of making vanilla extract lies in its minimalist ingredient list. You need only two primary components:
- Vanilla Beans: High-quality whole vanilla beans form the foundation of your extract. Premium varieties typically come from Madagascar, Tahiti, or Mexico, each imparting distinct flavor characteristics.
- Alcohol: Any spirit containing at least 35% alcohol by volume (70 proof) will effectively extract the vanilla compounds. Vodka remains the most popular choice due to its neutral flavor profile, though rum, brandy, and bourbon each create unique flavor profiles.
Beyond these ingredients, gather the following equipment:
- Clean glass bottles or jars with tight-fitting lids
- A sharp knife or kitchen scissors for preparing beans
- A small funnel (optional but helpful)
- Labels for dating and identifying your extract
- Boiling water for sterilizing containers
Selecting Quality Vanilla Beans
The quality of your final extract depends largely on the vanilla beans you select. Choose plump, flexible beans with a rich, dark color rather than brittle, dried specimens. Grade-B beans, which may have minor cosmetic imperfections compared to Grade-A varieties, work perfectly for extract production and typically cost less than premium grades.
For standard extract production, use approximately four whole vanilla beans per cup of alcohol, though this ratio can be adjusted based on your desired extraction strength. Some extract makers prefer a single-fold extract using one ounce of beans per cup of alcohol, while others create more concentrated versions using double the bean quantity.
Step-by-Step Preparation Process
Initial Bean Preparation: Begin by washing and sanitizing your bottles using mild soapy water, followed by a rinse with boiling hot water to eliminate any bacteria or contaminants. This sanitization step ensures your extract remains pure and unblemished throughout the infusion period.
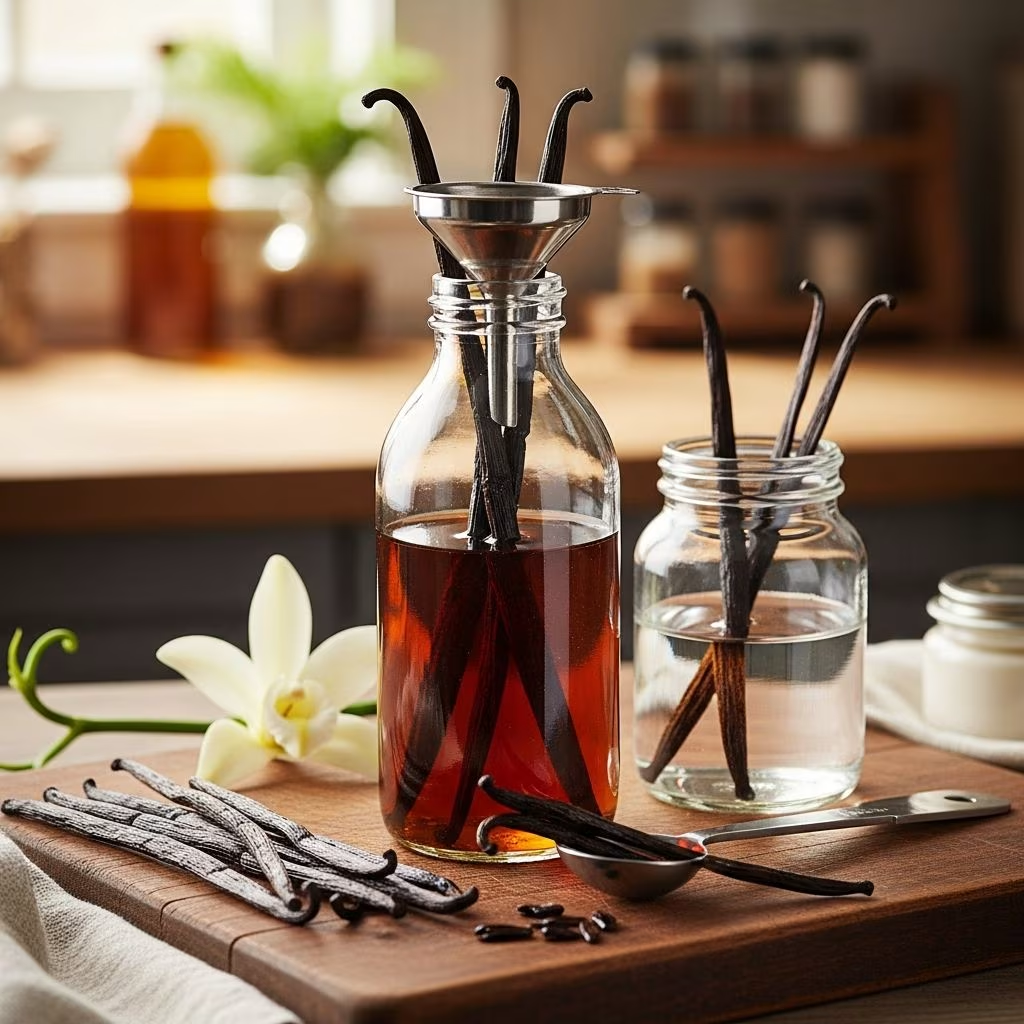
Next, prepare the vanilla beans by slicing them in half crosswise, which allows them to fit easily within your chosen container while remaining fully submerged. Using a sharp knife or kitchen scissors, carefully split each bean lengthwise down the middle while leaving the ends intact. This splitting exposes the tiny, flavorful seeds (often called vanilla caviar) to maximum contact with the alcohol. If your beans prove too dry to split easily, cut them into one-inch pieces instead.
Combining Ingredients: Place your prepared vanilla beans into the clean, dry glass bottle or jar. Pour your chosen spirit over the beans, ensuring complete submersion—this step is crucial for even extraction. Use a small funnel if available to prevent spillage when pouring the alcohol.
Activation and Initial Infusion: Seal the bottle tightly and shake vigorously for several seconds to distribute the beans and seeds throughout the alcohol. This initial shaking helps break up any clumping and ensures even contact between the beans and liquid.
The Maturation Timeline
Understanding the extraction timeline helps you manage expectations and determine when your extract reaches optimal flavor. The process unfolds in distinct phases:
- Week One: The vodka or chosen spirit initially remains clear, with minimal color change visible. However, flavor development begins almost immediately as alcohol molecules penetrate the bean structure.
- Week Two to Three: The extract begins darkening noticeably, transitioning from clear to light amber as flavor compounds accumulate in the liquid. You can begin using the extract at this stage, though the flavor remains subtle and alcohol notes may dominate the taste profile.
- Weeks Four to Eight: The extract develops progressively deeper color and more pronounced vanilla flavor during this period. Many home cooks find the extract reaches an acceptable flavor level within six to eight weeks of infusion.
- Three to Six Months: For fuller, more complex vanilla flavor, allow the extract to mature for the complete three to six month period. Flavor continues intensifying throughout this extended timeline, creating an exceptionally rich product.
- Six to Twelve Months: Extended infusion periods of six to twelve months produce the most concentrated, nuanced extracts with maximum flavor depth.
Maintenance and Monitoring During Infusion
Once your extract begins infusing, minimal ongoing effort is required. Every two to three days, shake the bottle vigorously to redistribute the beans, broken pulp, and settling particles throughout the liquid. This periodic shaking prevents settling and ensures even flavor extraction from all bean components.
Store your infusing extract in a cool, dark location away from direct sunlight, which can degrade flavor compounds and potentially alter the extract’s appearance. A pantry shelf, cabinet interior, or closet provides ideal conditions. Avoid storing near heat sources such as stoves or sunny windowsills.
Determining Extraction Completeness
Several indicators signal when your extract has reached desired flavor intensity. Color transformation provides the first visual clue—fully mature extract typically displays a deep amber to dark brown hue. Taste evaluation offers the most accurate assessment; sample a small amount to evaluate whether the vanilla flavor intensity matches your preferences.
Remember that extract continues developing flavor even after you begin using it, so you need not wait for absolute perfection before decanting and employing it in recipes. Many bakers find two-month extracts perfectly suitable for general baking applications, while professional bakers and extract connoisseurs prefer the complexity achieved through six to twelve month aging.
Scaling Your Production and Storage Considerations
One advantage of homemade extract production is simple scalability. The basic ratio remains consistent regardless of batch size—simply multiply the ingredient quantities while maintaining the same bean-to-alcohol proportion. Whether creating small four-ounce batches for personal use or producing multiple cups as gifts, the process remains identical.
For long-term storage, transfer your completed extract into smaller bottles with tight lids to minimize air exposure. Properly stored extract maintains quality for several years when kept in cool, dark conditions. Label each bottle clearly with the creation date and any variations you’ve made, such as bourbon-based extracts or double-strength versions.
Comparing Homemade to Commercial Extract
Homemade vanilla extract offers distinct advantages over most store-bought alternatives. You control the quality of beans, the alcohol base, and the extraction duration, creating a product precisely tailored to your baking needs. The cost efficiency becomes apparent when calculating ingredient expenses compared to premium retail prices for similar-quality extracts.
Beyond economic advantages, the flavor superiority of homemade extract often becomes evident in blind taste comparisons. The absence of additives, colorants, or artificial components that sometimes appear in commercial products results in purer, more authentic vanilla flavor in your finished baked goods.
Frequently Asked Questions About Homemade Vanilla Extract
Q: Can I use vodka brands specifically made for cooking?
A: Yes, any vodka meeting the 35% alcohol requirement works effectively. Budget-friendly vodka varieties perform just as well as premium brands since the alcohol’s only role is extracting vanilla compounds.
Q: What happens if my beans don’t completely submerge?
A: Exposed portions may develop mold or become oxidized. Always ensure complete submersion by using adequate alcohol quantity and occasionally shaking to redistribute beans.
Q: Can I reuse vanilla beans after extracting?
A: Absolutely. Exhausted beans retain residual flavor and can be used to create vanilla sugar, infuse milk, or prepare lower-strength secondary batches of extract.
Q: Should I filter the extract before using it?
A: Filtering remains optional. Many bakers prefer unfiltered extract containing visible bean particles, while others prefer filtering through cheesecloth for a cleaner appearance. Both approaches produce excellent results.
Creative Variations and Flavor Experimentation
Once you’ve mastered basic extract production, experiment with variations. Bourbon or rum-based extracts develop richer, more complex flavor profiles suitable for sophisticated desserts and beverages. Creating Madagascar, Tahitian, and Mexican vanilla extracts separately allows direct comparison of their distinct characteristics—Madagascar varieties typically offer classic vanilla notes, Tahitian beans impart floral undertones, while Mexican beans deliver warm, spicy complexity.
Consider creating custom blends by combining different bean origins or alcohol bases, or by adding complementary flavoring elements such as whole cinnamon sticks or vanilla bean husks to create signature extract variations.
Conclusion: Embracing DIY Extract Production
Creating homemade vanilla extract represents an accessible entry point into ingredient production, requiring minimal equipment, simple techniques, and readily available materials. The resulting extract surpasses most commercial alternatives while delivering significant cost savings over time. Begin your first batch today, and within weeks, you’ll experience the superior flavor that homemade extract brings to baking applications.
References
- Homemade Vanilla Extract • So Easy! — The View from Great Island. Accessed April 7, 2026. https://theviewfromgreatisland.com/homemade-vanilla-extract/
- How to Make Homemade Vanilla Extract (Video) — ZoëBakes. January 6, 2025. https://zoebakes.com/2025/01/06/homemade-vanilla-extract/
- Vanilla Extract Recipe — Natasha’s Kitchen. Accessed April 7, 2026. https://natashaskitchen.com/vanilla-extract-recipe/
- Homemade Vanilla Extract — Melissa K. Norris. Accessed April 7, 2026. https://melissaknorris.com/homemade-vanilla-extract/
- Homemade Vanilla Extract (2 Ingredients) — Sally’s Baking Addiction. Accessed April 7, 2026. https://sallysbakingaddiction.com/homemade-vanilla-extract/