Creating granola at home offers a remarkable opportunity to control quality, customize flavors, and develop a breakfast staple that suits your family’s preferences precisely. Unlike store-bought varieties often laden with excessive sugars and preservatives, homemade granola allows you to select each ingredient thoughtfully and adjust proportions to match your nutritional goals. The process combines straightforward mixing techniques with mindful oven management, resulting in a versatile food that transforms ordinary mornings into something special.
Understanding the Foundation: Core Ingredients Explained
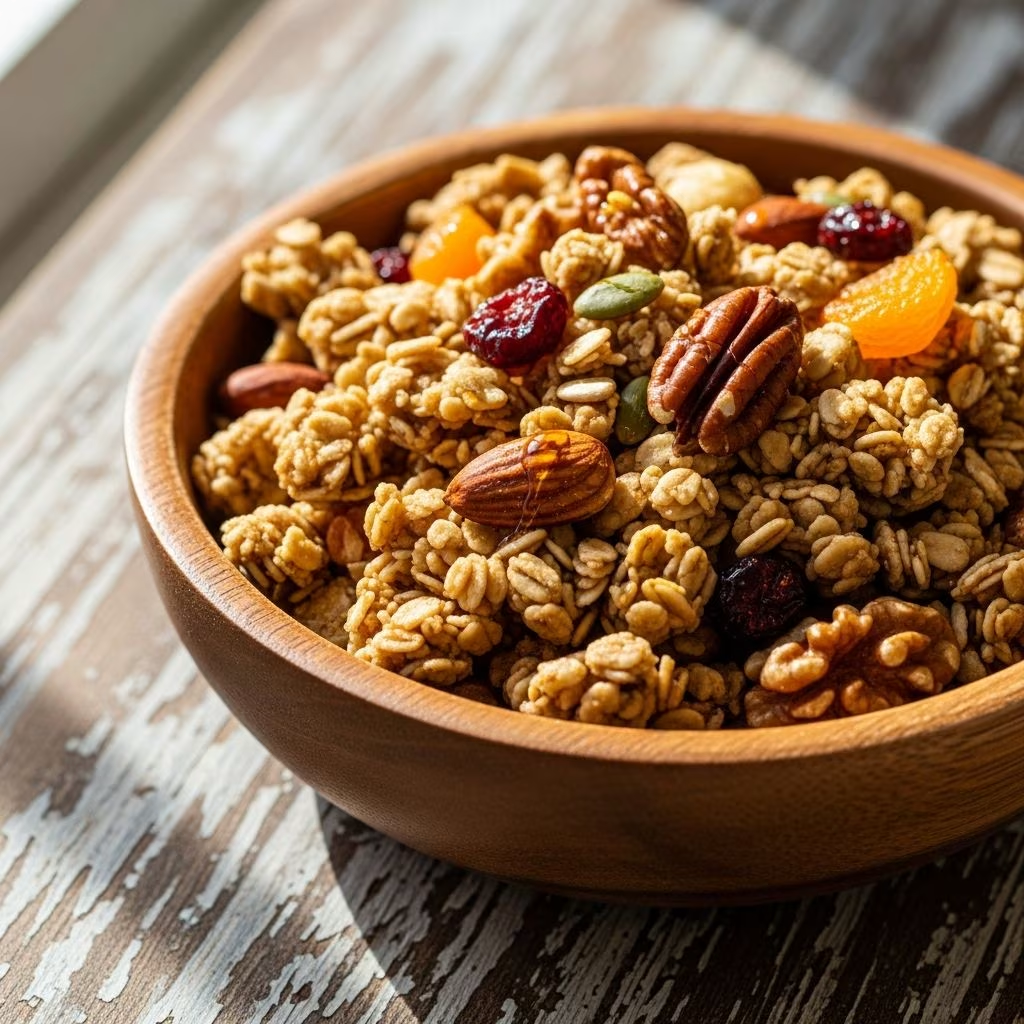
Every excellent granola recipe begins with understanding the role each component plays in creating the final texture and flavor profile. The foundation typically rests on rolled oats, which provide the bulk, chewiness, and structural integrity that defines granola’s characteristic appeal. These oats absorb liquid ingredients while toasting to develop nutty, caramelized notes that distinguish homemade versions from commercial alternatives.
Nuts contribute both nutritional value and textural contrast, offering healthy fats and proteins that sustain energy throughout the morning. Almonds provide a subtle, slightly sweet flavor, while walnuts introduce earthier notes. Different nuts work synergistically—combining several varieties creates complexity rather than monotony. Seeds like sesame, sunflower, or pumpkin seeds add crunch and important minerals including zinc and magnesium.
The binding agent typically combines honey or maple syrup with oil, creating the adhesive that transforms loose ingredients into clusters. Honey brings floral sweetness and aids browning, while oils distribute heat evenly and contribute to the desirable texture development. This liquid component acts as both flavor enhancer and structural glue.
Spices elevate granola from basic to memorable. Cinnamon provides warmth, while cardamom introduces sophisticated complexity. Salt heightens all flavors, preventing the granola from tasting one-dimensional. These aromatic additions require careful measurement—too little disappears entirely, while excess can overpower.
The Liquid Component: Sweeteners and Oils Demystified
Creating the perfect liquid mixture demands understanding how different sweeteners and fats interact. Honey offers several advantages: it browns beautifully during baking, creating visual appeal and depth of flavor. Its viscosity ensures even distribution throughout the dry ingredients, while its natural antimicrobial properties enhance shelf life.
Alternative sweeteners provide different benefits. Maple syrup delivers a distinctive forest-floor character that pairs wonderfully with warming spices. Agave nectar offers a neutral sweetness without competing flavors. The choice depends entirely on your desired final taste profile.
Oil selection significantly impacts both flavor and health profile. Olive oil contributes fruity notes and valuable polyphenols, though its flavor becomes pronounced in final products. Coconut oil creates cleaner taste while supporting the formation of clusters. Butter, though traditionally considered a dairy product, adds richness and supports browning through the Maillard reaction. Avocado oil provides neutral flavor with excellent nutritional credentials.
The ratio of liquid to dry ingredients requires precision. Too little liquid results in dry, crumbly granola that fails to clump; too much creates dense, heavy results that don’t crisp during cooling. Most recipes balance approximately one-third liquid to two-thirds dry ingredients by volume, though specific ratios vary based on individual preferences and ingredient choices.
Mixing Techniques for Optimal Texture Development
Proper mixing ensures every oat receives adequate coating while avoiding over-working the mixture. Begin by combining all dry ingredients—oats, nuts, seeds, spices—in a large bowl. This preliminary step distributes cinnamon and salt evenly, preventing concentrated pockets of flavor.
In a separate vessel, whisk together honey, oil, and vanilla extract. This preliminary mixing prevents the honey from clumping when it contacts cool ingredients. The whisking incorporates air, creating a slightly emulsified mixture that distributes more uniformly.
Pour the liquid mixture over dry ingredients and stir deliberately with a wooden spoon or your hands. The wooden tool prevents breakdown of larger nuts while ensuring thorough coating. If using hands, move the mixture from the bowl’s bottom upward repeatedly, rotating the bowl as you work. Continue mixing until no dry pockets remain—approximately two to three minutes. Over-mixing can crush nuts into powder, diminishing textural appeal.
Baking: Temperature, Timing, and Attention
Proper oven technique distinguishes mediocre granola from exceptional results. Preheat your oven to 325°F (approximately 163°C), a temperature that develops flavor through gentle toasting rather than harsh burning. This moderate heat encourages even browning and cluster formation.
Spread the mixture evenly across a parchment-lined baking sheet. Even distribution ensures consistent cooking—crowded areas steam rather than toast, while sparse sections risk burning. A single layer spread across the entire sheet promotes the desired results.
Bake for 30 to 35 minutes total, but this duration requires active engagement rather than passive waiting. Approximately every 10 minutes, remove the sheet and gently stir the granola with a spatula, redistributing pieces from the sheet’s edges toward the center. This rotation ensures uniform browning and prevents overcooked edges with undercooked centers.
Watch carefully as the granola approaches completion. The transformation from raw to finished occurs rapidly in the final minutes. You’re aiming for light to medium brown coloration with a toasted, nutty aroma filling your kitchen. Pulling the granola from the oven at this precise moment—rather than waiting for deep brown coloring—preserves nutritional value and ensures the texture remains crisp rather than becoming brittle.
The Cooling Phase: When Chemistry Completes
Many people overlook the cooling process, yet it proves absolutely critical to final texture. When granola first emerges from the oven, it appears sticky and slightly damp despite reaching adequate internal temperatures. This moisture content will evaporate as it cools, while the sticky coating will harden into the crunchy clusters characteristic of quality granola.
Spread the hot granola across the same baking sheet or transfer to a clean surface. Resist the temptation to stir or disturb it during cooling—this interruption breaks forming clusters into individual pieces. Allow 15 to 20 minutes for complete cooling and hardening. The granola will continue firming as it cools, reaching its final texture only after complete cooling.
Once fully cooled, break any over-sized clumps into bite-sized pieces by hand. This final step ensures consistent portion sizes and prevents unnecessarily large pieces from overwhelming your breakfast bowl.
Flavor Variations and Customization Strategies
The beauty of homemade granola lies in its infinite adaptability. Once you master the basic technique, experimenting with flavor combinations becomes enjoyable rather than risky.
Citrus-Infused Variations
Adding lemon or orange zest to the dry ingredients introduces bright, fresh notes that complement warming spices beautifully. Fold in one to two tablespoons of finely grated zest before mixing with the liquid component. The zest’s aromatic oils infuse the entire mixture, creating sophistication that elevates simple ingredients.
Dried Fruit Integration
Unlike nuts and seeds, dried fruits should never be added before baking. Their delicate structure breaks down under heat, releasing sugars that burn rather than caramelize. Instead, fold dried cherries, cranberries, apricots, or raisins into the completely cooled granola. This timing preserves their structure while distributing their sweetness throughout the finished product.
Spice Explorations
Beyond basic cinnamon, countless spices enhance granola’s appeal. Nutmeg adds subtle warmth; ginger introduces brightness; cloves contribute depth and complexity. Even a small pinch of cayenne pepper can enhance chocolate-based variations. Ground cardamom, a traditional Indian spice, creates an almost sophisticated quality that surprises and delights.
Protein Enhancements
For those prioritizing protein content, adding ground flaxseed, hemp seeds, or chia seeds increases nutritional density. These additions contribute approximately one additional gram of protein per quarter-cup serving while introducing subtle nutty flavors that complement traditional ingredients.
Storage, Shelf Life, and Freshness Maintenance
Proper storage determines whether your homemade granola remains crisp and delicious or gradually becomes stale. Cool granola must be completely dry before storage—any residual moisture encourages clumping and potential mold growth.
Transfer completely cooled granola into airtight containers or sealed glass jars. These vessels protect against humidity absorption from ambient air while preventing flavor transfer to other foods. Properly stored granola maintains optimal crispness and flavor for approximately three weeks, though most households consume their batches well before this timeline concludes.
Store containers in cool, dry locations away from direct sunlight. Pantries or kitchen cabinets away from heat sources work ideally. Avoid refrigeration, which introduces moisture and accelerates staleness rather than preventing it.
Serving Suggestions and Culinary Applications
Granola’s versatility extends far beyond the breakfast bowl. While traditional pairing with milk creates a hearty cereal alternative, numerous serving methods showcase this homemade staple.
Greek yogurt parfaits layer granola with thick yogurt and fresh berries, creating balanced nutrition with appealing visual appeal. The granola’s crunch contrasts beautifully against yogurt’s creamy texture. Smoothie bowls benefit from granola sprinkled atop thick, blended fruit mixtures, providing textural interest to otherwise uniform consistency.
For outdoor enthusiasts, granola serves as an ideal camping breakfast or trail snack. Its calorie density sustains energy for extended periods, while its shelf-stable nature requires no refrigeration. Eaten plain directly from a container, granola provides satisfying crunch and sustained satiation.
Creative cooks incorporate granola into unexpected applications. Crushed granola creates textured crusts for baked goods; sprinkled atop ice cream before freezing adds caramelized notes; stirred into salads provides protein and crunch that complements leafy greens.
Nutritional Considerations and Health Benefits
Homemade granola offers superior nutritional profiles compared to commercial alternatives. Control over ingredient selection allows you to maximize whole grains, nuts, and seeds while minimizing added sugars and artificial additives. Each ingredient contributes measurable nutritional value: oats provide beta-glucans supporting heart health; nuts deliver healthy monounsaturated fats; seeds contribute essential minerals.
The ability to adjust sweetness levels proves particularly valuable for those managing blood sugar or limiting refined sugar consumption. Using honey or maple syrup rather than high-fructose corn syrup ensures you’re consuming familiar, recognizable ingredients. Some recipes reduce sweetening substantially once you develop taste preferences, demonstrating how homemade versions adapt to individual health goals.
Troubleshooting Common Granola Challenges
Granola Remains Soft and Doesn’t Crisp: This typically indicates insufficient baking time or inadequate oven temperature. Increase duration by five minutes or raise temperature by 25 degrees Fahrenheit on subsequent attempts. Ensure your oven temperature is accurate using an independent thermometer.
Granola Becomes Too Dark or Burns: Reduce oven temperature by 25 degrees and monitor more frequently during baking. Stir every eight minutes rather than waiting ten minutes between rotations. Some nuts toast faster than others—toasting them separately before adding can provide better control.
Granola Becomes Clumpy During Storage: This indicates moisture infiltration. Ensure complete cooling before storage and verify your container genuinely seals airtight. Silica gel packets placed inside containers absorb ambient moisture, extending crispness.
Uneven Browning Across Batches: Most home ovens have temperature variations—hotter near edges, cooler in centers. Rotate your baking sheet 180 degrees halfway through baking to compensate. Some cooks rotate sheets even more frequently for perfectly consistent results.
Seasonal Adaptations and Theme-Based Recipes
Seasonal ingredients inspire creative variations that keep your granola preparations fresh and interesting throughout the year. Autumn versions incorporate pumpkin pie spice, dried apples, and pecans; winter batches feature chocolate chips, dried cranberries, and warming spices; spring variations highlight citrus zest with pistachios; summer mixes incorporate coconut with dried pineapple.
Holiday-themed granolas make exceptional gift options for friends and family. Package cooled granola in decorative glass jars with handwritten labels and gift tags. Homemade granola demonstrates thoughtfulness while providing practical, consumable gifts that recipients genuinely appreciate.
Advanced Techniques for Granola Enthusiasts
Once you’ve mastered basic granola production, exploring advanced techniques deepens your expertise. Layering different nut types and adding them at staggered intervals prevents over-toasting delicate varieties while ensuring heartier nuts develop full flavor. Tempering chocolate and drizzling it over finished, cooled granola creates elegant variations suitable for special occasions or upscale gift-giving.
Some advanced recipes incorporate briefly pre-toasting nuts and seeds before mixing them into the granola base. This technique intensifies their flavors and ensures their doneness precisely matches the finished granola, preventing undercooked or over-cooked components. Experimenting with nut butters—stirring in almond butter or tahini—creates creamier clusters with enhanced protein content.
Frequency Asked Questions
- Can I make granola without honey?
- Absolutely. Maple syrup, agave nectar, brown rice syrup, or date paste serve as effective substitutes. Each imparts different flavor characteristics while functioning identically from a structural standpoint.
- Is granola gluten-free?
- Most granola recipes are naturally gluten-free since oats contain no gluten. However, verify your oats carry gluten-free certification, as cross-contamination during processing occurs occasionally.
- How can I make lower-sugar granola?
- Reduce the sweetener by one-quarter cup from typical recipes. The granola will be less sweet but still acceptable to most palates. Add extra nuts and seeds to maintain satisfying texture.
- Can granola be frozen for extended storage?
- Yes. Place cooled granola in freezer-safe containers and freeze for up to three months. Thaw at room temperature before opening containers to prevent condensation.
- Why does my granola taste bitter?
- Over-baking causes this issue. Reduce baking time slightly on subsequent batches, or lower your oven temperature by 25 degrees. Bitter flavors typically emerge when granola reaches dark brown rather than light brown coloring.
References
- Easy Granola Recipe — Sunset Magazine. 2024. https://sunset.com/food-wine/techniques/granola-recipe
- Rolled Oats Nutritional Value and Health Benefits — U.S. Department of Agriculture, Agricultural Research Service. 2023. https://fdc.nal.usda.gov/
- Nuts and Seeds: Nutritional Profiles and Health Effects — National Institute of Health, PubMed Central. 2023. https://www.ncbi.nlm.nih.gov/pmc/
- Food Storage and Shelf Life Guidelines — U.S. Food and Drug Administration. 2024. https://www.fda.gov/food/food-storage
- Maillard Reaction in Baking Science — Food Chemistry Journal. 2023. https://www.sciencedirect.com/journal/food-chemistry