Creating scrambled eggs that are genuinely fluffy requires more than simply cracking eggs into a hot pan. The transformation from runny liquid to light, pillowy curds involves understanding the interplay between temperature, technique, timing, and ingredient composition. This comprehensive guide explores the science and practical methods behind achieving restaurant-quality fluffy scrambled eggs in your own kitchen.
Understanding the Science Behind Fluffy Eggs
The fluffy texture in scrambled eggs fundamentally depends on incorporating and preserving air throughout the cooking process. When you whisk eggs vigorously, you introduce tiny air bubbles that become trapped within the egg proteins. During cooking, these air pockets expand, creating the desired light and airy structure. The challenge lies in maintaining these air pockets while cooking the eggs to the proper consistency without overdoing them.
Protein molecules in eggs denature when exposed to heat, transforming from liquid to solid. This denaturation process forms the curds characteristic of scrambled eggs. However, excessive heat causes the proteins to squeeze out moisture, resulting in dry, rubbery eggs. The key to fluffy scrambled eggs is controlling this denaturation process by using moderate heat and careful manipulation.
Essential Ingredients and Their Roles
The ingredient list for fluffy scrambled eggs is deceptively simple, yet each component plays a specific role in achieving the desired texture and flavor:
- Eggs: Choose fresh, high-quality eggs as they contain more stable proteins and produce better results. The fresher the egg, the better it whips and maintains its structure.
- Butter: This provides fat that creates a protective barrier around protein strands, preventing them from bonding too tightly. Use unsalted butter for better control over final seasoning and approximately 1/2 to 1 tablespoon per two eggs.
- Heavy Cream or Whole Milk: These dairy products contain fat and water that keep eggs moist and tender during cooking. Heavy cream produces richer results while whole milk offers a lighter alternative.
- Salt and Pepper: Add these seasonings after whisking but before cooking for optimal flavor distribution without affecting the whisking process.
- Optional Additions: Cheese, fresh herbs, and other mix-ins should be incorporated during whisking to ensure even distribution.
The Whisking Technique: Building Your Fluffy Foundation
Proper whisking is arguably the most critical step in creating fluffy scrambled eggs. This technique introduces the air pockets essential for achieving the desired texture. Begin by cracking eggs into a small bowl and whisking them vigorously for approximately one minute. Use a fork rather than a whisk, as forks provide better control and prevent unnecessary splashing.
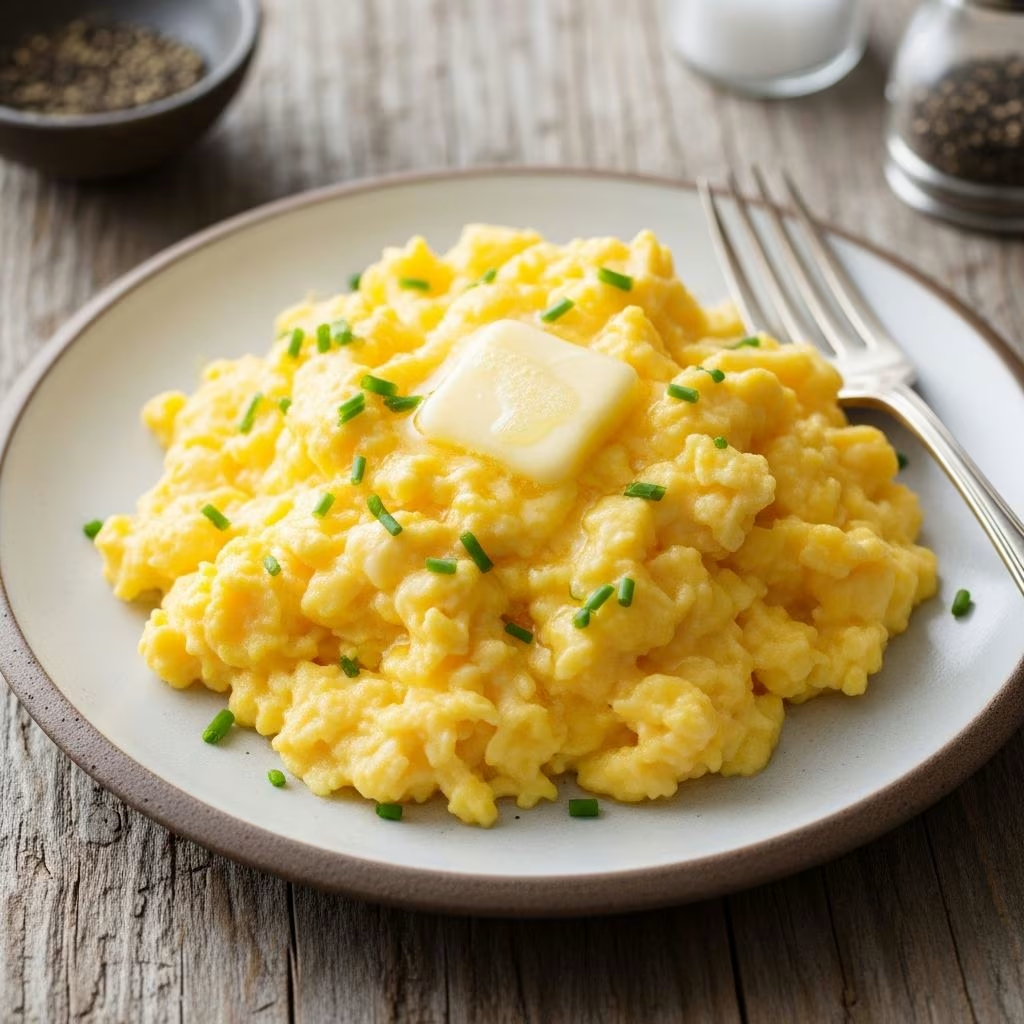
During this initial whisking phase, your goal is to create a uniform, slightly foamy mixture. The foam indicates the presence of air bubbles, which will expand during cooking to create fluffiness. If adding cheese or herbs, incorporate these during whisking to ensure even distribution throughout the mixture.
The visual indicator you’re seeking is a pale, homogeneous mixture with visible foam on the surface. This transformation typically takes one full minute of vigorous whisking. Don’t rush this step, as adequate whisking directly correlates with the final texture of your eggs.
Heat Management: The Foundation of Texture Control
Temperature control represents one of the most frequently misunderstood aspects of cooking scrambled eggs. Many home cooks use heat that’s too high, resulting in eggs that cook too quickly and become dry. The ideal approach involves starting with low to medium-low heat.
Begin by melting butter over low heat in a nonstick skillet or well-seasoned cast-iron pan. Wait until the butter begins to foam slightly before adding eggs. This foaming indicates the butter has reached an appropriate temperature. Some recipes recommend removing the pan from heat, adding eggs, then returning the pan to heat. This technique prevents initial overcooking at the pan’s edges while allowing the mixture to begin setting uniformly.
Throughout the cooking process, maintain low to medium-low heat. This lower temperature allows the eggs to cook gradually and evenly, giving you time to manipulate them and maintain the air pockets you created through whisking.
The Cooking Process: Technique and Timing
Once your eggs are in the heated butter, the actual cooking process begins. This phase requires attention and careful manipulation:
- Allow eggs to sit undisturbed for approximately 5-7 seconds after pouring them into the pan. This brief rest enables a thin layer to set on the bottom.
- Using a silicone spatula, begin at the edge of the pan and gently push the cooked portion toward the center. This motion allows uncooked egg to flow to the hot surface of the pan.
- Tilt the pan as needed to guide liquid egg toward exposed pan surface. Continue this gentle pushing and tilting motion every 15-20 seconds.
- As eggs continue setting, continue the same technique while rotating the pan to ensure even cooking across the entire surface.
- Watch carefully for the moment when eggs transition from mostly liquid to mostly set but still appear slightly wet on the surface.
- At this point, remove the pan from heat immediately. The residual heat will complete the cooking process, preventing overcooking.
This entire cooking phase typically requires 3-5 minutes. The exact timing depends on your specific stove, pan, and egg quantity. Patience during this phase is essential; rushing results in uneven cooking and broken air pockets.
Minimal Handling: Preserving Air Pockets
The gentle handling employed during cooking serves a specific purpose: preserving the air pockets created during whisking. Aggressive stirring or excessive manipulation disrupts these pockets, causing them to collapse and resulting in denser, less fluffy eggs.
The pushing-toward-the-center technique, as opposed to aggressive scrambling, achieves even cooking while maintaining structural integrity. Think of the process as organizing the eggs rather than breaking them apart. This distinction is subtle but meaningful for the final texture.
Similarly, use only silicone or rubber spatulas when cooking scrambled eggs. Metal utensils can scratch nonstick coatings and are more likely to break up eggs excessively. Silicone spatulas are gentler and provide better control during the pushing motion.
Equipment Selection: Pans and Tools
Your choice of cookware directly impacts your ability to create fluffy scrambled eggs. A quality nonstick skillet or well-seasoned cast-iron pan provides the best results. These surfaces reduce friction, making it easier to manipulate eggs gently without sticking. An 8-10 inch pan is ideal for two to four eggs, providing adequate space for proper technique without spreading the eggs too thin.
The pan’s heat retention properties matter significantly. Cast-iron retains heat exceptionally well, while nonstick pans distribute heat more evenly. Both can produce excellent results with proper technique.
In terms of utensils, a silicone spatula rated for high temperatures is essential. A fork for whisking provides better control than a whisk during the initial mixing phase. Some cooks prefer using a ladle or large spoon for the pushing motion during cooking, finding these tools more intuitive than spatulas.
Advanced Ingredient Variations
While the basic recipe remains consistent, several ingredient modifications can enhance fluffiness:
| Ingredient Addition | Amount per 2 Eggs | Effect on Texture |
|---|---|---|
| Extra Egg Yolk | 1 yolk per 2 eggs | Creates richer, creamier texture with enhanced yellow color |
| Heavy Cream | 1-2 tablespoons | Increases moisture retention and creates velvety texture |
| Cornstarch | 1 tablespoon mixed with 1 tablespoon water | Absorbs excess moisture and creates lighter, fluffier curds |
| Whole Milk | 1 tablespoon | Provides lighter creaminess than heavy cream with less richness |
The egg yolk addition creates distinctly richer, creamier eggs with a more vibrant yellow hue. This technique is particularly popular in professional kitchens. Cornstarch is a lesser-known technique that absorbs excess moisture, resulting in lighter, more cloud-like eggs. This approach works best with slightly higher heat than traditional methods.
Common Mistakes and How to Avoid Them
Understanding frequent errors helps prevent disappointing results:
- Insufficient Whisking: Underdeveloped air pockets result in denser eggs. Commit fully to vigorous one-minute whisking before cooking.
- Heat That’s Too High: This is the most common error. Eggs cook too quickly, proteins squeeze out moisture, and fluffiness disappears. Resist the temptation to increase heat.
- Aggressive Stirring: Breaking up curds excessively collapses air pockets. Use the gentle pushing technique instead.
- Cooking Too Long: Overcooking dries out eggs regardless of other techniques. Remove from heat while eggs still appear slightly wet.
- Poor Pan Quality: Sticky pans force aggressive manipulation and prevent proper technique execution. Invest in quality cookware.
- Inadequate Butter: Insufficient fat results in sticking and requires more aggressive manipulation. Use the full recommended amount.
Timing and Serving Considerations
Properly cooked fluffy scrambled eggs are best served immediately. The residual heat continues cooking after removal from the stove, so timing your removal correctly is crucial. Aim to remove eggs when they still appear slightly underdone on the surface; they will finish cooking on the plate.
For larger quantities, cook eggs in smaller batches rather than attempting to scale up a single recipe. This maintains better temperature control and allows proper execution of the technique. Two to four eggs per batch is ideal.
Season eggs just before serving with additional salt and pepper as needed. Finishing with fresh herbs, grated cheese, or a small pat of cold butter adds both visual appeal and subtle flavor complexity.
Frequently Asked Questions
Can I Make Fluffy Scrambled Eggs in Advance?
Fluffy scrambled eggs are best enjoyed immediately after cooking. The structure that creates fluffiness breaks down during storage. However, you can prepare all ingredients in advance and cook them when ready to eat.
What’s the Best Pan Size for Scrambled Eggs?
An 8-10 inch pan works best for two to four eggs. A pan that’s too large spreads eggs too thin and complicates temperature control, while an overcrowded pan prevents proper manipulation.
Should I Use Milk or Cream?
Both work, but they produce slightly different results. Heavy cream creates richer, more luxurious eggs while whole milk produces lighter results. Choose based on your preference.
Why Are My Eggs Still Coming Out Dry?
Dry eggs typically result from overcooking. Remove eggs from heat while they still appear slightly wet on the surface. The residual heat will complete cooking without over-drying them.
Can I Add Ingredients Like Cheese or Vegetables?
Yes, but timing matters. Mix cheese and fresh herbs into the egg mixture before cooking. Cooked vegetables and meats should be added just before removing eggs from heat to prevent overcooking them.
Conclusion: Mastering Your Technique
Creating consistently fluffy scrambled eggs requires understanding the underlying principles, practicing proper technique, and maintaining patience throughout the process. While the basic concept is simple, the execution demands attention to detail regarding heat management, whisking, and gentle handling. Begin with the fundamentals outlined here, and experiment with variations once you’ve mastered the basic technique. With practice, producing light, airy, perfectly cooked scrambled eggs will become second nature, elevating your everyday breakfast from ordinary to exceptional.
References
- The Cozy Cook – Fluffy Scrambled Eggs (Step by Step!) — The Cozy Cook. https://thecozycook.com/fluffy-scrambled-eggs/
- How to Make Fluffy Scrambled Eggs — Kiersten Hickman. https://www.kierstenhickman.com/how-to-make-fluffy-scrambled-eggs/
- Fluffiest Scrambled Eggs, Ever — Overtime Cook. https://overtimecook.com/2024/08/11/fluffiest-scrambled-eggs-ever/
- Perfect Easy Light & Fluffy Scrambled Eggs — Chef Mike Hard. https://www.chefmikehard.com/blog/light-fluffy-scrambled-eggs