The simplicity of a well-made flour tortilla belies the skill required to achieve that perfect balance of tenderness and structural integrity. While many home cooks rely on store-bought options, creating tortillas in your own kitchen offers unparalleled freshness, customization, and the satisfaction of mastering a fundamental cooking technique. This guide walks you through every aspect of tortilla production, from ingredient selection to advanced troubleshooting.
Understanding the Foundation: Essential Ingredients
The beauty of flour tortillas lies in their minimalist ingredient list. Unlike many bread products that require numerous additions, traditional tortillas depend on just four or five basic components working in harmony. Understanding the role each ingredient plays will help you appreciate the chemistry involved and make informed decisions when modifications become necessary.
Flour Selection and Its Impact
All-purpose flour serves as the backbone of most tortilla recipes, providing the right protein content for texture development without creating excessive chewiness. The protein percentage—typically between 10 and 12 percent in all-purpose flour—contributes to gluten formation, which creates the elasticity needed for pliable, non-brittle tortillas. Some bakers experiment with lower-protein cake flour for extra tenderness, though this risks sacrificing structural integrity. Conversely, bread flour produces denser results better suited to specialty applications.
When selecting flour, consider storage conditions in your pantry. Flour naturally absorbs moisture from the air, which means humidity levels in your kitchen will affect how much liquid your dough requires. During summer months or in humid climates, you may need slightly less water than during dry seasons. Many experienced tortilla makers keep a notebook tracking their adjustments across different seasons.
The Role of Fat in Achieving Texture
Fat—whether in the form of lard, vegetable shortening, or butter—serves multiple functions in tortilla dough. It tenderizes the gluten network by creating barriers between flour particles, preventing the development of excessive elasticity that would make rolling difficult. Fat also contributes to the characteristic flaky layers that develop as tortillas cook, and it enhances the overall mouthfeel and richness of the finished product.
Traditional recipes frequently call for lard because its neutral flavor and specific melting point produce superior results compared to many modern alternatives. However, vegetable shortening works adequately, while butter introduces a slight richness that some prefer. The key is using cold fat and not overworking it into the flour, as this preserves the layering effect.
Water, Salt, and Seasoning Considerations
Water hydration levels critically determine your dough’s workability. Dough that is too dry becomes difficult to roll and produces cracked tortillas, while excessive moisture creates a sticky dough that frustrates even experienced cooks. Most recipes call for approximately 60 to 65 percent hydration—meaning if you have 100 grams of flour, you would add 60 to 65 milliliters of water—though this varies based on your flour’s specific absorption capacity and environmental humidity.
Salt enhances flavor and controls fermentation if you choose to let your dough rest. Some cooks prefer adding a pinch of sugar to promote browning and slight caramelization during cooking. Experimenting within these parameters helps develop your personal preference.
Dough Preparation: Techniques for Success
Creating the dough represents the first critical juncture in tortilla making. The method you choose affects texture, consistency, and the time investment required. Whether mixing by hand or using mechanical equipment, the objective remains identical: combining ingredients into a cohesive mass without overdeveloping the gluten.
Hand-Mixing Method
Combining ingredients by hand provides direct sensory feedback and requires no special equipment. Begin by whisking together flour and salt in a large bowl. Create a small well in the center and add your fat, breaking it into small pieces. Using your fingertips, work the fat into the flour using a rubbing motion, continuing until the mixture resembles coarse breadcrumbs. Gradually add water while mixing with your fingers or a wooden spoon, pulling dry flour from the bowl’s edges toward the center until a shaggy dough forms.
Once the dough begins holding together, transfer it to a clean work surface and knead briefly—approximately one to two minutes—to bring everything together. This hands-on approach lets you immediately sense the dough’s hydration level, making adjustments more intuitive than when using food processors.
Food Processor Approach
The food processor offers speed and consistency, particularly when making large batches. Combine flour and salt, then pulse briefly. Add cold fat in small pieces and pulse until the mixture reaches the breadcrumb stage—typically 8 to 12 pulses. Add water gradually while pulsing, stopping as soon as the dough begins clumping. Over-processing develops excessive gluten, resulting in tough tortillas, so exercise restraint and resist the urge to achieve a perfectly smooth dough in the processor.
Rest Periods and Hydration Development
After mixing, allowing the dough to rest significantly improves workability and final texture. A resting period of 20 to 30 minutes permits the flour to fully absorb available moisture and allows gluten to relax, reducing the dough’s elasticity and making rolling easier. Some bakers prefer longer rests of one to two hours, which develop slightly more complex flavor through slow fermentation.
During resting, cover your dough with a clean kitchen towel or inverted bowl to prevent surface drying. If you plan to use the dough after several hours, refrigerate it to slow fermentation and prevent over-proofing. Cold dough can be brought to room temperature before proceeding, or rolled directly from the refrigerator if you prefer slightly thinner, crisper tortillas.
Shaping and Rolling: Mastering the Technique
Rolling represents the make-or-break stage for many home cooks. Achieving consistent thickness creates even cooking and prevents some tortillas from cooking too quickly while others remain underdone. Several approaches exist, each with distinct advantages.
Division and Portioning
Begin by dividing your dough into equal portions. For standard-sized tortillas, portions of 40 to 50 grams (approximately 1.5 ounces) work well. Rolling each portion into a smooth ball helps distribute moisture evenly and makes rolling more manageable. If using a scale, consistency in portioning ensures uniform cooking times and predictable results.
Rolling Techniques and Tools
A tortilla press equipped with plastic sheets provides the most reliable method for beginners, producing remarkably uniform thickness. Place a portion of dough on the lower plate, position plastic sheets to prevent sticking, lower the top plate, and apply moderate, even pressure. The result should be a thin, nearly uniform circle requiring minimal hand adjustment.
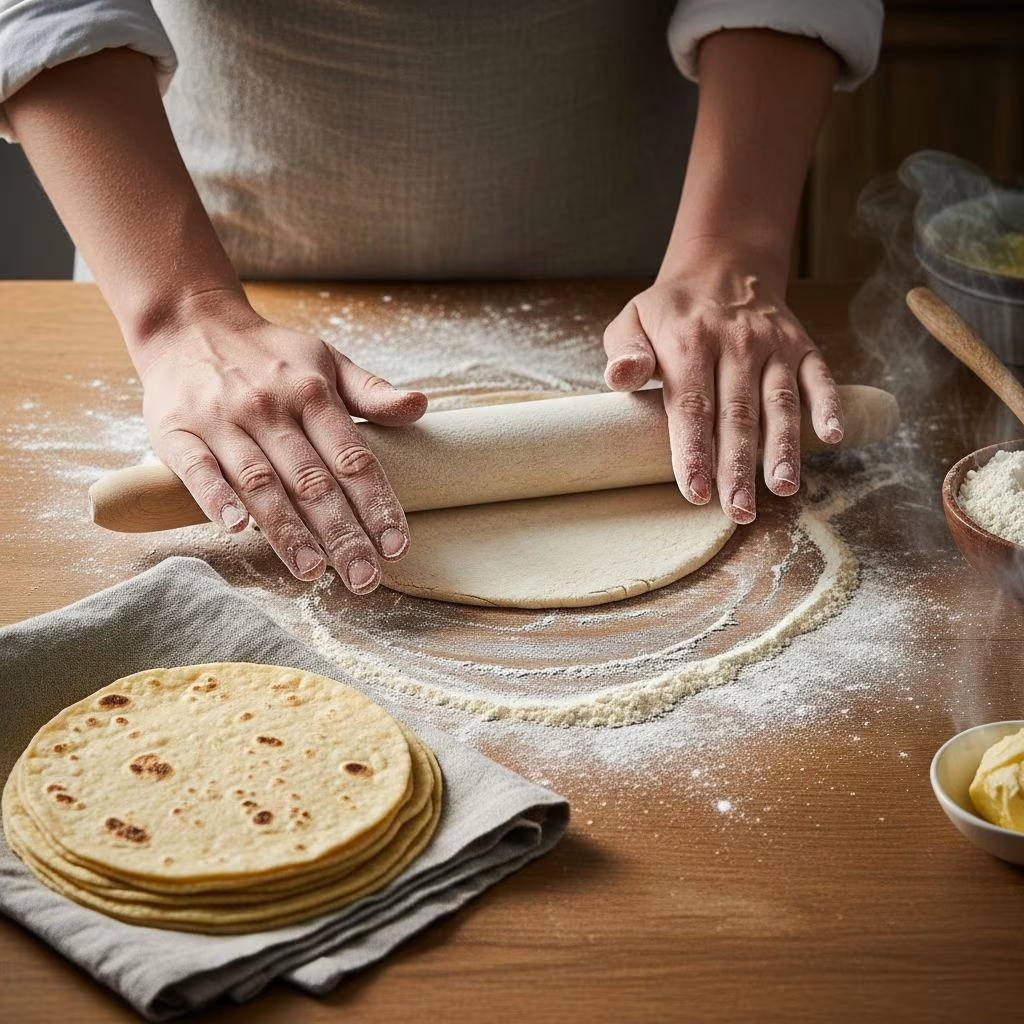
Manual rolling with a wooden or silicone rolling pin offers greater control for experienced bakers. Place the dough portion on a lightly floured surface and begin rolling from the center outward, rotating the tortilla 90 degrees after each few strokes. This prevents oblong shapes and encourages even thickness. Proper technique produces a circular tortilla approximately 7 to 8 inches in diameter.
Managing Flour and Preventing Sticking
Excessive flour on the dough’s surface prevents proper heat transfer and creates an uneven texture. Instead of generously dusting the dough, use just enough flour to prevent sticking. Some bakers prefer working between two pieces of parchment paper or silicone mats, which eliminates flour transfer to the cooking surface and produces a cleaner tortilla.
Cooking Methods and Temperature Control
The cooking stage transforms your dough into finished tortillas. Different heat sources produce varying results, each with devoted practitioners.
Stovetop and Cast Iron
A cast iron skillet heated to approximately 400 to 450 degrees Fahrenheit provides consistent results and reasonable heat retention. Place each rolled tortilla on the hot surface, cooking approximately 30 to 45 seconds on the first side until light brown spots appear. Flip and cook the second side similarly, watching for the tortilla to puff slightly—an indicator that steam has created separation between layers, enhancing the characteristic texture. Many tortillas never fully puff, and that is acceptable. The cooking goal is developing the dough without overcooking, which causes brittleness.
Griddle and Electric Options
A flat griddle distributes heat evenly across larger surface areas, accommodating multiple tortillas simultaneously and reducing overall cooking time. Electric griddles offer temperature consistency, though cast iron typically produces superior browning patterns and flavor development through better heat concentration.
Timing and Visual Indicators
Cooking times vary based on heat intensity, ambient temperature, and dough thickness. Rather than relying solely on timers, observe the tortilla for visual cues: light browning on the underside, slight puffing, and flexibility when lifted with a spatula all indicate appropriate cooking progression. Practice develops an intuitive sense for the ideal cook time.
Troubleshooting Common Challenges
| Issue | Likely Cause | Solution |
|---|---|---|
| Tortillas crack when rolling | Insufficient hydration or gluten overdevelopment | Add water gradually to dough; reduce kneading time; ensure adequate rest period |
| Tortillas are tough or chewy | Excess gluten development or excessive cooking | Minimize kneading; reduce cooking time; use lower-protein flour |
| Uneven browning | Inconsistent heat or uneven dough thickness | Verify cooking surface temperature; practice consistent rolling technique |
| Tortillas don’t puff | Excessive flour on surface or insufficient moisture | Use less flour when rolling; ensure adequate hydration in dough |
| Dough is too sticky | Excessive water or flour measurement | Add flour incrementally; use weight-based measurements for accuracy |
Storage and Preservation Strategies
Fresh tortillas remain at their peak for just a few hours after cooking. Store them in a clean kitchen towel or tortilla warmer to retain warmth and prevent moisture escape. For longer storage, allow tortillas to cool completely before wrapping them in plastic wrap or storing in airtight containers in the refrigerator for up to five days.
Freezing extends shelf life to several months. Stack cooled tortillas between parchment sheets, place them in freezer bags, and label with the date. Frozen tortillas reheat quickly on a skillet or griddle, returning them to freshly cooked quality within a minute or two.
Variations and Customizations
Once you master the basic recipe, numerous variations provide creative opportunities. Adding whole wheat flour contributes nutty flavor and increased fiber, though it requires slight hydration adjustments. Incorporating finely minced herbs, cheese, or mild spices creates specialty tortillas suited to specific dishes. Some bakers experiment with alternative fats like coconut oil or introduce small quantities of sugar for different browning characteristics.
Frequently Asked Questions
Can I make tortillas without a tortilla press?
Yes, a rolling pin works effectively with practice. The press simply provides consistency and speed, but manual rolling offers more control and requires only basic equipment readily available in most kitchens.
How much time does the entire process require?
From mixing to finished tortillas, plan approximately 45 to 60 minutes, including a 20 to 30-minute rest. This can be adjusted based on your chosen rest duration and cooking efficiency.
What causes tortillas to become hard or brittle?
Overcooking produces this texture. Reduce heat slightly or shorten cooking times. Additionally, proper storage in sealed containers prevents moisture loss that hardens tortillas after cooking.
Is lard necessary for authentic tortillas?
While traditional recipes use lard for its specific properties, vegetable shortening and butter produce acceptable results. Lard simply offers superior flavor and texture, but other fats remain viable alternatives.
Can the dough rest overnight?
Refrigerated dough benefits from cold storage, developing more complex flavors through slow fermentation. Bring it to room temperature before rolling, or work with it directly from the refrigerator for thinner, crisper tortillas.
References
- King Arthur Baking Company: The Science of Flour — King Arthur Baking Company. 2025. https://www.kingarthurbaking.com/resources/bread-baking-science
- USDA Food Composition Databases — United States Department of Agriculture. 2024. https://fdc.nal.usda.gov/
- Food Science and Cooking: Understanding Gluten Development — McGee, Harold. On Food and Cooking: The Science and Lore of the Kitchen (Revised Edition). Scribner, 2004.
- Mexican Culinary Institute: Traditional Tortilla Production — Instituto Culinario de México. 2023. https://www.institutoculinariodemexico.mx/